Have you ever tried to hang something on your wall, only to find that screws just won’t hold? Drilling an anchor into the wall is the secret to making sure your shelves, pictures, or mirrors stay put—no matter how heavy they are.
But if you’re not sure how to do it right, you might end up with holes, cracks, or worse. Don’t worry. This guide will walk you through every step, so you can confidently drill anchors that hold strong and keep your walls looking great.
Ready to learn the trick? Let’s get started.
:max_bytes(150000):strip_icc()/how-to-use-and-discard-anchor-screws-1822671-Final-ec8091ccf65241b1b1f888549f25003a.jpg)
Credit: www.thespruce.com
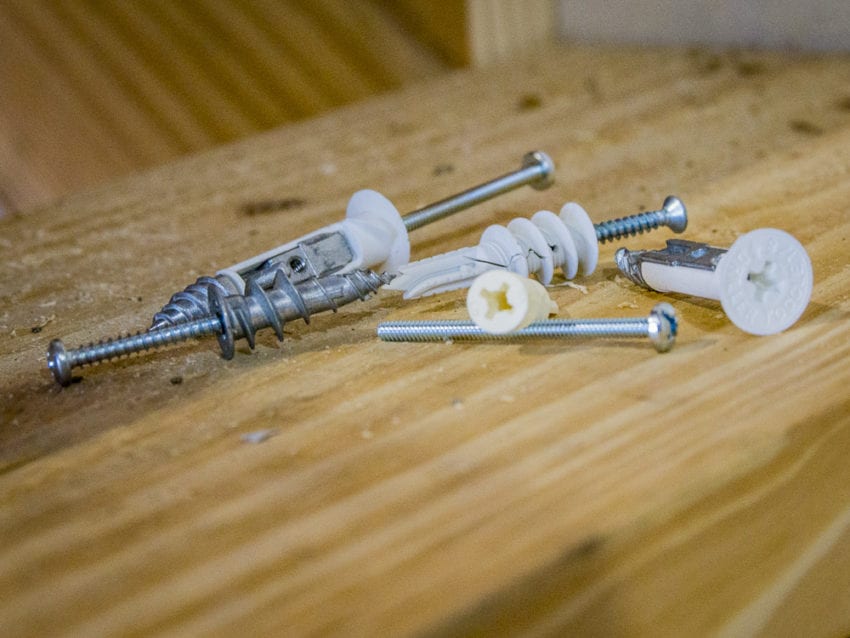
Choosing The Right Anchor
Choosing the right anchor is key to a strong and safe hold in your wall. Different walls need different anchors. Using the wrong one can lead to damage or weak support. Knowing which anchor fits your wall type and weight needs keeps your items secure.
Types Of Wall Anchors
There are many types of wall anchors. Plastic expansion anchors are common for light loads. They expand as you screw into them. Metal anchors, like molly bolts, offer more strength. Toggle bolts have wings that open behind the wall for heavy loads. Each type serves a different purpose.
Matching Anchor To Wall Material
Wall material matters a lot. Drywall requires lighter anchors like plastic or molly bolts. Concrete or brick needs heavy-duty anchors like sleeve or wedge anchors. Wood walls often work with simple screws or plastic anchors. Matching anchor type to wall material ensures a firm grip and avoids damage.
Weight Capacity Considerations
Always check the weight your anchor can hold. Light anchors suit small pictures or decorations. Heavy anchors are best for shelves, TVs, or cabinets. Overloading an anchor can cause it to fail. Choose an anchor with a weight rating above your item’s weight for safety.
Credit: www.protoolreviews.com
Gathering Necessary Tools
Before you start drilling an anchor into the wall, gather all the necessary tools. Having the right tools ready saves time and prevents mistakes. It also ensures a clean and secure anchor installation. This section covers the basic tools you need for the job.
Drill And Drill Bits
Choose a drill suitable for your wall type. A cordless drill is easy to handle and portable. Pick drill bits that match the anchor size. Use masonry bits for brick or concrete walls. For drywall, regular twist bits work well. Make sure bits are sharp and in good condition.
Measuring Tools
Use a tape measure to mark the drill spot accurately. A pencil helps make clear, visible marks. A level keeps your installation straight. A ruler or combination square ensures precise measurements. Measuring tools help avoid crooked or misplaced anchors.
Safety Gear
Wear safety goggles to protect your eyes from dust. Use gloves to protect your hands from sharp edges. Ear protection helps reduce noise from the drill. A dust mask prevents inhaling wall particles. Safety gear keeps you safe during drilling.
Preparing The Wall
Preparing the wall is the first step before drilling an anchor. It helps ensure the anchor holds strong and stays safe. Taking time to prepare prevents damage to your wall and hidden utilities. Follow simple steps to get your wall ready for drilling.
Locating Studs And Marking Spots
Find the studs behind the wall using a stud finder. Studs provide extra support for heavy items. Mark the exact spots where you want to drill. Use a pencil to make small marks. Avoid guessing or drilling randomly to protect your wall structure.
Cleaning The Surface
Remove dust, dirt, and grease from the drilling area. Use a clean cloth or mild cleaner for this task. A clean surface helps the drill bit cut better. It also improves anchor grip and prevents slipping during drilling.
Checking For Hidden Wires Or Pipes
Scan the wall for electrical wires or plumbing pipes. Use a wire detector or pipe locator tool. Drilling into wires or pipes can cause serious damage. Always double-check to keep your wall and home safe.
Drilling The Hole
Drilling the hole is a key step when installing an anchor in the wall. It sets the base for a strong hold. The hole must fit the anchor size and be clean. A poorly drilled hole can cause the anchor to fail or the wall to crack. Follow these simple steps for the best results.
Selecting The Right Drill Bit Size
Choose a drill bit that matches the anchor diameter exactly. The hole should be tight enough to hold the anchor firmly. Too large a bit makes the anchor loose. Too small, and the anchor won’t fit or may break. Check the anchor package for the recommended drill bit size. Use a new or sharp drill bit for a clean cut.
Drilling At Correct Angle And Depth
Hold the drill straight, at a 90-degree angle to the wall. This ensures the hole is straight and the anchor fits well. Tilted holes weaken the anchor grip. Mark the desired depth on the drill bit with tape. Drill slowly to the marked depth and stop. Going too deep wastes effort and may harm pipes or wires inside.
Avoiding Wall Damage
Start drilling slowly to avoid cracking the wall surface. Use a lower drill speed for drywall or plaster. For concrete or brick, use a hammer drill setting. Clear out dust and debris from the hole with a brush or blower. Check for pipes and wires before drilling to prevent accidents. Wear safety goggles to protect your eyes from dust.
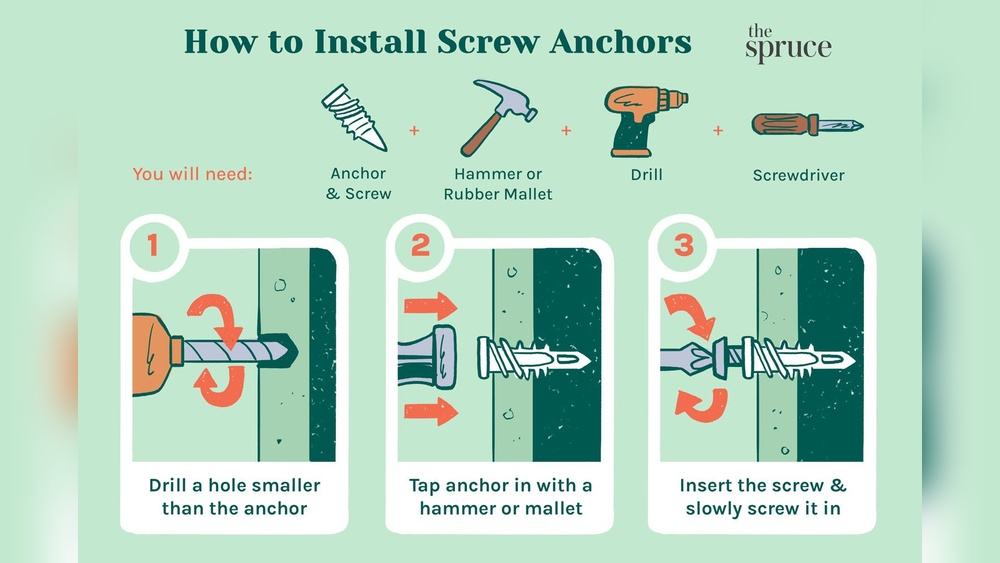
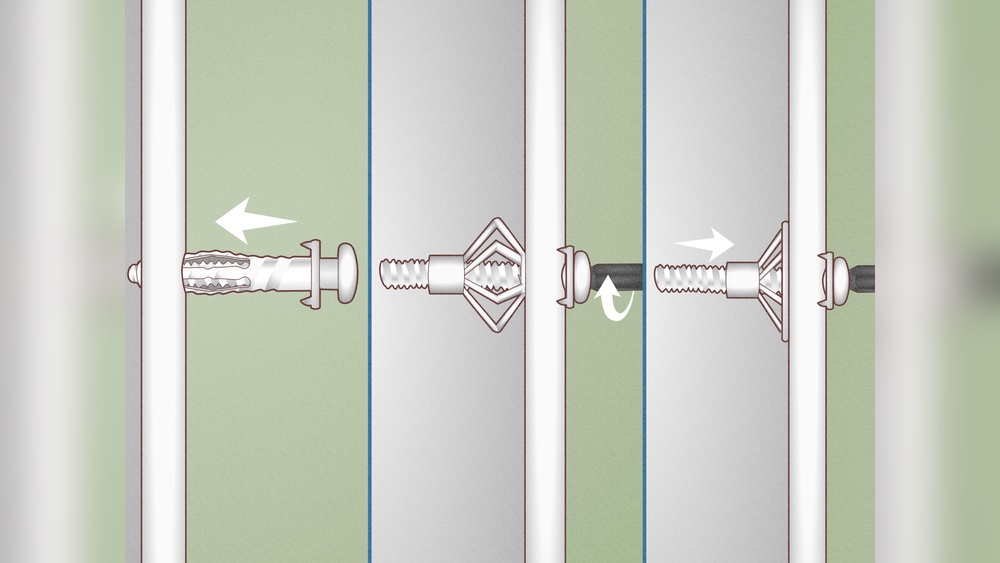
Installing The Anchor
Installing the anchor is a key step for a strong hold in the wall. It must fit right and stay steady. The process takes care and the right actions. This part guides you through each step clearly and simply.
Inserting The Anchor Properly
Hold the anchor straight to the drilled hole. Gently push it in with your fingers. The anchor should fit snugly without forcing it. Avoid twisting or bending the anchor during insertion. The hole must match the anchor size exactly.
Tapping The Anchor In
Use a small hammer or mallet to tap the anchor. Tap lightly to avoid damaging the wall or anchor. Tap until the anchor is flush with the wall surface. Do not tap too hard or the anchor may break. This step ensures the anchor is set firmly in place.
Ensuring A Secure Fit
Check the anchor by pulling it gently outward. It should not move or come loose. The anchor grips the wall tightly for strong support. If it feels loose, remove and try a different anchor or hole. A secure fit is essential for safety and strength.
:max_bytes(150000):strip_icc()/how-to-use-and-discard-anchor-screws-1822671_04_3225-fb61b874b829410e8ef26f3453ef35f0.jpg)
Credit: www.thespruce.com
Mounting Fixtures
Mounting fixtures on the wall is a common task in many homes. It requires careful work to make sure the fixture stays strong and safe. Properly mounting fixtures ensures they do not fall or cause damage.
Using wall anchors is important when the wall material is not strong enough. Anchors hold screws tightly and spread the load. This section explains how to mount fixtures using drilled anchors.
Aligning Fixtures With Anchors
Start by holding the fixture in the exact spot on the wall. Mark the holes where the screws will go. Check that these marks match the drilled anchors perfectly. Proper alignment keeps the fixture straight and secure. Double-check measurements before drilling or inserting screws.
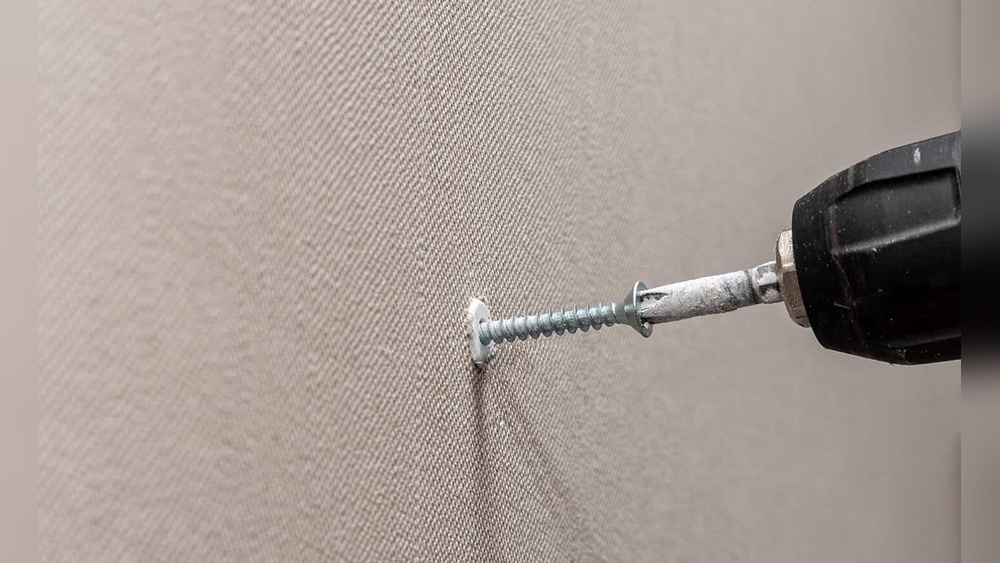
Using Screws And Fasteners
Choose screws that fit the anchors well. Insert screws through the fixture holes into the anchors. Tighten screws slowly and evenly. Avoid over-tightening to prevent damage to the wall or fixture. The screws must hold the fixture firmly but without cracking the wall.
Testing Stability
After mounting, gently push or pull the fixture. Check if it moves or feels loose. A stable fixture should not wiggle or shift. If it does, tighten screws or check anchors again. Stability ensures the fixture will stay safe for use.
Troubleshooting Common Issues
Troubleshooting common issues during wall anchor installation saves time and effort. Small mistakes can cause big problems. Fixing them early keeps your project strong and safe.
Some problems happen often but are easy to solve. Knowing what to check helps you avoid damage and wasted materials. Here are common issues and simple fixes.
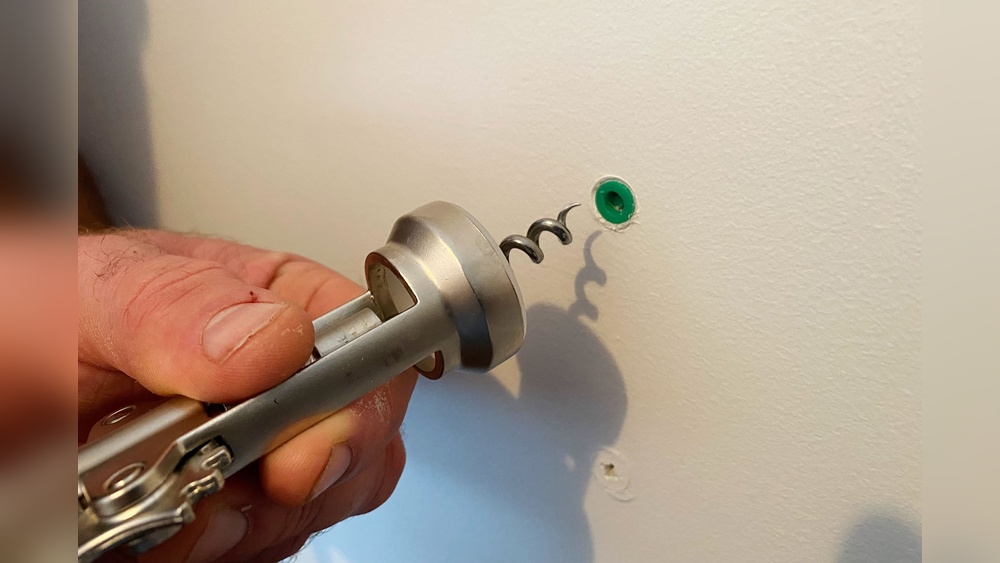
Loose Anchors
Loose anchors do not hold well. This happens if the hole is too big or the anchor is too small. Use a properly sized drill bit for the anchor. Push the anchor in firmly. If loose, try a bigger anchor or fill the hole with wood filler before placing the anchor.
Cracked Walls
Drilling can crack walls if you use too much force. Slow down and use a sharp drill bit. Avoid drilling near edges or old cracks. If cracks appear, stop and use a different wall spot. Patch the crack with wall filler before drilling again.
Misaligned Holes
Misaligned holes cause anchors and screws to not fit properly. Measure and mark carefully before drilling. Use a level to keep holes straight. If holes are off, fill them with putty and wait to dry. Then, drill new holes in the right position.
Frequently Asked Questions
How Do You Choose The Right Drill Bit For Anchors?
Select a drill bit matching the anchor size. Use a masonry bit for concrete or brick walls. For drywall, standard bits work. Correct bit size ensures a snug anchor fit and secure hold.
What Is The Proper Drill Speed For Anchors?
Use a slow to medium drill speed. This avoids overheating and damaging the wall or drill bit. Slow speed provides better control and cleaner holes for anchors.
How Deep Should You Drill For Wall Anchors?
Drill a hole slightly deeper than the anchor length. This allows the anchor to fit fully without obstruction. Proper depth ensures maximum holding strength and prevents wall damage.
Can I Drill Anchors Into Drywall Without Studs?
Yes, use specialized drywall anchors. Drill holes as per anchor instructions. These anchors expand behind drywall for a strong hold without studs.
Conclusion
Drilling an anchor into the wall is simple with the right steps. Choose the correct drill bit and anchor size first. Mark the spot clearly before you start drilling. Drill steadily and clean out the hole after. Insert the anchor gently and tighten the screw carefully.
This process keeps items secure and prevents wall damage. Practice a few times to gain confidence. Soon, you will hang shelves, pictures, or hooks easily. A little patience brings strong, lasting results. Keep safety in mind and enjoy your work.