Are you tired of your pictures, shelves, or hooks falling off the wall? Using the right wall anchors and screws can make all the difference.
But if you’re unsure how to choose or install them correctly, you’re not alone. This guide will show you simple, effective ways to secure your items safely and confidently. Keep reading, and you’ll learn easy steps that anyone can follow to get the job done right the first time.
Your walls—and your belongings—will thank you.
Credit: www.bobvila.com
Types Of Wall Anchors
Wall anchors come in different types. Each type fits different wall materials and weight needs. Choosing the right anchor keeps your items safe and steady. Here are common wall anchors you should know.
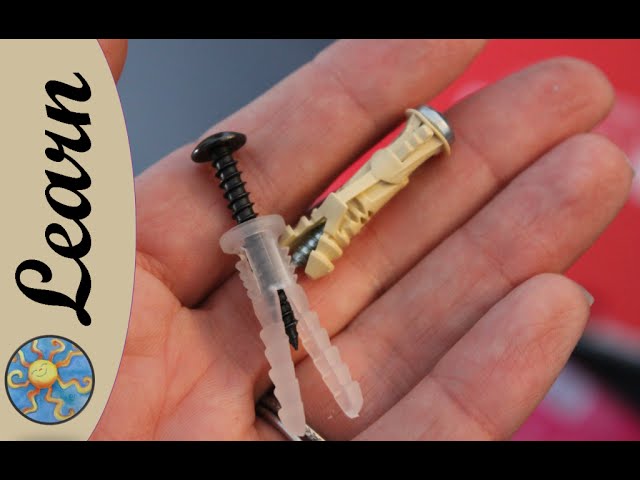
Plastic Expansion Anchors
Plastic expansion anchors are simple and popular. They work well in drywall and light materials. Insert the anchor into a drilled hole. The anchor expands when you screw into it. This holds the screw tightly in place.
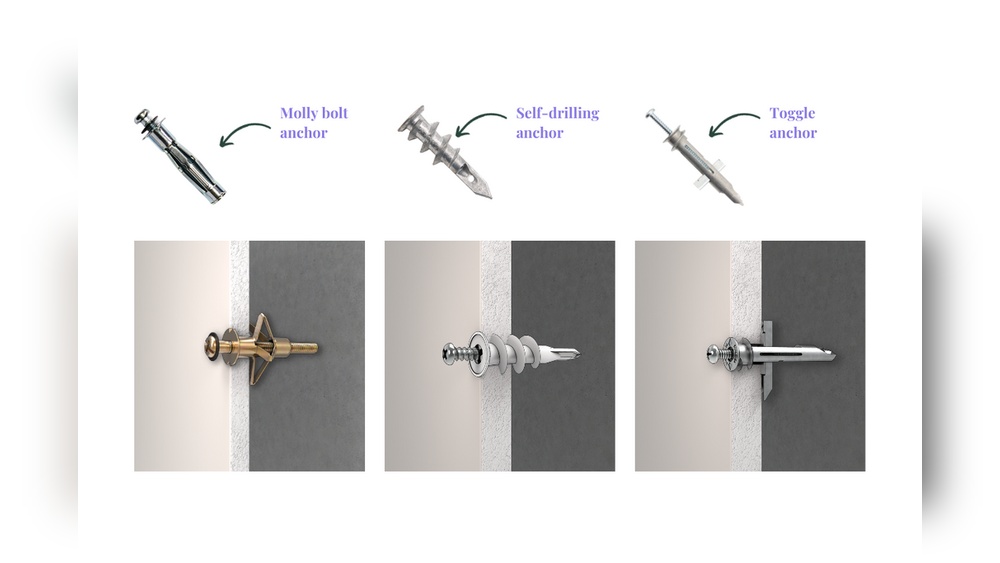
Toggle Bolts
Toggle bolts hold heavy items on hollow walls. They have wings that open inside the wall. The wings spread the load over a large area. This stops the bolt from pulling out easily.
Molly Bolts
Molly bolts are metal anchors that expand inside the wall. They provide strong support for medium weight items. You insert the bolt, then tighten the screw. This causes the anchor to open and grip the wall.
Threaded Drywall Anchors
Threaded drywall anchors screw directly into drywall. They have wide threads for a secure hold. No need to drill before installation. These anchors are good for light to medium loads.
Credit: www.youtube.com
Choosing The Right Anchor
Choosing the right wall anchor is important for a strong hold. Different anchors work best for different walls and weights. Picking the wrong one can cause damage or make your items fall. Consider the wall type, the weight you want to hold, and the size of the anchor. This helps ensure safety and stability for your projects.
Assessing Wall Material
Walls vary in material. Drywall, plaster, brick, and concrete all require different anchors. Drywall anchors work well for hollow walls. Masonry anchors suit brick or concrete. Identify your wall type before choosing an anchor. This step helps prevent mistakes and damage.
Considering Weight Capacity
Each anchor supports a certain weight. Check the package for weight limits. Use stronger anchors for heavy items. Light anchors fit small pictures or decorations. Choosing an anchor with enough strength keeps items secure.
Selecting Anchor Size
Anchor size matters. Bigger anchors hold more weight and fit larger screws. Small anchors fit light loads and small screws. Match the anchor size to your screw size. This ensures a tight fit and strong hold.
Tools Needed
Using wall anchors and screws requires a few basic tools. These tools help make the job easier and ensure the anchors hold well. Having the right tools also saves time and prevents damage to your walls.
Each tool has a specific role. Understanding what you need helps you prepare better for your project.
Drill And Drill Bits
A drill makes holes in the wall for the anchors. Different drill bits match different anchor sizes. Choose the correct bit to avoid loose or tight holes. A power drill speeds up the work and gives clean holes.
Screwdriver
A screwdriver helps insert screws into the anchors. Use the right type: flathead or Phillips. The right fit prevents stripping the screw head. A manual screwdriver works, but a powered one saves effort.
Measuring Tape
Measure distances on the wall with a tape. Accurate measurements keep anchors aligned. Mark spots before drilling to avoid mistakes. This step ensures your project looks neat and professional.
Level
A level checks if your anchors and screws are straight. It prevents crooked shelves or frames. Place the level on your marks before drilling. Straight lines make your work look polished and strong.
Preparing The Wall
Preparing the wall is the first step to secure wall anchors and screws properly. A well-prepared wall holds the weight better and prevents damage. Taking time to prepare ensures your installation lasts longer and stays safe.
Marking The Spot
Start by choosing the exact place for the anchor. Use a pencil to mark this spot clearly. Check the level to keep your marks straight. Accurate marking helps avoid mistakes during drilling.
Drilling Pilot Holes
Select the drill bit that fits the anchor size. Drill slowly at the marked spot. Keep the drill straight to avoid angled holes. Drilling pilot holes creates space for anchors without cracking the wall.
Cleaning The Hole
Remove dust and debris from the drilled hole. Use a small brush or blow air inside. Clean holes let anchors fit tightly and hold better. This simple step improves the strength of the fix.
Installing Wall Anchors
Installing wall anchors is key to securing items on walls safely. Different anchors fit different wall types and weights. Correct installation ensures strong support and prevents damage. Follow simple steps to insert each anchor type properly.
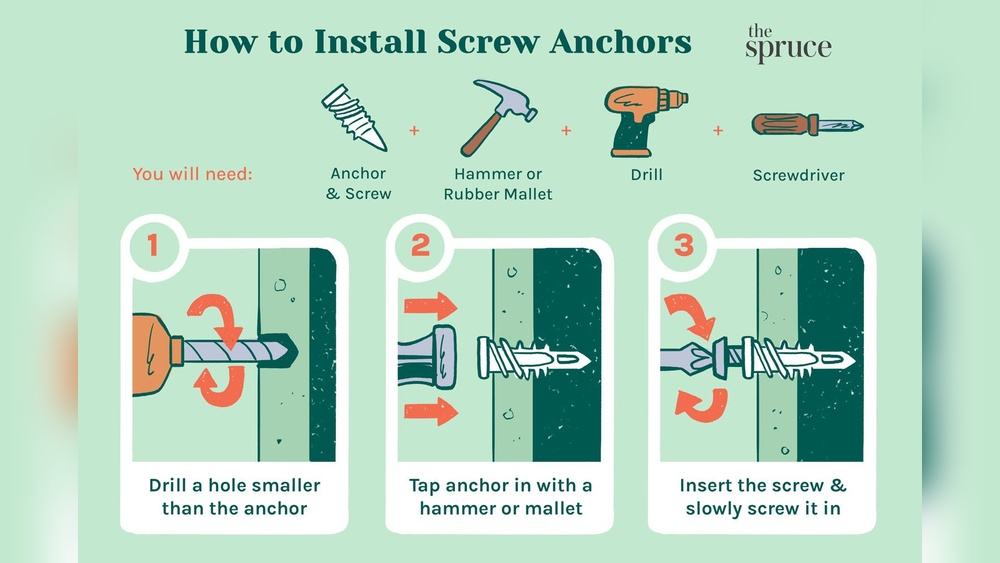
Inserting Plastic Anchors
Choose a drill bit that matches the anchor size. Drill a hole into the wall carefully. Push the plastic anchor into the hole until flush with the wall. Tap lightly with a hammer if needed. Now, insert the screw into the anchor and tighten slowly.
Setting Toggle Bolts
Drill a hole large enough for the toggle wings. Thread the bolt through the object to hang, then attach the wings. Squeeze the wings closed and push through the hole. Once inside, the wings open behind the wall. Pull the bolt gently to lock the wings. Tighten the bolt to secure the object.
Fixing Molly Bolts
Drill a hole slightly smaller than the molly bolt. Insert the bolt and tap it lightly until flush. Tighten the screw to expand the sleeve behind the wall. This creates a strong grip inside the drywall. Remove the screw, hang your item, and reinsert the screw.
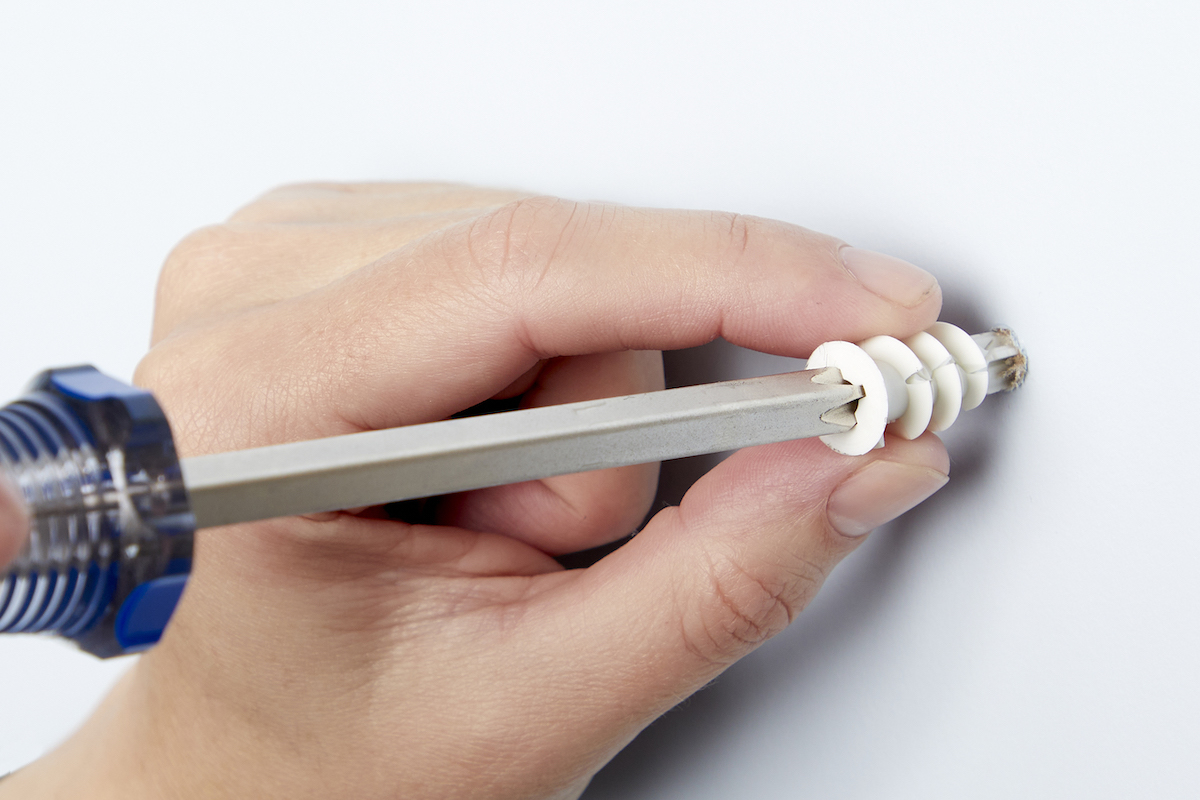
Placing Threaded Anchors
Drill a pilot hole smaller than the anchor diameter. Screw the threaded anchor into the hole by hand or with a screwdriver. Turn until the flange sits flush with the wall. Insert the screw into the anchor and tighten it. The anchor grips the drywall firmly for heavy loads.

Credit: www.youtube.com
Screw Installation Tips
Installing screws correctly is key to a strong hold. Poor screw installation can lead to loose fixtures or wall damage. Follow these simple tips for the best results.
Choosing The Right Screw Length
Select screws that fit the thickness of your wall and anchor. Too short screws will not grip firmly. Too long screws can break through the wall or hit pipes.
Measure the depth of the wall or anchor before buying screws. Pick screws long enough to go fully into the anchor but not too long.
Driving Screws Properly
Start screws slowly to avoid slipping or stripping the head. Use a screwdriver or drill with a proper bit that fits the screw head.
Drive screws straight into the anchor. Do not tilt the screw, or the grip will weaken. Stop tightening when the screw feels snug.
Avoiding Wall Damage
Do not force screws into the wall. If you feel resistance, check the anchor or screw size. Too big screws can crack drywall or plaster.
Use wall anchors to protect weak walls. Anchors spread the load and stop screws from pulling out easily.
Testing Stability
Testing stability is key after installing wall anchors and screws. It ensures the anchor holds tight and supports the load safely. This step prevents accidents and damage to your wall. Follow simple checks to confirm the anchor’s strength before hanging objects.
Applying Gradual Pressure
Start by pressing gently on the screw or attached item. Increase pressure slowly to avoid sudden stress. This method reveals if the anchor grips the wall firmly. A solid anchor will not shift or loosen under slow pressure.
Checking For Movement
Look closely for any wiggle or shift around the screw. Even small movements show weak anchoring. Use your fingers to feel for looseness. A stable anchor stays still and does not move under touch.
Reinforcing If Needed
If you find any movement, reinforce the anchor. Remove the screw and check the anchor position. Replace with a bigger anchor or use a different type. Tighten the screw securely but avoid over-tightening, which can damage the wall.
Common Mistakes To Avoid
Using wall anchors and screws might seem easy. Many people make simple mistakes that cause problems. These errors can damage your walls or make your items fall. Avoid these common mistakes to ensure a strong and safe hold.
Using Incorrect Anchors
Not all anchors fit every wall type. Using the wrong anchor weakens the hold. For example, plastic anchors fail in heavy loads or drywall. Metal anchors work better for heavy items. Choose anchors made for your wall material.
Over-tightening Screws
Turning screws too tight can break the anchor or wall. It also strips the screw hole, causing a loose fit. Stop tightening as soon as the screw feels firm. A snug fit holds better than a forced tight one.
Ignoring Wall Material
Walls differ: drywall, plaster, concrete, or brick. Each needs a different anchor type. Ignoring this causes weak support or damage. Check wall type before buying anchors and screws. This saves time and prevents mistakes.
Frequently Asked Questions
What Are Wall Anchors Used For?
Wall anchors provide extra support when screws alone can’t hold. They prevent damage and ensure secure mounting on drywall or hollow walls.
How Do I Choose The Right Wall Anchor?
Select anchors based on wall type and weight load. Plastic anchors suit light loads; metal or toggle anchors support heavier items.
Can I Use Screws Without Wall Anchors?
Screws alone work only in solid wood or studs. For drywall or hollow walls, anchors are necessary for stability.
How To Install Wall Anchors Correctly?
Drill a pilot hole, insert the anchor flush with the wall, then drive the screw in securely without overtightening.
Conclusion
Using wall anchors and screws correctly keeps your items secure and safe. Choose the right anchor for your wall type. Drill the hole carefully, then insert the anchor firmly. Screw in slowly to avoid damaging the wall. This simple process helps you hang shelves, pictures, or mirrors with confidence.
Practice makes the task easier and faster. Now, you can handle small projects around your home with ease. Try these steps next time you need extra support on your walls. Easy, strong, and reliable results every time.