Are you tired of struggling with loose screws and unstable wall fixtures? Knowing how to install a wall screw anchor correctly can save you time, effort, and frustration.
Whether you’re hanging a heavy mirror or mounting a shelf, the right anchor makes all the difference. In this guide, you’ll discover simple, step-by-step instructions that anyone can follow. By the end, you’ll feel confident tackling your wall projects like a pro.
Ready to get started? Let’s dive in!
Choosing The Right Wall Anchor
Choosing the right wall anchor is important for a strong hold. Not all anchors work for every wall. Picking the right type makes your installation safe and long-lasting. It also prevents damage to the wall.
Types Of Wall Anchors
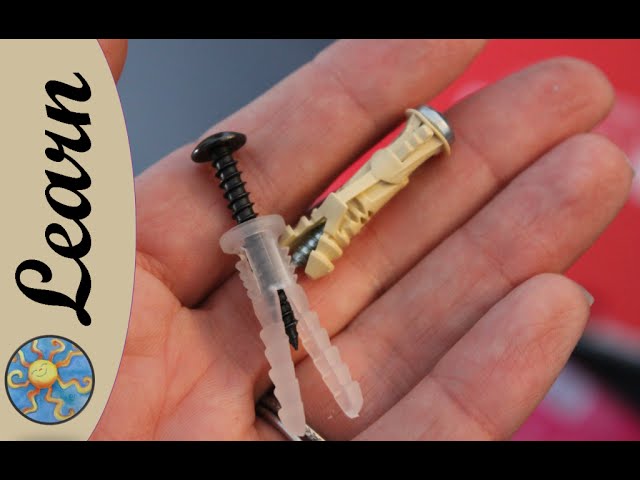
There are several types of wall anchors. Plastic expansion anchors are common for light loads. They expand when a screw is inserted. Toggle bolts have wings that open behind the wall. They hold heavy items securely. Molly bolts are metal anchors that expand inside the wall. They work well for medium to heavy loads. Self-drilling anchors screw directly into drywall. They are easy to install and remove.
Matching Anchors To Wall Materials
Wall materials affect anchor choice. Drywall needs anchors like plastic or self-drilling types. For plaster walls, toggle bolts work better. Concrete or brick requires heavy-duty anchors like sleeve anchors. Hollow walls need anchors that spread behind the surface. Always check wall thickness before selecting anchors. This ensures a secure and stable hold.
Tools And Materials Needed
Installing wall screw anchors requires the right tools and materials. Having everything ready makes the job faster and easier. This section covers what you need before starting the installation.
Essential Tools For Installation
You need a drill to make holes in the wall. Choose a drill bit that matches the size of the anchor. A screwdriver helps to insert the screw into the anchor. A hammer may be useful to tap the anchor into the wall if needed. A tape measure or ruler ensures accurate placement of the anchors. A pencil helps mark the spots where you will drill.
Selecting The Correct Screw Size
The screw size must match the anchor size for a strong hold. Too small screws will not grip well. Too large screws can damage the anchor or wall. Check the anchor packaging for recommended screw sizes. Use screws made of sturdy material to support the weight of items. Choose screws with the right length to go fully into the anchor.
Preparing The Wall
Preparing the wall is an important first step before installing a wall screw anchor. This step ensures the anchor will hold firmly and safely. Proper preparation helps avoid damage to the wall and makes the installation process smoother. Follow these simple steps carefully.
Locating The Drill Point
Find the exact spot where you want to place the screw anchor. Check the wall surface to avoid hitting wires or pipes. Use a stud finder if needed to locate studs behind the wall. Choose a spot on solid drywall or masonry for best hold.
Marking The Spot Accurately
Use a pencil to mark the drill point clearly on the wall. Make a small dot to guide your drill bit. Double-check the position to ensure it is level and aligned. Accurate marking prevents mistakes during drilling and installation.
Credit: www.protoolreviews.com
Drilling The Hole
Drilling the hole is the first important step when installing a wall screw anchor. A clean and well-sized hole makes the anchor fit tightly. This keeps the screw stable and the object secure. Taking time to drill carefully helps avoid damage to the wall and ensures the anchor works well.
Choosing The Drill Bit
Select a drill bit that matches the anchor size exactly. Too small and the anchor won’t fit. Too large and it will be loose. Use a masonry bit for concrete or brick walls. For drywall, a regular twist bit works fine. Check the anchor package for the recommended drill bit size.
Drilling Tips For Clean Holes
Mark the spot clearly before drilling. Hold the drill steady and straight. Drill slowly at first to avoid slipping. Increase speed once the bit grips the wall. Pull the bit out occasionally to clear dust. Clean holes help anchors grip better and last longer.
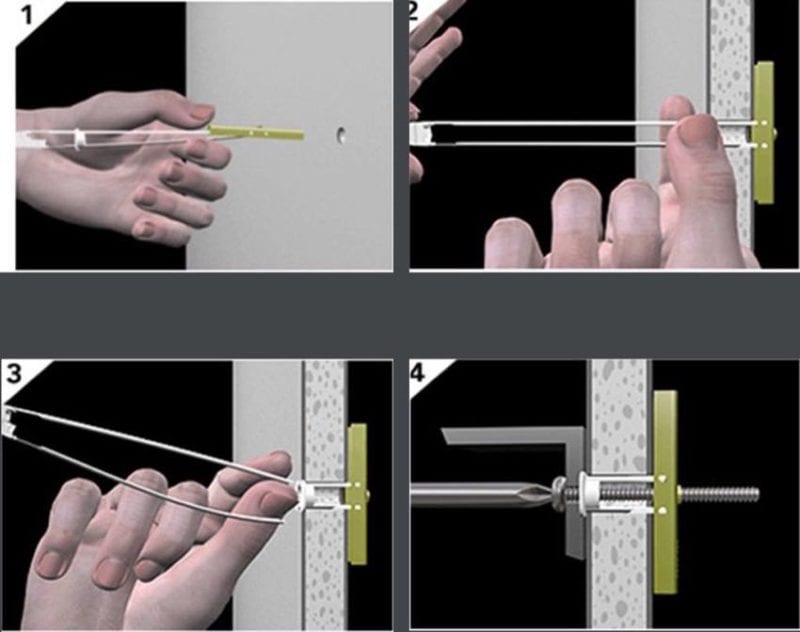
Inserting The Wall Anchor
Inserting the wall anchor is a key step in securing screws properly. This process helps the anchor hold tightly inside the wall. A well-inserted anchor supports weight and prevents damage. Follow clear steps to insert anchors with ease and safety.
Proper Insertion Techniques
Start by choosing the right anchor size for your hole. The hole should match the anchor’s diameter exactly. Gently push the anchor into the hole using your thumb. If it feels tight, tap lightly with a hammer. Avoid forcing the anchor too hard. The anchor must sit flush with the wall surface.
Ensuring A Snug Fit
Check that the anchor does not move in the hole. A loose anchor will not hold screws well. If loose, remove and try a larger anchor size. The anchor should feel firm and secure. A snug fit provides the best support for hanging items. Test by gently wiggling the anchor before screwing in.
Securing The Screw Anchor
Securing the screw anchor is a key step in making sure your wall fixture stays strong. The anchor must fit tightly inside the hole. This holds the screw firmly and keeps it from moving or falling out. Proper installation prevents damage to the wall and gives the best support for hanging objects.
Driving The Screw Correctly
Start by placing the screw into the anchor gently. Use a screwdriver or drill with low speed. Turn the screw slowly to avoid slipping or stripping the anchor. Stop when the screw head is flush with the anchor’s surface. Tighten carefully to avoid breaking the anchor inside the wall.
Avoiding Common Mistakes
Do not force the screw too hard. Over-tightening can crack the anchor or wall. Avoid using a screw that is too long or too short for the anchor. Choose the right size to fit well. Do not skip drilling the correct hole size. Too big or too small holes weaken the anchor’s grip.
Testing The Support Strength
Testing the support strength of a wall screw anchor is a key step after installation. It ensures the anchor can hold the weight it is meant to carry. This step helps avoid accidents and damage to your walls or items hung.
Proper testing gives confidence in the anchor’s stability. It also shows if any adjustments are needed before use. Follow simple methods to check and adjust the anchor’s support strength.
Checking Stability
Start by gently pulling on the screw or hook attached to the anchor. Apply steady pressure without sudden jerks. The anchor should not move or wiggle in the wall. If the screw feels loose, the anchor may not support weight well.
Try adding light weight to test the hold. Use small objects or bags first. Watch for any signs of slipping or wall damage. If everything stays firm, the anchor is stable and ready.
Adjusting If Necessary
If the anchor moves or feels weak, remove the screw carefully. Check if the anchor is properly seated in the wall. Sometimes, pushing it deeper or re-drilling the hole helps. Use a larger anchor for heavier loads.
After adjustments, test the anchor again. Repeat gentle pulling and light loading. Only use the anchor after it holds firmly without any movement. Proper adjustment ensures safety and long-lasting support.
Credit: www.youtube.com
Tips For Long-lasting Support
Ensuring long-lasting support for wall screw anchors is key to keeping your fixtures safe and secure. Proper care helps the anchors hold strong over time. Small habits make a big difference in durability.
Regular checks and simple maintenance keep your anchors working well. Knowing when to replace anchors avoids damage and accidents. These tips help your installation stay reliable for years.
Maintenance Suggestions
Check anchors regularly for signs of wear or rust. Clean the area around the anchor to prevent dirt buildup. Tighten screws if they become loose to keep a firm hold. Avoid hanging items that are too heavy for the anchor size. Use a screwdriver, not a drill, to avoid over-tightening.
When To Replace Anchors
Replace anchors if you see cracks or breaks in the wall. Remove anchors that wobble or feel loose when touched. Change anchors after removing heavy items to avoid weak spots. Swap out rusty or corroded anchors to maintain strength. Use new anchors if you change the fixture’s location.

Credit: www.youtube.com
Frequently Asked Questions
What Tools Do I Need To Install Wall Screw Anchors?
You need a drill, drill bit, screwdriver, and the correct screw anchors. Choose drill bits matching anchor size for precise holes. A hammer may help insert anchors in some cases.
How Do I Choose The Right Wall Screw Anchor?
Select anchors based on wall type and weight load. Plastic anchors suit light loads; metal anchors handle heavier items. Always check package instructions for weight limits and wall compatibility.
Can I Install Wall Anchors Without A Drill?
Yes, for lightweight anchors, you can manually insert them using a screwdriver. However, drilling is recommended for accuracy and secure fitting, especially for heavier loads.
How Deep Should I Drill For Wall Screw Anchors?
Drill a hole slightly deeper than the anchor length. This ensures the anchor fits fully and holds firmly in the wall.
Conclusion
Installing wall screw anchors is simple with the right steps. Choose the correct anchor for your wall type. Drill a hole that fits the anchor snugly. Push the anchor in carefully, then screw it tightly. This ensures a strong hold for your items.
Take your time to avoid mistakes or damage. Practice makes perfect for better results each time. Use these tips to hang shelves, pictures, or hooks safely. Enjoy a secure and sturdy wall mount every time.