If you want to install a deadbolt on your metal door, the first step can seem tricky: cutting the right hole. You might worry about making mistakes or damaging your door.
But don’t let that stop you. With the right tools and clear steps, you can do this yourself and boost your home’s security. Keep reading, and you’ll learn exactly how to cut a perfect deadbolt hole in your metal door—saving time and money while getting the job done right.

Credit: diy.stackexchange.com
Tools And Materials Needed
Cutting a deadbolt hole in a metal door requires specific tools and materials. Using the right items helps make the job easier and safer. Prepare everything before starting to avoid delays or mistakes.
Essential Tools
You will need a power drill with a metal drill bit. A hole saw bit sized for your deadbolt is important. A center punch helps mark the drilling spot. Use a tape measure and pencil for accurate measurements. A file or deburring tool smooths rough edges after cutting.
Safety Gear
Wear safety goggles to protect your eyes from metal shards. Use gloves to guard your hands from sharp edges. Hearing protection reduces noise from drilling. A dust mask prevents inhaling fine metal particles. Always wear long sleeves to protect your arms.
Recommended Materials
Choose a metal door that can hold a deadbolt lock. Select a deadbolt lock kit designed for metal doors. Use masking tape to mark the drilling area clearly. Have a drop cloth to catch metal debris. Keep a clean cloth handy for wiping dust and dirt.

Credit: www.reddit.com
Preparing The Metal Door
Preparing the metal door is the first step to cut a deadbolt hole safely and accurately. This process sets the foundation for a clean, precise cut. Taking time to prepare well helps avoid mistakes. It also ensures the deadbolt fits perfectly. Follow the steps carefully to get the best results.
Marking The Deadbolt Position
Start by choosing the right spot for the deadbolt. Use the lock template or the deadbolt itself to find the position. Mark the outline clearly with a pencil or marker. Make sure the marks are visible and precise. This step guides the cutting process and prevents errors.
Measuring And Aligning
Measure twice to be sure of your marks. Check the height from the floor and the distance from the door edge. Use a ruler or tape measure for accuracy. Align the marks straight and level. This keeps the deadbolt hole in the correct place on the door.
Securing The Door
Before cutting, secure the door firmly. Use clamps or a sturdy workbench to hold it steady. A moving door can cause a crooked hole. Make sure the door cannot shift during the cutting. This step improves safety and cutting precision.
Drilling The Deadbolt Hole
Drilling the deadbolt hole in a metal door is a key step in installing your lock. It requires care and the right tools. This part of the process must be done carefully to avoid damaging the door or the lock.
Follow clear steps to make a clean, precise hole. This ensures the deadbolt fits perfectly and works smoothly. Below are tips to help you drill the hole correctly.
Choosing The Right Drill Bit
Select a drill bit made for metal. High-speed steel (HSS) or cobalt bits work best. These bits cut through metal cleanly without dulling fast.
Pick a bit size that matches your deadbolt’s hole diameter. Check the lock instructions for exact measurements. Using the wrong size can cause a loose or tight fit.
Creating Pilot Holes
Start by marking the hole spot clearly. Use a center punch to make a small dent. This keeps the drill bit from slipping on the metal.
Drill a small pilot hole first. This smaller hole guides the larger bit and reduces stress on the metal. It also helps keep the drill steady.
Drilling The Main Hole
Use a slow, steady speed on your drill. High speeds can overheat and damage the bit or door. Apply gentle pressure without forcing the drill.
Keep the drill straight and aligned with the mark. This makes a clean, round hole for the deadbolt. Cool the bit with water if it gets hot.
Finish by smoothing any rough edges with a metal file. This prevents damage to the lock and ensures easy installation.
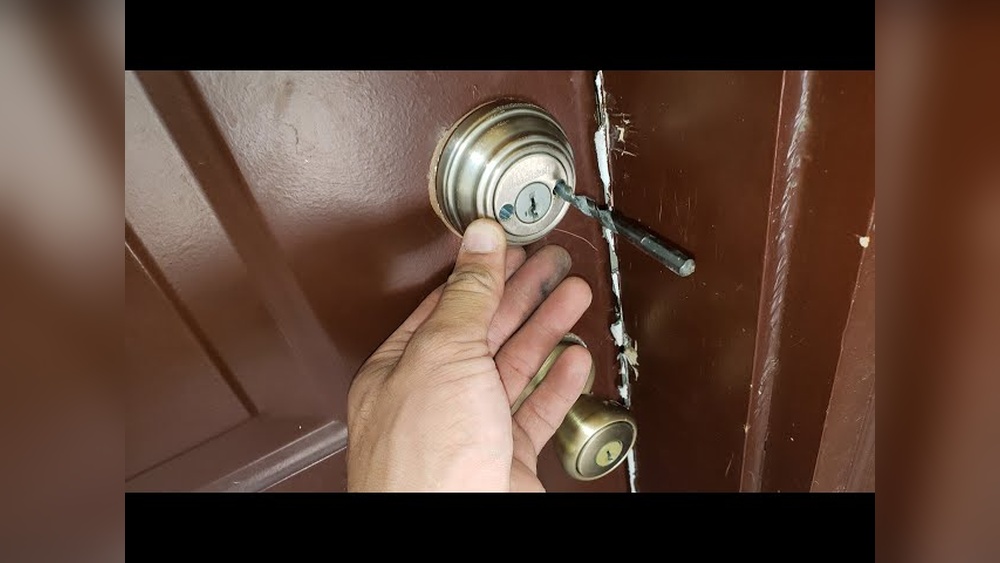
Cutting The Edge Bore
Cutting the edge bore is a key step in fitting a deadbolt into a metal door. It creates the hole on the door’s edge where the bolt will slide in. This part must be precise to ensure the deadbolt works smoothly and fits well. Careful cutting avoids damage to the door and keeps everything aligned.
Marking The Edge
Start by measuring the deadbolt’s size and position on the door edge. Use a pencil or marker to outline the exact spot. Double-check these marks to be sure. Clear, accurate marks help guide the cutting tool and prevent mistakes.
Using A Hole Saw
Select a hole saw that matches the deadbolt’s size. Attach it to a drill and position it on the marked spot. Drill slowly and steadily, keeping the saw straight. Metal doors need firm pressure but avoid pushing too hard. Take breaks to cool the metal and drill bit if needed.
Smoothing The Edges
After cutting, the hole edges may be rough or sharp. Use a metal file or sandpaper to smooth them out. This step prevents injury and helps the deadbolt fit better. Check the hole by inserting the deadbolt to ensure a clean fit.
Finishing Touches
After cutting the deadbolt hole, the finishing touches make all the difference. These steps ensure your work looks clean and functions well. Proper care here leads to a secure and neat installation.
Cleaning Metal Debris
Remove all metal shavings and dust from the hole. Use a brush or vacuum to clear the area completely. Clean edges prevent damage and help the deadbolt fit smoothly. Wear gloves to avoid cuts from sharp metal pieces.
Testing The Fit
Place the deadbolt into the hole to check alignment. The lock should slide in without force or gaps. Adjust the hole edges slightly if the fit feels tight. A well-fitted deadbolt ensures better security and easy use.
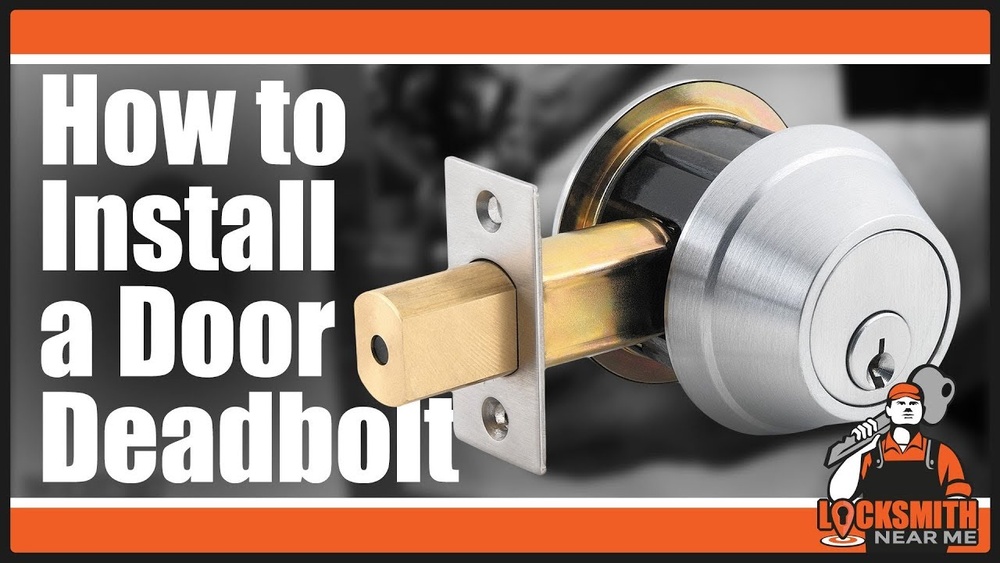
Installing The Deadbolt
Secure the deadbolt with screws, following the manufacturer’s instructions. Tighten screws evenly to avoid bending the metal door. Test the lock by turning the key or thumb turn. Confirm it locks and unlocks smoothly every time.
Common Mistakes To Avoid
Cutting a deadbolt hole in a metal door requires precision and care. Mistakes can cause damage and waste time. Avoiding common errors helps complete the job smoothly and safely. Focus on key areas to prevent problems and get the best result.
Misalignment Issues
Mark the hole position carefully. A small error can cause the deadbolt to fit poorly. Check measurements twice before cutting. Use a template if possible. Misaligned holes weaken the door and lock function.
Using Incorrect Tools
Choose tools designed for metal cutting. Using wrong tools can dull blades or damage the door. Drill bits and hole saws for metal work best. Avoid cheap or worn-out tools. Sharp, suitable tools make cleaner cuts and save effort.
Ignoring Safety Precautions
Wear safety glasses and gloves at all times. Metal cutting produces sharp edges and flying debris. Work in a well-ventilated area. Keep hands and clothing away from moving parts. Safety prevents injuries and ensures a smooth process.
Tips For A Professional Finish
Cutting a deadbolt hole in a metal door requires care and precision. A neat, professional finish makes your door look good and ensures the deadbolt works well. Follow these tips to get the best results and avoid mistakes.
Working Slowly And Carefully
Take your time during each step. Rushing can cause mistakes or damage to the door. Move tools gently and steadily. This reduces the risk of slipping or making uneven cuts. Slow work helps keep the hole clean and smooth.
Maintaining Tool Sharpness
Use sharp tools for easier cutting. Dull blades make rough edges and take more effort. Check your drill bits and saw blades before starting. Replace or sharpen them if needed. Sharp tools create neat holes and save time.
Double-checking Measurements
Measure twice before cutting once. Mark your hole carefully using a template or ruler. Double-check all marks and sizes. Correct measurements prevent holes that are too big or small. This step saves frustration and extra work later.

Credit: www.youtube.com
Frequently Asked Questions
How Do I Measure For A Deadbolt Hole On Metal Doors?
Measure the door thickness and mark the hole’s center at the correct height. Use a template for accuracy to ensure a proper fit for the deadbolt.
What Tools Are Needed To Cut A Deadbolt Hole In Metal?
You need a drill with a hole saw bit, a metal file, and a marker. These tools help create a clean, precise hole for the deadbolt installation.
How Can I Prevent Metal Door Damage While Cutting Holes?
Use masking tape over the cut area to avoid scratches. Drill slowly and apply steady pressure to reduce metal warping or damage.
Can I Cut A Deadbolt Hole In Any Metal Door Type?
Most metal doors can be drilled if they are hollow or solid steel. Avoid cutting on aluminum or stainless steel without proper tools.
Conclusion
Cutting a deadbolt hole in a metal door takes careful steps and the right tools. Follow the guide step-by-step to avoid mistakes. Take your time and measure twice before cutting. Safety is important—wear protective gear and work slowly. Doing it yourself saves money and adds security to your home.
Practice on scrap metal if you can. Soon, you will have a strong door with a perfect deadbolt fit. Simple tools and patience make the job easier than it seems. Keep your door safe and secure with confidence.