Have you ever faced the frustration of a deadbolt lock that just won’t budge? Whether the key is stuck, broken, or the lock is simply jammed, knowing how to drill out a deadbolt hole can save you time, money, and stress.
In this guide, you’ll discover the exact steps to remove that stubborn lock safely and efficiently. By the end, you’ll feel confident handling the job yourself—no locksmith needed. Ready to unlock the solution? Let’s get started.
Tools Needed
Drilling out a deadbolt hole needs the right tools. Having the proper equipment makes the job easier and safer. Prepare all your tools before starting. This helps avoid interruptions and mistakes.
Essential Drill Bits
Use a set of drill bits designed for metal and wood. Start with a small bit to create a pilot hole. Then use larger bits to widen the hole to the needed size. A spade bit or hole saw around 2 inches can work well for the deadbolt hole.
Safety Gear
Protect yourself with safety glasses to shield your eyes. Wear gloves to guard your hands from sharp metal pieces. Use ear protection if your drill is loud. Safety first keeps accidents away.
Additional Tools
Keep a power drill ready with a steady grip. Have a punch or nail set to mark drill spots. A screwdriver helps remove any screws near the deadbolt. A vacuum or brush clears away dust and debris.

Credit: www.parkavenuelocks.com
Preparing The Door
Preparing the door is the first step in drilling out a deadbolt hole. This stage sets the foundation for a clean and precise job. It involves removing old parts and marking exact points for drilling. Proper preparation helps avoid mistakes and damage to the door.
Taking time here makes the whole process easier and safer. You will have better control and a clear plan to follow.
Removing The Deadbolt Hardware
Start by unscrewing the deadbolt from both sides of the door. Keep the screws in a small container to avoid losing them. Gently pull the lock apart and remove the latch from the door edge. This exposes the hole and gives full access to the lock area.
Check for any remaining parts like plates or screws. Remove all to prevent interference with drilling. The door surface must be clear and flat.
Marking The Drill Points
Use a pencil to mark the center of the existing deadbolt hole. This helps guide the drill bit accurately. Measure the size of the drill bit needed for the hole. Mark the points around the center to keep the drill steady.
Double-check the marks before starting. Correct marks ensure the hole will be drilled in the right place without causing damage. Accurate marking leads to a smooth drilling process.
Choosing The Right Drill Bit
Choosing the right drill bit is key for drilling out a deadbolt hole. The correct bit makes the job easier and safer. Using the wrong bit can damage your door or lock. This section helps you pick the best bit for the task.
Bit Size For Deadbolt
Deadbolt holes usually need a 2 1/8 inch hole saw bit. This size fits most standard deadbolts. For the latch, a 1-inch spade bit works well. Check the lock’s instructions for exact sizes. Using the correct size prevents a loose or tight fit.
Material Considerations
Doors come in wood, metal, or fiberglass. Wood doors allow regular wood bits. Metal doors need high-speed steel or cobalt bits. Fiberglass doors require carbide-tipped bits. Picking the right bit for your door material protects the door and bit. It also helps drill smoothly without extra effort.
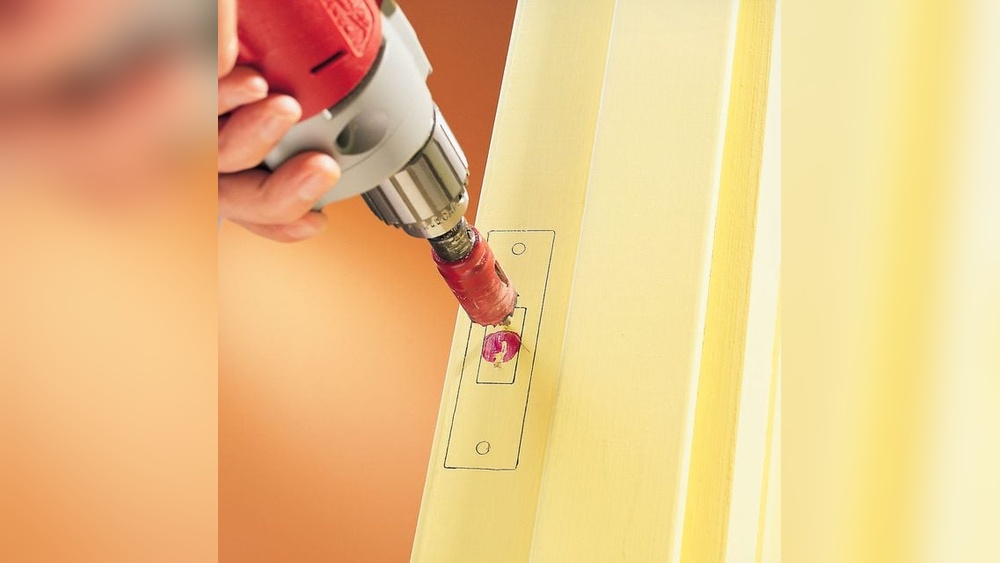
Drilling Techniques
Drilling out a deadbolt hole requires careful technique to ensure success. Using the right method helps you work faster and safer. Follow these simple steps to drill effectively and protect your door.
Starting The Hole
Begin by marking the center of the deadbolt hole clearly. Use a small drill bit to create a pilot hole. This guides the larger drill bit and prevents slipping. Drill slowly at first to keep control. A steady start sets the tone for the whole job.
Maintaining Drill Stability
Hold the drill firmly with both hands. Keep the drill straight and aligned with the hole. Avoid pushing too hard; let the drill do the work. Pause often to check your progress. Stability reduces mistakes and keeps the hole clean.
Avoiding Door Damage
Protect the door surface by placing tape around the hole area. Use drill bits designed for metal or wood, matching your door type. Drill in short bursts to prevent heat buildup. Cooling the bit with water helps avoid burning. Careful drilling keeps your door intact.
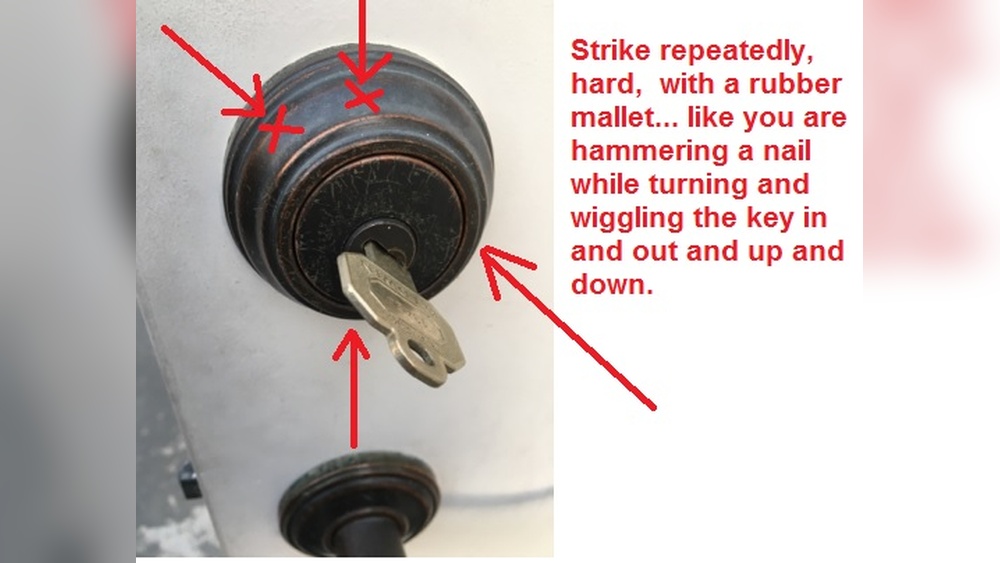
Removing The Deadbolt Cylinder
Removing the deadbolt cylinder is the first step in drilling out a deadbolt hole. This part holds the lock mechanism in place. Taking it out carefully helps access the inner parts of the lock. It requires some basic tools and patience. Safety matters too, so wear eye protection.
Let’s break down the process into two main parts: extracting the core and handling stuck components. These steps guide you through removing the cylinder without causing extra damage.
Extracting The Core
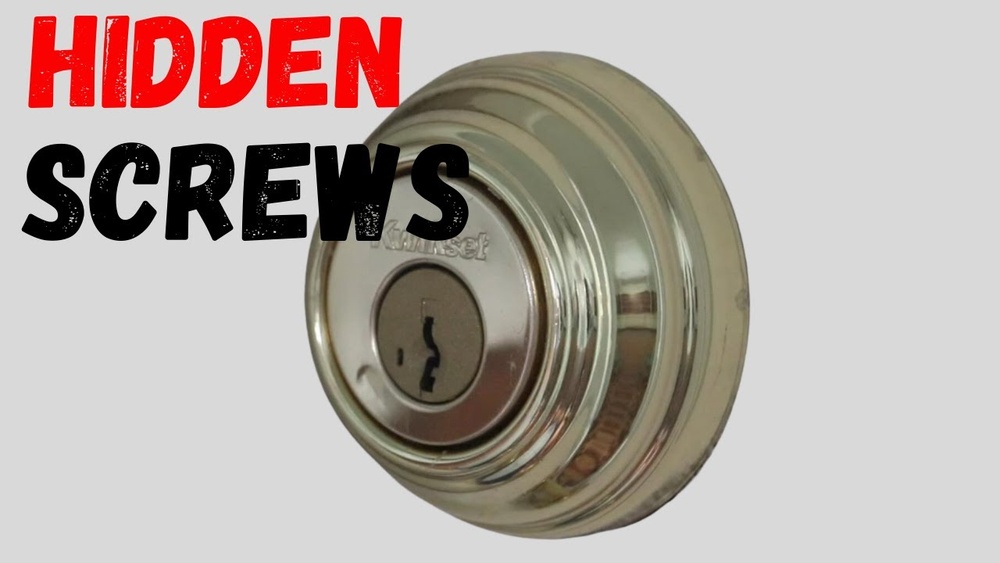
Start by locating the small screw on the side of the lock faceplate. Remove this screw with a screwdriver. This screw keeps the cylinder fixed inside the door.
Next, insert the key and turn it slightly to line up the cylinder. This action allows the cylinder to slide out easily. Pull the cylinder straight out of the door. Use pliers if it feels tight, but avoid twisting too hard.
Handling Stuck Components
Sometimes, the cylinder may not come out smoothly. Rust or dirt can cause it to stick. Spray some lubricant into the keyhole and let it sit for a few minutes.
Try to wiggle the cylinder gently while pulling it out. Use a flathead screwdriver to pry around the edges if needed. Be careful not to damage the door surface.
Repeat these steps until the cylinder comes free. Patience is key during this process.

Credit: www.youtube.com
Finishing Touches
After drilling out the deadbolt hole, the job is almost done. The final steps make sure the hole looks clean and fits the new lock perfectly. These finishing touches help the lock work smoothly and keep your door safe.
Smoothing The Hole Edges
Check the hole edges for rough spots or splinters. Use sandpaper or a file to smooth the edges gently. Smooth edges prevent damage to the lock and make installation easier. Take your time and ensure the hole is even all around.
Preparing For New Hardware
Clean the hole and remove any dust or debris. Test fit the new deadbolt to check for size and fit. Adjust the hole slightly if needed for a perfect fit. Mark the screw holes clearly before drilling pilot holes. This step helps the lock sit firmly and work well.

Credit: www.youtube.com
Frequently Asked Questions
How Do I Safely Drill Out A Deadbolt Hole?
Use a drill bit slightly smaller than the deadbolt screw. Drill slowly to avoid damaging the door. Wear safety glasses and clear debris regularly for safety and precision.
What Tools Are Needed To Drill Out A Deadbolt?
You need a power drill, drill bits, a screwdriver, and safety glasses. Optionally, use a center punch to mark the hole and a lubricant for smooth drilling.
Can Drilling Out A Deadbolt Damage My Door?
If done carefully with the right tools, drilling won’t harm the door. Avoid excessive pressure and keep the drill steady to prevent cracks or splinters.
How Long Does It Take To Drill Out A Deadbolt?
Drilling out a deadbolt typically takes 10 to 20 minutes. Time varies based on door material and your drilling experience.
Conclusion
Drilling out a deadbolt hole takes patience and care. Use the right tools and follow safety steps closely. Take your time to avoid damaging the door. Practice on scrap wood if unsure about the process. This method can save time and money on lock removal.
Always wear safety glasses to protect your eyes. Now, you can handle deadbolt holes with more confidence. Keep your door secure with a properly installed lock. Simple steps lead to better home security and peace of mind.