Have you ever tried hanging something on your wall, only to have it fall down moments later? It’s frustrating, right?
Using the right wall anchors can make all the difference between a secure hold and a big mess. But how do you choose the right ones, and more importantly, how do you use them correctly? This guide will walk you through everything you need to know to get it right the first time.
Keep reading, and you’ll learn simple tips that save you time, money, and hassle. Your walls—and your peace of mind—will thank you.
Types Of Wall Anchors
Wall anchors come in several types. Each type works best for different wall materials and weights. Choosing the right anchor makes your installation strong and safe. Learn about the main types below to find the best fit for your project.
Plastic Expansion Anchors
Plastic expansion anchors are common and easy to use. They work well in drywall and light materials. Insert the anchor into a drilled hole, then screw in. The plastic expands and grips the wall tightly. Ideal for hanging pictures or light shelves.
Toggle Bolts
Toggle bolts provide strong support for heavy items. They have wings that open behind the wall. These wings spread the load over a larger area. Best for hollow walls like drywall or plaster. Use toggle bolts for heavy mirrors or cabinets.
Molly Bolts
Molly bolts are metal anchors with expandable sleeves. Inserted into a drilled hole, then tightened to expand inside the wall. They offer a secure hold in drywall and plaster. Suitable for medium-weight fixtures like towel racks or curtain rods.
Self-drilling Anchors
Self-drilling anchors do not need pre-drilling. They screw directly into drywall or thin plaster. The anchor creates its own hole while being installed. Easy and quick to use for light to medium loads. Perfect for small shelves or hooks.
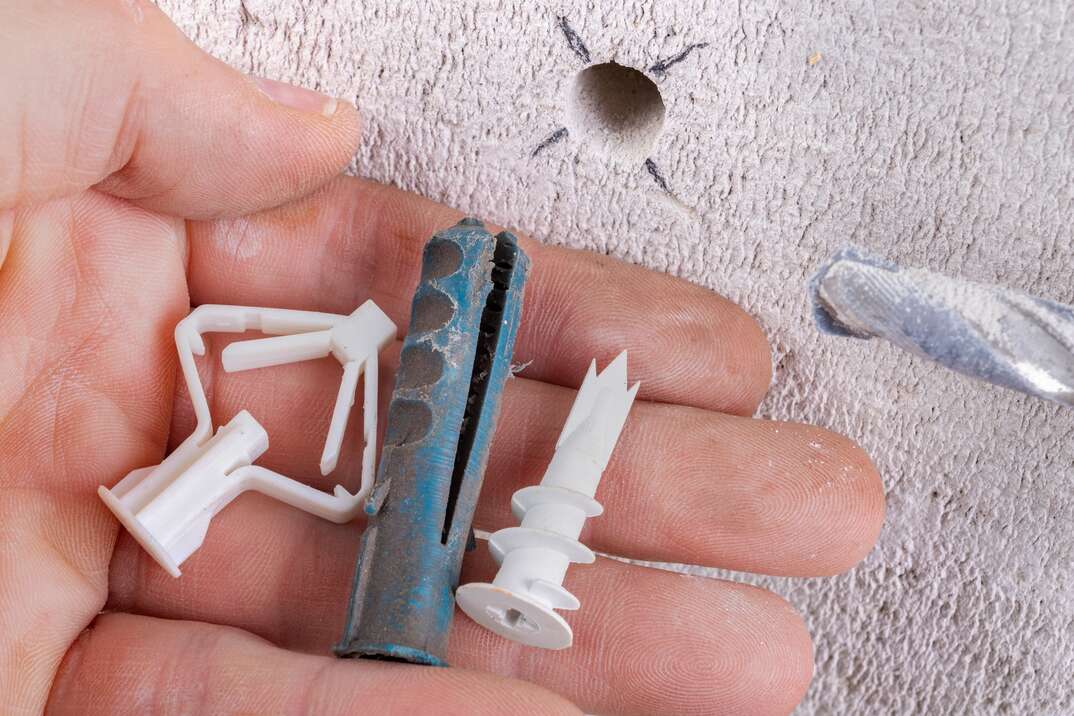
Credit: www.homeserve.com
Choosing The Right Anchor
Choosing the right wall anchor is key to secure mounting. The wrong anchor can cause damage or fail to hold the item. Understand your wall type, the weight of the object, and the size of the anchor needed. These factors help ensure safety and stability.
Assessing Wall Material
Start by checking the wall material. Drywall, plaster, brick, and concrete need different anchors. Drywall anchors are usually plastic or metal. Masonry walls need heavier anchors like sleeve or wedge anchors. Knowing your wall type guides you to the correct anchor choice.
Weight Capacity Considerations
Think about the weight of the item you want to hang. Light objects need small anchors. Heavy items require strong anchors with higher weight ratings. Check the packaging for weight limits. Choose an anchor that supports more than your item’s weight for safety.
Anchor Size And Length
Select the right size and length for the anchor. Larger anchors hold more weight and fit thicker walls. The anchor must fully enter the wall for a secure grip. Too short anchors can slip out. Match the anchor size to your wall thickness and item weight.
Tools Needed For Installation
Using wall anchors correctly needs the right tools. These tools help you install anchors safely and hold items firmly on walls. Preparing the tools before starting saves time and avoids mistakes.
Drills And Drill Bits
A drill makes holes for wall anchors. Choose the drill bit size that fits the anchor. Using the wrong size can cause weak support. A power drill works best for hard walls like concrete or brick. For drywall, a hand drill or screwdriver may be enough.
Screwdrivers And Wrenches
Screwdrivers drive screws into anchors. Match the screwdriver head to the screw type, such as Phillips or flathead. Wrenches help tighten bolts on certain anchors. Both tools make sure the anchors stay in place firmly.
Measuring And Marking Tools
Measuring tools ensure anchors go in the right spot. Use a tape measure to check distances. A pencil marks where to drill. A level keeps the marks straight. Accurate measuring and marking prevent crooked or loose anchors.
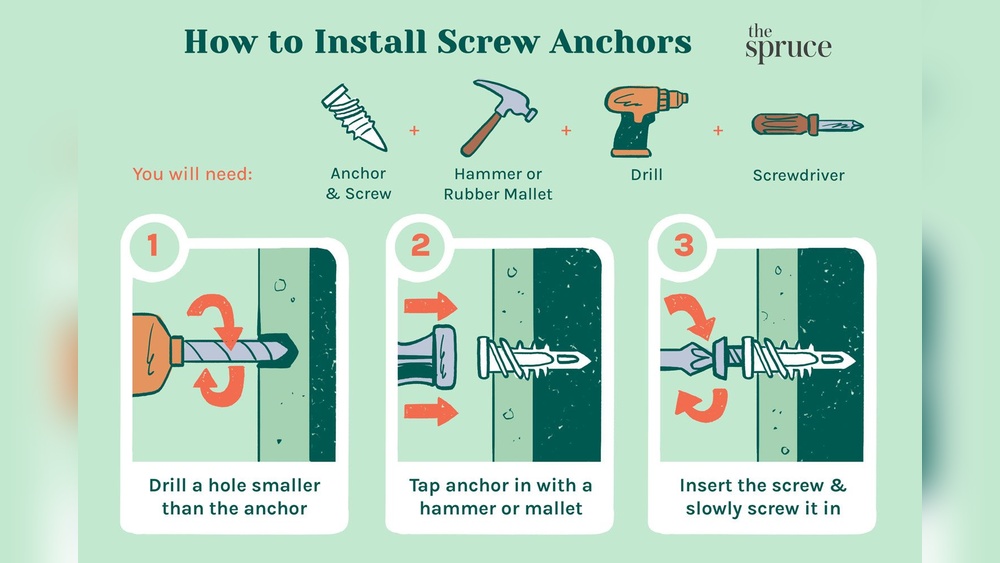
:max_bytes(150000):strip_icc()/how-to-use-and-discard-anchor-screws-1822671-Final-ec8091ccf65241b1b1f888549f25003a.jpg)
Credit: www.thespruce.com
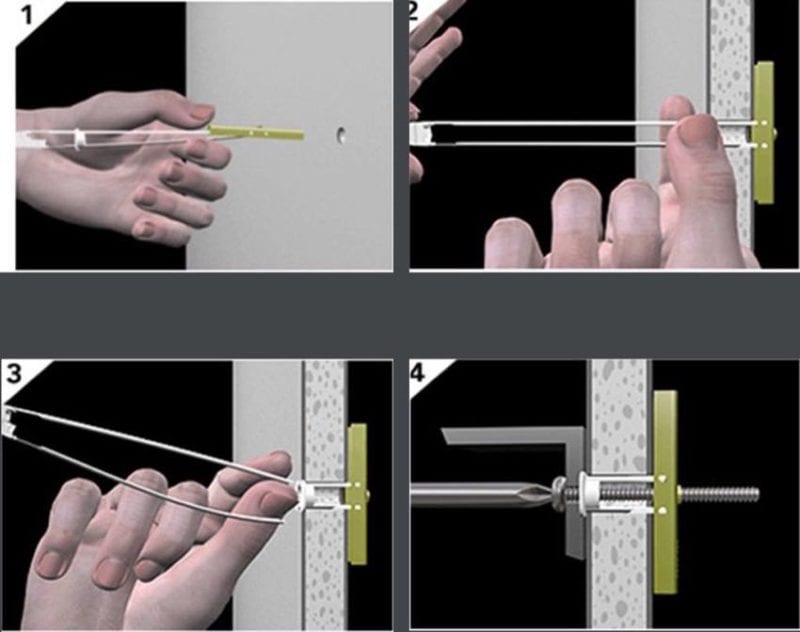
Step-by-step Installation Guide
Using wall anchors correctly ensures your items stay safe and secure on the wall. Follow this step-by-step guide to install wall anchors with ease and confidence. Each step is simple and clear to help you avoid mistakes and get the best results.
Marking The Spot
First, decide where to place the item on the wall. Use a pencil to mark the exact spot. Double-check the measurement to avoid errors. A clear mark helps guide the next steps.
Drilling The Hole
Choose a drill bit that matches the size of the anchor. Drill slowly and straight into the wall at the marked spot. Stop once the hole is deep enough for the anchor. Clean out any dust from the hole.
Inserting The Anchor
Push the wall anchor into the hole. Tap it gently with a hammer if needed. The anchor should fit snugly without moving. This holds the screw firmly in place.
Securing The Screw
Place the screw into the anchor. Turn it slowly with a screwdriver. Tighten until the screw is secure but avoid over-tightening. The screw should hold your item firmly on the wall.
Common Mistakes To Avoid
Using wall anchors can make hanging items easier and safer. Avoiding common mistakes helps keep your walls strong and your items secure. Small errors can cause anchors to fail or damage the wall. Understanding these mistakes saves time and effort.
Using Incorrect Anchor Type
Choosing the wrong anchor weakens the hold. Drywall anchors are different from masonry anchors. Each anchor type suits a specific wall material. Using a plastic anchor in brick walls often leads to failure. Match the anchor type to your wall for best results.
Drilling Holes Too Large Or Small
Drilling the wrong hole size causes problems. A hole too big makes the anchor loose. A hole too small can crack the anchor or wall. Measure the anchor size and drill carefully. Proper hole size ensures a tight, secure fit.
Overtightening Screws
Too much screw pressure damages anchors and walls. Overtightening can break the anchor inside the wall. Stop tightening when the screw feels snug. Firm but gentle pressure holds items safely. Avoid forcing screws to prevent wall damage.
Testing Anchor Strength
Testing the strength of wall anchors is a key step after installation. It ensures the anchor holds firmly and safely supports the weight. Without testing, the anchor might fail and cause damage or injury. Follow simple checks to confirm the anchor is secure before hanging anything heavy.
Applying Gradual Load
Start by applying a small weight to the anchor. Slowly increase the load in steps. This helps see how the anchor reacts under pressure. Watch carefully for any signs of slipping or shifting. Stop adding weight if you notice any movement.
Checking For Movement
Try to gently wiggle the attached object. Look for any back-and-forth or up-and-down movement. Movement means the anchor is loose or not fully secure. No movement indicates the anchor is firmly fixed. Always double-check to avoid surprises later.
Reinforcing Weak Anchors
Weak anchors need extra support to hold safely. Remove the anchor and choose a larger size or a stronger type. Use additional anchors nearby to spread the load. Fill loose holes with wall filler before reinstalling. Reinforcing improves safety and prevents damage.
Special Tips For Different Surfaces
Wall anchors work differently on various surfaces. Each surface needs a special approach for the best hold. Knowing these tips helps prevent damage and keeps items secure. Here are simple tips for drywall, concrete, brick, and plaster walls.
Drywall Anchors
Drywall is soft and weak for heavy loads. Use plastic or metal anchors made for drywall. Drill a small hole first. Push or screw the anchor gently into the hole. Avoid over-tightening screws. It can break the drywall or anchor.
Concrete And Brick Walls
Concrete and brick are hard and strong but need special tools. Use a hammer drill and masonry bit to make a hole. Choose anchors designed for masonry. Clean the hole from dust before inserting the anchor. Tap it in firmly. Tighten screws slowly to avoid cracking.
Plaster Walls
Plaster is brittle and cracks easily. Find studs behind the plaster before drilling. Use anchors that spread inside the wall for better grip. Drill a small pilot hole first. Insert the anchor carefully without forcing. This stops damage and holds weight well.
Credit: www.protoolreviews.com
Frequently Asked Questions
What Types Of Wall Anchors Are Best For Drywall?
Plastic expansion anchors work well for light loads. Toggle bolts and molly bolts are better for heavy items. Choose based on the weight and wall material for secure mounting.
How Do You Install Wall Anchors Correctly?
Drill a hole matching the anchor size. Insert the anchor flush with the wall. Tighten the screw slowly to expand the anchor securely inside the wall.
Can Wall Anchors Hold Heavy Shelves Safely?
Yes, heavy-duty anchors like toggle bolts support heavy shelves. Always check the weight rating on the anchor package. Use multiple anchors for extra stability.
When Should I Avoid Using Wall Anchors?
Avoid anchors in damaged or crumbly walls. In plaster or brick walls, use specialized anchors. For very heavy loads, consider mounting directly into studs.
Conclusion
Using wall anchors correctly keeps your items secure on the wall. Choose the right anchor for the wall type and weight. Drill the proper hole size and insert the anchor firmly. Tighten screws gently to avoid damaging the wall. These simple steps help your shelves and decorations stay safe.
Practice careful installation to prevent accidents and damage. Wall anchors make hanging easier and stronger when used right. Keep these tips in mind for your next project. Safe and sturdy walls make any space better.