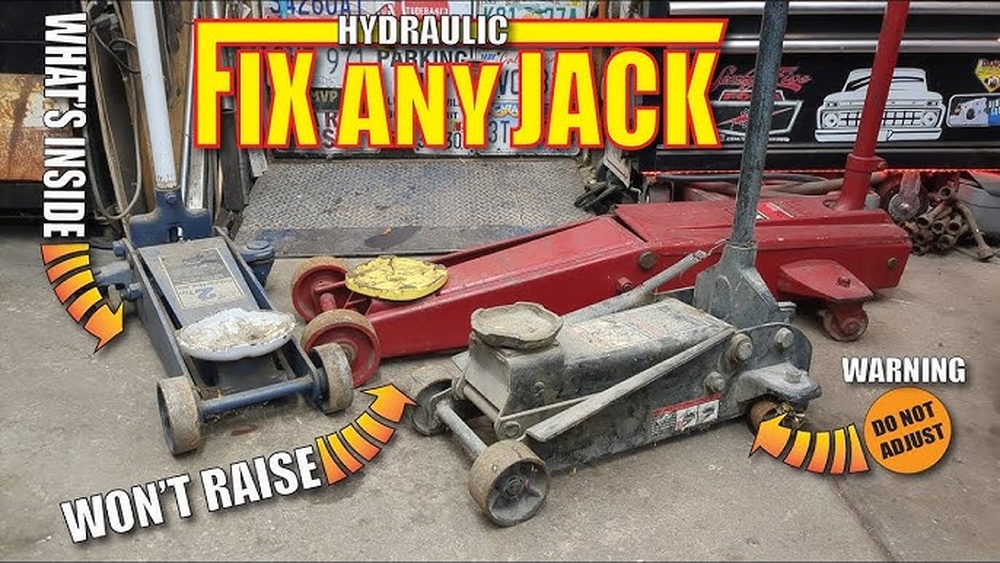
If you own an old Sears floor jack, you know how important it is to keep it working smoothly and safely. Over time, the hydraulic fluid inside can lose pressure or get air bubbles, making your jack less effective or even unsafe to use.
Knowing how to fill and bleed your floor jack will save you time, money, and frustration. In this guide, you’ll learn simple, step-by-step instructions to restore your jack’s power and reliability. Keep reading, and you’ll have your floor jack working like new in no time.

Credit: www.wikihow.com
Tools And Materials Needed
Before starting to fill and bleed your old Sears floor jack, gather the right tools and materials. Using proper items makes the job easier and safer. It also helps avoid damage to the jack.
Having everything ready saves time. It helps you work smoothly without interruption. Here is a list of what you need.
Hydraulic Jack Oil
Use only hydraulic jack oil. Avoid motor oil or other fluids. The right oil keeps the jack working well and lasts longer.
Wrenches Or Socket Set
Wrenches or sockets help open the jack’s oil fill plug. Choose the correct size for your jack. This avoids stripping the plug or damaging parts.
Clean Cloths Or Rags
Clean cloths wipe away dirt and old oil. Keeping the jack clean prevents dirt from entering. It also helps spot leaks or damage.
Flathead Screwdriver
A flathead screwdriver may be needed to open the bleed valve. Use it carefully to avoid damage. It also helps loosen stuck parts gently.
Drain Pan Or Container
Use a container to catch old oil. This keeps your work area clean. Proper disposal helps protect the environment.
Gloves And Safety Glasses
Wear gloves to protect your hands from oil and dirt. Safety glasses protect your eyes from splashes. Safety comes first in all repairs.
Safety Precautions
Safety is the top priority when filling and bleeding an old Sears floor jack. Taking the right precautions prevents accidents and equipment damage. Follow simple steps to protect yourself and others around you.
Wear Protective Gear
Always wear gloves to protect your hands from hydraulic fluid. Safety goggles keep your eyes safe from splashes. Use old clothes or a shop apron to avoid stains.
Work In A Well-ventilated Area
Hydraulic fluid fumes can be harmful. Open windows or work outside to ensure fresh air. Good ventilation reduces the risk of inhaling fumes.
Secure The Floor Jack
Place the jack on a flat, stable surface. Prevent it from moving during the process. Use wheel chocks or blocks if needed for extra safety.
Dispose Of Old Fluid Properly
Used hydraulic fluid is hazardous waste. Collect it in a sealed container. Take it to a recycling center or hazardous waste facility.
Keep Tools And Parts Organized
Arrange tools nearby to avoid searching during the task. Clean spills immediately to prevent slips. Stay focused and work calmly.
Locating The Fill And Bleed Points
Finding the fill and bleed points on an old Sears floor jack is the first step in proper maintenance. These points let you add hydraulic fluid and remove trapped air. Correctly locating them ensures smooth jack operation and safety.
Old Sears floor jacks may have different designs. Knowing where to look saves time and avoids damage. This section guides you to identify these key spots easily.
Identifying The Fill Plug
The fill plug is usually on the main body of the jack. It looks like a small bolt or screw. Often, it sits near the hydraulic cylinder. Use a flashlight to spot it clearly. Removing this plug lets you add hydraulic fluid.
Finding The Bleed Valve
The bleed valve releases air from the jack’s hydraulic system. It is smaller than the fill plug. Check near the base or around the hydraulic pump. Sometimes it is a small screw or valve stem. Loosening it slightly lets air escape during bleeding.
Using The Owner’s Manual For Reference
The owner’s manual often shows exact locations of fill and bleed points. It provides diagrams and part names. If you have the manual, follow its instructions closely. Manuals help avoid guessing and prevent mistakes.
Draining Old Hydraulic Fluid
Draining old hydraulic fluid is a key step for maintaining your Sears floor jack. Over time, the fluid gets dirty and loses its strength. This can cause your jack to work poorly or even break. Removing old fluid ensures the jack runs smoothly and lasts longer.
Start by preparing a clean area to catch the old fluid. Use a container that can hold at least one quart of fluid. Protect the floor with newspapers or a plastic sheet. Wear gloves to keep your hands clean.
Locate The Drain Plug
Find the drain plug under the jack’s hydraulic reservoir. It is usually a small bolt or screw. Use the right tool, often a wrench or screwdriver, to remove it. Be careful to avoid stripping the plug.
Drain The Fluid Completely
Place the container under the drain plug. Slowly unscrew the plug to let the fluid flow out. Allow all the old fluid to drain. This can take a few minutes. Do not rush or force the fluid out.
Dispose Of Old Hydraulic Fluid Properly
Do not pour the old fluid down drains or on the ground. Take it to a recycling center or hazardous waste facility. Proper disposal protects the environment and follows safety rules. Keep the container sealed until you can dispose of it.
Refilling The Hydraulic Fluid
Refilling the hydraulic fluid in an old Sears floor jack is a key step to keep it working well. The fluid helps the jack lift heavy loads smoothly. Over time, the fluid can leak or get dirty, which makes the jack less effective. Adding fresh hydraulic fluid brings back the jack’s power.
This process is simple and does not need special tools. It only takes a few minutes and some care. Use the right type of hydraulic fluid for your model. Too thick or too thin fluid can cause problems. Follow these steps carefully to fill the jack correctly.
Prepare The Jack For Refilling
Place the jack on a flat surface. Make sure it is fully lowered. Clean the area around the fluid fill plug. Remove dirt and grease to avoid contamination. Have a clean cloth ready for wiping.
Locate And Remove The Fill Plug
Find the fill plug on the jack’s main cylinder. It is usually a small bolt or screw. Use the correct tool to unscrew it. Turn slowly to avoid damaging the threads. Keep the plug safe for later replacement.
Add The Hydraulic Fluid
Use a funnel to pour the fluid. Add slowly to prevent spills. Fill until the fluid reaches the level indicated in the manual. Do not overfill. Excess fluid can cause leaks or pressure issues.
Replace The Fill Plug Securely
After filling, clean any spilled fluid. Screw the fill plug back in tight. Avoid overtightening to prevent stripping the threads. Wipe the area clean once more.

Credit: www.onallcylinders.com
Bleeding Air From The System
Bleeding air from the system is a key step in maintaining an old Sears floor jack. Air trapped inside the hydraulic system can cause the jack to work poorly. It makes lifting heavy loads unsafe and difficult. Removing this air restores smooth and reliable jack operation.
Bleeding the system removes air bubbles that reduce hydraulic pressure. This process helps the jack lift smoothly and hold weight steadily. Simple tools and careful steps make bleeding easy for anyone.
Prepare The Floor Jack For Bleeding
Start by placing the jack on a flat, stable surface. Lower the jack completely to release any pressure inside. Clean around the fill plug to avoid dirt entering the system. Remove the fill plug slowly to let out any built-up pressure.
Pump The Handle To Release Air
With the fill plug open, pump the jack handle several times. This action pushes air out through the open plug hole. Watch for air bubbles escaping with the hydraulic fluid. Keep pumping until no more bubbles appear.
Refill Hydraulic Fluid And Seal The System
Check the fluid level inside the jack reservoir. Add the correct hydraulic fluid until it reaches the recommended level. Replace the fill plug tightly to prevent leaks. Test the jack by lifting a small load and observe its response.
Testing The Floor Jack Performance
Testing the floor jack performance is an important step after filling and bleeding your old Sears floor jack. This ensures the jack works safely and lifts smoothly. Proper testing helps find leaks, air pockets, or other issues. It also confirms the jack holds weight steadily without sinking.
Performing these checks protects you and your vehicle during lifting tasks. Follow each step carefully for best results.
Checking The Lifting Capacity
Start by placing the jack on a flat, solid surface. Pump the handle slowly and watch the jack rise. Make sure it lifts the expected weight without strain or unusual sounds. Stop pumping once it reaches the highest point. The jack should hold steady without slipping down.
Observing For Leaks And Air Pockets
Look closely around the jack for any fluid leaks. Fluid should not drip or pool under the jack. Listen for hissing or air sounds during pumping. These may indicate air trapped inside the system. If leaks or air bubbles appear, repeat the bleeding process carefully.
Testing The Release Valve Function
Open the release valve slowly to lower the jack. The descent should be smooth and controlled. Avoid opening the valve too fast, which can cause sudden drops. If the jack lowers too quickly or unevenly, check for internal damage or improper fluid levels.
Confirming Stability Under Load
Place a safe test load on the jack, such as a heavy wood block. Pump the jack to lift the load slightly off the ground. Watch for any wobbling or shifting. The jack must stay stable and firm. Instability means further inspection or repair is needed.

Credit: www.youtube.com
Common Issues And Troubleshooting
Old Sears floor jacks may develop issues over time. Troubleshooting helps keep them working well. Knowing common problems saves time and effort.
Some issues happen often during filling and bleeding. Understanding these helps fix the jack faster. This section covers typical problems and easy solutions.
Air Trapped In The Hydraulic System
Air inside the jack causes it to lose pressure. The jack may not lift smoothly or fully. Bleeding the jack removes trapped air. Use the bleed valve and pump slowly. Repeat until lifting feels firm and steady.
Hydraulic Fluid Leaks
Leaks reduce fluid levels and lower jack performance. Check seals and connections for cracks or damage. Tighten loose fittings carefully. Replace worn seals to stop leaks. Always use the recommended hydraulic fluid.
Jack Won’t Lift Or Holds Pressure
Low fluid or air in the system causes this issue. Fill the reservoir with proper fluid. Bleed the jack to remove air pockets. Inspect the release valve; it may stick. Clean or replace the valve if needed.
Slow Or Jerky Lifting Action
Dirt or old fluid can block the system. Flush and refill the hydraulic fluid regularly. Clean moving parts and lubricate them lightly. This keeps the jack lifting smooth and steady.
Maintenance Tips For Longevity
Keeping your old Sears floor jack in good shape helps it last many years. Regular care prevents damage and keeps it working smoothly. Simple steps can save time and money on repairs.
Follow these maintenance tips to keep your floor jack strong and reliable. Small actions make a big difference in its performance and safety.
Check Hydraulic Fluid Levels Regularly
Hydraulic fluid powers the lifting action. Low fluid causes poor performance and damage. Open the fill plug and add recommended fluid if low. Use clean fluid to avoid contamination.
Remove Air By Bleeding The Jack
Air trapped inside reduces lifting strength. Bleed the jack by opening the release valve. Pump the handle several times to push air out. Close the valve tightly to keep air from returning.
Clean And Lubricate Moving Parts
Dirt and rust slow down the jack’s parts. Wipe clean with a cloth after each use. Apply light oil to joints and wheels to keep movement smooth.
Inspect For Leaks And Damage
Look for oil leaks around seals and fittings. Leaks reduce hydraulic pressure and cause failure. Replace damaged seals or parts quickly to avoid bigger problems.
Store The Jack Properly
Keep the jack in a dry, clean place. Avoid moisture to prevent rust. Lower the jack fully before storage to relieve pressure on parts.
Frequently Asked Questions
How Do I Fill Hydraulic Fluid In An Old Sears Floor Jack?
To fill hydraulic fluid, first remove the fill plug on the jack. Use the recommended jack oil or hydraulic fluid. Slowly pour fluid until it reaches the fill hole. Replace the plug securely to prevent leaks. Avoid overfilling to maintain optimal jack performance.
What Is The Correct Bleeding Method For A Sears Floor Jack?
To bleed, open the release valve and pump the handle slowly. This removes trapped air from the hydraulic system. Repeat until the jack lifts smoothly without sponginess. Close the release valve tightly before use to ensure proper pressure and operation.
How Often Should I Bleed My Sears Floor Jack?
Bleed your floor jack whenever it feels spongy or lifts unevenly. Regular maintenance every 6 months helps keep hydraulic fluid clean and air-free. Proper bleeding extends the jack’s lifespan and ensures safe and reliable lifting performance.
Can I Use Any Hydraulic Fluid For My Sears Floor Jack?
It’s best to use manufacturer-recommended hydraulic oil or jack fluid. Using improper fluids can damage seals and reduce jack efficiency. Check your jack’s manual for specific fluid types to maintain optimal functionality and avoid costly repairs.
Conclusion
Filling and bleeding an old Sears floor jack keeps it working well. Regular care helps avoid problems and extends its life. Follow the steps carefully for safety and best results. Check the jack often to catch issues early. A well-maintained floor jack makes your work easier and safer.
Small efforts now save time and money later. Keep your tools ready for any job.