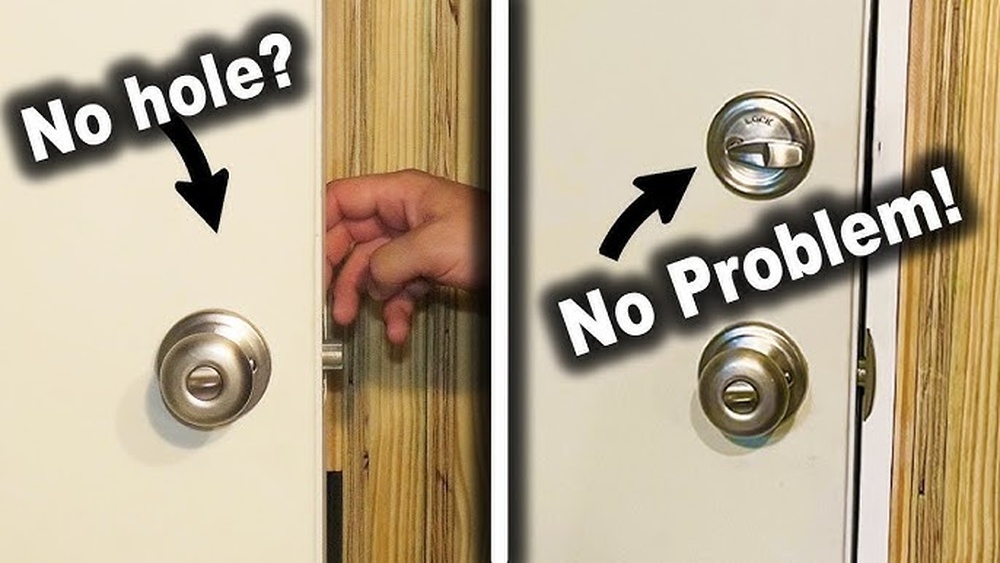
Looking to boost your home’s security by installing a deadbolt? You’ve come to the right place.
Knowing how to install a deadbolt hole correctly is key to keeping your door strong and reliable. If you want a step-by-step guide that’s simple to follow, this article will walk you through the process with clear instructions and helpful tips.
By the end, you’ll feel confident tackling the job yourself—and that peace of mind is priceless. Ready to get started? Let’s dive in.
Credit: www.lowes.com
Tools And Materials Needed
Preparing to install a deadbolt hole requires the right tools and materials. Having these ready helps the job go smoothly. It also ensures the lock fits and works well. This section covers what you need before starting the installation.
Essential Tools
Start with a power drill. It makes drilling the hole easier and faster. Use a hole saw bit sized for your deadbolt. A spade bit helps with the latch hole on the door edge. A screwdriver is needed to attach the lock parts. A tape measure ensures correct hole placement. Marking tools like a pencil or marker guide your cuts. Safety glasses protect your eyes from wood chips. A chisel helps clean up the edges of the hole.
Choosing The Right Deadbolt
Pick a deadbolt that fits your door thickness. Standard doors need a 2 1/8 inch hole size. Check if your door is metal or wood. Some deadbolts work better on certain materials. Decide between single-cylinder or double-cylinder types. Single-cylinder uses a key outside and thumb turn inside. Double-cylinder needs a key on both sides. Consider the lock finish to match your door hardware. Quality matters for security and durability.
Preparing The Door
Preparing the door is the first important step for installing a deadbolt hole. You need to get precise measurements and mark the door carefully. This step ensures the lock fits perfectly and works well.
Marking The Hole Location
Start by deciding where the deadbolt will go on the door. Usually, it sits above the doorknob. Use a pencil to mark the exact spot on the door edge. Also, mark the face of the door where the lock cylinder will fit. Make sure the marks are clear and straight.
Measuring Backset And Height
The backset is the distance from the door edge to the center of the hole. It commonly measures 2 3/8 or 2 3/4 inches. Measure this carefully and mark it on the door. The height is the distance from the floor to the hole center. Standard height is about 6 to 12 inches above the doorknob. Double-check these measurements before drilling to avoid mistakes.
Drilling The Deadbolt Hole
Drilling the deadbolt hole is a key step in installing a secure lock. This process requires precision and care to ensure the deadbolt fits correctly. Proper drilling helps the lock work smoothly and keeps your door safe.
There are two main holes to drill: the face bore and the edge bore. Each hole has a specific size and position. Following the right steps makes installation easier and more accurate.
Drilling The Face Bore
The face bore is the large hole on the door’s face. It holds the main part of the deadbolt. Mark the center point on the door, usually 6 to 12 inches above the doorknob.
Use a hole saw drill bit that matches the deadbolt diameter, often 2 1/8 inches. Hold the drill steady and drill straight through the door. Keep the drill level for a clean, round hole.
Creating The Edge Bore
The edge bore is the smaller hole on the door’s edge. It fits the deadbolt latch. Measure and mark the center of the door’s edge to align with the face bore.
Use a spade bit or hole saw matching the latch size, usually 1 inch. Drill carefully into the door edge until it meets the face bore hole. Clean out any wood chips for a smooth fit.

Credit: support.shopyalehome.com
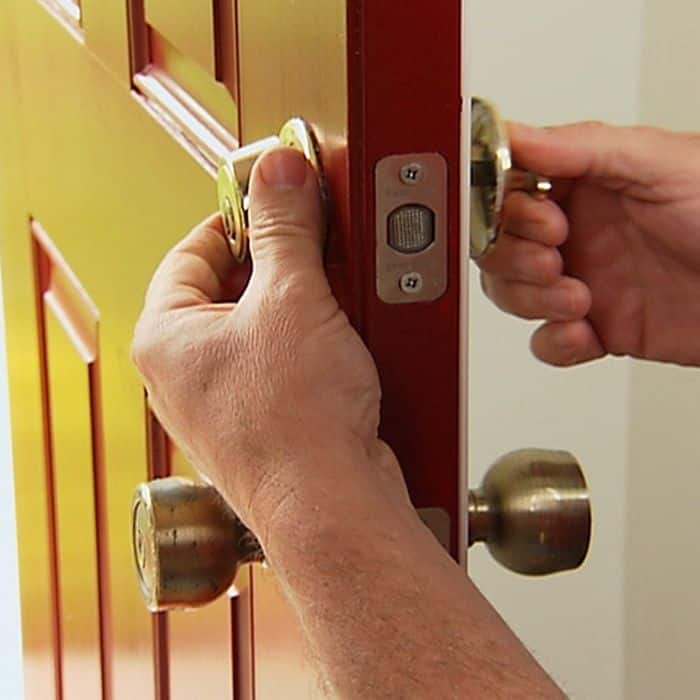
Installing The Deadbolt
Installing the deadbolt is a key step in securing your door properly. It involves placing parts in the right spots and fixing them tightly. This section explains how to fit the latch and secure the deadbolt cylinder.
Fitting The Latch
First, insert the latch into the hole on the door edge. Make sure the angled side faces the door frame. Push it in until it sits flush with the door surface. Use screws to fasten the latch firmly. Check that the latch moves smoothly when you push the bolt.
Securing The Deadbolt Cylinder
Next, place the deadbolt cylinder on the outside of the door. Align it with the latch mechanism inside. On the inside, fit the thumb turn or interior plate. Screw both sides together tightly. Test the deadbolt by turning the key and thumb turn. It should lock and unlock without sticking.
Aligning The Strike Plate
Aligning the strike plate is a key step in installing a deadbolt hole. The strike plate holds the bolt in place when the door locks. Proper alignment ensures the door locks smoothly and securely. Misalignment can cause the deadbolt to stick or not lock fully. Take time to mark and prepare the door frame carefully for the strike plate.
Marking The Door Frame
Start by closing the door. Extend the deadbolt and note where it meets the door frame. Use a pencil to mark the top and bottom edges of the deadbolt on the frame. These marks show where the strike plate will sit. Double-check the marks to make sure they line up with the bolt.
Chiseling For The Plate
Place the strike plate over the marks on the frame. Trace around the plate with a pencil. Use a chisel to carve out a shallow recess inside the traced area. The recess should fit the plate snugly. Work slowly to avoid making the recess too deep or wide. The strike plate must sit flush with the door frame surface.
Testing The Lock
Testing the lock after installing a deadbolt hole is key. It confirms the lock works well and fits perfectly. This step helps avoid future troubles and ensures safety.
Ensuring Smooth Operation
Start by turning the key in the lock. It should move easily without sticking. Check the bolt slides out and retracts fully. Test the lock from both inside and outside. Make sure the door closes without forcing the bolt. Smooth action means the hole size and position are right.
Troubleshooting Common Issues
If the key is hard to turn, the hole may be off-center. The bolt might catch on the strike plate. Loosen screws and adjust the lock slightly. Sand rough edges inside the hole for better fit. Tighten everything again and test the lock once more. Repeat until the lock works smoothly.
Tips For Enhanced Security
Installing a deadbolt hole is just the start of securing your door. Extra care and smart choices keep your home safer. Follow these tips to strengthen your lock setup. Simple steps can make a big difference in protection.
Choosing Quality Deadbolts
Select deadbolts made from strong materials like solid steel. Cheap locks break or wear out fast. Pick ones with a Grade 1 or 2 rating for better security. Look for deadbolts with a long throw bolt. This means the bolt goes deeper into the door frame. Choose models that resist picking and drilling. These features stop burglars from forcing entry.
Maintaining Your Lock
Keep your deadbolt working smoothly with regular checks. Clean the lock with a dry cloth to remove dirt. Avoid oily lubricants; use graphite powder instead. Test the lock monthly to ensure it turns easily. Tighten loose screws on the lock and strike plate. Replace worn or damaged parts quickly. A well-maintained lock lasts longer and stays secure.

Credit: www.youtube.com
Frequently Asked Questions
How Do I Measure For A Deadbolt Hole?
Measure the door thickness and mark the hole location. Use a template for accurate placement. Ensure the hole aligns with the lock mechanism.
What Tools Are Needed For Deadbolt Hole Installation?
You need a drill, hole saw, chisel, screwdriver, tape measure, and pencil. These tools help create precise holes and secure the deadbolt properly.
Can I Install A Deadbolt Hole On Any Door?
Most wooden and metal doors can have a deadbolt hole installed. Check door thickness and material compatibility before starting the installation.
How Deep Should The Deadbolt Hole Be Drilled?
Drill the hole to match the lock’s specifications, usually about 2 1/8 inches in diameter. The depth should accommodate the lock body comfortably.
Conclusion
Installing a deadbolt hole is a simple task with the right tools. Follow each step carefully for best results. Take your time to measure and drill accurately. A properly installed deadbolt improves your door’s security. You can protect your home without hiring a professional.
Practice makes perfect, so don’t rush the process. Soon, you will feel more confident handling home repairs. Safety and peace of mind start with small actions like this. Keep your tools ready for future projects. Stay safe and enjoy your secure home.


