Has your deadbolt lock broken at the worst possible time? You’re not alone, and it can be frustrating when you can’t get your door to open or close properly.
But don’t worry—removing a broken deadbolt lock is easier than you might think. In this guide, you’ll discover simple, step-by-step methods to get that stubborn lock off quickly and safely. Whether you want to fix it yourself or prepare for a replacement, this article will give you the confidence and clear instructions you need.
Keep reading, and you’ll have your door working smoothly again in no time.
Tools Needed
Removing a broken deadbolt lock requires specific tools. Having the right tools makes the job easier and faster. This section lists the basic tools you need before starting the repair.
Flathead Screwdriver
A flathead screwdriver helps to pry off the lock cover and remove screws. Choose one with a sturdy handle for better grip. It fits most screws found in deadbolt locks.
Phillips Screwdriver
Many locks use Phillips screws. This screwdriver has a cross-shaped tip that fits those screws perfectly. Using the correct screwdriver prevents damage to the screws and lock.
Pliers
Pliers help to grip and pull broken pieces from the lock. Needle-nose pliers are best for tight spaces. They provide good control and strength.
Drill With Drill Bits
A drill can remove stubborn screws or drill out the broken lock cylinder. Use metal drill bits suitable for locks. Drilling requires care to avoid damaging the door.
Utility Knife
A sharp utility knife helps to cut any sealant or tape around the lock. It also cleans up rough edges after removing the lock. Handle it carefully to avoid injury.

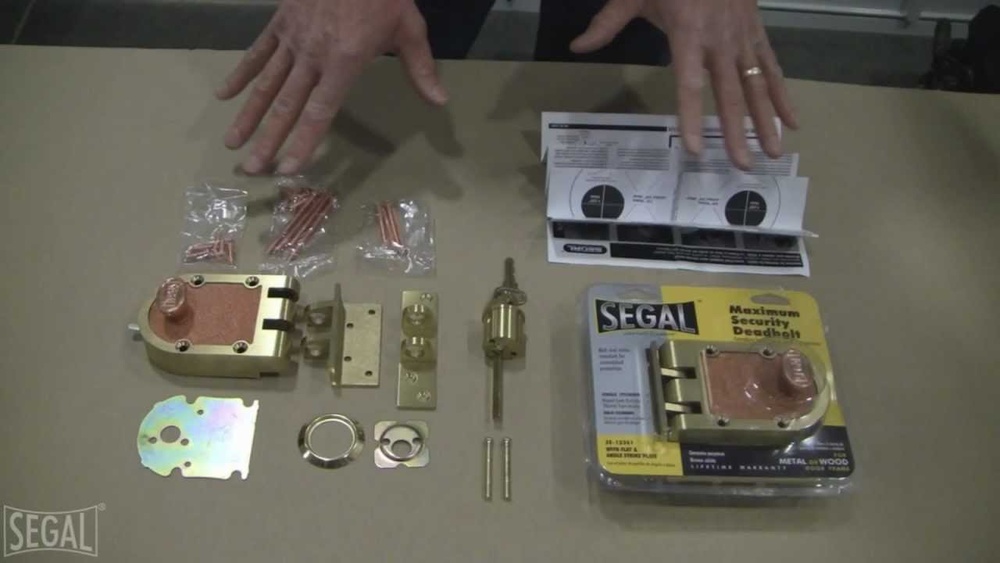
Credit: www.reddit.com
Assess The Damage
Assessing the damage is the first step to remove a broken deadbolt lock. It helps you understand how bad the break is and what tools you need. Careful inspection saves time and prevents further damage to your door.
Look closely at the lock’s exterior and interior parts. Notice any cracks, bends, or missing pieces. These signs show the lock’s condition and how stuck it might be.
Check For Visible Damage
Look at the lock face and keyhole. Are there scratches or dents? A broken key stuck inside? These clues tell you how the lock broke.
Test The Lock Movement
Try to turn the key or knob gently. Does it move or stay stuck? Movement shows partial damage. No movement means the lock is fully jammed.
Inspect The Deadbolt Bolt
Look at the bolt that slides into the door frame. Is it stuck or broken? A stuck bolt needs different tools than a broken one.
Note Any Loose Or Missing Screws
Check if screws around the lock are loose or missing. Loose screws can make the lock unstable. Missing screws might mean parts fell inside the door.
Remove The Exterior Lock Cylinder
Removing the exterior lock cylinder is the next step in taking out a broken deadbolt lock. This part sits on the outside of your door and holds the keyhole. Taking it off carefully helps you access the inner parts of the lock. Follow these simple steps to remove it safely and without damage.
Locate And Remove The Retaining Clip
Look for a small clip or ring on the side of the lock cylinder. This clip holds the cylinder in place. Use a flathead screwdriver or needle-nose pliers to gently pry it off. Keep the clip safe for later reassembly or replacement.
Unscrew The Cylinder Faceplate
Find the screws on the faceplate of the lock cylinder. These screws are usually on the door’s exterior side. Use a screwdriver to remove them. Set the screws aside to avoid losing them during the process.
Pull Out The Exterior Lock Cylinder
After removing screws and clips, gently pull the cylinder out of the door. Wiggle it slightly if it feels stuck, but avoid forcing it. If the cylinder resists, check for hidden screws or clips you might have missed.
Take Out The Deadbolt
Removing a broken deadbolt lock can seem tricky. Taking out the deadbolt is the next step. This part holds the door secure. Removing it carefully helps you install a new lock easily. Follow simple steps to get it out without damage.
Locate The Deadbolt Screws
First, find the screws on the edge of the door. These screws hold the deadbolt in place. Use a screwdriver to remove them. Keep the screws safe for later use or disposal.
Pull Out The Deadbolt Mechanism
After removing the screws, gently pull the deadbolt from the door edge. It may need a little wiggle to come loose. Avoid forcing it hard to prevent damage to the door.
Remove The Faceplate
The faceplate covers the deadbolt on the door edge. Unscrew it with the screwdriver. Take off the faceplate carefully. This step clears the way for the deadbolt to come out fully.
Clear The Deadbolt From The Door
Push or pull the deadbolt through the hole in the door. It should slide out smoothly now. If stuck, check for any remaining screws or parts holding it.
Handle Stuck Or Jammed Parts
Dealing with a stuck or jammed handle can stop you from removing a broken deadbolt lock easily. The handle may not move at all, or it might turn only a little. This problem often happens because of rust, dirt, or broken parts inside the lock. To fix this, you need to carefully free the handle before you can take the lock apart.
Use Lubricant To Loosen The Handle
Spray a lubricant like WD-40 into the keyhole and around the handle. Let it sit for 5 to 10 minutes. This helps to loosen rust and dirt that block the handle. Try turning the handle gently after applying lubricant. Do not force it hard, as this can break the lock more.
Tap The Handle Lightly
Use a small hammer or a screwdriver handle to tap the stuck handle gently. This can help break up rust or dirt inside. Tap around the base of the handle, not too hard. The slight impact can free up stuck parts inside the lock.
Remove Screws Holding The Handle
Look for screws on the faceplate or side of the handle. Use a screwdriver to remove these screws carefully. Once screws are out, you may be able to pull the handle off. This gives better access to the broken parts inside the deadbolt.
Apply Heat To Expand Metal Parts
Use a hairdryer or heat gun to warm the handle and lock area. Heat can expand metal parts and loosen tight fits. Heat the lock for a few minutes, then try turning the handle again. Avoid using open flames to prevent damage or fire risk.
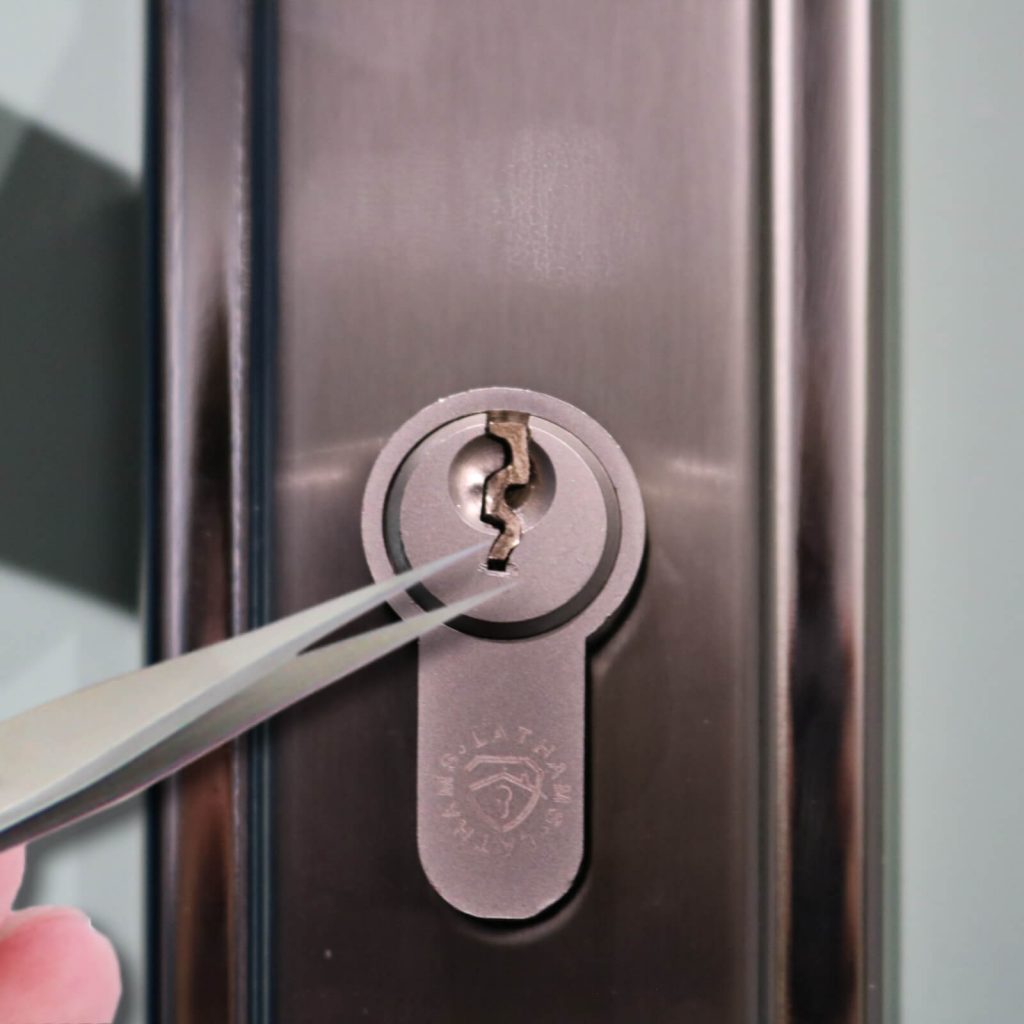
Credit: www.lathamshardware.co.uk
Replace With A New Deadbolt
Replacing a broken deadbolt with a new one improves your door’s security. A new deadbolt fits better and works smoothly. It also gives peace of mind. Follow clear steps to install the new lock correctly. This ensures safety and ease of use for years.
Choose The Right Deadbolt
Select a deadbolt that fits your door thickness. Check the lock type: single cylinder or double cylinder. Single cylinder uses a key outside and a thumb turn inside. Double cylinder needs a key on both sides. Pick a style that matches your security needs.
Prepare The Door For Installation
Remove any old screws and clean the door surface. Check the hole size for the new deadbolt. Use a drill to widen the hole if needed. Make sure the latch fits snugly in the door edge. Smooth edges help the lock fit well.
Install The New Deadbolt
Insert the latch into the door edge and secure it. Attach the exterior part with the keyhole first. Align the interior thumb turn on the opposite side. Connect both parts with screws provided. Tighten screws evenly to avoid misalignment.
Test The Deadbolt Operation
Turn the key or thumb turn to check the lock. The bolt should move smoothly in and out. Lock and unlock several times to confirm function. Adjust screws if the lock feels loose or tight. Proper operation ensures your door stays secure.
Test The New Lock
Testing the new lock is an important step after installation. It ensures the lock works correctly and keeps your door secure. A properly tested lock avoids problems later, like getting stuck or failing to lock.
Check the lock’s function several times. Turn the key or thumb turn to confirm smooth operation. Make sure the bolt extends fully into the door frame. This confirms the lock is secure and aligned.
Check Key Operation
Insert the key and turn it slowly. It should turn smoothly without force. The lock should move the bolt easily. Test the key in both lock and unlock positions.
Test The Thumb Turn
Use the thumb turn on the inside of the door. Turn it fully to lock and unlock. Feel for any resistance or sticking parts. The movement should be smooth and easy.
Verify Bolt Alignment
Close the door slowly and watch the bolt enter the strike plate. The bolt must fit securely inside. If it doesn’t, adjust the lock or strike plate. Proper alignment prevents lock failures.
Repeat The Test
Test the lock multiple times. Open and close the door several times. Operate the key and thumb turn each time. This ensures consistent performance and reliability.
Credit: www.lathamshardware.co.uk
Tips For Preventing Future Breakage
Preventing future breakage of a deadbolt lock saves time and money. A strong lock protects your home better. Small habits help keep the lock working well for years.
Follow these simple tips to extend the life of your deadbolt. They stop wear and tear before serious problems start.
Choose Quality Locks
Buy locks made from strong materials. Metal like brass or steel lasts longer. Avoid cheap locks that break easily.
Look for locks with good reviews and strong ratings. They offer better security and durability.
Regularly Lubricate The Lock
Use graphite or silicone spray to keep the lock smooth. This stops rust and reduces friction inside.
Lubricate the lock every six months or after bad weather. It helps the key turn easily and prevents jamming.
Keep The Lock Clean
Remove dust and dirt around the lock area. Dirt can cause the lock to stick or break.
Wipe the outside and use compressed air to clean inside the keyhole.
Avoid Forcing The Lock
Turn the key gently and never force it if stuck. Forcing can break internal parts fast.
If the key won’t turn, check for dirt or damage. Fix problems before they get worse.
Check Door Alignment
Make sure the door fits well in the frame. A misaligned door puts extra pressure on the lock.
Adjust hinges or strike plates to keep the door straight. This reduces stress on the deadbolt.
Frequently Asked Questions
How Do I Remove A Broken Deadbolt Lock Safely?
To remove a broken deadbolt, first gather basic tools like a screwdriver and pliers. Unscrew the lock’s interior plate, then carefully pull out the broken cylinder. Avoid forcing parts to prevent damage. If stuck, use lubricant or call a locksmith for assistance.
What Tools Are Needed To Remove A Broken Deadbolt?
You need a Phillips screwdriver, flathead screwdriver, pliers, and lubricant. These tools help unscrew and loosen the deadbolt components. Having a drill may help if screws are stripped. Proper tools ensure safe and efficient removal without damaging the door.
Can I Remove A Broken Deadbolt Without Professional Help?
Yes, many broken deadbolts can be removed DIY with patience and basic tools. Follow step-by-step guides carefully. If the lock is severely damaged or stuck, professional help is recommended to avoid door damage or injury.
How Long Does It Take To Remove A Broken Deadbolt?
Removing a broken deadbolt typically takes 15 to 30 minutes for most people. Time varies based on lock complexity and damage extent. Proper preparation and tools speed up the process.
Conclusion
Removing a broken deadbolt lock can seem tough. Take your time and follow each step carefully. Use the right tools to avoid damage. Safety comes first—wear gloves and eye protection. After removal, check the door for any problems. Replacing the lock keeps your home secure.
Small repairs can save money and stress. Practice makes the task easier next time. You can do this with patience and care. Keep your tools ready for future fixes.