Have you ever struggled to hang something heavy on your wall, only to find the screws slipping or the anchors failing? If so, understanding how drive wall anchors work can save you time, frustration, and damage to your walls.
These small but powerful tools hold your items securely, but only if you know how they function and how to use them correctly. You’ll discover exactly what makes drive wall anchors so reliable, and how you can use them to keep your shelves, mirrors, and decorations firmly in place.
Keep reading to unlock the secret behind strong, lasting wall support!
Types Of Wall Anchors
Wall anchors come in different types. Each type fits a specific need and wall material. Understanding these types helps in choosing the right anchor for the job. Here are some common wall anchors and how they work.
Plastic Expansion Anchors
Plastic expansion anchors are the most common type. They work well in drywall and plaster. Insert the anchor into a drilled hole. When a screw goes in, the anchor expands. This expansion holds the anchor tight inside the wall. They are easy to use and cost-effective.
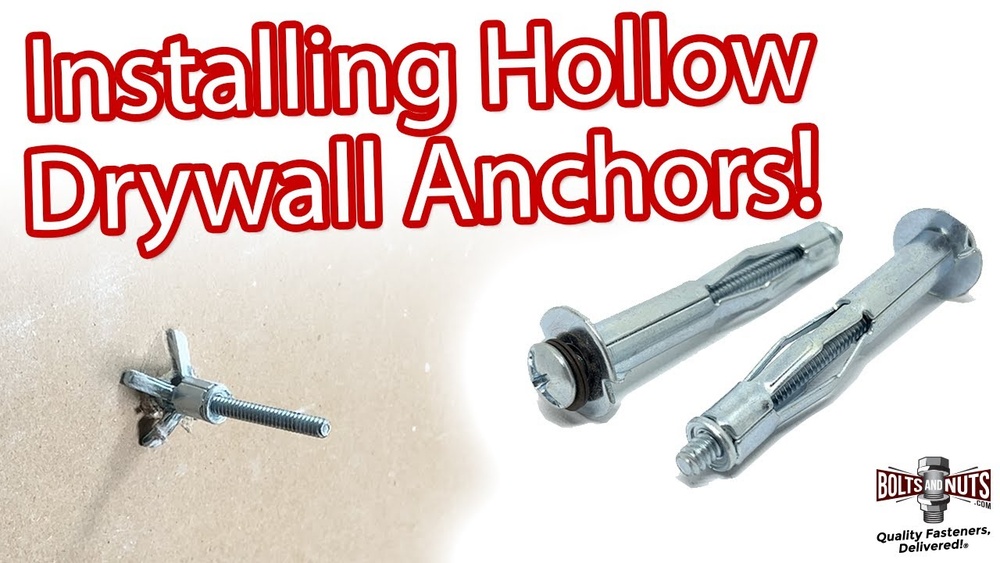
Toggle Bolts
Toggle bolts have metal wings that open inside the wall. Insert the bolt through the item and hole. Push the wings through a drilled hole. The wings open and press against the wall’s back. This holds heavy items securely on hollow walls. They need a larger hole for installation.
Molly Bolts
Molly bolts are designed for hollow walls too. Insert the bolt and tighten the screw. This action makes the sleeve expand behind the wall. The expanded sleeve locks the bolt in place. They provide strong support for medium-weight loads.
Self-drilling Anchors
Self-drilling anchors do not need a pre-drilled hole. They have a sharp tip that drills into the wall. Twist the anchor into drywall by hand or with a screwdriver. Once in place, insert the screw to secure your item. These anchors save time and effort.
Mechanics Behind Wall Anchors
Wall anchors help secure items to walls. They work by gripping the wall material tightly. Understanding their mechanics shows how they hold weight safely.
The design of wall anchors allows them to expand inside the wall. This expansion creates a strong hold that prevents slipping or falling.
Anchor Expansion
When you insert a drive wall anchor, it pushes against the wall inside. This pressure makes the anchor expand. The expansion grips the wall firmly. It stops the anchor from pulling out. This is key for heavy objects like shelves or mirrors.
Load Distribution
Wall anchors spread the weight over a larger area. This reduces stress on one spot. It protects the wall from damage. The load spreads evenly through the anchor. This balance keeps the wall strong and stable.
Material Compatibility
Different walls need different anchors. Drywall, concrete, or brick all react differently. Using the right anchor material is important. Some anchors work best with soft walls. Others fit harder surfaces better. Matching the anchor to the wall ensures a secure hold.
Choosing The Right Anchor
Choosing the right wall anchor is important for a strong hold. The right anchor fits the wall type and the load it must carry. A good choice prevents damage and keeps items secure.
Assessing Wall Material
Walls come in different materials like drywall, concrete, or brick. Each needs a specific anchor type for proper grip. Drive anchors work well in solid walls but may fail in hollow ones. Identify your wall material before selecting an anchor.
Weight Capacity Needs
Every anchor has a weight limit. Check the item weight and add some safety margin. Heavy objects need anchors with higher load ratings. Use anchors strong enough to hold the load without slipping.
Environmental Factors
Consider where the anchor will be used. Moist areas need rust-resistant anchors. Outdoor anchors must withstand weather changes. Choose anchors made from materials that last in your environment.

Credit: www.youtube.com
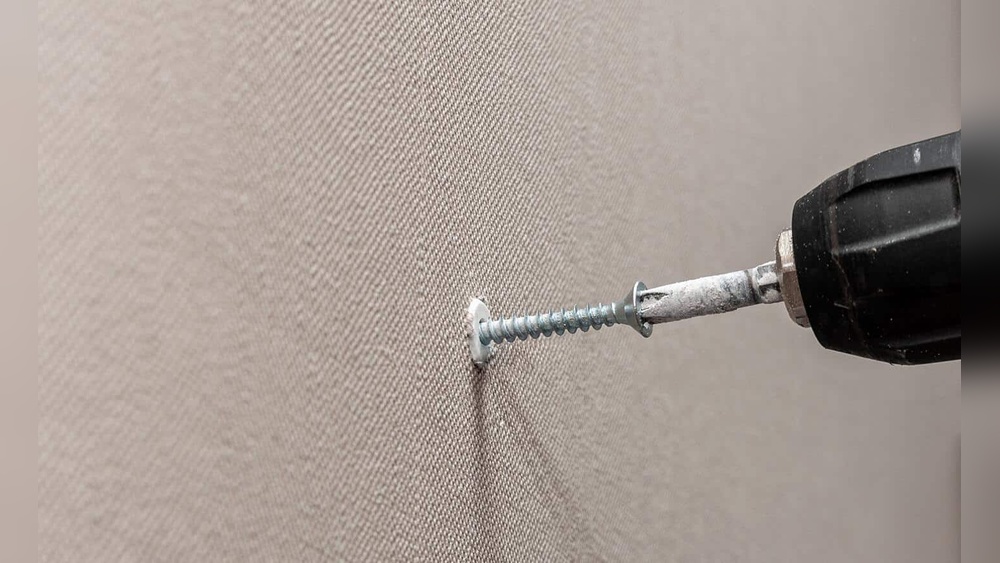
Step-by-step Installation
The step-by-step installation of drive wall anchors is simple and clear. It helps secure objects to walls safely. Following these steps ensures a strong hold and prevents damage to your wall. Each part of the process matters for a lasting fix.
Preparing The Surface
Start by choosing a clean, dry wall surface. Remove dust, dirt, or loose paint. This ensures the anchor grips well. Mark the exact spot where you want to install the anchor. Use a pencil for a small, precise mark.
Drilling The Hole
Select a drill bit that matches the anchor size. Hold the drill steady and drill straight into the wall. Drill to the proper depth for the anchor length. Clean out the hole to remove dust and debris.
Inserting The Anchor
Push the drive wall anchor into the drilled hole. Tap it lightly with a hammer if needed. Make sure the anchor sits flush with the wall surface. The anchor expands inside to hold firmly.
Securing The Fixing
Insert the screw or bolt into the anchor. Tighten it carefully to avoid damaging the wall. The anchor expands and locks in place as you tighten. Check the fixing for stability before hanging anything.
Common Installation Mistakes
Installing drive wall anchors seems simple but often involves mistakes. These errors can reduce holding strength or damage walls. Avoiding common installation mistakes ensures strong, safe anchoring.
Incorrect Hole Size
Drilling a hole too big or too small is a frequent error. A large hole makes the anchor loose and weak. A small hole can crack the wall or stop the anchor from fitting. Use the anchor package size guide for the right hole diameter.
Over-tightening
Turning screws too tight can break the anchor or wall. Excess force can strip the anchor’s grip inside the wall. Tighten screws just enough to hold firmly. Stop once you feel resistance and the fixture feels secure.
Ignoring Wall Material
Different walls need different anchor types and techniques. Drywall, concrete, or brick require special anchors. Using the wrong anchor weakens the hold or damages the wall. Check wall type before buying and installing anchors.

Credit: www.homedepot.com
Maintenance And Safety Tips
Maintaining drive wall anchors ensures they stay strong and safe over time. Simple care helps avoid accidents and keeps walls intact. Follow these tips for proper upkeep and safe use.
Regular Checks
Inspect anchors often for signs of damage or rust. Look for cracks, bends, or loose parts. Replace any damaged anchors immediately. Regular checks prevent failures and keep loads secure.
Handling Heavy Loads
Know the weight limit of each anchor. Do not exceed the recommended load capacity. Use anchors made for heavy-duty support if needed. Proper handling avoids accidents and wall damage.
Removing Anchors Safely
Use the right tools to remove anchors without harming the wall. Pull anchors straight out to avoid widening holes. Fill holes after removal to keep the wall smooth. Safe removal saves wall strength and appearance.

Credit: www.youtube.com
Frequently Asked Questions
What Are Drive Wall Anchors Used For?
Drive wall anchors secure heavy items to drywall or masonry. They provide strong, reliable support where screws alone fail. They distribute weight evenly, preventing damage and improving stability.
How Do Drive Wall Anchors Work In Drywall?
Drive wall anchors expand behind drywall when inserted. This expansion grips the wall firmly, increasing holding power. They prevent pull-out and ensure heavy objects stay securely mounted.
Can Drive Wall Anchors Be Used In Concrete?
Yes, drive wall anchors are effective in concrete. They penetrate hard surfaces and expand inside drilled holes. This expansion creates a strong hold for mounting fixtures or shelves.
What Tools Are Needed To Install Drive Wall Anchors?
You’ll need a drill, screwdriver, and hammer. Drill a pilot hole, insert the anchor, then tap it in. Finally, drive the screw to expand the anchor and secure it.
Conclusion
Drive wall anchors hold items firmly to walls. They expand inside the wall for a strong grip. Using the right anchor type matters a lot. This keeps your shelves or pictures safe and steady. Always check the wall material before choosing anchors.
Proper installation ensures lasting support and stability. Simple steps lead to secure, reliable mounting every time. Now, you can hang items with confidence and ease.