Has your deadbolt suddenly broken, leaving you locked out or worried about your home’s security? You’re not alone, and the good news is that you don’t need to call a locksmith right away.
Removing a broken deadbolt might seem tricky, but with the right steps, you can handle it yourself quickly and safely. In this guide, you’ll discover simple, clear instructions to get that stubborn lock out and restore peace of mind to your door.
Keep reading, and you’ll be back in control in no time.
Tools Needed
Removing a broken deadbolt needs the right tools. These tools help you work safely and finish the job faster. You don’t need many tools, but each one has a clear role.
Gathering these tools before you start saves time and reduces frustration. Prepare your workspace and make sure you have good lighting. Safety glasses are a good idea too.
Phillips And Flathead Screwdrivers
Screwdrivers remove screws holding the deadbolt. A Phillips screwdriver fits cross-shaped screws. A flathead works for straight, single-slot screws. Both types are common on door hardware.
Pliers
Pliers grip and pull broken parts inside the lock. Needle-nose pliers reach small spaces. Slip-joint pliers give a strong hold. Use them carefully to avoid damaging the door.
Drill And Drill Bits
A drill helps remove stubborn screws or break lock parts. Use a small drill bit to start. Increase size carefully to avoid door damage. Drilling is a last resort but often needed.
Utility Knife
A utility knife cuts through paint or sealant around the lock. It also helps remove stuck parts. Keep the blade sharp for clean cuts and safety.
Hammer
A hammer taps tools into tight spots. It can also gently loosen the lock. Use a small hammer to control the force.
Assessing The Damage
Assessing the damage is the first step in removing a broken deadbolt. It helps you understand what tools and methods you need. Careful inspection saves time and effort later.
Start by looking closely at the deadbolt. Notice if the key turns or if the lock is stuck. Check if any parts are visibly broken or bent.
Next, test the door’s movement. See if the bolt slides smoothly or if it jams inside the door frame. This shows if the problem is with the deadbolt or the door itself.
Look at the screws holding the deadbolt. Some screws might be stripped or rusted. This affects how easily you can remove the lock.
Finally, check if the lock cylinder is damaged. A cracked or loose cylinder means you will need special tools to remove it.
Identifying Visible Damage
Scan the deadbolt for cracks or broken pieces. Look for bent metal or missing screws. These signs tell you what parts need extra care.
Checking The Lock Mechanism
Try to turn the key gently. Notice if it moves or stays stuck. This shows if the inner mechanism is damaged or frozen.
Examining The Door Frame
Look at the door frame where the bolt slides. Check for dents or splinters. Damage here might block the deadbolt from moving.
Assessing Screw And Fastener Condition
Inspect all screws and fasteners holding the lock. Rusted or stripped screws will need special tools or removal methods.
Evaluating The Lock Cylinder
Check if the lock cylinder is loose or cracked. A damaged cylinder may require drilling or other careful removal steps.
Removing The Exterior Part
Removing the exterior part of a broken deadbolt is the first step in fixing or replacing the lock. This part faces outside and often shows signs of damage. Taking it off carefully helps avoid extra trouble. The process involves unscrewing the faceplate and handling the lock cylinder. Both need simple tools and patience. Follow these steps to remove the exterior piece safely.
Unscrewing The Faceplate
Begin by locating the screws on the faceplate. They hold the exterior lock to the door. Use a screwdriver that fits the screws well. Turn the screws counterclockwise to loosen them. Keep the screws safe for later use. After all screws are out, gently pull the faceplate away from the door. If it sticks, wiggle it slightly to free it. Avoid forcing it hard to prevent damage.
Dealing With A Jammed Cylinder
The cylinder may get stuck inside the door after removing the faceplate. This happens if parts are broken or rusted. Use a pair of pliers to grip the cylinder carefully. Try to pull it straight out without twisting. If it does not move, spray some lubricant around the edges. Let it sit for a few minutes. Then, try pulling again. Keep patience and avoid using too much force.
Extracting The Broken Deadbolt
Removing a broken deadbolt can be tricky. The key or part of the lock may be stuck inside the mechanism. Careful extraction helps avoid damage to the door or lock. Using the right tools and methods makes the process easier and safer.
Start by assessing how the deadbolt is stuck. Check if any pieces are loose or visible for easy removal. Then follow simple steps to pull out the broken parts without force.
Using Pliers Or Tweezers
Use needle-nose pliers or tweezers for small broken pieces inside the lock. Insert them gently into the keyhole. Grip the broken key or deadbolt piece firmly. Pull straight out slowly to avoid pushing it deeper. Repeat if necessary, but do not force it. This method works best for pieces near the surface.
Applying Lubricant For Stuck Parts
Apply a small amount of lubricant into the keyhole. It helps loosen rust and tight parts. Use a spray or liquid lubricant designed for locks. Wait a few minutes after applying it. Then try to remove the broken piece again with pliers or tweezers. Lubricant reduces friction and makes extraction smoother.
Removing The Interior Assembly
Removing the interior assembly of a broken deadbolt is a key step in fixing or replacing the lock. This part holds the lock mechanism on the inside of your door. Taking it off carefully helps you access the broken pieces inside. Follow simple steps to remove it without causing damage.
Unscrewing Interior Screws
Locate the screws holding the interior assembly on the door. Usually, two or three screws secure it firmly. Use a screwdriver that fits the screws well. Turn the screwdriver counterclockwise to loosen each screw. Keep the screws safe for reassembly. If screws feel stuck, apply gentle pressure without forcing. Slow, steady turns work best to avoid stripping the screws.
Handling Broken Or Stripped Screws
Broken or stripped screws can block your progress. Try a rubber band over the screw head for extra grip. Press the screwdriver into the rubber band and turn slowly. Use pliers to grip and turn screws that stick out slightly. If screws are deeply damaged, a screw extractor tool can help. Work carefully to avoid damaging the door or lock parts.

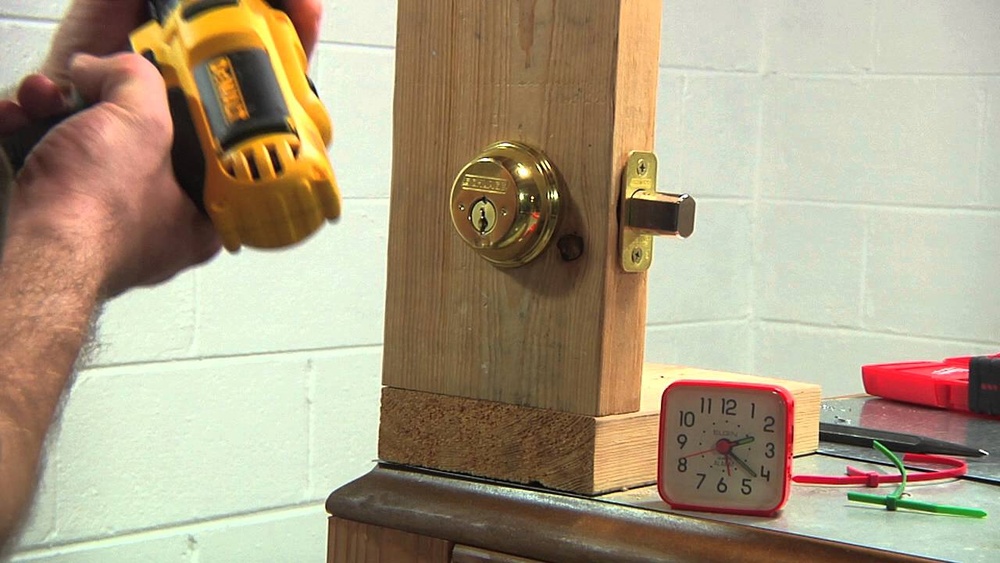
Credit: www.youtube.com
Preparing For New Installation
Preparing for a new deadbolt installation is an important step. It helps ensure the lock fits well and works smoothly. Taking time to clean and check the door can save effort later. A clean surface and proper alignment create a strong, secure lock setup.
Cleaning The Door Edge
Start by cleaning the edge of the door. Remove dirt, dust, and old paint around the lock area. Use a soft cloth and mild cleaner for this task. A clean surface helps the new deadbolt sit flush and attach firmly. Clear away any loose wood or debris. This keeps the new lock from getting stuck or crooked.
Checking The Alignment
Check the door and frame alignment next. The door must close evenly without gaps or pressure points. Look at the strike plate area on the door frame. Make sure it lines up with the deadbolt hole on the door. Adjust hinges or sand edges if needed to correct fit. Proper alignment lets the deadbolt slide smoothly into the strike plate, ensuring security and ease of use.
Safety Tips
Start by turning off the power to any electronic locks. Use proper tools to avoid injury or damage. Wear gloves and eye protection for extra safety.
Wear Protective Gear
Protect your eyes and hands before starting. Use safety goggles to stop debris from hurting your eyes. Gloves will protect your hands from sharp edges and tools.
Turn Off Power And Remove Batteries
Some deadbolts have electronic parts. Make sure to disconnect any power source. This prevents electric shock during removal.
Use The Right Tools
Use tools made for lock removal or small repairs. Avoid using makeshift tools that can slip or break. This reduces injury risk and damage to the door.
Work In A Well-lit Area
Good lighting helps you see small parts clearly. It lowers chances of mistakes and accidents. Use a flashlight if needed.
Keep Children And Pets Away
Lock removal can be noisy and messy. Keep kids and pets out of the work area. It keeps them safe and helps you focus.

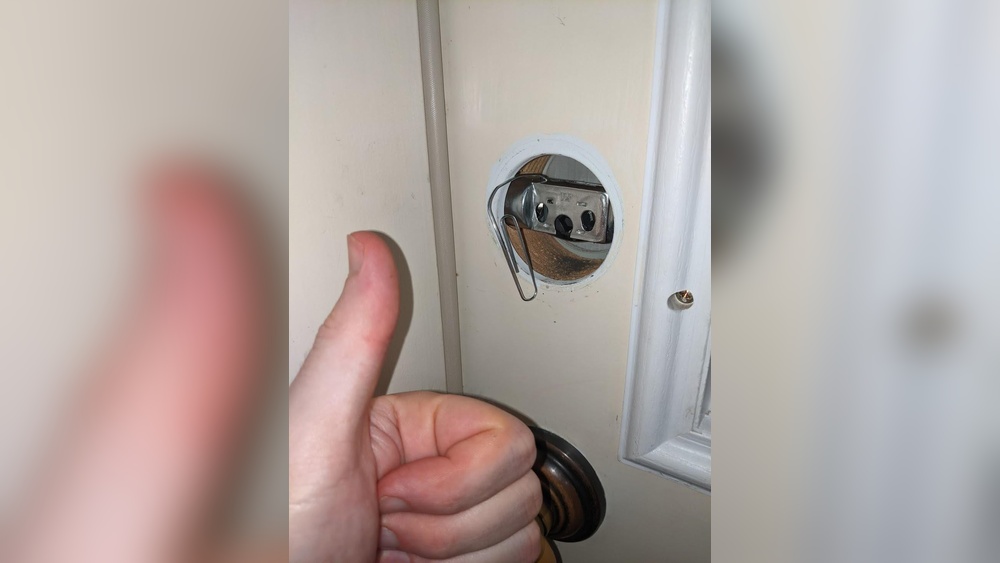
Credit: www.aspire-doors.co.uk

Credit: www.youtube.com
Frequently Asked Questions
How Do I Remove A Broken Deadbolt From A Door?
First, unscrew the interior plate using a screwdriver. Next, remove the broken cylinder carefully. Finally, extract the deadbolt mechanism from the door edge.
What Tools Are Needed To Remove A Broken Deadbolt?
You need a screwdriver, pliers, and possibly a drill. A lubricant spray can help loosen stuck parts. Having a replacement deadbolt ready is also useful.
Can I Remove A Broken Deadbolt Without Damaging The Door?
Yes, by using the right tools and patience. Avoid forcing the lock. Gently loosen screws and carefully pull out the broken parts.
How Long Does It Take To Remove A Broken Deadbolt?
It typically takes 15 to 30 minutes. Time varies depending on the deadbolt’s condition and your experience level. Preparation speeds up the process.
Conclusion
Removing a broken deadbolt can feel tough but is doable. Take your time and follow each step with care. Use the right tools to avoid extra damage. Small fixes save money and keep your home safe. Practice patience and stay calm throughout the process.
Soon, your door will work smoothly again. This guide helps you handle the problem yourself. Remember, safety first—always check your work twice. Keep your home secure with simple, smart repairs.