Are you ready to transform your cabinets with a sleek, modern look? Installing sliding cabinet door hardware is easier than you think, and it can instantly upgrade the style and functionality of your space.
Whether you want to save room or add a touch of elegance, this guide will walk you through every step. By the end, you’ll have the confidence to install your own sliding doors quickly and smoothly. Keep reading to discover simple tips and tricks that make the process stress-free and even enjoyable!
Credit: www.youtube.com
Choosing The Right Hardware
Choosing the right sliding cabinet door hardware is key to a smooth installation. The hardware must fit your door style and cabinet size. It also affects the door’s movement and durability. Picking suitable hardware ensures your doors work well and look great.
Types Of Sliding Door Hardware
Sliding door hardware comes in many styles. The most common are top-mounted, bottom-mounted, and bypass tracks. Top-mounted hardware hangs the door from a track above. Bottom-mounted slides the door along a track below. Bypass hardware lets two doors slide past each other.
Each type fits different cabinet designs. Consider your cabinet layout and door weight before choosing.
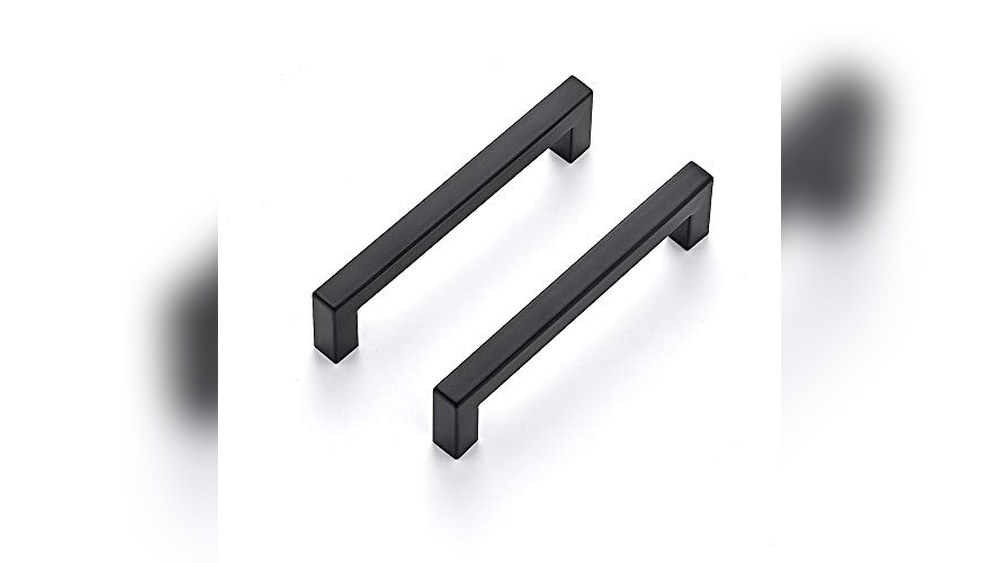
Materials And Finishes
Hardware materials affect strength and appearance. Steel offers strong support and lasts long. Aluminum is lighter and resists rust. Plastic parts can reduce cost but may wear faster.
Finishes match hardware with your cabinet style. Chrome and nickel look modern. Bronze and brass suit classic designs. Choose a finish that blends well with your room.
Measuring For Accuracy
Accurate measurements prevent installation problems. Measure the cabinet width and height carefully. Check door thickness and weight too. Note the space needed for the door to slide smoothly.
Write down measurements before buying hardware. Double-check to avoid mistakes. Precise measurements make installation easier and doors work better.
Gathering Tools And Materials
Before installing sliding cabinet door hardware, gather all necessary tools and materials. This step saves time and prevents interruptions during installation. Having everything ready ensures a smooth and efficient process.
Essential Tools Needed
- Measuring tape for accurate dimensions
- Electric drill for making holes
- Screwdriver to fasten screws
- Level to ensure straight installation
- Pencil for marking drill points
- Wrench or pliers for tightening bolts
Hardware Components Checklist
- Sliding door track
- Roller wheels or hangers
- Door stops to prevent sliding off
- Mounting brackets
- Screws and bolts matching the hardware
- Handles or pulls for opening doors
Preparing The Cabinet Doors
Preparing the cabinet doors is the first step in installing sliding door hardware. Proper preparation makes the installation easier and ensures smooth operation. Start by removing old doors carefully. Then mark drill points accurately for hardware placement. These steps set a strong foundation for the project.
Removing Existing Doors
Begin by opening the cabinet doors fully. Use a screwdriver to remove screws from the hinges. Keep the screws safe for later use or discard if new hardware requires different ones. Gently lift the doors off the cabinet frame. Place the doors on a flat surface to avoid damage.
Marking Drill Points
Measure the hardware parts to find exact drill spots. Use a pencil to mark these points clearly on the doors. Check measurements twice to avoid mistakes. Marking drill points carefully helps align the hardware perfectly. This step prevents holes in wrong places and ensures smooth sliding.
Installing The Track System
Installing the track system is a key step for sliding cabinet doors. The track holds the doors and allows smooth sliding. Careful measuring and secure mounting ensure the doors work well and last long.
Follow the steps below to install the top track and bottom guide properly. Take your time to check alignment and tightness. This makes the sliding action easy and quiet.
Mounting The Top Track
Start by measuring the cabinet width to cut the top track to size. Use a saw if needed. Place the track on the cabinet top, centered and straight.
Mark the screw holes through the track onto the cabinet. Drill pilot holes to avoid splitting the wood. Attach the track with screws, tightening them firmly.
Check the track level with a spirit level. Adjust if needed before fully tightening screws. A level track keeps the door sliding smoothly without sticking.
Securing The Bottom Guide
The bottom guide keeps the door from swinging out. Position the guide on the cabinet floor, aligned under the top track.
Mark the holes for screws, then drill pilot holes. Screw the guide securely in place. Make sure it fits the door’s bottom edge without forcing it.
Test the door by sliding it on the track. The bottom guide should hold the door steady and allow easy movement. Adjust if the door sticks or wobbles.
Attaching Rollers To Doors
Attaching rollers to sliding cabinet doors is an important step. It allows smooth movement and proper door alignment. Follow these easy steps to attach rollers correctly. This will make sure your doors slide without trouble.
Positioning Rollers
Start by placing the door on a flat surface. Measure the top edge of the door. Mark the spots for the rollers using a pencil. Usually, rollers go near each corner. Make sure the marks are even and straight. This helps the door stay balanced when sliding.
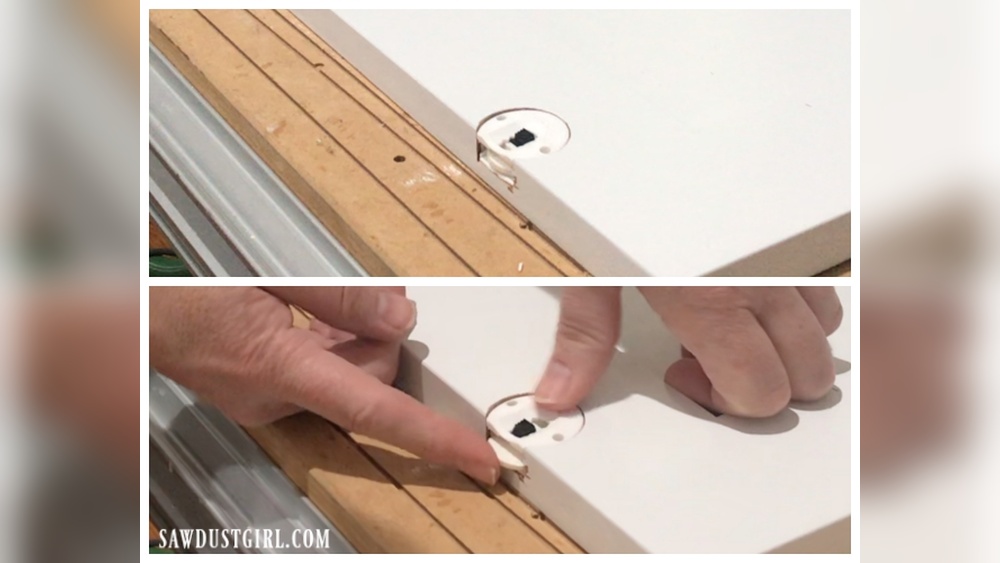
Fastening Rollers Securely
Use screws that come with the roller hardware. Align the roller with the marks on the door. Hold the roller firmly in place. Drive screws into the door to attach the roller. Tighten the screws but avoid over-tightening. Loose screws cause wobbling, and too tight can damage the door.

Credit: www.youtube.com
Hanging The Doors
Hanging the sliding cabinet doors is a key step in the installation process. This step ensures that the doors move smoothly and look great. Take your time to place the doors carefully. Proper hanging prevents damage and keeps the hardware working well.
Lifting Doors Onto Track
Start by lifting the door with both hands. Hold it steady to avoid dropping. Align the top rollers with the track. Gently place the rollers on the track. Make sure the door sits fully on the track before letting go. This helps the door slide without trouble.
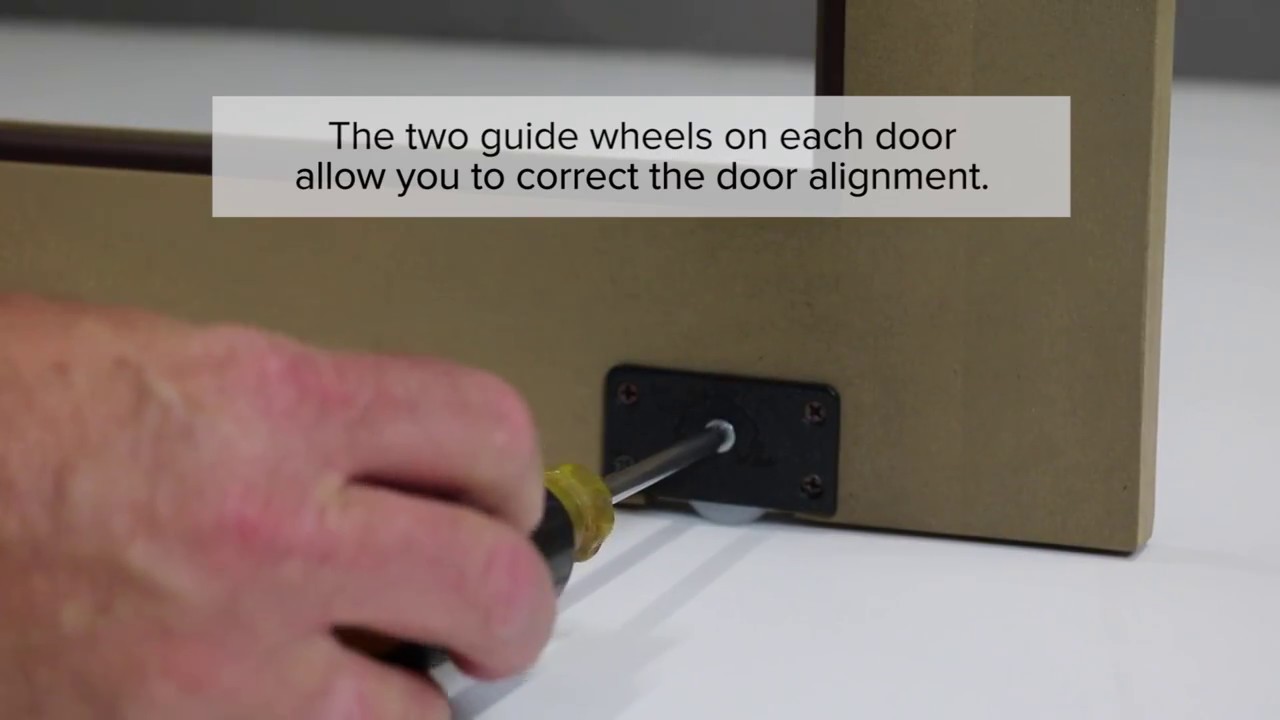
Adjusting Door Alignment
Check if the door hangs straight and even. Use the adjustment screws on the rollers or brackets. Turn screws slowly to raise or lower the door. Move the door left or right if needed. Keep adjusting until the door moves smoothly and fits well in the frame.
Testing And Adjusting
Testing and adjusting sliding cabinet door hardware is a key step. It ensures the doors move easily and fit properly. This step helps avoid future problems like sticking or misalignment. Take your time to check and fix any issues before finishing the job.
Ensuring Smooth Sliding
Start by opening and closing the doors slowly. Listen for any squeaks or catches. Check if the doors slide without resistance. If you feel rough spots, clean the tracks and rollers. Dirt can block smooth movement. Also, make sure the doors hang evenly on the track. Uneven doors can cause rubbing and damage.
Fine-tuning Hardware
Use the adjustment screws on the rollers or brackets. These screws help raise or lower the doors slightly. Adjust one side at a time to keep the doors level. Tighten screws just enough to hold the doors firmly. Avoid over-tightening, which can stop smooth sliding. Test the doors again after each adjustment. Repeat until the movement feels easy and balanced.
Maintenance Tips
Proper maintenance keeps sliding cabinet door hardware working smoothly. Regular care helps prevent damage and extends the life of your doors. Small efforts save time and money later.
Cleaning Hardware
Dust and dirt can build up on tracks and rollers. Use a soft cloth to wipe them clean every few weeks. Avoid harsh chemicals that may damage the finish. Mild soap and water work best for cleaning.
Clear debris from the track to stop doors from sticking. A vacuum with a brush attachment also helps remove dirt. Clean hardware ensures smooth sliding and less noise.
Lubrication Schedule
Lubricate moving parts to reduce friction and wear. Apply a silicone-based lubricant to tracks and rollers every three months. Avoid oil-based lubricants that attract dust and grime.
Check the hardware before and after winter. Cold weather can cause parts to stiffen. Regular lubrication keeps doors sliding easily year-round.

Credit: www.amazon.com
Frequently Asked Questions
What Tools Are Needed To Install Sliding Cabinet Door Hardware?
You need a drill, screwdriver, measuring tape, level, pencil, and mounting hardware. These tools ensure accurate installation and smooth door operation.
How Do I Measure For Sliding Cabinet Door Hardware?
Measure the cabinet width and door height precisely. This helps select the correct hardware size and ensures proper door fit and function.
Can I Install Sliding Cabinet Door Hardware Myself?
Yes, with basic DIY skills and proper tools, you can install the hardware. Follow instructions carefully for a secure and functional setup.
How Do I Maintain Sliding Cabinet Door Hardware?
Regularly clean tracks and rollers to prevent dirt buildup. Lubricate moving parts to ensure smooth sliding and extend hardware life.
Conclusion
Installing sliding cabinet door hardware can be simple and quick. Follow each step carefully for best results. Measure twice to avoid mistakes and ensure a perfect fit. Use the right tools to make the job easier. Take your time to secure all parts properly.
Enjoy the smooth movement of your new sliding doors. This upgrade adds style and saves space in your home. Keep your hardware clean to maintain good function. Now, your cabinets look neat and work well every day.