Are you looking to give your cabinets a unique, timeless look without spending a fortune? Antique cabinet hardware can transform your space with charm and character that modern pieces simply can’t match.
But how do you find the perfect antique hardware that fits your style and needs? In this guide, you’ll discover easy, practical tips to choose and use antique cabinet hardware that will make your cabinets stand out. Keep reading, and you’ll learn how small changes can bring big style to your home.
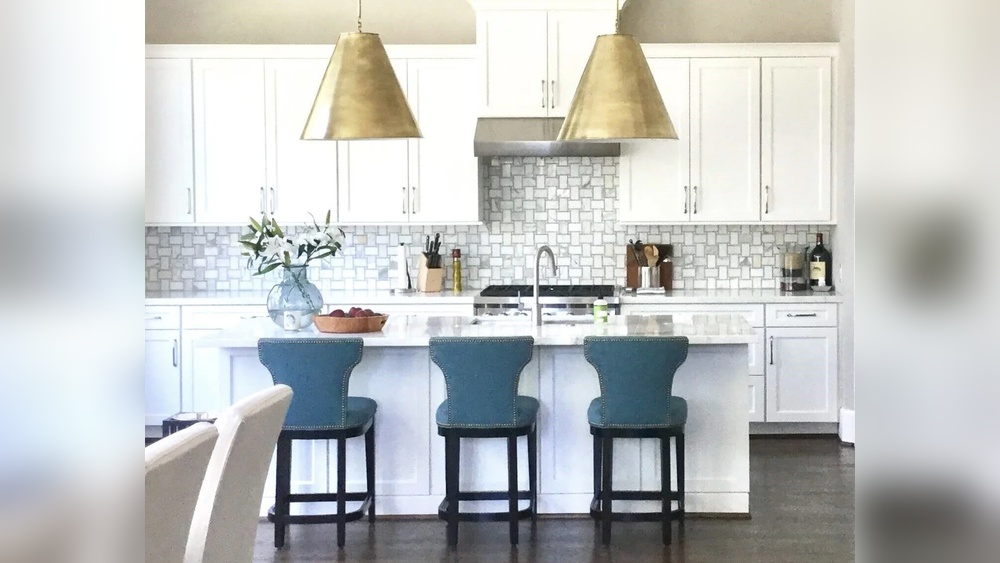
Credit: www.martellhardware.com
Choosing The Right Hardware
Choosing the right hardware is key to antique cabinet restoration. It brings out the cabinet’s charm and fits your style. The right hardware also ensures the cabinet works well and lasts long. Focus on the details to match the look you want.
Types Of Cabinet Hardware
Cabinet hardware includes knobs, pulls, and handles. Knobs are small and round, easy to install. Pulls are longer and often used on drawers. Handles come in various shapes and sizes for different looks. Pick the type that fits your cabinet style and use.
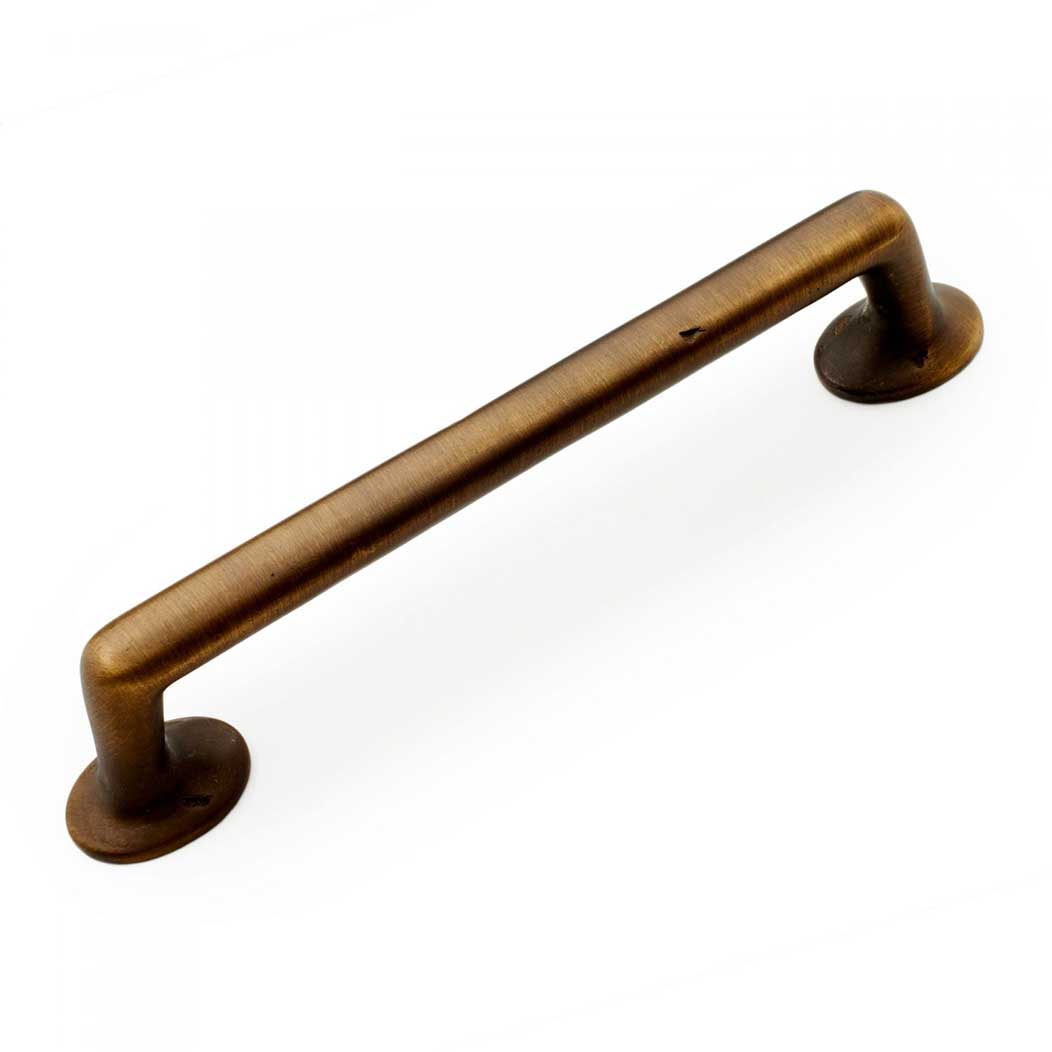
Materials And Finishes
Common materials are brass, bronze, iron, and nickel. Brass has a warm, golden look. Bronze offers a dark, rich tone. Iron feels strong and rustic. Nickel shines with a silver color. Finishes like matte, shiny, or aged change the hardware’s feel. Choose materials and finishes that match your cabinet’s age and look.
Matching Vintage Styles
Old cabinets often have unique hardware styles. Victorian, Art Deco, and Colonial are popular vintage looks. Each style has distinct shapes and details. Study your cabinet’s design before choosing hardware. Matching the style keeps the cabinet’s charm and value. Avoid modern hardware that may clash with the antique feel.
Gathering Necessary Tools
Gathering the right tools is the first step to antique cabinet hardware restoration. Having everything ready saves time and avoids frustration. The right tools make the job easier and give better results.
Essential Supplies
You need a few basic supplies for this project. A screwdriver set helps remove old hardware carefully. Fine steel wool or a soft brush cleans dirt and rust. Mild soap and water prepare the pieces for restoration. A small container holds parts safely during work. Some light oil or metal polish improves the finish. A clean cloth helps wipe and dry the pieces.
Safety Gear Tips
Protect yourself with simple safety gear. Wear gloves to avoid cuts and skin irritation. Safety glasses keep dust and particles out of your eyes. Use a mask if you scrub rust or use chemicals. Work in a well-ventilated area to avoid fumes. Keep your workspace organized to prevent accidents. Safety is important for a smooth and safe restoration.
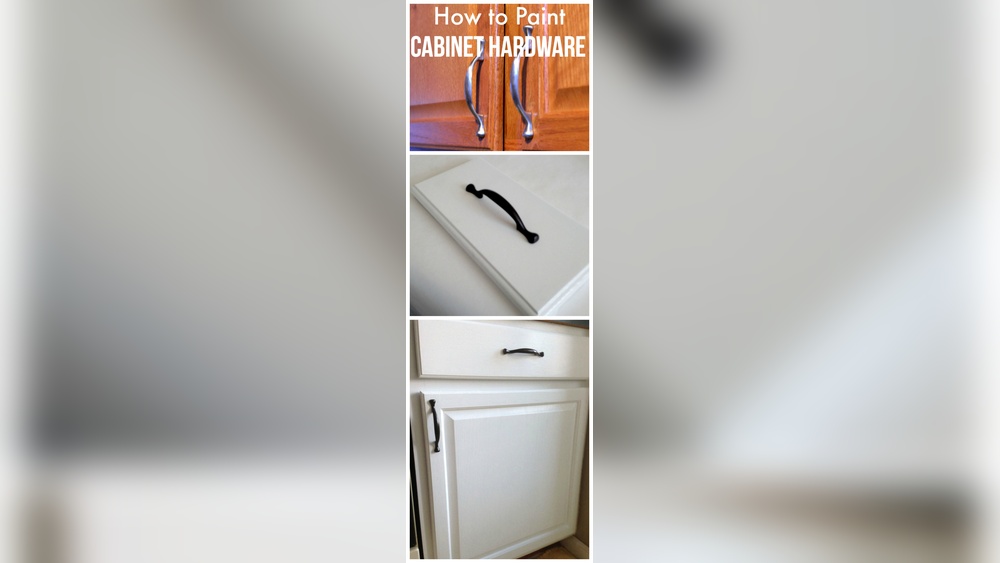
Preparing The Hardware
Preparing the hardware is a key step in antiquing cabinet pieces. This process ensures the hardware looks authentic and lasts longer. It involves cleaning and removing old coatings. These steps help new finishes stick better and reveal the original metal beneath. Careful preparation makes a big difference in the final result.
Cleaning Old Pieces
Start by cleaning the hardware thoroughly. Use warm water and mild soap to remove dirt and grease. A soft brush helps reach small crevices. Avoid harsh chemicals that can damage metal. Dry the pieces completely to prevent rust. Clean hardware shows details clearly and helps the antiquing process work well.
Removing Existing Coatings
Next, remove any old paint or lacquer on the hardware. Use a gentle paint stripper or sanding paper. Work slowly to avoid scratching the metal. Removing coatings exposes the metal surface for a natural antique look. This step ensures new finishes will bond properly and look smooth.
Applying Antique Finishes
Applying antique finishes to cabinet hardware gives it a timeless look. This process adds depth and character to plain or new pieces. Antique finishes make hardware appear aged and full of history. Simple methods can create beautiful, authentic effects on metal or wood hardware.
Patina Techniques
Patina forms naturally on metals over time. You can speed up this process using safe household items. Vinegar, salt, and ammonia create different patinas on brass or copper. Apply these solutions carefully with a brush or cloth. Let the hardware dry slowly to develop color layers. Patina adds a soft, worn surface that looks natural.
Using Paint And Stains
Paint and stains change the hardware’s color and texture. Start with a base coat of dark paint or stain. Wipe away some paint while it is still wet to reveal the metal beneath. Use a dry brush to add light touches of gold or bronze paint. This technique mimics old, chipped finishes. Stains darken wood hardware and highlight grain patterns. Multiple layers create a rich, antique look.
Aging With Chemicals
Certain chemicals react with metal to speed up aging. Liver of sulfur is popular for darkening silver and brass. Use gloves and work in a well-ventilated area. Dip or brush the hardware with the chemical and watch color change. Rinse with water to stop the reaction. Chemicals produce deep, uneven tones that look like real age. This method adds authenticity to any hardware.
Sealing And Protecting
Sealing and protecting antique cabinet hardware helps keep its beauty and finish. It stops rust and wear from daily use. A good seal also makes cleaning easier and keeps the hardware looking new longer.
Choosing Sealants
Pick a sealant that fits the hardware material. Clear lacquer works well on metal and brass. Wax gives a soft, natural finish but needs reapplication often. Polyurethane offers strong protection for high-use pieces. Avoid thick sealants that hide details on delicate hardware.
Application Methods
Clean hardware before applying any sealant. Use a soft cloth or brush to spread sealant evenly. Spray sealants offer quick, smooth coverage without brush marks. Let each coat dry fully before adding more. Thin, multiple coats protect better than one thick layer.

Credit: acornmfg.com
Installing The Hardware
Installing antique cabinet hardware gives your furniture a fresh, classic look. Proper installation keeps the hardware functional and attractive for years. Take your time to place and fix the pieces carefully. This ensures the best fit and durability.
Proper Placement
Mark the spots for knobs or handles before drilling. Use a ruler or tape measure for accuracy. Measure from the edge of the cabinet to place the hardware evenly. Check both sides to keep symmetry. Use a pencil to mark drill holes lightly. Avoid placing hardware too close to edges or corners.
Ensuring Secure Fixing
Use the right screws that come with the hardware. Tighten screws just enough to hold firmly. Avoid over-tightening, which can damage the wood or hardware. For heavy pieces, use wall anchors or extra support. Test the hardware by opening and closing doors or drawers. Fix any loose screws promptly to maintain strength.
Maintaining Vintage Charm
Maintaining vintage charm in antique cabinet hardware keeps the character alive. It preserves the unique look that adds warmth and history to any space. Small steps help protect the hardware’s beauty and function over time.
Careful attention makes these pieces last for years. Proper maintenance highlights their original design without losing their worn appeal. It balances cleaning with gentle handling to keep their old-world feel intact.
Cleaning Tips
Use a soft cloth to wipe dust and dirt regularly. Avoid harsh chemicals that can damage the finish. A mix of mild soap and water works well for light cleaning. Dry thoroughly to prevent rust or water spots. For tougher grime, a soft toothbrush can reach small details. Polishing with a gentle wax can restore shine without removing patina.
Handling Wear And Tear
Wear adds character but needs care to avoid damage. Tighten loose screws to keep hardware secure. Replace broken parts with pieces that match the style. Avoid sanding or stripping, as it removes the aged look. Light scratches can be softened with fine steel wool. Handle hardware gently to prevent bending or breaking. Protect surfaces by using felt pads behind knobs or pulls.

Credit: www.ballarddesigns.com
Frequently Asked Questions
What Materials Work Best For Antiquing Cabinet Hardware?
Brass, bronze, and iron are ideal for antiquing cabinet hardware. These metals develop a natural patina that enhances the aged look. Avoid plastic or coated hardware as they do not age authentically or respond well to antiquing techniques.
How Do I Prepare Cabinet Hardware For Antiquing?
Clean hardware thoroughly with soap and water to remove dirt and grease. Dry completely before applying any antiquing solution. Lightly sanding smooths the surface, helping the finish adhere better and appear more natural.
Which Antiquing Methods Suit Cabinet Hardware?
Common methods include using patina solutions, rubbing with vinegar and salt, or applying dark wax. Each technique creates an aged appearance by enhancing natural wear patterns and adding depth to the metal.
Can I Antique Cabinet Hardware Without Removing It?
Yes, but removal allows better access and more even results. If hardware is stuck, clean in place and use a cloth to apply antiquing solutions carefully to avoid damaging cabinets.
Conclusion
Antique cabinet hardware adds charm to any furniture piece. Clean and polish carefully to keep its look. Use gentle tools and mild cleaners to protect details. Small repairs can bring old hardware back to life. Choose pieces that match your cabinet style.
Taking time with each step makes a big difference. Enjoy the unique character antique hardware brings to your space. This simple upgrade refreshes your cabinets without much cost. Try these tips and see your furniture shine anew.