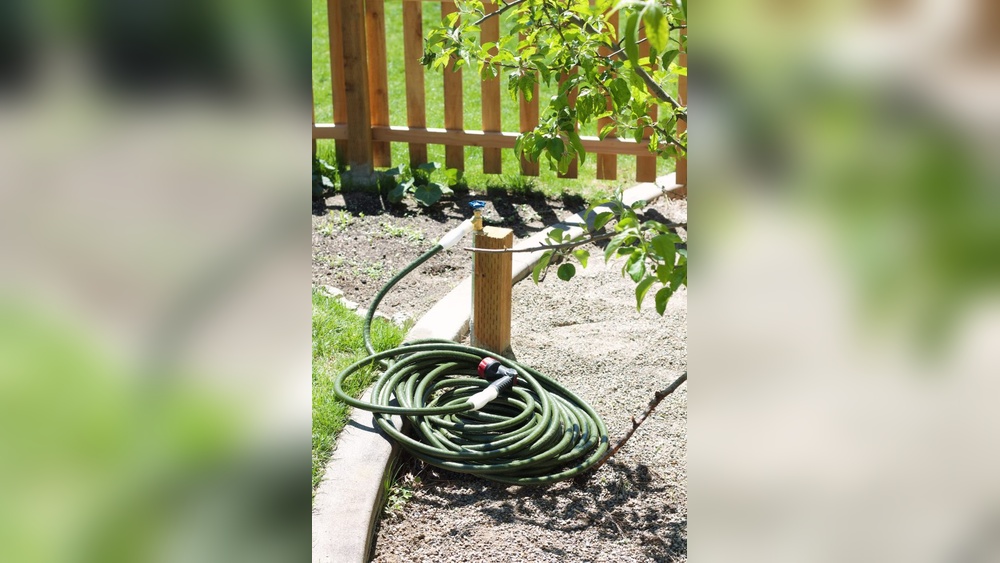
Are you struggling to keep your drip line hose neatly in place on your concrete wall patio? You’re not alone.
Without the right anchoring method, your hose can sag, move, or even get damaged, wasting water and effort. But don’t worry—anchoring your drip line hose to a concrete wall is easier than you think. You’ll discover simple, effective steps to secure your hose firmly, saving you time and keeping your garden healthy.
Ready to transform your patio setup and enjoy a hassle-free watering system? Let’s dive in!

Credit: www.erynwhalenonline.com
Choosing The Right Drip Line Hose
Choosing the right drip line hose is important for a successful patio watering system. The hose must fit your needs and hold up against weather and use. Selecting the proper hose helps water plants evenly and saves water. It also makes installation easier and keeps the hose secure on a concrete wall patio.
Types Of Drip Line Hoses
There are several types of drip line hoses. Some have built-in emitters spaced evenly. Others allow you to add emitters anywhere along the hose. Porous hoses slowly release water along the entire length. Choose a type that fits your plant layout and watering needs. A hose with built-in emitters is simple to install. Porous hoses work well for flower beds and ground covers.
Sizing Your Hose Correctly
Choose the hose length to cover all plants without excess. A hose that is too short wastes time with extensions. Too long a hose may cause water pressure loss. Also, consider the hose diameter. Larger diameters carry more water but may be harder to secure. Smaller diameters are easier to handle but may limit water flow. Measure your patio and plant spacing carefully before buying.
Materials And Durability
Drip line hoses come in various materials. Polyethylene is common and flexible. It resists UV rays and cracking. Rubber hoses are stronger but less flexible. Consider hoses rated for outdoor use and heat resistance. A durable hose lasts longer and needs fewer repairs. Look for hoses with thick walls to prevent leaks. The right material ensures your drip system works well season after season.
Preparing Your Concrete Wall Patio
Preparing your concrete wall patio is the first step to properly anchor a drip line hose. A clean, well-marked surface ensures strong and lasting attachment. Taking time to prepare helps avoid future repairs and keeps your irrigation system working well. Follow simple steps to get your wall ready for the drip line.
Cleaning The Surface
Start by removing dirt, dust, and loose debris from the concrete wall. Use a stiff brush or broom to scrub the surface. Wash the wall with water and mild soap if needed. Let the wall dry completely before moving to the next step. A clean surface improves the grip of anchors and prevents slipping.
Identifying Anchor Points
Decide where the drip line hose will run along the wall. Look for spots that allow easy hose attachment without bending or stretching. Choose points near water sources or plant beds for best efficiency. Make sure anchor points are spaced evenly to support the hose well. Proper placement prevents leaks and damage.
Measuring And Marking
Use a tape measure to mark exact spots for each anchor point. Mark with a pencil or chalk on the concrete surface. Double-check measurements to ensure accuracy. Marking helps guide drilling and keeps the hose straight. Clear marks speed up installation and reduce mistakes.
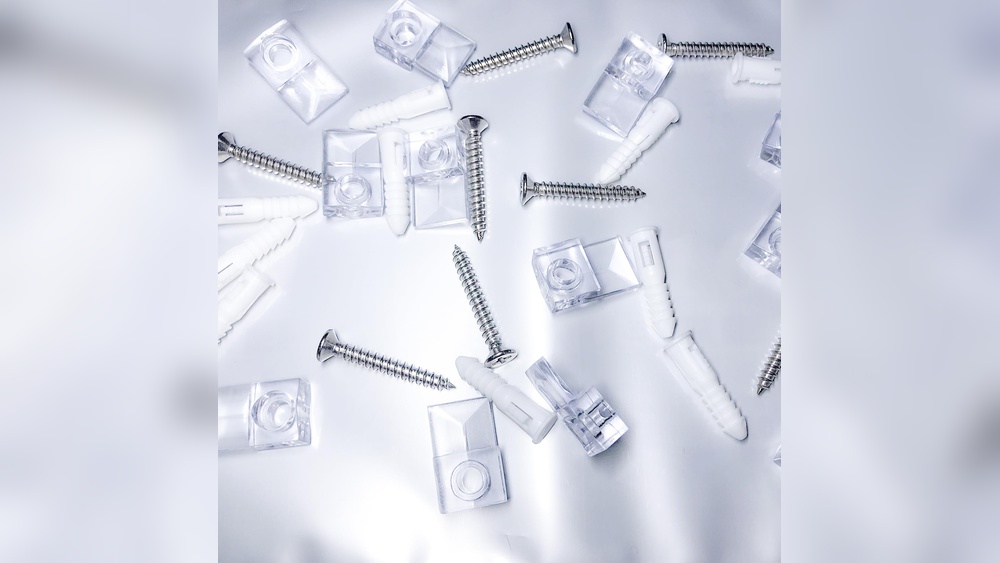
Selecting Anchoring Materials
Selecting the right materials to anchor a drip line hose on a concrete wall patio is key. The materials must hold the hose securely and resist weather damage. Choosing the correct anchors ensures the hose stays in place and works efficiently.
Consider the type of concrete and outdoor conditions. Some anchors work better for smooth surfaces, while others fit rough textures. Quality materials last longer and need less maintenance.
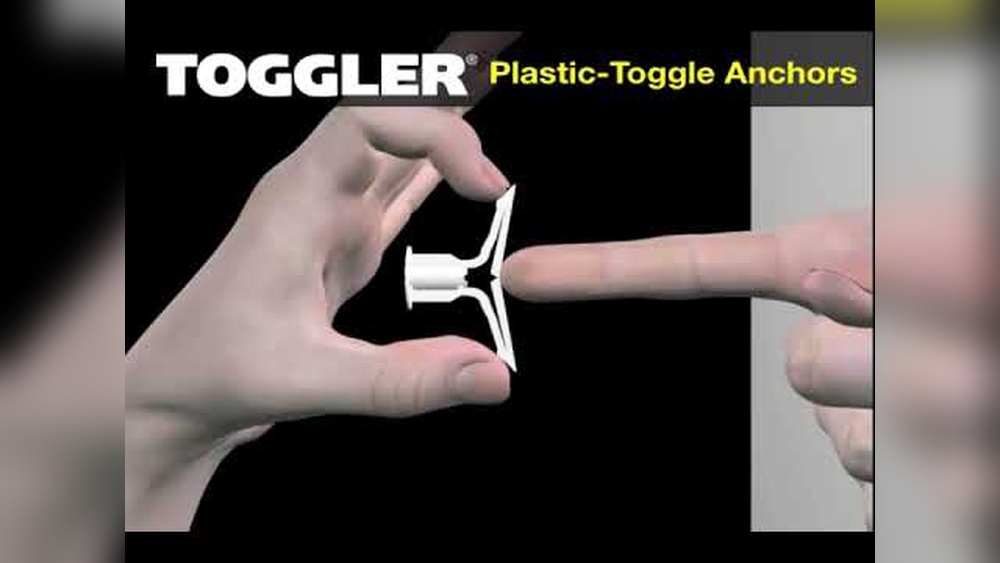
Anchor Types For Concrete
Concrete screws are popular for light to medium loads. They are easy to install and remove if needed. Expansion anchors fit tightly into drilled holes and hold strong in heavy-duty setups. Plastic anchors suit smaller hoses but may wear out faster. Sleeve anchors provide a solid grip for thick concrete walls. Choose the anchor based on hose size and wall thickness.
Tools Required
A drill with a masonry bit is essential to create holes in concrete. A hammer helps insert some types of anchors. A screwdriver or impact driver tightens screws and bolts. Safety goggles protect eyes from dust and debris. Measuring tape ensures proper spacing for neat installation. Have a pencil to mark drilling points clearly.
Safety Precautions
Wear safety goggles and gloves before starting work. Concrete dust can irritate eyes and skin. Work in a well-ventilated area or outdoors. Keep the work area clean to avoid trips and falls. Use the drill carefully to prevent slipping or damage. Follow manufacturer instructions for each tool and anchor type.

Credit: www.remodelaholic.com
Step-by-step Anchoring Process
Anchoring a drip line hose to a concrete wall patio keeps your irrigation neat and effective. This process is simple but needs careful steps. Follow the steps below for a secure and long-lasting installation.
Drilling Holes In Concrete
Start by marking spots on the concrete wall. Space them evenly along the drip line path. Use a hammer drill with a masonry bit to drill holes at the marks. Drill holes about 1 to 2 inches deep. Wear safety glasses to protect your eyes from dust.
Inserting Anchors
Choose anchors that fit the drilled holes. Push the anchors gently into the holes. Tap lightly with a hammer to set them flush with the surface. Anchors provide a strong hold for the screws. Check that each anchor is secure before moving on.
Securing The Drip Line Hose
Place the drip line hose along the wall, aligning it with the anchors. Use screws with hose clamps or special drip line clips to hold the hose. Tighten screws carefully to avoid crushing the hose. Check the hose is tight but not damaged. This keeps the drip line steady and water flow consistent.
Testing And Adjusting The Setup
Testing and adjusting the drip line hose setup is key to a successful irrigation system. It ensures the hose stays in place and water flows evenly. This step helps avoid water waste and keeps plants healthy.
Checking Hose Stability
Start by gently pushing the hose to see if it moves. A stable hose should stay firmly against the concrete wall. Look for any loose spots or areas where the hose pulls away. Secure these points with extra anchors or clips. Stability prevents leaks and uneven watering.
Adjusting Tension
The hose should be taut but not too tight. Too much tension can damage the hose or anchors. Too little tension causes sagging and poor water flow. Adjust by tightening or loosening the anchors. Check the tension along the entire length for consistency.
Ensuring Proper Water Flow
Turn on the water supply and watch the drip line. Water should drip evenly from each emitter. Look for dry spots or areas with heavy flow. Adjust the hose position or check for clogs. Proper flow means every plant gets enough water.
Maintenance Tips For Longevity
Keeping your drip line hose anchored to a concrete wall patio in good shape takes some care. Simple maintenance helps the hose last longer and works better. Follow easy steps to keep the system steady and avoid leaks or damage.
Regular Inspections
Check the hose and anchors at least once a month. Look for cracks, loose spots, or wear. Early fixing stops bigger problems later. Pay attention to areas where the hose bends or meets anchors.
Cleaning The Hose
Remove dirt and debris from the hose surface often. Use a soft cloth or brush with water. Dirt buildup can block water flow and cause damage. Clean anchors too, to keep them tight and secure.
Replacing Worn Anchors
Replace any anchors that look old or broken right away. Worn anchors fail to hold the hose firmly. Use anchors designed for concrete walls to ensure a strong hold. Secure replacements prevent the hose from sagging or pulling loose.

Credit: www.homedepot.com
Frequently Asked Questions
How Do I Secure Drip Line Hose To A Concrete Wall?
Use concrete anchors or masonry screws with hose clamps. Drill pilot holes with a masonry bit first. Attach clamps firmly to hold the hose against the wall without damaging it.
What Tools Are Needed To Anchor Drip Hose On Concrete?
You need a drill with a masonry bit, concrete anchors or screws, hose clamps, a screwdriver, and a hammer. These tools ensure a secure and durable attachment to the concrete surface.
Can I Use Adhesive To Fix Drip Lines On Concrete?
Adhesives can work but are less reliable outdoors. Use concrete anchors or screws for a stronger, long-lasting hold on patios exposed to weather.
How Far Apart Should Drip Line Anchors Be Placed?
Place anchors every 12 to 18 inches along the drip line hose. This spacing prevents sagging and keeps the hose securely against the wall.
Conclusion
Anchoring a drip line hose to a concrete wall patio keeps your garden neat and healthy. Use proper tools and anchors for a secure fit. Check the hose regularly to avoid leaks or damage. A well-anchored hose saves water and helps plants grow better.
Small steps make a big difference in your watering system. Keep it simple, steady, and strong for best results. This way, your garden stays green and your patio clean. Easy to do and worth the effort.