Are you staring at a stubborn wall anchor and wondering how to get it out without damaging your wall? Removing a wall anchor can feel tricky, especially if you want to keep your space looking neat.
But don’t worry—you’re about to learn simple, effective steps that anyone can follow. By the end of this article, you’ll have the confidence to remove wall anchors safely and cleanly, saving you time and frustration. Keep reading to discover the easy tricks that make this task a breeze!
Types Of Wall Anchors
Wall anchors hold objects on walls securely. Different anchors suit different wall types and weights. Knowing the types helps in choosing and removing them correctly.
Plastic Expansion Anchors
These anchors are common and easy to use. Made of plastic, they expand inside the wall when a screw is driven in. They work well in drywall and light materials. Removing them may require pulling or pushing them out carefully.
Toggle Bolts
Toggle bolts have wings that open behind the wall. They support heavy objects on hollow walls. The wings spread the load over a large area. To remove them, you must unscrew and pull the bolt, then work the wings out through the hole.
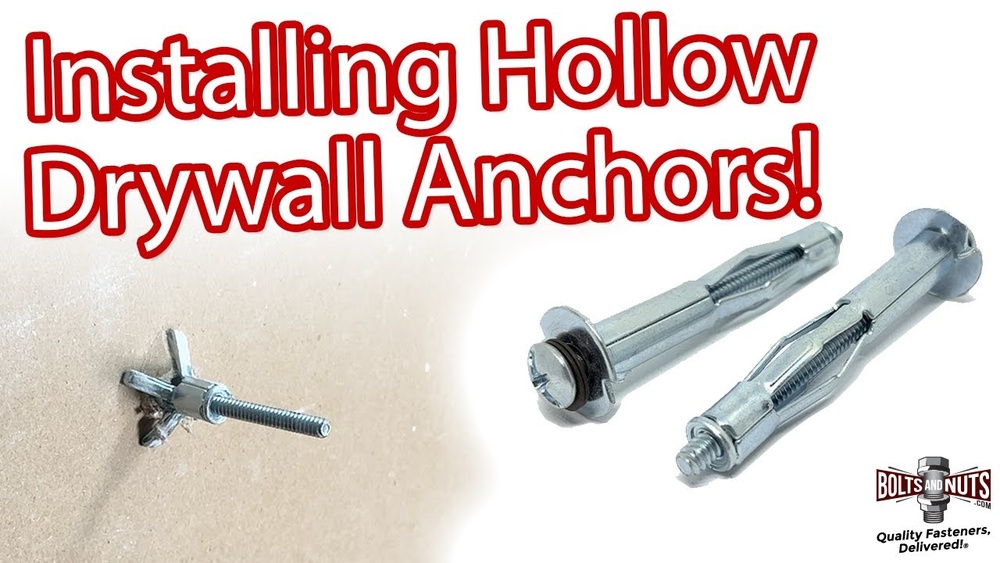
Molly Bolts
Molly bolts are metal anchors that expand inside the wall. They provide strong support for medium to heavy loads. The metal sleeve spreads out as the screw tightens. Removal involves unscrewing, then gently pulling the anchor free or pushing it inside the wall.
Self-drilling Anchors
These anchors screw directly into drywall without pre-drilling. They have sharp threads for easy installation. Ideal for medium loads, they hold screws tightly. Removal means unscrewing the screw and pulling the anchor out carefully to avoid wall damage.
Tools You’ll Need
Taking out a wall anchor needs the right tools. Using proper tools makes the job easier and safer. The type of wall anchor can change the tools you need. Below are the main tools required for most wall anchor removals.
Screwdriver Options
A screwdriver is the main tool for removing wall anchors. Use a flathead or Phillips screwdriver depending on the screw head. Choose a screwdriver that fits tightly to avoid slipping. Sometimes a small screwdriver works better for tight spaces.
Pliers And Wrenches
Pliers help to grip and pull out anchors stuck in the wall. Needle-nose pliers work well for small anchors. Wrenches can turn anchors that are screwed in tightly. Use gentle force to avoid wall damage.
Drill And Drill Bits
A drill removes anchors that can’t be unscrewed easily. Use a drill bit slightly larger than the anchor. Drill slowly to avoid making big holes. This tool is useful for plastic or metal anchors.
Utility Knife
A utility knife cuts away drywall around the anchor. It helps loosen anchors glued or painted over. Use the knife carefully to avoid cutting too deep. This tool prepares the area for easier anchor removal.
Preparing For Removal
Preparing to remove a wall anchor is key to a smooth process. Taking time to get ready helps avoid damage. It also keeps you safe and makes the task easier.
Clearing The Area
Remove objects near the wall anchor. Clear furniture and decorations from the workspace. This gives you enough space to work safely. Dust and debris will fall, so cover floors with a drop cloth or old sheet.
Assessing Wall Material
Check the type of wall before removal. Different walls need different tools and care. Drywall, plaster, and concrete all react differently. Knowing your wall material helps choose the right method and prevents damage.
Safety Precautions
Wear safety glasses to protect your eyes. Gloves can protect your hands from sharp edges. Use a mask if dust is likely. Make sure you have good lighting to see clearly. Take your time to avoid accidents.
Removing Plastic Expansion Anchors
Removing plastic expansion anchors can be tricky but manageable with the right steps. These anchors expand inside the wall to hold screws firmly. Taking them out requires care to avoid wall damage.
This guide shows simple methods to remove plastic anchors safely. Follow these easy steps to clear your wall for repairs or new fixtures.
Unscrewing The Anchor
Start by trying to unscrew the plastic anchor with a screwdriver. Sometimes it turns out like a normal screw. Use a screwdriver that fits well to avoid slipping.
If the anchor spins without coming out, it means it is stuck inside the wall. Stop and try the next method to avoid damage.
Prying Out With Pliers
Grab the edge of the anchor with needle-nose pliers. Pull gently while wiggling it back and forth. This loosens the anchor from the wall.
If the anchor is flush with the wall, pinch it carefully. Pull straight out to avoid breaking the wall surface.
Use steady pressure. Avoid sudden force that can cause wall cracks.
Filling The Hole
Once the anchor is out, a hole remains in the wall. Fill it with spackling paste or wall filler.
Use a putty knife to spread the filler evenly. Let it dry fully before sanding smooth.
Paint over the patched area to match your wall color. This restores a clean, finished look.
Taking Out Toggle Bolts
Taking out toggle bolts can be tricky. These anchors hold strongly inside walls. Removing them needs care to avoid wall damage. Follow simple steps to remove toggle bolts safely and cleanly.
Unscrewing The Bolt
Start by turning the bolt counterclockwise. Use a screwdriver that fits well. Keep turning until the bolt is loose. The toggle will stay inside the wall. Do not pull the bolt out yet.
Collapsing The Toggle
The toggle is a spring-loaded wing. It opens wide behind the wall to hold tight. Push the toggle wings toward each other gently. This will make the toggle collapse. Be patient to avoid breaking the wall.
Extracting From The Wall
After collapsing, pull the bolt slowly. The toggle should slide out with it. If it does not come out, push the toggle inside. Use a long tool or wire for help. Clean the hole for patching or reuse.
:max_bytes(150000):strip_icc()/how-to-remove-drywall-anchors-7562285-02-c01abbfe63374ad3a7bc1e52d0c15bb2.JPG)
Credit: www.thespruce.com
Extracting Molly Bolts
Extracting molly bolts from a wall can be tricky. These anchors expand behind the wall, holding tightly. You need the right steps to remove them without causing big damage. This guide breaks down the process into simple parts. Follow these steps to take out molly bolts safely and cleanly.
Loosening The Sleeve
Start by finding the bolt head in the center. Use a screwdriver to turn it counterclockwise. This helps loosen the metal sleeve inside the wall. Sometimes, the sleeve stays tight. Tap the bolt gently with a hammer to loosen it further. Keep turning until the sleeve feels loose.
Pulling Out The Anchor
Once the sleeve is loose, grip the bolt with pliers. Pull the bolt straight out of the wall. The sleeve may come out with it or stay inside. If the sleeve stays, use needle-nose pliers to pull it out. Pull slowly to avoid tearing the drywall. If it breaks, you will need to patch the hole later.
Repairing Wall Damage
After removing the anchor, check the hole size. Use spackle or wall filler to fill the hole. Smooth the surface with a putty knife. Let the filler dry completely. Sand lightly for a smooth finish. Paint over the patch to match the wall color. This restores your wall and hides any damage.
Removing Self-drilling Anchors
Removing self-drilling anchors is easier than most people think. These anchors screw directly into drywall, making them strong and simple to install. Taking them out requires some care to avoid damaging the wall. Use the right tools and steps to get the job done cleanly.
Unscrewing Anchor With Screwdriver
Start by using a screwdriver that fits the anchor’s screw head. Turn the screwdriver counterclockwise to unscrew the anchor. Pull the anchor out gently as it loosens. If the anchor spins without coming out, stop to avoid wall damage.
Using Drill For Stubborn Anchors
For anchors stuck tight, use a drill with a small bit. Drill slowly into the center of the anchor to break its hold. Be careful not to drill too deep or wide. Once loosened, pull the anchor out with pliers or your fingers.
Hole Repair Tips
After anchor removal, the wall will have a hole. Fill the hole with spackle or wall filler. Smooth the surface with a putty knife and let it dry. Sand the area gently to make it even. Paint over the repair for a clean finish.

Credit: www.wikihow.com
Fixing Wall Damage After Removal
Removing a wall anchor often leaves a hole or damage on the wall. Fixing this damage restores the wall’s smooth look. It also prepares the wall for new paint or decorations. The repair process is simple and takes just a few steps.
Cleaning The Hole
Start by cleaning the hole left by the anchor. Remove any dust, debris, or loose paint inside. Use a small brush or vacuum to clear the area. A clean hole helps the repair material stick better. Make sure the hole is dry before moving on.
Applying Spackle Or Putty
Use spackle or wall putty to fill the hole. Apply it with a putty knife, pressing firmly into the hole. Spread the material smoothly over the surface. Avoid putting too much at once. Let it dry according to the instructions on the package.
Sanding And Painting
Once the spackle is dry, sand the area gently. Use fine sandpaper to smooth the surface. Make it level with the rest of the wall. Wipe away dust with a clean cloth. Finally, paint over the patch using matching paint. This step hides the repair and blends it well.
Tips To Prevent Wall Damage
Removing a wall anchor can sometimes cause damage to your wall. Preventing this damage helps keep your walls looking clean and smooth. Follow simple tips to protect your wall while taking out anchors.
Choosing The Right Anchor
Select an anchor suitable for your wall type. Drywall anchors differ from those for brick or plaster. The right anchor reduces the chance of wall cracks or holes. Use anchors that fit the weight of the item you hang.
Using Proper Tools
Use tools designed for anchor removal. A screwdriver, pliers, or a drill may be needed. Avoid sharp or heavy tools that can gouge the wall. Proper tools help you work gently and precisely.
Removing Anchors Carefully
Start by loosening the anchor slowly. Pull or twist gently to avoid tearing the wall. If the anchor is stuck, try pushing it inward slightly. Work patiently to keep the wall intact.

Credit: www.hgtv.com
Frequently Asked Questions
How Do I Safely Remove A Wall Anchor?
To safely remove a wall anchor, first, unscrew any attached screws. Then, use pliers to gently pull out the anchor. If stuck, push it into the wall cavity or drill it out carefully. Always wear safety goggles to protect your eyes.
What Tools Are Needed To Remove Wall Anchors?
You will need a screwdriver, pliers, a utility knife, and optionally a drill. These tools help loosen, grip, and extract the anchor with minimal wall damage. Having safety goggles is also recommended to protect your eyes during removal.
Can I Reuse A Wall Anchor After Removal?
Generally, wall anchors are not reusable because they deform during removal. It’s best to replace them with new anchors for a secure hold. Using fresh anchors ensures stronger support for hanging items and prevents future wall damage.
How To Fix Holes After Removing Wall Anchors?
Fill the hole with spackle or wall filler using a putty knife. Let it dry completely, then sand smooth. Finally, repaint the area to match the wall color for a clean, finished look.
Conclusion
Removing a wall anchor is easier than it seems. Use the right tools and go step-by-step. Take your time to avoid wall damage. Small holes can be fixed with filler or putty. Clean the area well before repainting or hanging new items.
Practicing these tips helps keep your walls neat and strong. Remember, patience and care make the job smooth. Now, you can confidently handle wall anchors yourself.