Is your light switch box crooked and driving you crazy every time you look at it? You’re not alone.
A tilted switch box can make even the simplest room look unfinished and sloppy. The good news? Fixing it is easier than you think—and you don’t need to be an expert. In this guide, you’ll discover simple, step-by-step tips to straighten your light switch box quickly and safely.
Keep reading, and by the end, you’ll have that switch looking neat and perfectly aligned, adding a clean, polished touch to your space.
Signs Of A Crooked Switch Box
A crooked light switch box can cause problems in your home. It looks uneven and may affect the switch’s function. Spotting the signs early helps fix the issue before it worsens. Below are common signs that show a switch box is crooked.
Visible Tilt Or Slant
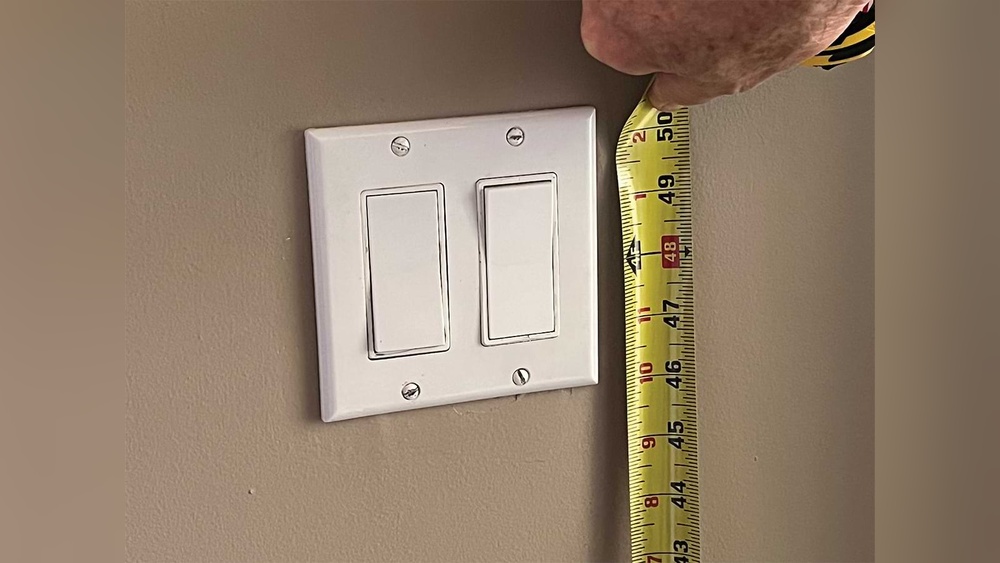
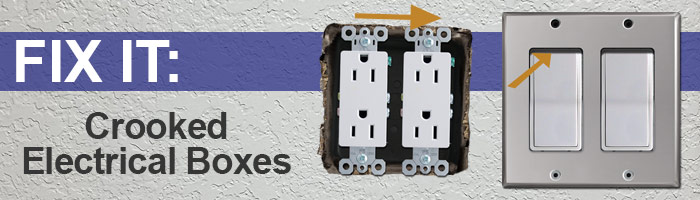
The switch plate or cover does not sit straight. It leans to one side or angles oddly. This tilt is a clear sign the box behind is crooked.
Gaps Around The Switch Plate
Notice gaps between the wall and the switch plate. These gaps mean the box is not flush with the wall. A crooked box often causes uneven spaces here.
Switch Feels Loose Or Wobbly
The switch moves more than usual when pressed. Loose feeling means the box may not be secured well. A crooked box can make the switch unstable.
Misaligned Switch Toggle
The switch toggle does not line up with the plate. It may tilt or rest at an odd angle. This misalignment often signals a crooked box behind the wall.
Uneven Wall Surface Around The Box
The wall near the switch looks uneven or bulging. This can happen if the box was installed poorly. A crooked box can cause the wall surface to appear irregular.
Tools Needed For The Fix
Fixing a crooked light switch box needs the right tools. Having these tools ready makes the job easier and safer. This section lists all the tools required for the fix.
Screwdriver
A screwdriver is essential to remove and tighten screws on the switch and box. Choose a flathead or Phillips screwdriver based on your switch type.
Level
A level helps ensure the switch box is straight. It shows if the box is crooked or aligned properly.
Voltage Tester
A voltage tester checks if the power is off. It keeps you safe by preventing electric shocks during the fix.
Pliers
Pliers assist in bending or holding wires. They also help remove stubborn screws or nails from the box.
Shims Or Cardboard
Shims or pieces of cardboard help adjust the box position. They fill gaps to keep the box steady and level.
Utility Knife
A utility knife cuts drywall or shims for a perfect fit. It helps clean edges around the switch box.
Turn Off Power Safely
Turning off power before fixing a crooked light switch box is crucial. It keeps you safe from electric shocks. Never skip this step.
Safety starts at the breaker panel. Locate the right breaker for the room. Switch it off to cut the power.
Always double-check the power is off. Use a voltage tester on the switch. No light or beep means the power is off.
Do not rely only on the switch position. Testing ensures no electricity flows. Stay safe by confirming twice.
Locate The Circuit Breaker Panel
Find your home’s breaker panel. It is often in the basement or garage. Look for a metal box with switches inside.
Identify The Correct Breaker
Check the labels next to each breaker. Find the one for your light switch’s room. If unlabeled, turn off breakers one by one and test.
Switch Off The Breaker
Flip the breaker switch to the off position. You may feel a click. This action stops power flow to the switch box.
Verify Power Is Off
Use a voltage tester or multimeter. Touch the tester probes to the switch terminals. No reading means power is off.
Work Only When Power Is Off
Never start fixing until you confirm no electricity. This prevents shocks and injuries. Safety first, always.
Credit: www.kyleswitchplates.com
Remove The Switch Cover And Plate
Removing the switch cover and plate is the first step to fix a crooked light switch box. It gives clear access to the switch and the box behind it. This step is simple but important to work safely and effectively.
Start by turning off the power to the switch at the breaker. This keeps you safe from electric shock. Next, use a screwdriver to remove the screws holding the cover plate in place. Set the screws and cover aside carefully.
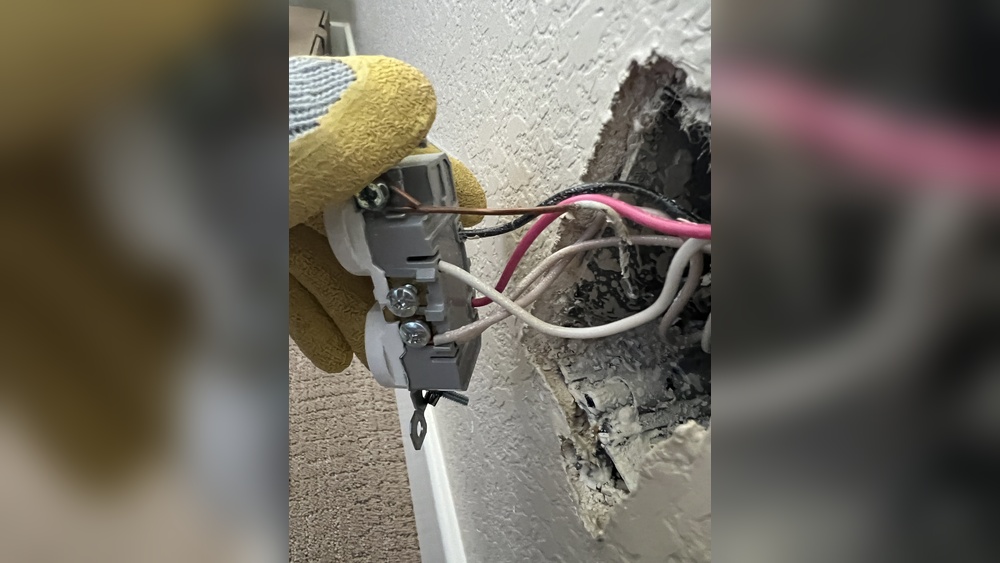
After removing the plate, you will see the switch attached to the box. The switch itself is held by screws on each side. Unscrew these to pull the switch out slightly. This allows you to check the box and its alignment.
Gather Necessary Tools
Prepare a flathead or Phillips screwdriver. A flashlight helps to see inside the box. Have a small container ready to hold screws safely.
Switch off the circuit breaker that controls the light. Use a tester to confirm the power is off. Safety is the top priority before touching wires.
Remove The Switch Cover Plate
Locate screws on the cover plate. Use the screwdriver to remove them slowly. Keep screws safe for reinstallation later.
Unscrew The Light Switch
Remove screws holding the switch to the box. Pull the switch gently outward. Avoid pulling wires or putting stress on connections.
Loosen The Switch Box Screws
Loosening the switch box screws is the first step to fix a crooked light switch box. It allows you to adjust the box’s position without damaging the wall. This step is simple and safe. It helps make the switch straight and secure.
Start by turning off the power to the switch at the breaker. Safety is important before touching any electrical parts. Use a screwdriver to find the screws holding the switch box. These screws attach the box to the wall studs or drywall.
Loosen the screws just enough to move the box. Do not remove them completely. This gives you some wiggle room to align the box properly. You can gently push or pull the box until it looks straight.
Once the box is in the right place, tighten the screws again. This keeps the box steady and prevents future movement. Check the switch cover plate to see if it fits well. A neat switch box improves the room’s look and function.
Identify The Switch Box Screws
Look inside the switch box for screws. They are usually on the sides or back. Use a flashlight if the area is dark. These screws secure the box to the wall frame. Knowing their location saves time during fixing.
Use The Right Screwdriver
Choose a screwdriver that fits the screws well. Most switch box screws are flathead or Phillips. Using the correct tool prevents stripping the screw head. A firm grip helps to loosen screws smoothly.
Loosen Without Removing Screws
Turn the screws counterclockwise to loosen. Stop once the screws can move the box. Removing screws may cause the box to fall out. Keep the screws in place to keep control over the box.
Adjust The Switch Box Position
Push or pull the box gently to align it. Check the switch from the front to see if it is straight. Make small movements for better accuracy. Proper alignment helps the switch cover fit perfectly.
Tighten Screws Securely
After adjusting, turn screws clockwise to tighten. Secure screws hold the box firmly against the wall. Avoid overtightening to prevent damage to the wall or box. A tight box reduces wobbling and keeps the switch safe.
Realign The Switch Box
Realigning the switch box is a key step to fixing a crooked light switch. This process ensures the switch fits well and looks straight on the wall. A well-aligned box also helps avoid damage to the switch or wall.
Check The Box Position
First, remove the switch cover plate. Look closely at the box inside the wall. Check if it sits flush against the wall surface. Notice if it tilts or shifts to one side. Use a small level tool to see if it is straight.
Adjust The Box For Level
Loosen the screws holding the box in place. Gently move the box until it sits level. Use the level tool again to confirm its position. Make small movements to avoid breaking the wall. Keep adjusting until the box is perfectly straight.
Secure The Box Firmly
Tighten the screws while holding the box steady. Make sure the box does not move while tightening. The box must stay flush with the wall. Check the level once more after tightening. A firm box prevents future crookedness and keeps the switch safe.
Reattach The Switch And Cover Plate
Reattaching the switch and cover plate is the final step to fix a crooked light switch box. This step ensures the switch sits straight and the cover plate fits snugly. Proper alignment improves the switch’s look and safety.
Take your time during this step. A crooked switch or loose cover plate can cause problems later.
Position The Light Switch Properly
First, place the light switch inside the box carefully. Make sure the switch lines up with the screw holes. Check that the switch is level and not tilted. Adjust it by moving it slightly until it looks straight.
Secure The Switch With Screws
Use a screwdriver to tighten the screws holding the switch in place. Tighten each screw a little at a time. Avoid over-tightening to prevent damage. The switch should feel firm and not move.
Attach The Cover Plate
Align the cover plate over the switch. The screw holes on the cover plate should match the switch. Place the cover plate flat against the wall. This hides the box and gives a finished look.
Tighten The Cover Plate Screws
Insert the screws into the cover plate holes. Tighten the screws gently with a screwdriver. Make sure the cover plate is flush with the wall. Do not force the screws, as this can crack the plate.

Credit: diy.stackexchange.com
Restore Power And Test
After fixing the crooked light switch box, restoring power and testing is the next important step. This ensures the switch works correctly and safely. Follow these steps carefully to avoid any electrical hazards.
Turn The Circuit Breaker Back On
Find your home’s electrical panel. Locate the breaker that controls the switch you fixed. Flip it back to the “on” position. This will restore power to the switch and the connected light fixture.
Test The Light Switch
Press the switch up and down. Check if the light turns on and off smoothly. Make sure it does not flicker or feel loose. A properly fixed box should hold the switch firmly in place.
Observe For Any Issues
Watch the light for a few minutes. Look for flickering or unusual behavior. Listen for buzzing sounds near the switch. Any problem means you should turn off the power and recheck your work.
Tips To Prevent Future Misalignment
Preventing future misalignment of your light switch box helps keep your walls neat and safe. Small steps during installation or repairs can avoid crooked switches later. Proper care protects both the switch and the wall surface.
Follow clear tips to ensure your light switch box stays straight over time. These easy methods save you from repeated fixes and improve your home’s look.
Use A Level During Installation
A level tool ensures the box is perfectly straight. Check the box from all angles before securing it. This small step prevents crooked switches and uneven wall plates.
Secure The Box Firmly To Studs
Attach the box directly to wall studs for strong support. Loose boxes shift and cause misalignment. Use screws that fit well and hold tight.
Choose The Right Box Size
Select a box that fits the wall cavity snugly. Oversized boxes move easily, leading to crooked mounting. Measure carefully before buying to avoid problems.
Double-check Wall Surface Before Installation
Make sure the wall surface is flat and even. Uneven walls tilt boxes and switches. Fix any wall bumps or gaps first for a smooth fit.
Avoid Over-tightening Screws
Tighten screws just enough to hold the box firm. Over-tightening can bend or shift the box. Gentle, steady pressure works best for lasting alignment.

Credit: www.youtube.com
Frequently Asked Questions
How Do I Straighten A Crooked Light Switch Box?
To straighten a crooked light switch box, first turn off power. Loosen mounting screws, realign the box, then tighten screws securely. Use a level to ensure it’s straight before restoring power.
What Tools Are Needed To Fix A Crooked Switch Box?
You need a screwdriver, level, and possibly pliers. A flashlight helps see inside the box. These tools allow you to loosen screws, adjust the box, and ensure proper alignment.
Can A Crooked Light Switch Box Cause Electrical Issues?
Yes, a crooked box can cause loose wiring connections. This may lead to flickering lights or safety hazards. Fixing the alignment helps maintain secure electrical connections and prevents potential problems.
How Long Does It Take To Fix A Crooked Switch Box?
Fixing a crooked switch box typically takes 15 to 30 minutes. Time varies with experience and accessibility. Careful adjustment ensures safety and proper switch operation.
Conclusion
Fixing a crooked light switch box is easier than it seems. With the right tools and steps, you can do it yourself. Take your time and work carefully to avoid mistakes. A straight switch box improves your room’s look and safety.
Small repairs make a big difference in your home. Try this fix and see the neat results for yourself.