Have you ever pulled off a Command hook only to find your wall looking worse for wear? Those little sticky strips seem harmless, but when they leave behind damage, it can be frustrating.
You want your walls to look clean and smooth again, without spending hours or money on repairs. The good news? Fixing wall damage from Command hooks is easier than you think. You’ll discover simple, effective steps to restore your walls quickly.
Keep reading, and you’ll have your space looking perfect in no time.
Credit: www.reddit.com
Common Wall Damage From Command Hooks
Command hooks are popular for hanging items without nails or screws. They leave less damage than traditional hooks. Still, some wall damage can happen when you remove them. Knowing the common types of damage helps you fix the wall quickly. Understanding why damage occurs can prevent it in the future.
Types Of Damage
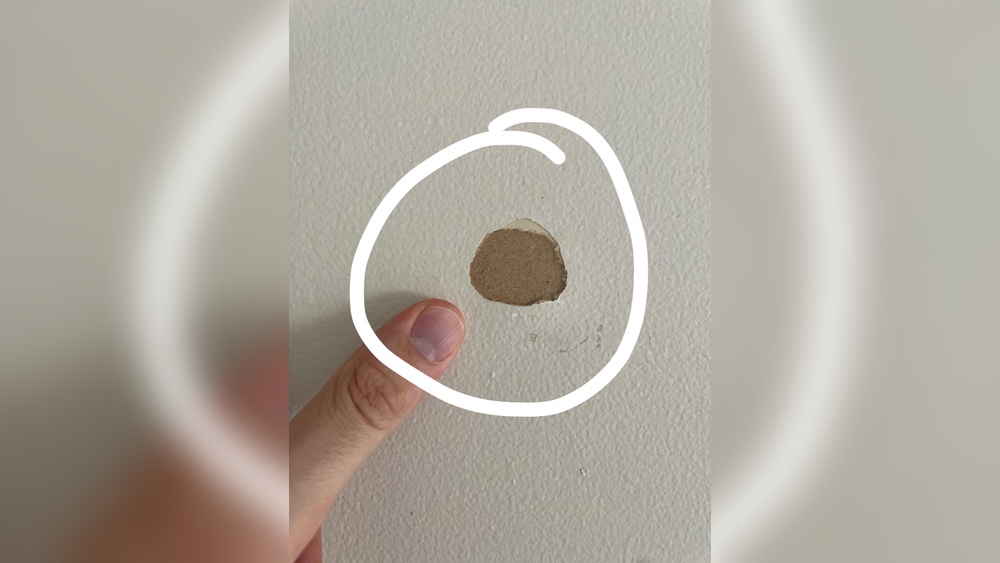
The most common damage is paint peeling or chipping. The adhesive sometimes pulls off paint from the wall. Small holes or dents can appear if the wall surface is weak. Stains or sticky residue may stay after removing the hook. In some cases, the wall surface may crack slightly.
Why Damage Occurs
Damage happens because the adhesive sticks strongly to the wall. Removing the hook too fast can pull off paint. Walls with old or weak paint are more likely to peel. High humidity can weaken the adhesive or paint. Applying too much weight on the hook also causes damage. Following the removal instructions reduces damage risks.
Tools And Materials Needed
Fixing wall damage caused by Command hooks requires the right tools and materials. Using proper supplies makes the repair smoother and more effective. Prepare everything before starting to save time and avoid frustration.
Basic Repair Supplies
Start with spackling paste to fill small holes and dents. A putty knife helps spread the paste evenly. Sandpaper smooths the surface after the paste dries. Use a clean cloth to wipe dust away. Primer and paint match the wall color and hide repairs.
Optional Tools For Better Results
A small paintbrush allows precise painting on repaired spots. A sanding block offers better grip and control than loose sandpaper. A damp sponge can clean the area before repair. Painter’s tape protects surrounding areas from paint. A utility knife trims rough edges around holes.
Preparing The Damaged Area
Preparing the damaged area is the first step to fixing wall damage caused by Command hooks. This step makes sure the wall is ready for repair materials. Proper preparation helps the patch last longer and look smooth. Start by removing all leftover sticky residue. Then clean the surface well. These actions create a clean, smooth base for repair.
Removing Residue
Command hooks often leave sticky residue on the wall. Remove this residue carefully to avoid further damage. Use your fingers or a plastic scraper to peel off large bits. For sticky spots, apply a small amount of rubbing alcohol or adhesive remover on a cloth. Gently rub the residue until it lifts away. Avoid harsh scrubbing, which can harm the wall surface.
Cleaning The Surface
After removing residue, clean the wall to remove dust and oils. Use a soft cloth dampened with warm, soapy water. Wipe the damaged area gently but thoroughly. This step removes dirt that can stop repair materials from sticking. Let the wall dry completely before starting repairs. A clean, dry wall gives the best results.
Filling Small Holes And Tears
Small holes and tears from Command hooks can ruin your wall’s look. Fixing them is simple with the right tools and steps. Filling these spots makes your wall smooth and ready for paint. The process needs care to get the best results.
Choosing The Right Filler
Use a filler that fits the size of the hole or tear. For tiny holes, spackling paste works well. It dries fast and is easy to sand. For bigger holes, try joint compound or wall putty. These provide a stronger repair. Check if the filler is paintable. This helps to match your wall color perfectly.
Applying And Smoothing Filler
Start by cleaning the damaged area. Remove any loose paint or debris. Use a putty knife to apply the filler gently. Press it into the hole or tear fully. Spread the filler evenly over the surface. Let it dry according to the package instructions. After drying, sand the area smoothly. Use fine-grit sandpaper for best results. Wipe away dust before painting.
Fixing Larger Wall Damage
Larger wall damage from Command hooks needs more care to fix. Small holes or marks can be easy, but bigger holes or torn paint need extra steps. Fixing these damages makes your wall look smooth and new again. This section explains how to repair bigger damage using simple tools and materials.
Using Patch Kits
Patch kits are great for fixing bigger holes or cracks. They usually come with putty, a spreader, and sometimes sandpaper. First, clean the damaged area well. Remove any loose paint or debris. Then, apply the putty from the kit to fill the hole. Use the spreader to smooth the putty evenly over the damage. Let it dry completely. Drying time depends on the putty type, usually a few hours.
Sanding And Smoothing
After the putty dries, the surface may feel rough or uneven. Use fine-grit sandpaper to gently sand the patched area. Sand until the patch blends with the rest of the wall. Be careful not to over-sand and damage the surrounding paint. Wipe away dust with a clean cloth. The wall should feel smooth and ready for painting or touch-ups.

Credit: www.reddit.com
Painting And Finishing Touches
Painting and finishing touches are the final steps in fixing wall damage caused by Command hooks. These steps help make the repair look natural and clean. Proper painting hides the patch and blends it with the rest of the wall. Finishing touches add a smooth and polished look. This part requires care and patience to get the best results.
Matching Wall Paint
Start by finding paint that matches your wall’s color exactly. Check your paint cans for the original color code. If you do not have it, take a small paint chip to a store. Many stores can match the color with special tools. Use the same type of paint, like matte or satin, for the best blend.
Test the paint on a hidden spot first. This step shows how close the color match is. Let it dry fully before deciding to use it on the repair.
Blending Repairs Seamlessly
Apply the paint gently over the patched area. Use a small brush or roller for control. Paint beyond the patch edges to help blend it with the wall. Thin coats work better than thick layers. Let each coat dry before adding the next one.
Feather the paint outwards by lightly brushing around the edges. This technique softens the transition between old and new paint. Avoid harsh lines that make the patch obvious. Take your time. The goal is to make the repair invisible to the eye.
Preventing Future Damage
Preventing future damage from Command hooks starts with careful use and smart choices. Small changes in how you use hooks can protect your walls. Knowing the right way to apply and remove hooks helps keep walls intact. Exploring other hanging options also reduces the risk of damage. These steps save time and money on repairs.
Proper Command Hook Use
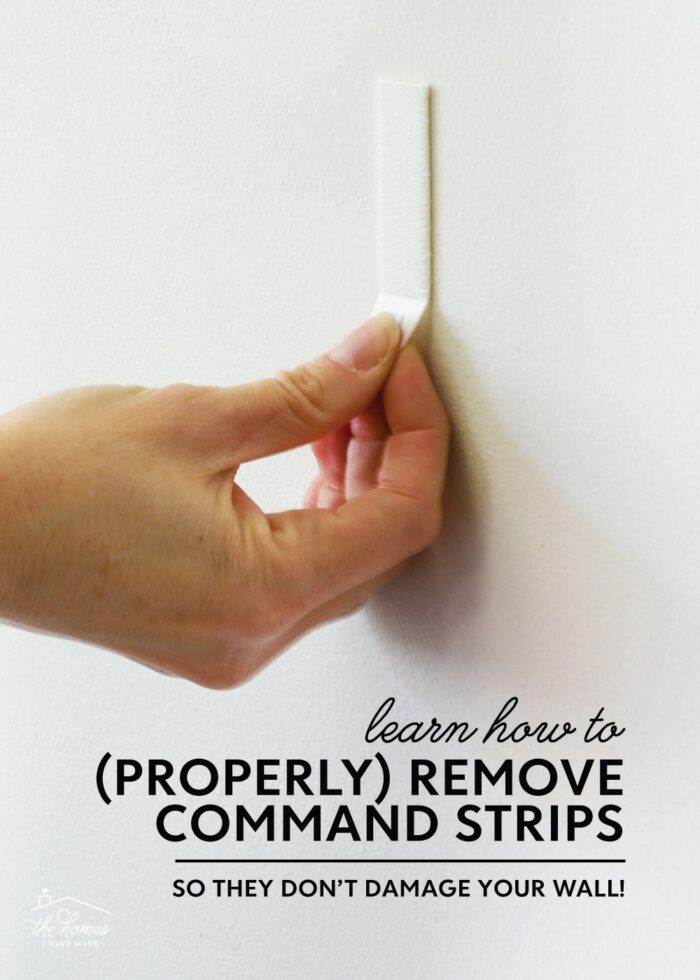
Follow the instructions on the package carefully. Clean the wall surface with rubbing alcohol before applying. Avoid using hooks on wallpaper or textured walls. Press the hook firmly for 30 seconds to secure it well. Wait one hour before hanging anything. Remove hooks slowly by pulling the tab down, not out. Using the right size hook for the weight prevents falls and marks.
Alternative Hanging Methods
Try adhesive strips made for delicate walls. Use removable mounting putty for lightweight items. Picture hanging strips can hold frames without holes. Consider tension rods for curtains or decorations. Small shelves with brackets offer strong support. Use nails or screws only on walls that can handle them. Each method suits different wall types and weights.
Credit: thehomesihavemade.com
Frequently Asked Questions
How Do You Remove Command Hooks Without Damaging Walls?
To remove Command hooks safely, pull the adhesive strip slowly downward. Avoid pulling outward to prevent wall damage. This method reduces paint peeling and maintains wall integrity. Always follow the product instructions for best results.
What Materials Fix Holes Left By Command Hooks?
Use spackling paste or wall filler to fix holes. Apply with a putty knife and smooth the surface. Let it dry completely before sanding lightly. Paint over the patched area to match the wall color.
Can I Repaint After Fixing Command Hook Damage?
Yes, repainting after repairing is recommended. Use primer first for better paint adhesion. Choose matching paint to blend the repair seamlessly. This restores your wall’s original look effectively.
How Long Does It Take To Fix Wall Damage?
Fixing small holes from Command hooks usually takes a few hours. Drying time for filler can range from 30 minutes to several hours. Painting may add extra time depending on coat layers.
Conclusion
Fixing wall damage from Command hooks takes simple steps. Clean the area well before starting repairs. Use spackle or putty to fill holes. Let it dry completely. Sand the spot smooth for a neat finish. Paint over to match your wall color.
Small damages can disappear quickly with care. Taking time to fix walls keeps your space looking fresh. Try these easy fixes and enjoy a clean, damage-free wall again.