Are you ready to make your home smarter and more convenient? Connecting your Wemo Light Switch to WiFi is easier than you think, and it opens up a world of control right at your fingertips.
Imagine turning your lights on or off from anywhere, setting schedules, and saving energy without lifting a finger. In this guide, you’ll discover simple, step-by-step instructions to get your Wemo Light Switch online quickly. Keep reading, and you’ll be enjoying smart lighting in no time.
Credit: www.homedepot.com
Prepare Your Wemo Switch
Preparing your Wemo Light Switch before connecting it to WiFi is important. Proper preparation helps avoid issues during installation. It also keeps you safe and ensures the switch works well with your network.
This section guides you through the key steps to get your Wemo switch ready. Follow each step carefully for a smooth setup experience.
Check Compatibility
Make sure your Wemo Light Switch is compatible with your home WiFi. It usually supports 2.4 GHz networks, not 5 GHz. Verify your router settings before starting. Also, confirm the switch works with your home’s wiring system.
Gather Necessary Tools
Collect all tools needed for installation. You will need a screwdriver, voltage tester, and wire stripper. Having these ready saves time. Keep the Wemo switch manual nearby for reference.
Turn Off Power Safely
Switch off the power at your circuit breaker. This prevents electric shocks while installing the switch. Use a voltage tester to double-check the wires have no power. Safety first, always.
Install The Wemo Light Switch
Installing the Wemo Light Switch is the next step after gathering your tools. This process replaces your old switch with the smart one. Careful installation ensures your switch works safely and connects to WiFi without issues.
Remove Existing Switch
Start by turning off power at the circuit breaker. Use a tester to confirm no electricity flows to the switch. Remove the switch cover plate with a screwdriver. Unscrew the old switch from the wall box. Carefully pull the switch out to expose the wires.
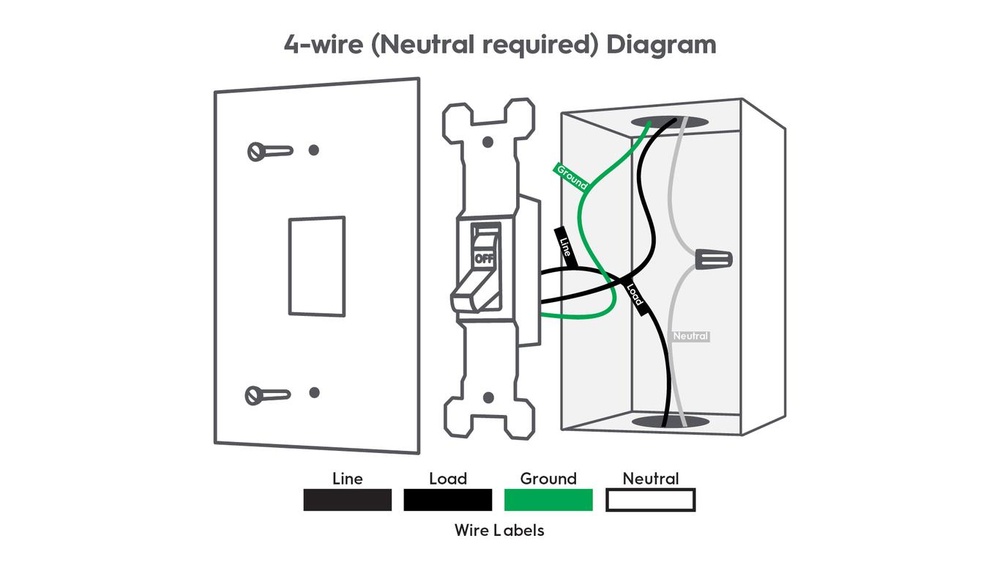
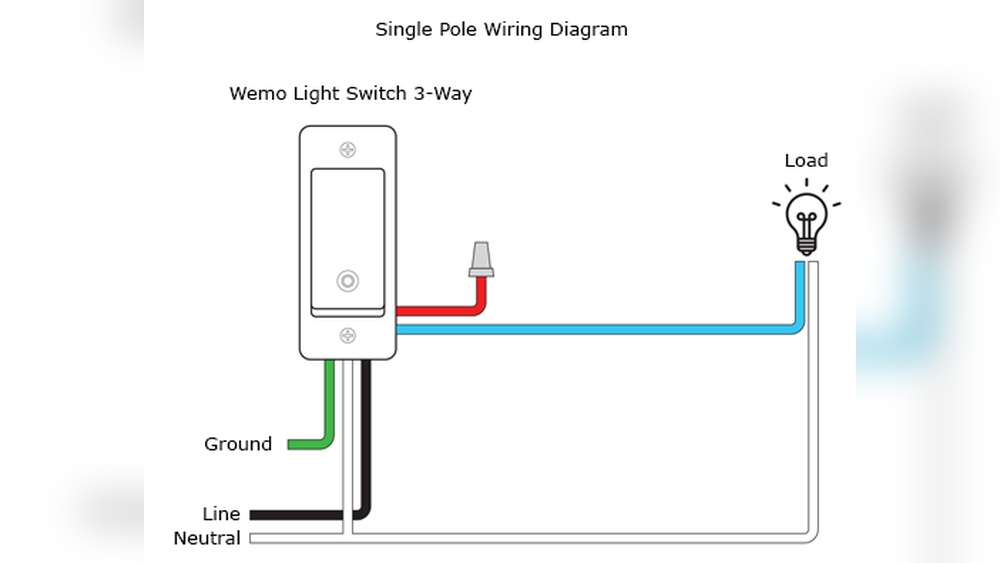
Connect Wires Correctly
Identify the wires: line, load, neutral, and ground. Match each wire to the Wemo switch terminals. Connect the neutral wire to the neutral terminal. Attach the line wire to the line terminal. Connect the load wire to the load terminal. Secure the ground wire to the grounding screw. Tighten all wire connections firmly to prevent loose contacts.
Secure The Switch In Place
Push the wires gently back into the wall box. Align the Wemo switch with the mounting holes. Use screws to fix the switch firmly to the box. Attach the cover plate over the switch. Turn the power back on at the breaker. Your switch is now ready for WiFi setup.
Set Up Wifi Connection
Setting up the WiFi connection for your Wemo Light Switch is easy. This step links your smart switch to your home network. Once connected, you control lights from anywhere using your phone. Follow these steps to connect your Wemo Light Switch to WiFi quickly.
Download The Wemo App
Start by downloading the Wemo app on your smartphone. The app is available for both Android and iOS devices. Search for “Wemo” in the Google Play Store or Apple App Store. Install the app and open it to begin setup.
Create A Wemo Account
Next, create a Wemo account for secure access. Open the app and tap “Sign Up.” Enter your email address and create a strong password. Confirm your details and accept the terms of service. Your account will help manage all your Wemo devices.
Connect To Home Wifi Network
Now, connect the Wemo Light Switch to your home WiFi. Make sure your phone is connected to the same WiFi network. In the app, follow the instructions to find your Wemo switch. Select your home WiFi network and enter the password. Wait a moment for the switch to connect. Once connected, your Wemo switch is ready to use.
Pair Wemo Switch With Wifi
Pairing your Wemo Light Switch with WiFi is the key step to control your lights remotely. This process connects the switch to your home network. It lets you use the Wemo app to turn lights on or off from anywhere.
The pairing is simple and takes just a few minutes. Follow the steps below to get your Wemo switch online and ready to use.
Put Switch In Setup Mode
First, put your Wemo switch in setup mode. Press and hold the button on the switch for about 5 seconds. The LED light will start blinking quickly. This means the switch is ready to connect to WiFi.
Follow App Instructions
Open the Wemo app on your smartphone. The app will guide you step-by-step. Choose your WiFi network and enter the password. Make sure your phone is connected to the same WiFi network. The app will search and connect to your switch.
Confirm Successful Connection
After the setup, check the LED light on the switch. It should stop blinking and glow steadily. The app will show a success message. Now, your Wemo switch is connected to WiFi and ready to control your lights.
Troubleshoot Common Issues
Troubleshooting common issues helps keep your Wemo Light Switch working smoothly. Problems can stop the switch from connecting to your WiFi or app. Fixing these problems is easier than you think. Follow simple steps to solve them quickly.
Wifi Signal Problems
Weak WiFi signals cause connection issues. Place the Wemo switch near the router for a stronger signal. Thick walls and distance reduce signal strength. Try moving your router closer to the switch. Avoid interference from other devices like microwaves or cordless phones. Check your WiFi speed; slow internet can affect performance.
App Connectivity Errors
App errors can stop you from controlling the switch. Make sure the Wemo app is updated to the latest version. Close and reopen the app to refresh the connection. Restart your phone to clear temporary bugs. Check if your phone and the Wemo switch are on the same WiFi network. Disable VPNs or firewalls that might block the app.
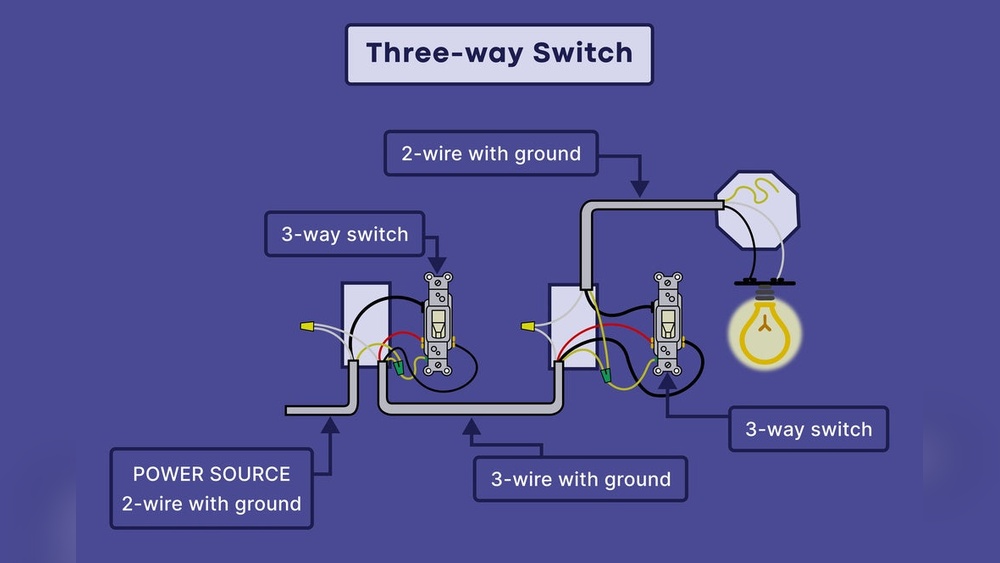
Resetting The Wemo Switch
Resetting the switch fixes many issues quickly. Press and hold the reset button for 10 seconds. Wait for the LED light to blink amber and then green. This process erases old settings and returns the switch to factory defaults. After resetting, reconnect the switch to your WiFi using the app. Resetting can solve stubborn connection problems.

Credit: www.reddit.com
Optimize Wemo Switch Performance
Optimizing your Wemo Light Switch ensures it works smoothly and lasts longer. Proper care helps avoid connection problems and boosts performance. Small steps make a big difference in daily use.
Update Firmware Regularly
Keep your Wemo Switch firmware updated. Updates fix bugs and improve features. Check the Wemo app for new updates often. Installing updates keeps your switch secure and reliable.
Use Voice Control Features
Use voice commands to control your Wemo Switch easily. Connect it with Alexa, Google Assistant, or Siri. Voice control adds convenience and saves time. Speak simple commands to turn lights on or off.
Integrate With Smart Home Devices
Link your Wemo Switch with other smart devices. Use smart hubs or apps for better control. Integration creates a seamless home automation experience. Schedule lights or sync with sensors to save energy.

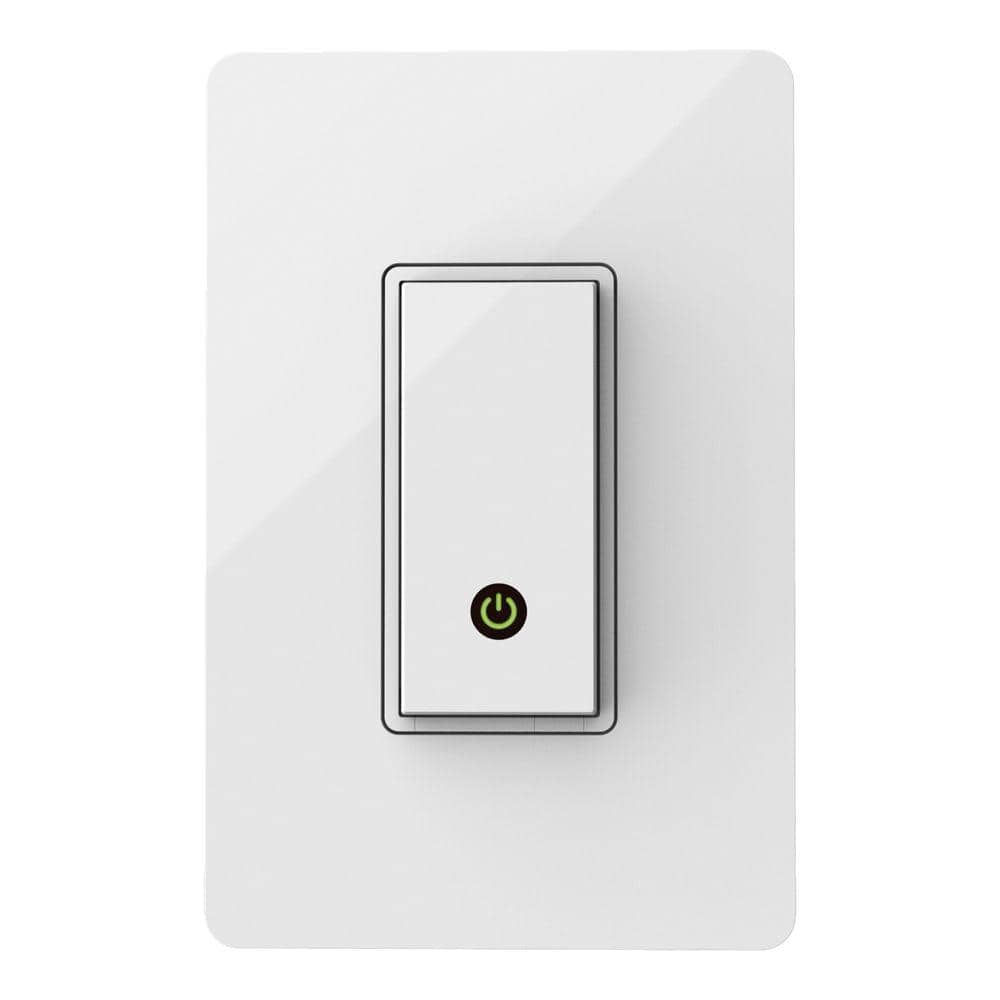
Credit: www.belkin.com
Frequently Asked Questions
How Do I Connect Wemo Light Switch To Wifi?
To connect your Wemo Light Switch to WiFi, first install the switch. Open the Wemo app, follow the setup prompts, and select your WiFi network. Enter your WiFi password to complete the connection. Ensure your phone is on the same WiFi network during setup.
What Wifi Frequency Does Wemo Light Switch Use?
Wemo Light Switch supports 2. 4 GHz WiFi networks only. It does not work with 5 GHz networks. Ensure your router broadcasts a 2. 4 GHz signal for proper connection and operation of your Wemo device.
Why Won’t My Wemo Light Switch Connect To Wifi?
Connection issues often stem from weak WiFi signals or incorrect passwords. Restart your router and switch. Verify your phone is on the same 2. 4 GHz network. Reset the switch if needed and retry the setup process in the Wemo app.
Can I Use Wemo Light Switch Without Wifi?
No, the Wemo Light Switch requires a WiFi connection to function. It communicates through your home network to allow remote control and automation via the Wemo app or voice assistants.
Conclusion
Connecting your Wemo light switch to WiFi is simple and quick. Follow each step carefully for the best results. Once connected, you can control your lights from anywhere. This adds comfort and convenience to your daily life. Enjoy hands-free lighting with voice commands or app control.
Troubleshoot any issues by restarting your router or switch. Stay patient, and the process will go smoothly. Now, your smart home setup is ready to use.