Are you tired of harsh lighting that makes your room feel cold and uninviting? Installing a dimmer light switch can instantly change the mood, giving you full control over brightness.
Imagine setting the perfect light for movie nights, cozy dinners, or focused work without getting up. In this guide, you’ll learn exactly how to install a dimmer light switch quickly and safely—even if you’re not an expert. Keep reading, and you’ll discover simple steps that bring comfort and style to your home with just a few tools and some easy wiring.

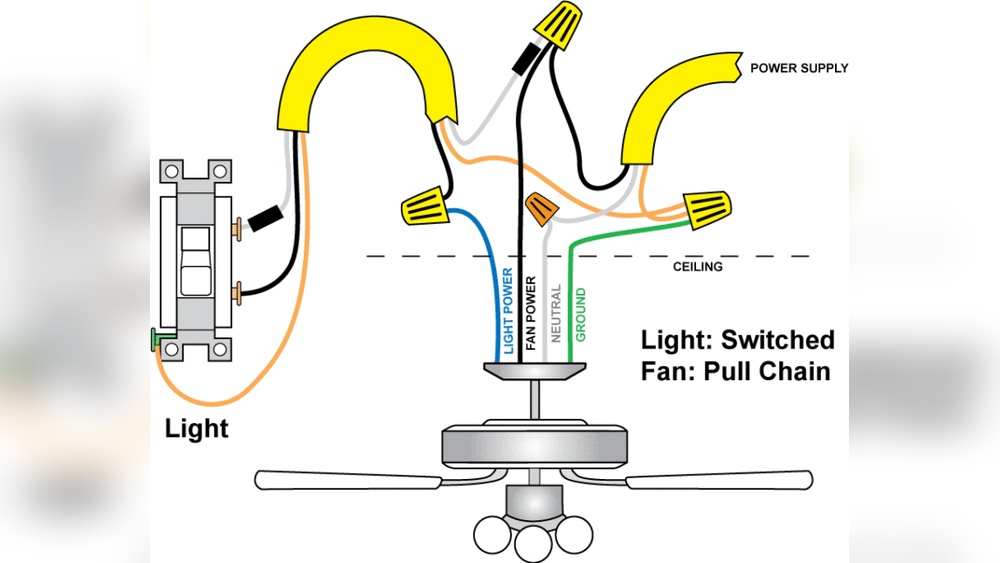
Credit: www.gelighting.com
Tools And Materials Needed
Installing a dimmer light switch requires the right tools and materials. These help make the job safer and easier. Having everything ready saves time and avoids frustration.
Below is a list of essential items to gather before starting your installation. Each tool has a specific purpose for handling electrical parts and wiring.
Safety Gear
Wear safety gloves to protect your hands. Use safety goggles to shield your eyes from dust or sparks. Safety first.
Screwdrivers
A flathead screwdriver and a Phillips-head screwdriver are necessary. They help remove and attach screws on the switch plate and wiring terminals.
Voltage Tester
This tool checks if the power is off. It keeps you safe by preventing electric shocks during installation.
Wire Strippers
Wire strippers remove the insulation from wires cleanly. This is important for making good electrical connections.
Dimmer Switch
Choose the correct dimmer switch for your light type. Check compatibility with LED or incandescent bulbs.
Electrical Tape
Use electrical tape to wrap wire connections. It insulates wires and prevents short circuits.
Wire Nuts
Wire nuts secure wire ends together. They create safe and stable connections inside the switch box.
Flashlight
A flashlight helps you see better in dark areas. It is useful when the power is off during installation.
Safety Precautions
Working with electrical switches requires care. Safety is the top priority. Before starting the installation of a dimmer light switch, understanding safety rules helps prevent accidents. Follow all precautions to protect yourself and your home.
Turn Off The Power
Always switch off power at the circuit breaker. Do not rely on the wall switch alone. Use a voltage tester to confirm no electricity flows to the wires. This step is crucial to avoid electric shocks.
Use Proper Tools
Select insulated tools designed for electrical work. Avoid using damaged or worn tools. Proper tools reduce the risk of slipping or causing shorts. Keep tools organized and within reach.
Wear Safety Gear
Wear rubber-soled shoes to reduce shock risk. Use safety glasses to protect eyes from sparks or debris. Avoid loose clothing that can catch on wires or tools. Gloves are optional but can protect your hands.
Check For Wire Damage
Inspect wires for cuts or frays before connecting the dimmer. Damaged wires can cause shorts or fires. Replace any damaged wiring with new, approved wire. Do not twist or force wires into place.
Follow Manufacturer Instructions
Read and understand the dimmer switch instructions fully. Each model may have specific wiring or load limits. Proper installation ensures safe and correct operation. Do not guess or skip steps in the manual.
Turn Off Power
Turning off the power is the first and most important step before installing a dimmer light switch. It keeps you safe from electric shock. Always treat electricity with respect. Never skip this step.
Before touching any wires, make sure the power to the switch is completely off. This prevents accidents and damage to your home’s electrical system. Safety first.
Locate The Circuit Breaker
Find the main electrical panel in your home. Look for the circuit breaker that controls the light switch you want to change. It usually has labels or numbers. This helps you identify the correct breaker quickly.
Switch Off The Power
Flip the circuit breaker to the off position. This stops electricity from reaching the switch. Double-check by turning the light switch on and off. The light should not turn on.
Use A Voltage Tester
Test the switch wires with a voltage tester. It confirms no electricity is flowing. This tool is easy to use and very important for safety. Never touch wires without testing first.

Credit: icar.vn
Remove Existing Switch
Removing the existing switch is the first step to install a dimmer light switch. This step helps you work safely and correctly. You need to turn off the power to avoid electric shock. Take your time and follow each step carefully.
Turn Off The Power
Go to your home’s circuit breaker panel. Find the switch that controls the light circuit. Flip the breaker to the off position. Test the switch by turning the light on. Make sure it does not work.
Remove The Switch Plate
Use a screwdriver to remove the screws on the switch plate. Take off the plate carefully. Set the screws and plate aside. This gives you access to the switch inside the wall.
Unscrew The Existing Switch
Remove the screws holding the switch in place. Gently pull the switch out of the wall box. Do not pull too hard to avoid damage. Keep the wires connected for now.
Note Wire Connections
Look closely at how wires connect to the switch. Take a photo or write notes. This helps when connecting the dimmer switch later. Remember the position of each wire.
Disconnect The Wires
Use a screwdriver to loosen the terminal screws. Carefully disconnect each wire from the switch. Keep the wires apart to avoid contact. Prepare them for the dimmer switch installation.
Identify Wiring
Start by turning off the power to avoid shock. Locate the wires: typically, black is live, white is neutral, and green or bare is ground. Properly identifying these helps connect the dimmer switch safely.
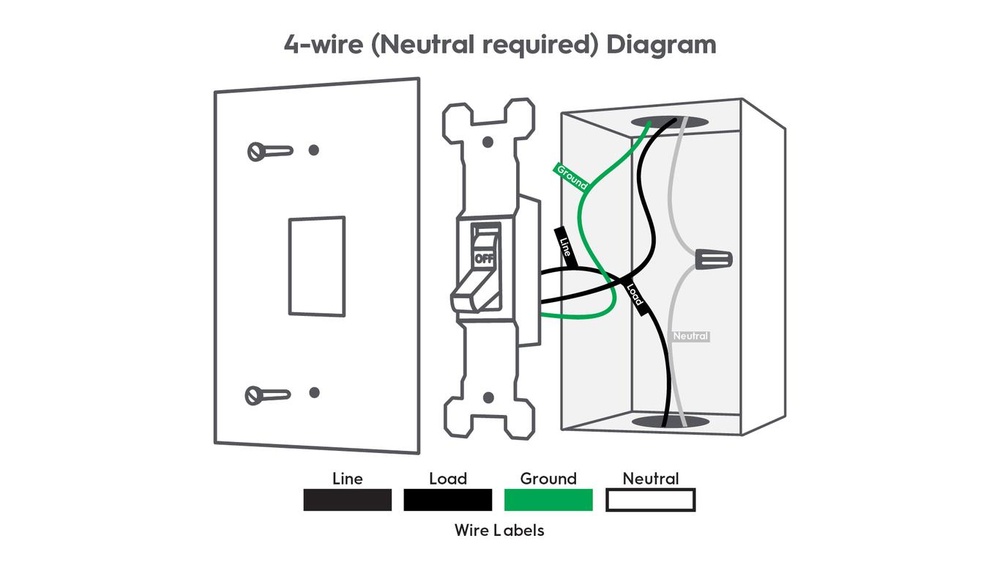
Understanding The Types Of Wires
Before installing a dimmer switch, identify the wires in your wall box. Most homes have three main wires: live (hot), neutral, and ground. The live wire carries electricity to the switch. The neutral wire completes the circuit back to the power source. The ground wire is for safety and prevents electrical shocks.
Using A Voltage Tester Safely
Turn off the power at the circuit breaker. Use a voltage tester to check each wire. The tester shows which wire is live. This step avoids electric shock. Never touch wires with bare hands until you confirm the power is off.
Recognizing Wire Colors
Wire colors help identify their function. Usually, black or red wires are live. White wires are neutral. Green or bare copper wires are ground. Some older homes may have different colors. Always test wires to be sure.
Labeling Wires For Easy Installation
Label each wire with tape or a marker. Mark live, neutral, and ground wires clearly. This step helps when connecting the dimmer switch. Correct connections ensure the switch works safely and properly.
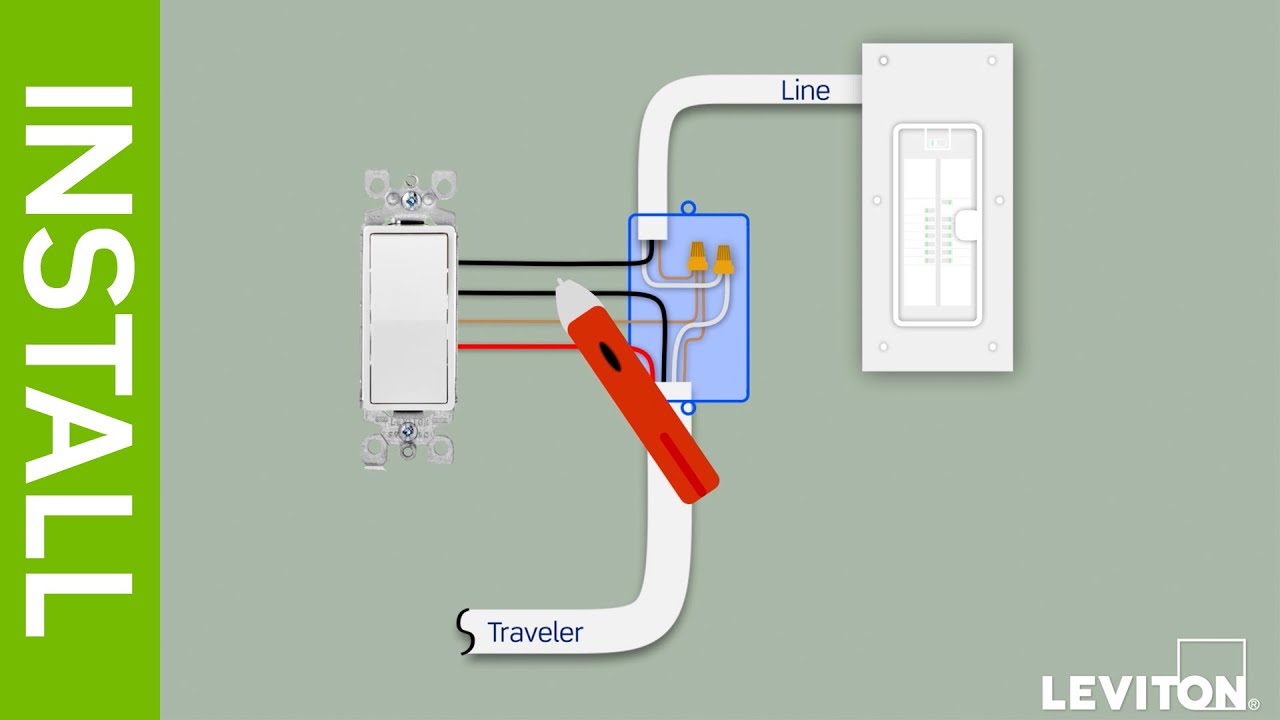
Connect Dimmer Switch Wires
Connecting the dimmer switch wires is a key step in installing a dimmer light switch. It ensures the switch works correctly and safely. Follow clear, simple steps to make sure each wire connects properly.
Before starting, turn off the power at the circuit breaker. This prevents electric shocks during installation. Use a voltage tester to confirm the wires are not live.
Identify The Wires
First, find the wires in the wall box. Usually, there are three types: live (hot), load, and ground. The live wire carries power from the breaker. The load wire goes to the light fixture. The ground wire is for safety and is usually green or bare copper.
Match Dimmer Switch Wires
Look at the wires on your dimmer switch. Most have two black wires and one green or copper ground wire. Some dimmers also have a red wire for three-way switches. Match each wire to the correct wire in the wall box.
Connect The Wires Securely
Use wire nuts to join each pair of wires. Twist the wires together clockwise. Screw the wire nut on tightly. Tug lightly on the wires to check for a secure fit. Connect the ground wire last by twisting it with the dimmer’s ground wire and the box’s ground wire.
Secure The Dimmer Switch
Securing the dimmer switch is a key step in the installation process. It keeps the switch stable and safe to use. A loose switch may cause flickering or electrical hazards.
Follow these simple steps to secure your dimmer switch correctly. This ensures smooth operation and a neat finish.
Check The Switch Box Alignment
Make sure the switch box is flush with the wall surface. Use a level tool to verify it is straight. Adjust the box if it sticks out or is recessed.
Attach The Dimmer Switch To The Box
Place the dimmer switch into the box carefully. Align the screw holes on the switch with those on the box. Use a screwdriver to tighten the screws gently. Do not over-tighten to avoid damaging the switch.
Test The Stability Of The Switch
After tightening, wiggle the switch slightly. It should not move or feel loose. If it moves, tighten the screws a bit more until secure.
Install The Wall Plate
Place the wall plate over the dimmer switch. Align the screw holes and insert screws. Tighten these screws evenly to hold the plate firmly in place.
Final Check For Safety
Confirm all screws are tight and the switch is stable. Turn the power back on and test the dimmer switch. It should work smoothly without any wobbling.
Restore Power And Test
After installing your dimmer switch, restoring power and testing it is the next step. This phase ensures the switch works safely and controls the lights correctly.
Take your time to check everything carefully. A smooth test means a successful installation.
Turn The Circuit Breaker Back On
Find your home’s main electrical panel. Switch the circuit breaker back to the “on” position. This action restores power to the switch and the connected lights. Avoid touching wires or the switch until the power is on.
Test The Dimmer Switch Functionality
Flip the dimmer switch on. Observe the light. Does it turn on? Use the dimmer control to adjust brightness. The light should get brighter or dimmer smoothly. If it flickers or doesn’t work, turn off the breaker and check wiring.
Check For Unusual Sounds Or Smells
Listen for buzzing or humming sounds from the switch. Smell for any burning odors. These signs suggest a problem. Turn off the power immediately. Inspect the installation or call an electrician.
Troubleshooting Common Issues
Installing a dimmer switch can improve your room’s lighting. Sometimes, issues arise after installation. These problems often have simple fixes. Troubleshooting helps avoid extra costs and frustration.
Read on to find common problems and easy solutions.
Check For Loose Wires
Loose wires cause flickering or no light. Turn off power before checking. Tighten all wire connections. Use wire nuts to secure wires. Loose wires can stop the switch from working.
Verify Compatibility With Bulbs
Not all bulbs work with dimmers. Use dimmable LED or incandescent bulbs. Non-dimmable bulbs may flicker or not dim. Check the bulb package for compatibility. Using the right bulb avoids many issues.
Inspect The Dimmer Switch Rating
Dimmer switches have a maximum wattage limit. Exceeding this can cause problems. Add the wattage of all bulbs on the circuit. Ensure total wattage is below the dimmer’s rating. Overloading may cause switch failure.
Reset The Circuit Breaker
A tripped breaker can stop the dimmer from working. Turn off the dimmer switch. Reset the breaker by flipping it off and on. Turn the dimmer back on. This simple step can restore power.
Test The Switch For Faults
The dimmer itself may be defective. Swap it with a normal switch to test. If the lights work, replace the dimmer. Faulty switches cause flickering or no light. Testing saves time and guesswork.
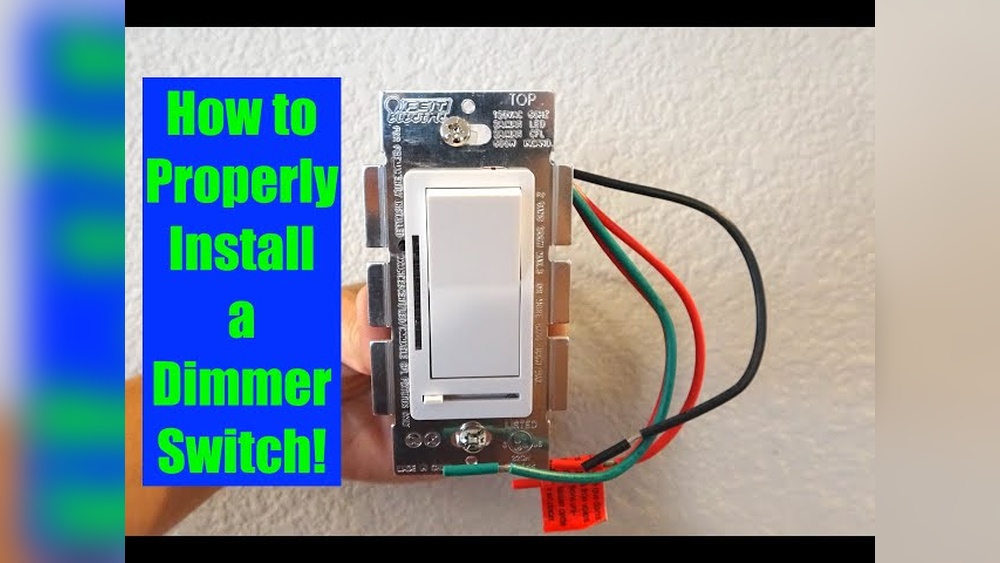
Credit: www.youtube.com
Tips For Choosing The Right Dimmer
Choosing the right dimmer switch is key to a smooth installation and perfect lighting. Dimmer switches come in many types. Picking the correct one helps avoid flickering and other issues. It also ensures your lights dim smoothly and safely.
Understanding Your Light Bulb Type
Check what kind of bulbs your lights use. Incandescent and halogen bulbs need different dimmers than LED or CFL bulbs. Using the wrong dimmer can cause buzzing or flickering. Match the dimmer to your bulb type for best results.
Check The Wattage Rating
Each dimmer switch has a maximum wattage limit. Add up the wattage of all bulbs on the circuit. Choose a dimmer with a wattage rating higher than this total. This prevents overload and protects your dimmer switch.
Choose The Right Dimmer Style
Dimmers come in various styles like rotary, slide, and touch. Pick one that fits your room’s look and your ease of use. Some dimmers offer remote control or smart features. Choose simple models for basic control.
Consider Your Wiring Setup
Check if your switch box has a neutral wire. Some dimmers need a neutral wire to work properly. Older homes may lack this wire. Choose dimmers that do not require a neutral wire if needed.
Frequently Asked Questions
What Tools Do I Need To Install A Dimmer Switch?
You need a screwdriver, voltage tester, wire stripper, and electrical tape. These tools help safely remove the old switch and install the dimmer.
Can I Install A Dimmer Switch Myself Safely?
Yes, you can if you turn off the power first. Follow instructions carefully and use a voltage tester to ensure safety.
Will A Dimmer Switch Work With Led Bulbs?
Most modern dimmer switches are compatible with LED bulbs. Check the packaging to confirm compatibility before purchasing.
How Do I Know If My Wiring Supports A Dimmer Switch?
Look for three wires: live, load, and ground. If unsure, consult an electrician to verify your wiring setup.
Conclusion
Installing a dimmer light switch can change your room’s mood easily. It saves energy and helps protect your bulbs. Follow the steps carefully for safe and smooth work. Always turn off power before starting any electrical task. Take your time, and don’t rush the process.
Enjoy the new control over your lighting once done. Brightness at your fingertips. Simple, smart, and effective. You got this!