Have you ever wanted to control three lights with just one switch but weren’t sure how to do it? Connecting multiple lights to a single switch might sound tricky, but it’s easier than you think.
Imagine turning on all your room’s lights with one simple flick—no more running around flipping separate switches. In this guide, you’ll learn step-by-step how to make this happen safely and effectively. Keep reading, and by the end, you’ll have the confidence to brighten up your space exactly how you want.
Tools And Materials Needed
To connect three lights to one switch, having the right tools and materials is key. These items make the job easier and safer. Preparing everything before starting saves time and stress.
Essential Tools
- Screwdriver (flathead and Phillips)
- Wire stripper
- Voltage tester
- Needle-nose pliers
- Electrical tape
- Drill (optional for mounting)
Required Materials
- Light switch rated for your circuit
- Three light fixtures
- Electrical wire (14/2 or 12/2 gauge)
- Wire connectors (wire nuts)
- Switch box
- Mounting screws
Credit: www.youtube.com
Safety Precautions
Working with electrical wiring can be risky. Safety is the top priority before starting. Taking the right precautions protects you from shocks and injuries. Follow these simple safety steps to keep the task safe and smooth.
Power Shutoff
Turn off the power at the main circuit breaker. This stops electricity from flowing to the switch and lights. Use a voltage tester to make sure the power is off. Never trust the switch position alone. Always double-check before touching wires.
Protective Gear
Wear insulated gloves to protect your hands from shocks. Use safety glasses to shield your eyes from sparks or debris. Avoid loose clothing that can catch on wires or tools. Proper gear helps prevent accidents and keeps you safe.
Basic Electrical Concepts
Understanding basic electrical concepts is key to safely connecting three lights to one switch. Knowing how wiring works and what a switch does helps you set up the circuit correctly. This knowledge prevents mistakes and keeps your home safe.
Wiring Types
Electrical wiring comes in different types. The most common are live, neutral, and ground wires. Live wires carry electricity from the power source to the device. Neutral wires return the current back to the power source. Ground wires protect from electrical shocks by directing excess electricity into the earth.
For connecting three lights to one switch, you mainly work with live and neutral wires. Each light needs to connect to the neutral wire to complete the circuit. The live wire runs through the switch to control the power flow to all three lights.
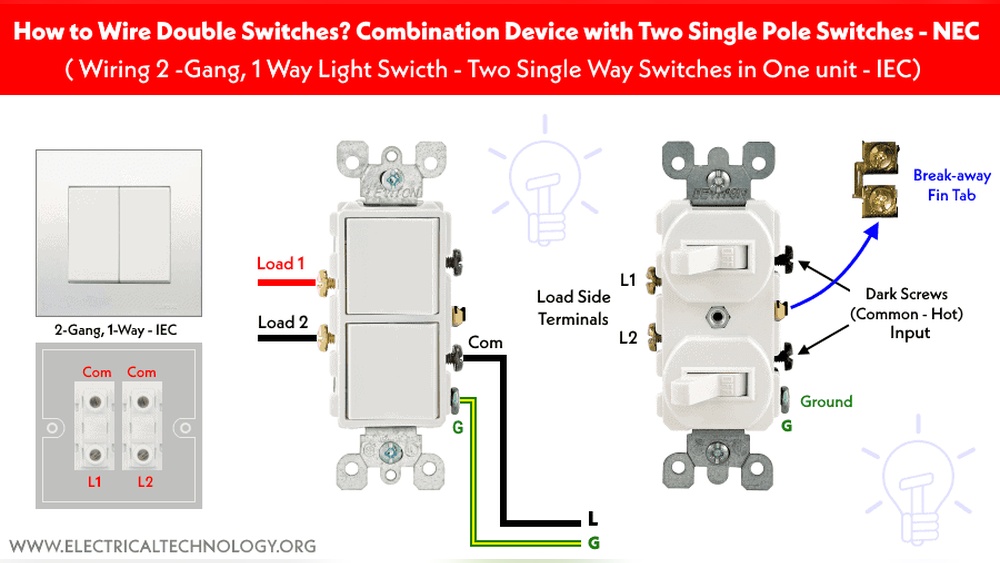
Switch Functions
A switch controls the flow of electricity in a circuit. It acts like a gate that opens or closes the path for the electric current. When the switch is on, electricity flows to the lights, and they turn on. When off, the circuit is broken, and the lights go out.
One switch can control multiple lights by connecting all their live wires in parallel. This setup lets the switch send power to all lights at once. Understanding the switch’s role helps you wire the lights properly and safely.

Credit: diy.stackexchange.com
Preparing The Wiring Setup
Preparing the wiring setup is the first step to connect three lights to one switch. It ensures safety and smooth operation. You need to understand the wires you will handle. Also, planning the circuit properly will help you avoid mistakes. This section breaks down these tasks clearly.
Identifying Wires
Start by turning off the power at the breaker box. Use a voltage tester to check wires for electricity. Look for three main wires: the live (hot), neutral, and ground wires. The live wire usually has black or red insulation. The neutral wire is often white. The ground wire is green or bare copper. Label each wire with tape for easy recognition later. This step prevents confusion during the connection process.
Planning The Circuit
Draw a simple diagram showing the switch and three lights. Decide how wires will run from the switch to each light. The switch controls the live wire to all lights. Connect the neutral wires from all lights together in the circuit. Ground wires should also connect to each light and the switch box. Planning this layout helps you arrange the wires neatly. It reduces the risk of wiring errors and electrical faults.
Connecting The Lights To The Switch
Connecting three lights to one switch requires careful planning and proper wiring. This step controls all the lights together with one switch. The goal is to make the setup safe and efficient. Understanding the wiring method helps avoid common problems like flickering or power loss.
Focus on wiring the switch correctly first. Then, choose the best way to connect the lights. The two main ways are series and parallel. Each method affects how the lights work and how much power they use.
Wiring The Switch
Start by turning off the power at the circuit breaker. Safety is the top priority. Use a voltage tester to check wires before touching them. Connect the power source’s live wire to one terminal of the switch.
Next, connect the other terminal of the switch to the live wire going to the lights. The neutral wires from the power source and the lights join together in the electrical box. Ground wires must be connected to the switch’s ground terminal and the box if it is metal.
Make sure all connections are tight. Loose wires can cause sparks or failures. Use wire nuts to secure each connection and wrap them with electrical tape for extra safety.
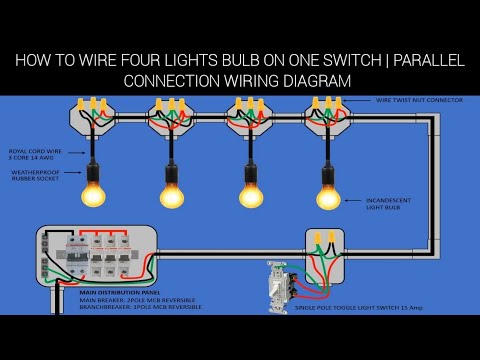
Connecting Lights In Series Vs Parallel
Wiring lights in series means connecting them one after another. The power flows through each light in order. This setup is simple but has downsides. If one light burns out, all lights go off. The brightness also decreases with each light.
Parallel wiring connects each light directly to the power source. All lights receive the same voltage. If one light fails, the others stay on. This method keeps brightness steady and is safer for home use. Parallel wiring is the best choice for most lighting setups.
Use parallel wiring for three lights on one switch. It ensures consistent lighting and reliable performance. Double-check connections for each light’s live, neutral, and ground wires. Proper wiring extends the life of your lights and switch.
Testing The Installation
Testing the installation is a key step after wiring three lights to one switch. This step ensures your work is safe and the lights function correctly. Skipping this part can cause problems or hazards later.
Restoring Power
First, turn the main power back on at the circuit breaker. This action restores electricity to the switch and lights. Wait a few seconds to let the system stabilize. Avoid touching any wires during this time to stay safe.
Checking Light Functionality
Flip the switch to turn the lights on. Watch each light carefully. They should all turn on without flickering. Turn the switch off and check that all lights go out. If a light does not work, double-check your wiring. Fix any loose connections before testing again.
Troubleshooting Common Issues
Troubleshooting is a key step when connecting three lights to one switch. Problems can happen, but most have easy fixes. Understanding common issues helps save time and effort.
Check each part carefully. The switch, wiring, and bulbs all play a role. Knowing what to look for helps find the problem fast.
Lights Not Turning On
First, ensure the power is on. Check the circuit breaker or fuse box. Sometimes a tripped breaker stops power flow.
Inspect the switch wiring. Loose or wrong connections can block electricity. Tighten wires and match colors correctly.
Test the bulbs. Burned-out bulbs will not light. Replace any faulty bulbs before testing again.
Look for damaged wires. Cuts or frays break the circuit. Replace or repair any damaged wiring.
Flickering Or Dim Lights
Flickering often means a loose connection. Check all wire nuts and terminals. Secure any loose parts firmly.
Dim lights can signal voltage drops. This happens if wires are too thin or too long. Use correct wire size for your setup.
Old or weak bulbs may flicker or dim. Try new bulbs to see if the problem stops.
Check the switch itself. A worn switch may cause flickering. Replace the switch if needed.

Credit: www.youtube.com
Tips For A Neat And Safe Installation
Keeping the wiring neat and safe is very important when connecting three lights to one switch. Good organization prevents accidents and helps future repairs. Follow these simple tips for a clean and secure installation.
Securing Wires
Keep wires tight and close to the wall or ceiling. Use cable clips or staples to hold wires in place. Avoid bending wires sharply to stop damage. Leave enough slack for connections but not too much. This prevents wires from pulling loose over time.
Using Proper Connectors
Choose the right connectors for your wire size and type. Twist-on wire nuts work well for most connections. Push-in connectors are easy and safe to use. Make sure connectors fit tightly to avoid loose connections. Loose connections can cause sparks or shorts.
Frequently Asked Questions
How Do I Wire Three Lights To One Switch Safely?
To wire three lights to one switch safely, connect the switch’s live wire to the first light’s live terminal. Then, daisy-chain the live wires between the lights. Connect all neutral wires together and ground wires properly for safety.
Can I Control Three Lights With A Single Switch?
Yes, a single switch can control three lights by connecting their live wires in parallel. This setup allows all lights to turn on or off simultaneously from one switch.
What Tools Are Needed To Connect Three Lights To One Switch?
You need a screwdriver, wire stripper, voltage tester, electrical tape, wire nuts, and appropriate wires. Always ensure power is off before starting any electrical work for safety.
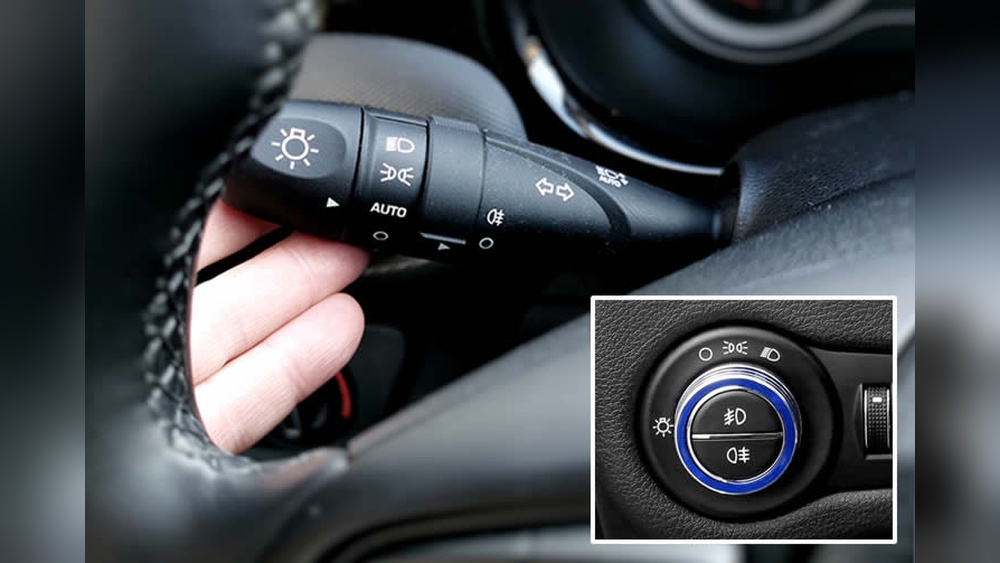
Is It Possible To Use One Switch For Different Light Types?
Yes, one switch can control different light types if they share the same voltage and wiring system. Ensure the switch’s rating matches the total load of all lights.
Conclusion
Connecting three lights to one switch is simple with the right steps. Always turn off the power before starting. Use proper wires and follow safety rules carefully. Test the switch and lights after wiring. This setup saves space and adds convenience.
With practice, anyone can do this task safely. Take your time and double-check each connection. Enjoy having control over multiple lights from one switch. This project helps improve your home’s lighting easily and effectively.