Are you tired of flickering lights or a switch that just won’t work right? Replacing a light switch might seem tricky, but with the right steps, you can do it yourself safely and quickly.
Imagine saving time and money by fixing it on your own, without waiting for an electrician. In this guide, you’ll discover simple, clear instructions that anyone can follow. Keep reading, and by the end, you’ll feel confident to replace your light switch like a pro.
Tools And Materials Needed
Replacing a light switch needs the right tools and materials. Having these ready makes the job easier and safer. Preparing well saves time and avoids mistakes.
Essential Tools
You need a screwdriver set with flathead and Phillips tips. A voltage tester helps check if the power is off. Wire strippers remove insulation from wires. Needle-nose pliers bend and hold wires. A flashlight or headlamp improves visibility in dark areas.
Choosing The Right Switch
Select a switch that matches your home’s wiring and style. Single-pole switches control one light from one place. Three-way switches control one light from two places. Check the switch’s voltage and current rating. Pick a switch that fits your wall plate size.
Safety Gear
Wear insulated gloves to avoid electric shocks. Use safety glasses to protect your eyes from debris. Non-slip shoes help keep balance while working. Avoid loose clothing or jewelry near wires. Always turn off the circuit breaker before starting work.
Preparing For The Replacement
Preparing for a light switch replacement is a crucial step. It ensures safety and smooth work. Taking time to prepare helps prevent accidents and mistakes. Follow these simple steps before starting the replacement.
Turning Off Power
Locate the main circuit breaker panel. Switch off the breaker controlling the light switch. This stops electricity flow to the switch. Never skip this step to avoid electric shock. Double check that the power is off before proceeding.
Testing For Live Wires
Use a non-contact voltage tester to check wires. Hold it near the wires connected to the switch. If the tester beeps or lights up, power is still on. Test each wire carefully. This confirms the circuit is safe to work on.
Clearing The Work Area
Remove any furniture or obstacles near the switch. Keep the area clean and well-lit. Gather all tools needed for the job. A tidy workspace helps you work faster and safer. Make sure you have enough room to move freely.
Removing The Old Switch
Removing the old light switch is the first step in replacing it safely. Take your time and follow each step carefully. This ensures the new switch will work correctly and safely.
Unscrewing The Cover Plate
Start by turning off the power at the circuit breaker. Use a screwdriver to remove the screws holding the cover plate. Gently pull the cover plate away from the wall. Set the screws and plate aside for later use.
Detaching The Switch
Now, unscrew the screws that hold the switch in the electrical box. Carefully pull the switch out to see the wires behind it. Do not pull too hard to avoid damaging the wires.
Labeling Wires
Before disconnecting, label each wire with tape or a marker. This helps you remember where each wire goes on the new switch. Take a photo for extra reference if needed. Then, loosen the screws and remove the wires from the old switch.

Credit: www.youtube.com
Installing The New Switch
Installing the new switch is a key step in replacing your light switch. This part needs careful attention. Connect the wires properly, secure the switch, and replace the cover plate. These steps ensure your switch works well and looks neat.
Connecting The Wires
First, identify the wires coming from the wall. Usually, there are two or three wires. One is the live wire, and the other is the load wire. Use a screwdriver to loosen the terminal screws on the new switch. Attach each wire to the correct terminal. Tighten the screws firmly but do not over-tighten. Make sure no bare wire is exposed. This prevents short circuits and keeps the connection safe.
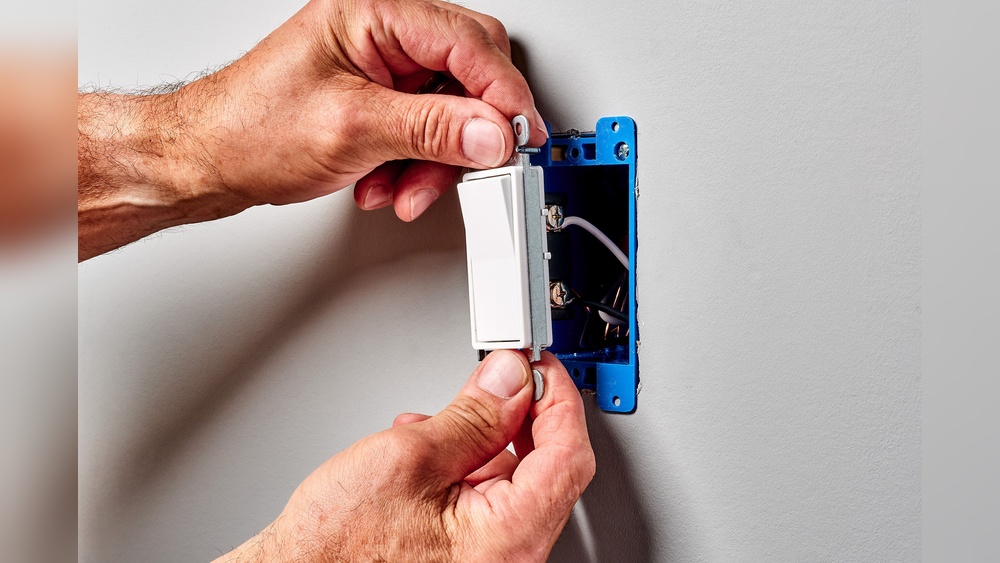
Securing The Switch
After wiring, gently push the switch back into the electrical box. Align it so the screw holes match. Use the mounting screws to fix the switch in place. Tighten the screws evenly. The switch should sit flush with the wall. Avoid forcing it, as this can damage the wires or the switch.
Replacing The Cover Plate
Next, place the cover plate over the switch. Line up the screw holes with the switch. Insert the screws and tighten them carefully. The cover plate protects the wiring and gives a clean look. Do not overtighten screws to prevent cracking the plate. Check the switch for smooth operation after installing the cover.
Testing And Troubleshooting
Testing and troubleshooting are key steps after replacing a light switch. These steps ensure the switch works safely and correctly. Skipping them may cause problems or hazards. Follow simple checks to confirm the installation is successful.
Restoring Power
Turn the circuit breaker back on to restore power. Make sure the switch area is dry and safe. Use a voltage tester to confirm power is active. Avoid touching wires directly. Safety first.
Checking Switch Operation
Flip the switch on and off to test its function. The connected light should respond immediately. If the light does not turn on, double-check your wiring. Listen for any unusual sounds from the switch. These can signal a problem.
Common Issues And Fixes
The light flickers or stays off. This often means loose connections. Turn off power and tighten wire screws. The switch feels warm or sparks appear. Replace the switch immediately. A faulty switch can cause electrical hazards. No light and no power? Check the breaker again. Sometimes the breaker trips without clear signs.
:max_bytes(150000):strip_icc()/how-to-replace-a-light-switch-1824670_07_newswitch_40431-69f2872f4a734dc89e3c2bed8711fc69.jpg)
Credit: www.thespruce.com
Safety Tips For Diy Electrical Work
Working with electrical switches requires care and attention. Safety should be your top priority during any DIY electrical project. Simple mistakes can cause shocks, fires, or damage. Follow these safety tips to protect yourself and your home.
When To Call A Professional
Some electrical tasks need expert skills. Complex wiring or old electrical systems can be risky. Call a licensed electrician if you feel unsure. It is safer and often required by law.
Avoiding Electrical Hazards
Always turn off the power before starting. Use a voltage tester to confirm the power is off. Never touch wires with wet hands or metal tools. Wear insulated gloves and use tools made for electrical work.
Maintaining Switches
Check switches regularly for cracks or burns. Replace any damaged switches immediately. Keep switches clean and dry to prevent faults. Proper maintenance helps avoid future problems and keeps your home safe.

Credit: www.wikihow.com
Frequently Asked Questions
How Do I Safely Replace A Light Switch?
Turn off the power at the circuit breaker before starting. Use a voltage tester to confirm no electricity flows. Remove the old switch carefully, noting wire positions. Connect the new switch exactly as the old one was wired. Secure it and restore power to test.
What Tools Are Needed To Replace A Light Switch?
You need a screwdriver, voltage tester, wire stripper, and needle-nose pliers. These tools help remove the old switch, check power, and connect wires safely. Having these tools ensures a smooth, safe replacement process.
How Long Does It Take To Replace A Light Switch?
Replacing a light switch usually takes 15 to 30 minutes. The time depends on your experience and the switch type. Proper preparation and safety checks can make the process quicker and safer.
Can I Replace A Light Switch Without Electrical Knowledge?
Basic electrical knowledge is helpful but not mandatory. Follow safety steps carefully, especially turning off power. If unsure, consult a professional electrician to avoid risks. Safety should always be your priority.
Conclusion
Replacing a light switch can save time and money. Always turn off the power before starting. Use the right tools to avoid mistakes. Follow each step carefully for safety. Double-check your work before restoring power. Simple tasks like this boost confidence in home repairs.
Keep this guide handy for future use. Light switches do not have to be difficult to replace. You can do it yourself with patience and care.