Are you unsure if your light switch is working properly? Testing a light switch might seem tricky, but it’s easier than you think.
Knowing how to test your light switch can save you time, money, and frustration. Whether your lights flicker or won’t turn on at all, this simple skill puts the power in your hands. Keep reading, and you’ll learn clear, step-by-step ways to check your switches safely and quickly—no electrician needed.
Your home’s lighting depends on it!
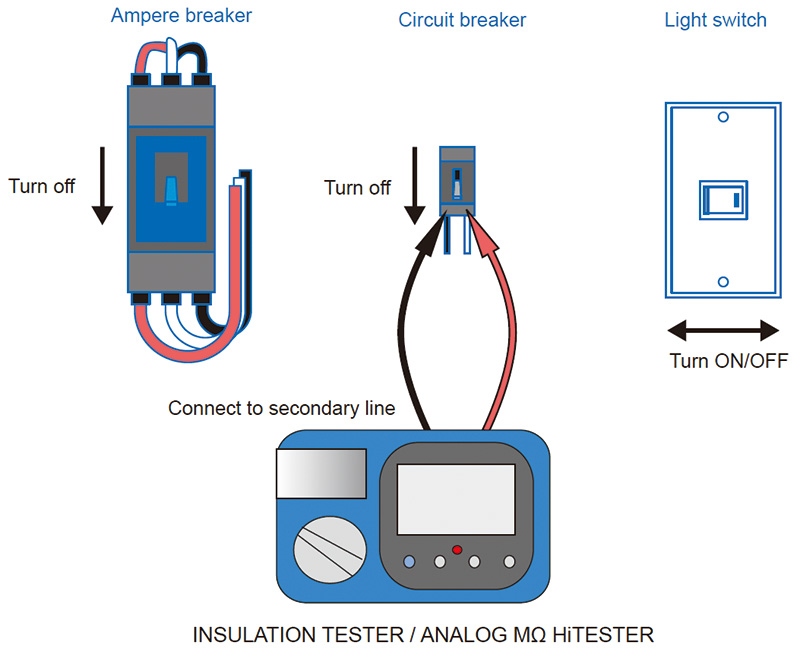
Credit: www.hioki.com
Tools Needed For Testing
Testing a light switch needs some simple tools. These tools help check if the switch works well and if the wiring is safe. Having the right tools makes the job easier and safer. Here is a list of the basic tools you will need to test a light switch properly.
Basic Electrical Tester
A basic electrical tester shows if electricity flows through the switch. It is easy to use and gives a quick result. This tester can detect voltage without touching wires directly. It helps check if power reaches the switch and if the switch turns the power on or off.
Multimeter Use
A multimeter measures voltage, current, and resistance. It gives more detailed information than a simple tester. Use the multimeter to see if the switch connects or breaks the circuit. Set the multimeter to the right mode before testing. It helps find problems like broken wires or bad connections.
Safety Gear Essentials
Safety gear protects you from electric shock and injuries. Always wear insulated gloves when testing. Use safety goggles to protect your eyes. Make sure your tools have insulated handles. Never test a switch with wet hands or in a wet area. Safety gear keeps you safe while working with electricity.
Preparing For The Test
Preparing to test a light switch requires care and focus. Safety is the top priority. Taking the right steps before testing helps avoid accidents. Follow clear instructions to get ready properly.
Gather basic tools like a screwdriver and a voltage tester. Wear insulated gloves for extra protection. Make sure the work area is dry and well-lit. These steps make testing easier and safer.
Turn Off Power Supply
Start by turning off the power at the circuit breaker. This stops electricity from flowing to the switch. Double-check by trying to turn the light on. No light means the power is off and safe to work on.
Remove Switch Cover
Use a screwdriver to remove the screws holding the switch cover. Take off the cover carefully to avoid damaging it. Set the screws and cover aside in a safe place. This exposes the switch and wiring for testing.
Identify Wiring
Look closely at the wires connected to the switch. Note their colors and positions. This helps understand how the switch works. Use a voltage tester to confirm wires are not live. Knowing wiring details is key for a safe test.
Testing The Light Switch
Testing the light switch helps find electrical problems safely and quickly. It shows if the switch works or if wiring issues exist. Use simple tools to test the switch’s function and condition.
Using A Voltage Tester
Turn off power at the circuit breaker before testing. Remove the switch cover carefully. Touch the voltage tester probes to the switch terminals. If the tester lights or beeps, power is present. No signal means no voltage at the switch. This test checks if electricity reaches the switch.
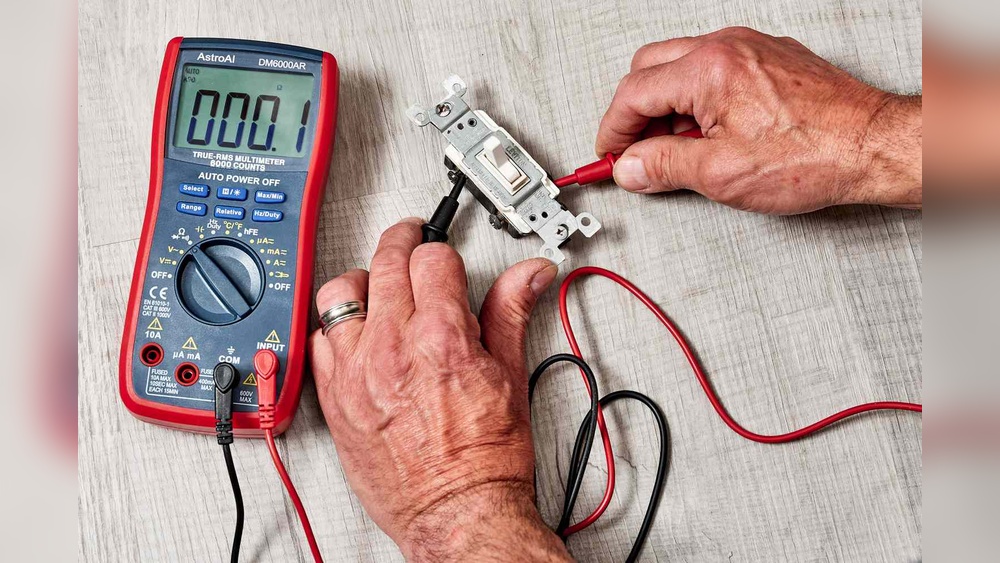
Checking Continuity With Multimeter
Set the multimeter to continuity mode. Disconnect the switch wires to avoid false readings. Place probes on the two switch terminals. Press the switch on and off. Continuity means the switch closes the circuit. No continuity means a broken switch or wiring issue.
Interpreting Test Results
Voltage present but no continuity means a faulty switch. No voltage and no continuity often means a wiring problem. Continuity with no voltage means power is off or wiring is disconnected. Use test results to decide if the switch needs repair or replacement.

Credit: www.youtube.com
Troubleshooting Common Issues
Troubleshooting common issues with light switches helps fix many simple problems. Most switch issues happen due to loose connections or a faulty switch. Knowing how to spot these problems saves time and effort. Sometimes, the problem needs a professional’s help. This section covers easy steps to test and fix common light switch troubles.
Loose Connections
Loose connections cause flickering lights or switches that don’t work. Turn off the power at the breaker before checking. Remove the switch cover carefully. Check if wires are tightly connected to the terminals. Tighten any loose screws or wires. Loose connections can cause sparks or shorts. Fixing them often restores the switch function quickly.
Faulty Switch Replacement
Some switches stop working because they are faulty. Test the switch with a voltage tester to check if power flows. If no power passes, the switch may be broken. Buy a new switch with the same rating. Turn off power before removing the old switch. Disconnect wires carefully and connect them to the new switch. Secure the switch and test it by turning power back on.
When To Call A Professional
Not all switch problems are safe to fix alone. If wires look damaged or burnt, call an electrician. Complex wiring issues need expert tools and knowledge. If you feel unsure or unsafe, do not try to fix it yourself. Professionals ensure the switch works correctly and safely. They prevent electrical hazards and costly mistakes.
Safety Tips For Diy Electrical Work
Safety is the top priority when working with electrical switches. Even small mistakes can cause serious injuries or damage. Follow these safety tips to protect yourself while testing a light switch. Simple rules make the job safer and easier.
Avoiding Electric Shock
Always turn off the power at the circuit breaker before starting. Use a voltage tester to confirm no electricity flows to the switch. Never touch wires with wet hands or metal tools. Wear rubber-soled shoes to reduce shock risk.
Proper Tool Handling
Use insulated tools made for electrical work. Keep tools in good condition and clean. Avoid using damaged or worn tools. Hold tools firmly and work slowly. Do not force tools into tight spaces.
Work Area Precautions
Clear the area of clutter and water. Make sure the workspace is dry and well-lit. Use a sturdy ladder if needed to reach the switch. Keep children and pets away from the work zone. Have a phone nearby for emergencies.

Credit: mrelectric.com
Frequently Asked Questions
How Do I Test A Light Switch With A Multimeter?
To test a light switch with a multimeter, first turn off the power. Set the multimeter to continuity mode. Remove the switch cover and place probes on terminals. Flip the switch; a beep or zero resistance shows it’s working.
Can I Test A Light Switch Without Removing It?
Yes, you can test a light switch without removing it by checking the circuit voltage. Use a non-contact voltage tester near the switch. If it detects voltage, the switch is receiving power but may still be faulty internally.
What Tools Do I Need To Test A Light Switch?
You need a multimeter or a non-contact voltage tester to test a light switch. A screwdriver is also useful for removing the switch cover. Safety gloves and a voltage detector ensure safe handling during testing.
What Indicates A Faulty Light Switch During Testing?
If the multimeter shows no continuity when the switch is ON, the switch is faulty. Also, if voltage is present but the light doesn’t turn on, the switch may be defective. Physical damage or burning smell can also indicate failure.
Conclusion
Testing a light switch is simple and safe with the right steps. Use a tester to check if power flows correctly. Always turn off the main power before starting any test. Finding faults early helps avoid bigger problems later. Regular checks keep your home’s wiring safe and working well.
Now, you can test switches confidently and keep lights shining bright.