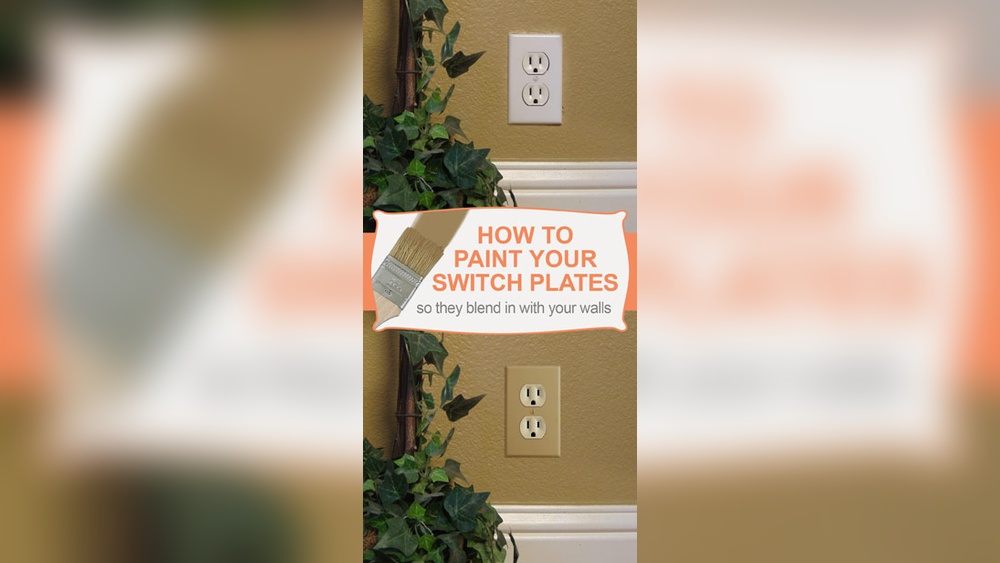
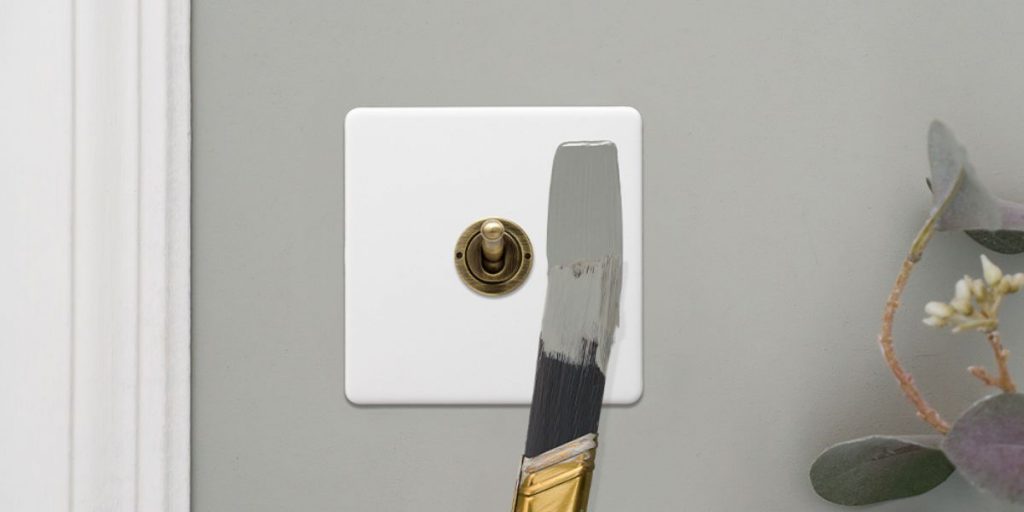
Are your light switches looking dull or outdated? You might think they’re too small or tricky to paint, but with the right steps, you can easily transform them and give your room a fresh, personalized touch.
Imagine how a simple splash of color on your switches could brighten your space and reflect your style. In this guide, you’ll discover the easy way to paint light switches safely and beautifully—no experience needed. Ready to add a pop of personality to your walls?
Let’s get started!
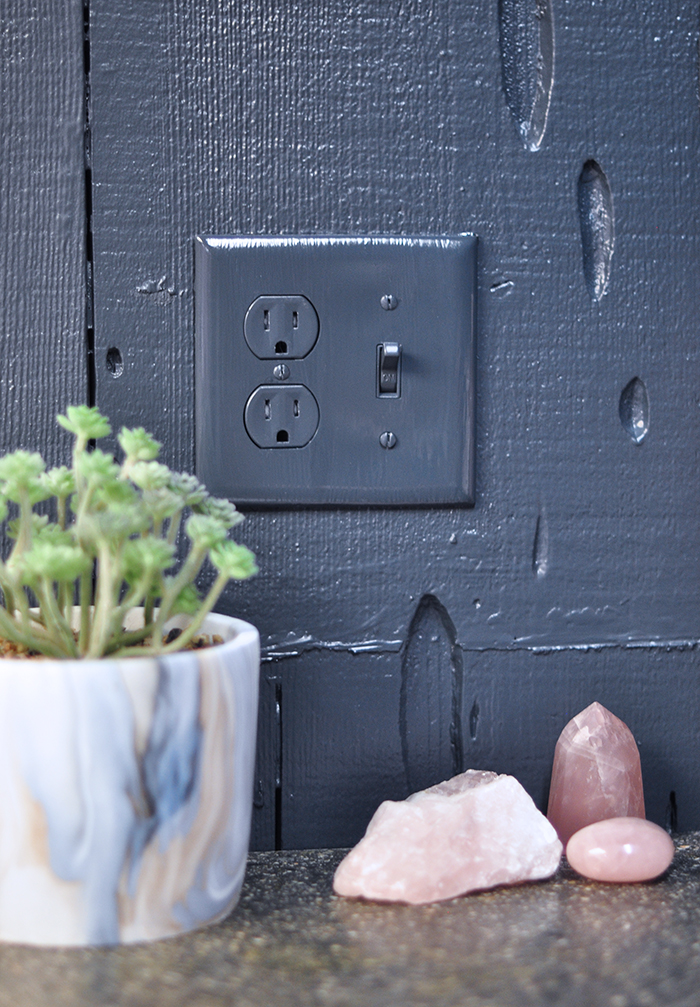
Credit: lovemaegan.com
Gathering Materials
Gathering the right materials is the first step to painting light switches. Having good supplies helps the paint stick and look smooth. It also makes the job easier and faster. Plan ahead and collect all items before starting.
Choosing The Right Paint
Pick paint that works well on plastic or metal. Satin or semi-gloss finishes last longer and clean easily. Avoid thick paints that can drip or clump. Test a small area first to check how the paint sticks.
Essential Tools Needed
Use painter’s tape to protect walls and switch plates. A small brush or foam brush offers better control. Sandpaper smooths the surface for better paint grip. Also, have a screwdriver to remove the switch cover safely.
Credit: www.elesi.com
Preparing The Switch Plates
Preparing the switch plates is the first step in painting light switches. Proper preparation helps the paint stick better and last longer. It also ensures a smooth and clean finish. Take your time with this step for the best results.
Start by removing the switch covers carefully. Then clean and sand the plates to get rid of dirt and roughen the surface. This makes painting easier and more effective.
Removing The Switch Covers
Turn off the power to the switch for safety. Use a screwdriver to remove the screws holding the switch covers. Keep the screws safe for reattaching later. Gently pull the covers away from the wall. Avoid forcing them to prevent damage.
Cleaning And Sanding
Clean the switch plates with warm, soapy water. Remove all dust, grease, and grime. Dry the plates completely with a soft cloth. Lightly sand the surface with fine-grit sandpaper. Sanding helps the paint stick better. Wipe away any dust with a dry cloth before painting.
Applying Primer
Applying primer to light switches is an important step before painting. Primer helps paint stick better and last longer. It also covers any old colors or stains. This step ensures a smooth and even finish. Skipping primer might cause the paint to peel or chip.
Why Primer Matters
Primer creates a strong base for the paint. It seals the surface, so paint does not soak in unevenly. This helps avoid blotchy spots. Primer also improves paint adhesion. This means the paint stays on longer without cracking. It helps the final color look true and bright.
Tips For Even Application
Use a small brush for detailed areas. Apply a thin, even coat of primer. Avoid thick layers that can drip or bubble. Let the primer dry completely before painting. Lightly sand the surface after drying for smoothness. This makes the paint finish cleaner and more polished.
Painting Techniques
Painting light switches needs the right techniques to get good results. The choice of tools and how you apply paint affect the finish a lot. This section covers key painting methods that help you paint light switches neatly and smoothly.
Using Brushes Vs. Spray Paint
Brushes give control for small areas like light switches. They help paint edges carefully without making a mess. Use a small, fine brush for the best results. Brush strokes can be visible, so use light, even strokes.
Spray paint covers surfaces quickly and evenly. It avoids brush marks and saves time. Hold the can about 6-8 inches away and spray in short bursts. Protect nearby walls and switches from overspray by covering them well.
Layering For Smoothness
Apply thin layers of paint rather than thick coats. Thin layers dry faster and reduce drips or bumps. Wait 10-15 minutes between layers to let paint set. Multiple layers build a smooth, clean finish on the switch surface.
Light sanding between layers can help remove rough spots. Use very fine sandpaper and sand gently. Clean the switch with a dry cloth before painting the next layer. This process ensures a professional and smooth look.
Drying And Curing
Drying and curing are critical steps after painting light switches. These steps ensure the paint sets well and lasts longer. Proper drying prevents smudges and uneven surfaces. Curing strengthens the paint, making it durable against daily use.
Optimal Drying Times
Allow the paint to dry completely before touching the switch. Most paints need about one to two hours to dry on the surface. Wait at least 24 hours for the paint to cure fully. Avoid rushing this process to keep the finish smooth and hard.
Avoiding Smudges And Imperfections
Keep the painted switches in a dust-free area while drying. Do not touch or press the switch until the paint is dry. Use light, even coats of paint to reduce drips and bumps. If needed, sand lightly between coats for a clean finish.
Reinstalling The Switch Plates
Reinstalling the switch plates is the last step after painting light switches. It brings the project together and keeps the switches safe. This process requires care to avoid damage or injury. Follow clear steps to ensure the switch plates fit well and look neat.
Safe Reattachment
Turn off the power at the circuit breaker before touching the switches. Use a screwdriver to place the switch plates back on their original spots. Tighten the screws gently to avoid cracking the plates. Check that the plates sit flat against the wall. Do not force the screws too hard.
Final Touches
Clean any paint smudges from the edges of the switch plates. Use a soft cloth slightly dampened with water for cleaning. Inspect the plates for even paint coverage and smooth finish. Allow the paint to dry completely before turning the power back on. Enjoy the fresh look of your painted switches.
Maintenance Tips
Painting light switches can refresh any room’s look. Keeping them in good shape helps the paint last longer. Simple maintenance steps protect your work and keep switches looking fresh.
Cleaning Painted Switches
Dust and dirt can build up on painted switches. Use a soft cloth to wipe them gently. Avoid harsh cleaners that can damage paint. A damp cloth with mild soap works best. Dry the switch plate well after cleaning to prevent moisture damage.
Touching Up Chips
Small chips may appear over time. Keep some leftover paint for touch-ups. Use a fine brush to fix tiny spots carefully. Let the paint dry fully before using the switch. This keeps the switch looking neat and new.

Credit: nluvstudio.com
Frequently Asked Questions
Can I Paint Light Switches Without Removing Them?
Yes, you can paint switches without removal, but it’s safer to remove them first. Removal prevents paint from entering electrical components and ensures a cleaner finish.
What Type Of Paint Works Best For Light Switches?
Use spray enamel or semi-gloss acrylic paint for light switches. These paints adhere well, resist chipping, and provide a smooth, durable surface ideal for frequent use.
How Long Should Paint Dry On Light Switches?
Allow paint to dry for at least 24 hours. This ensures it fully cures, preventing smudges and peeling when you reinstall or use the switches.
Is It Safe To Paint Light Switch Covers?
Yes, it’s safe to paint covers if you avoid electrical parts. Always unplug power and use painter’s tape to protect switch mechanisms from paint.
Conclusion
Painting light switches adds a fresh touch to any room. It is a simple, low-cost way to update your space. Always turn off the power before starting to paint. Use the right paint and tools for best results. Take your time and be careful around edges.
A neat finish makes a big difference. Small changes like this can brighten your home easily. Try it yourself and enjoy the new look!