Are you struggling to keep your utility sink steady and secure? If your sink wobbles or feels loose, it can cause leaks, damage, or even accidents.
Anchoring your utility sink to the wall is the best way to make sure it stays put and works perfectly every time you use it. You’ll discover simple, step-by-step instructions that anyone can follow—even if you’re not a DIY expert.
By the end, you’ll have the confidence and know-how to anchor your sink safely and effectively. Keep reading, and say goodbye to shaky sinks for good!
Tools And Materials Needed
Before anchoring a utility sink to the wall, gather all necessary tools and materials. Having everything ready makes the job smoother and safer. This list covers what you need for a strong, secure installation.
Essential Tools
- Power drill with drill bits
- Level
- Measuring tape
- Socket wrench or adjustable wrench
- Screwdriver (Phillips and flathead)
- Stud finder
- Pencil or marker
- Safety glasses
- Work gloves
Required Materials
- Utility sink with mounting brackets
- Wall anchors or toggle bolts
- Lag screws or heavy-duty screws
- Plumber’s putty or silicone sealant
- Washers (if needed)
- Pipe fittings and connectors
- Water supply lines
- Drain assembly
Choosing The Right Location
Choosing the right location for your utility sink is essential for stability and ease of use. The spot must support the sink’s weight and allow easy access to plumbing. Careful planning avoids costly mistakes and ensures a durable setup.
Wall Type Considerations
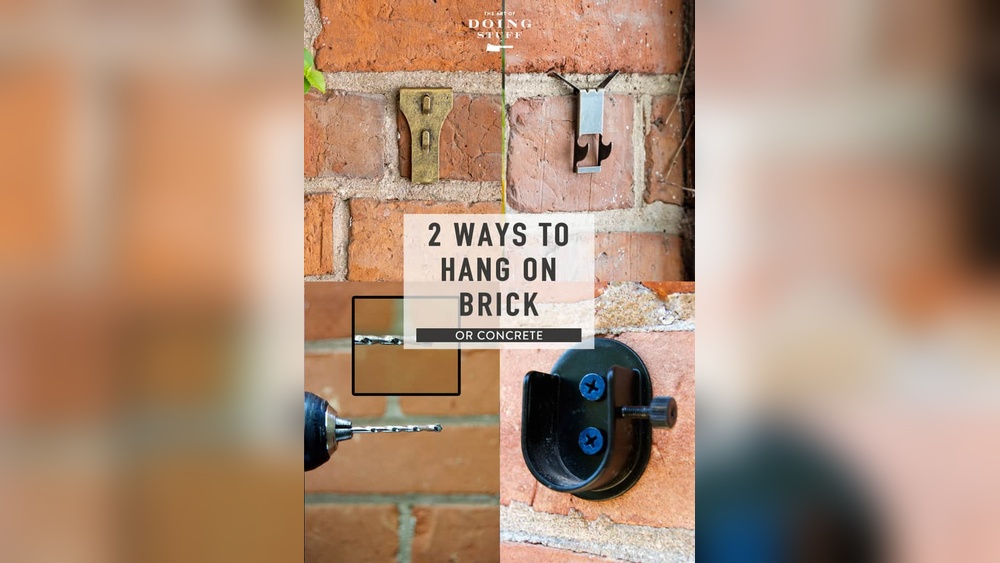
Different walls hold weight differently. Drywall alone cannot support a heavy sink. Stud walls with wooden or metal studs offer strong support. Concrete or brick walls can bear weight but require special anchors. Knowing your wall type helps pick the right anchors and tools.
Measuring And Marking
Measure the sink’s height and width carefully. Mark the wall where the sink will mount. Use a level to keep marks straight and even. Double-check measurements before drilling holes. Accurate markings make installation smoother and safer.
Preparing The Wall
Preparing the wall is the first step to anchor a utility sink securely. A solid wall ensures your sink stays in place and supports its weight. Before installation, check the wall’s structure. This step prevents damage and keeps the sink stable over time.
Locating Studs
Studs are vertical wooden beams behind the wall. They provide strong support for heavy fixtures like utility sinks. Use a stud finder to locate them easily. Move the device slowly across the wall surface. Mark the stud positions with a pencil. Anchoring directly into studs is the safest option. It gives the best hold and prevents wall damage.
Using Wall Anchors
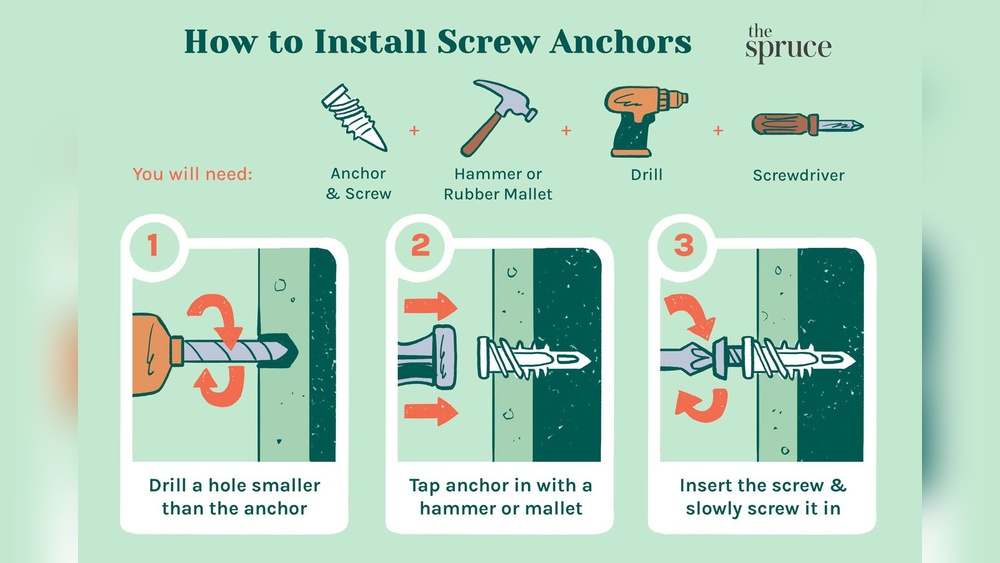
Wall anchors help when you cannot find studs. They spread the sink’s weight over a larger area. Choose anchors suitable for your wall type, such as drywall or plaster. Drill holes where you marked the sink’s position. Insert the anchors carefully, so they fit snugly. Attach the sink brackets to these anchors. This method keeps the sink secure without a stud.

Credit: www.reddit.com
Mounting The Sink Bracket
Mounting the sink bracket is a key step in securing your utility sink to the wall. A properly mounted bracket holds the sink firmly. It prevents movement and ensures stability during use. This part needs care and attention for safety and durability.
Aligning The Bracket
Start by holding the bracket against the wall at the desired height. Use a level to make sure it is straight. Mark the spots where you will drill holes for screws. Double-check the marks to avoid mistakes. Proper alignment keeps the sink balanced and secure.
Securing With Screws
Choose screws that fit the bracket and wall type well. Drill pilot holes at the marked spots to ease screw insertion. Insert screws and tighten them firmly with a screwdriver. Avoid over-tightening to prevent damage. Secure screws hold the bracket tightly to the wall.
Attaching The Sink
Attaching the utility sink to the wall is an important step. It keeps the sink stable and safe during use. This section explains how to position the sink and fasten it securely to the bracket.
Positioning The Sink
Start by holding the sink against the wall. Check the height and level it carefully. Use a spirit level to make sure it is straight. Mark the wall where the sink edges meet. This helps place the bracket in the right spot. Make sure the sink is near water and drain connections. Adjust the position if needed before drilling or fixing anything.
Fastening To The Bracket
Attach the mounting bracket to the wall using screws. Use wall anchors if the wall is drywall or plaster. Lift the sink and fit it onto the bracket hooks. Press the sink firmly against the wall. Secure it with screws through the sink holes into the bracket. Tighten all screws evenly to avoid wobbling. Check the sink again for level and adjust if needed.
Checking Stability
Checking the stability of your utility sink after anchoring is vital. A stable sink stays secure during use. It prevents damage to the wall and plumbing. This step ensures safety and durability. Follow these simple tests and adjustments for a firm fit.
Testing For Firmness
Press gently on the sink’s edges. Try to move it side to side. Push down lightly on the basin. The sink should not wobble or shift. Any movement means it is not secure. Check all anchor points for tightness. Listen for creaks or unusual sounds. These indicate loose fittings that need fixing.
Adjusting If Necessary
Loosen the anchors slightly if the sink moves. Reposition the sink closer to the wall. Tighten the screws or bolts firmly but carefully. Avoid over-tightening, which can crack the sink or wall. Use shims to fill any gaps behind the sink. Check again by pressing and moving it. Repeat adjustments until the sink feels solid and safe.
Sealing And Finishing Touches
Sealing and finishing touches complete the utility sink installation. These steps protect your work and give a neat look. Proper sealing stops water leaks and damage to the wall. Finishing touches ensure the sink stays secure and lasts longer.
Applying Caulk
Choose a waterproof caulk for sealing around the sink edges. Cut the caulk tube tip at a 45-degree angle. Apply a smooth bead of caulk along the gap between the sink and wall. Use a wet finger or tool to smooth the caulk line. This creates a tight, clean seal that prevents water from seeping in.
Cleaning Up
Remove any excess caulk quickly before it dries. Wipe the area with a damp cloth for a clean finish. Clean your tools and hands immediately after caulking. Check the sink and wall for leftover dirt or dust. A tidy workspace improves the final appearance and keeps everything neat.

Credit: www.reddit.com

Credit: www.reddit.com
Frequently Asked Questions
How Do You Anchor A Utility Sink To Drywall?
To anchor a utility sink to drywall, use heavy-duty wall anchors or toggle bolts. Locate wall studs for added support. Secure the sink bracket to the wall anchors or studs. This prevents movement and ensures stability during use.
What Tools Are Needed To Anchor A Utility Sink?
You need a drill, stud finder, level, screws, wall anchors, and a wrench. These tools help locate studs, drill holes, and securely fasten the sink to the wall.
How High Should A Utility Sink Be Mounted?
Mount a utility sink 34 to 36 inches from the floor. This height provides comfortable access for most users. Adjust based on user height and specific workspace requirements.
Can I Anchor A Utility Sink Without Wall Studs?
Yes, use heavy-duty wall anchors or toggle bolts if no studs are available. These provide strong support and prevent the sink from pulling away from the drywall.
Conclusion
Anchoring a utility sink to the wall keeps it steady and safe. Follow the steps carefully to avoid mistakes. Use the right tools and strong anchors for best results. Double-check your work to ensure the sink does not wobble. A well-secured sink lasts longer and works better.
Take your time, and don’t rush the job. Simple steps lead to a strong, reliable utility sink setup. Now, your sink will stay firm and serve you well.