Looking for a fun and practical way to add personality to your space? Making flip flop wall hooks is easier than you think, and they bring a splash of summer vibes right into your home.
You don’t need special tools or skills—just a few simple steps and some creativity. Imagine turning your old flip flops into stylish hooks that hold your keys, hats, or bags while brightening up any room. Keep reading, and you’ll discover how to make these unique wall hooks yourself, saving money and creating something truly one-of-a-kind.
Ready to get started?

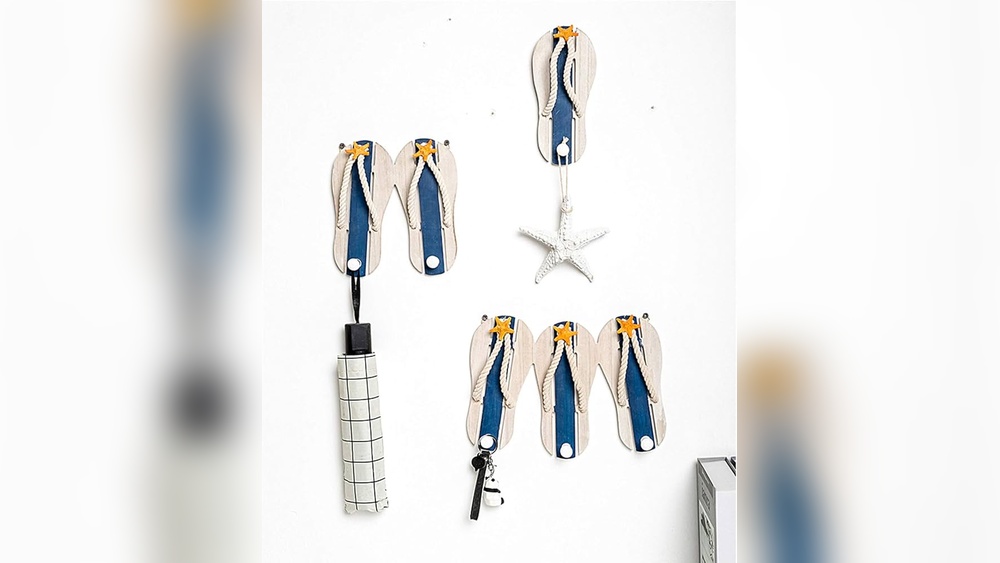
Credit: viridianbay.com
Materials Needed
Before starting to make flip flop wall hooks, gather all necessary materials. Choosing the right items helps you create sturdy and attractive hooks. Prepare everything beforehand to avoid interruptions during the project.
Choosing The Right Flip Flops
Select flip flops that are strong and in good shape. Avoid worn-out or broken pairs. Bright colors or fun patterns add personality to your hooks. Choose flip flops with thick soles for better support. Old pairs no longer used make perfect candidates.
Required Tools And Supplies
Besides flip flops, you need a few simple tools and supplies. A drill with a small bit helps make holes for screws. Screws and wall anchors keep hooks firmly attached to walls. Strong glue can secure parts if needed. Sandpaper smooths rough edges on the flip flops. A pencil marks where to drill or cut. A ruler or measuring tape ensures correct placement and size.
Preparing The Flip Flops
Preparing the flip flops is the first step to making wall hooks. This stage ensures the flip flops are clean and shaped correctly. Proper preparation helps the hooks last longer and look better on your wall. Follow these simple steps to get your flip flops ready.
Cleaning And Drying
Start by washing the flip flops with soap and water. Use a soft brush to remove dirt and grime. Rinse them well to get rid of soap. Dry the flip flops completely before moving on. Moisture can weaken the glue or screws used later.
Trimming And Modifying
Check the flip flops for any parts to trim. Cut off extra straps or worn-out sections carefully. This makes the flip flops easier to mount on the wall. Smooth any rough edges with sandpaper for a clean finish. Adjust the shape as needed to fit your space.
Attaching Hooks
Attaching hooks to flip flops is the key step in making wall hooks. This step turns old flip flops into useful hangers. Proper attachment ensures the hooks hold weight well. It also gives a neat and sturdy look to your project.
Selecting Hook Types
Choose hooks that fit the style and use of your flip flop wall hooks. Small metal hooks work best for keys or light items. Larger hooks hold heavier objects like bags or coats. Plastic hooks are good for a colorful, casual look. Pick hooks with flat bases to attach easily to flip flops. Avoid hooks with sharp edges to keep safety first.
Securing Hooks To Flip Flops
Start by cleaning the flip flop surface. This helps glue or screws stick better. Use strong glue like epoxy or super glue for quick attachment. Hold the hook firmly in place until the glue dries. For extra strength, use small screws if the flip flop material allows. Drill tiny holes carefully to avoid damage. Let everything dry fully before using the hooks. Test the hook by gently pulling to ensure it holds tight.

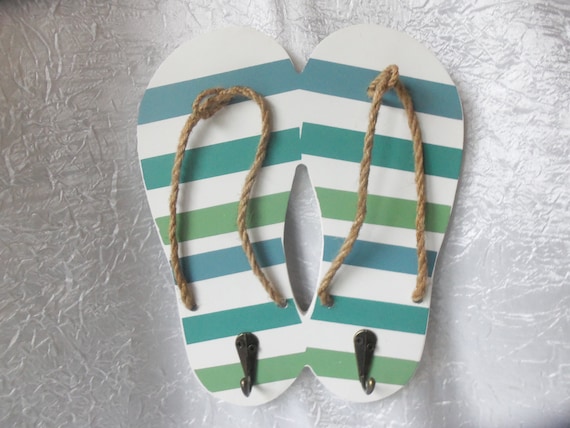
Credit: www.ebay.com
Mounting On The Wall
Mounting your flip flop wall hooks correctly is key for a sturdy and attractive display. This step ensures your hooks hold weight and last long. Choose a spot and install with care for best results.
Choosing The Perfect Spot
Pick a wall area that is easy to reach. Near the door or in the hallway works well. Make sure the wall surface is smooth and clean. Avoid places with moisture or direct sunlight. Check for enough space so hooks don’t overcrowd.
Installation Tips
Use a level to keep hooks straight. Mark holes lightly with a pencil. Drill pilot holes to avoid wall damage. Use anchors if the wall is drywall. Tighten screws firmly but don’t overtighten. Test each hook by hanging a small item first.
Customizing Your Hooks
Customizing your flip flop wall hooks lets you create something truly unique. This step adds personality and style to a simple project. You can match your home décor or show off your creativity.
Small changes can make a big impact. Use colors and decorations to make your hooks stand out. This part is fun and allows your personal touch to shine.
Painting And Decorating
Start with a base coat of paint on the flip flops. Choose bright colors or soft pastels to fit your space. Use acrylic paint for good coverage and durability.
Add patterns like stripes, dots, or waves for extra interest. Use a fine brush to create neat designs. Seal the paint with clear varnish to protect it from wear.
Try adding glitter or small stickers for more flair. Keep designs simple for a clean look. These small details make your hooks one-of-a-kind.
Adding Beachy Accents
Attach seashells, small starfish, or pieces of driftwood. Use strong glue to secure these accents firmly. These natural elements bring a coastal vibe to your hooks.
Wrap twine or rope around the straps for texture. This adds a rustic and beachy feel. You can also glue tiny beads or buttons for extra decoration.
Mix and match accents to create a balanced look. Keep the size of decorations small to not hide the flip flop shape. These touches make your wall hooks more inviting.
Maintenance And Care
Maintaining your flip flop wall hooks keeps them looking fresh and working well. Regular care stops damage and extends their life. A little effort goes a long way.
Cleaning Your Wall Hooks
Dust your wall hooks often with a soft cloth. Use a damp cloth for sticky spots. Mild soap and water work best. Avoid harsh cleaners that can harm the materials. Dry hooks completely after cleaning to stop rust or mold.
Ensuring Durability
Check hooks for loose screws or parts regularly. Tighten any loose pieces with a screwdriver. Avoid hanging very heavy items on the hooks. Place them away from direct sunlight to prevent fading. Store spare hooks in a dry place to keep them safe.
Creative Uses
Flip flop wall hooks offer a fun and unique way to organize your space. They bring color and personality to any room. These hooks are not just practical but also creative. You can use them in many ways beyond hanging keys or coats. Let’s explore some creative uses that make these hooks a great addition to your home.
Organizing Accessories
Flip flop hooks are perfect for keeping accessories tidy. Hang your hats, scarves, or belts on them. They make your items easy to find and grab. Use them in bedrooms or closets for small bags and jewelry. Kids can store backpacks and lunch boxes on these hooks. They keep everyday items off the floor and organized.
Seasonal And Gift Ideas
These hooks work well for seasonal decorations. Hang holiday ornaments or string lights on them. Use them to display summer hats or beach towels during warm months. They also make thoughtful, handmade gifts. Customize flip flop hooks with paint or decorations. Friends and family will love their charm and usefulness.
Credit: www.etsy.com
Frequently Asked Questions
What Materials Do I Need For Flip Flop Wall Hooks?
You need old flip flops, strong adhesive, screws, wall anchors, and a drill. These basic supplies make crafting easy and affordable.
How Do I Attach Flip Flops Securely To Walls?
Use strong adhesive or screws with wall anchors. Ensure the surface is clean and dry before mounting for best hold.
Can Flip Flop Wall Hooks Hold Heavy Items?
They are best for lightweight items like keys, hats, or jewelry. Heavy items may cause hooks to loosen or fall.
How Long Does It Take To Make Flip Flop Wall Hooks?
It typically takes 30 to 60 minutes. Drying time for adhesive may add additional time.
Conclusion
Creating flip flop wall hooks adds charm and function to your space. These hooks hold keys, towels, or bags with ease. Crafting them is simple and fun for all skill levels. Use your favorite flip flops to personalize each hook uniquely.
Hang your new hooks in entryways, bathrooms, or bedrooms. Enjoy the mix of style and practicality every day. Try making a few sets as gifts for friends and family. Small projects like this bring creativity into your home. Give it a go and see how it brightens your walls!


