Are you struggling to remove your Quickset deadbolt and don’t know where to start? You’re not alone.
Whether you want to replace it, fix a jam, or upgrade your lock, getting the deadbolt out can feel tricky. But don’t worry—this guide will walk you through simple, clear steps that anyone can follow. By the end, you’ll have your deadbolt removed quickly and without stress.
Keep reading to take control of your lock and make your home safer on your terms.
Tools Needed
Removing a Quickset deadbolt requires some basic tools. Having the right tools makes the job easier and faster. These tools help you take apart the lock without damage. You do not need many items. Just a few common tools will do the work.
Phillips Screwdriver
A Phillips screwdriver is essential for removing screws. Quickset deadbolts use crosshead screws. This tool fits perfectly and prevents slipping. It helps you remove the screws on the lock cover and interior parts.
Flathead Screwdriver
A flathead screwdriver works well to pry parts gently. It helps lift the lock’s faceplate or cover. This tool is also useful for pushing small tabs or clips inside the lock.
Allen Wrench
Some Quickset deadbolts have small hex screws. An Allen wrench set covers different sizes. It helps loosen or tighten these screws safely. Keep this tool handy during the removal process.
Paperclip Or Pin
A straightened paperclip or small pin helps press release buttons. Some Quickset models have hidden pins to unlock the cylinder. This tool is perfect for reaching tight spots inside the lock.
Towel Or Soft Cloth
Use a towel or soft cloth to protect your door. Place it under the lock to avoid scratches. It also cushions the tools and parts during removal.

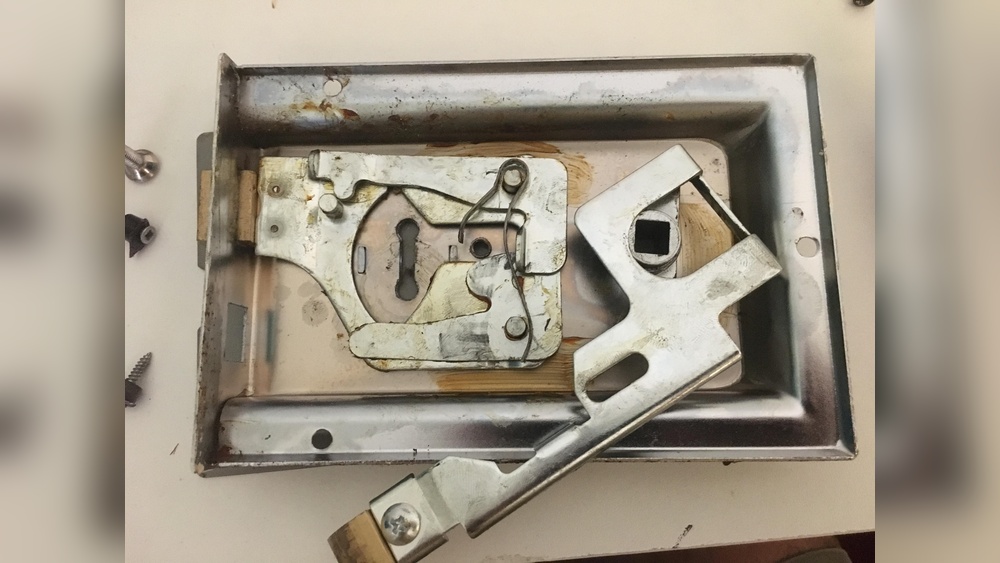
Credit: diy.stackexchange.com
Locate The Deadbolt Components
Locating the deadbolt components is the first step to remove a Quickset deadbolt. You need to identify all parts before starting the removal process.
Knowing where each component sits helps avoid confusion and damage. It also makes the job faster and easier.
Exterior Keypad Or Thumbturn
The exterior part usually has a keypad or a key slot. This is where you enter the code or use a key. It is attached to the door’s outside surface.
Interior Thumbturn
The interior side has a thumbturn. This lets you lock or unlock the door from inside. It is fixed to the door’s inner surface.
Mounting Screws
Mounting screws hold the exterior and interior parts together. Look for screws on the inside plate. These screws secure the whole lock to the door.
Deadbolt Latch
The deadbolt latch slides into the door frame to lock the door. It is visible on the edge of the door. This part moves when you turn the thumbturn or use the key.
Remove The Interior Thumb Turn
Removing the interior thumb turn is the first step to take out a Quickset deadbolt. This part controls the locking mechanism from inside your door. Taking it off lets you access the screws and parts needed to remove the entire lock.
The process is simple and requires only basic tools. Follow these steps carefully to avoid damage and make the removal smooth.
Locate The Thumb Turn On The Interior Side
The thumb turn is the small lever you twist to lock or unlock the door. It sits on the inside of your door, attached to the deadbolt. Identify this part before starting the removal.
Remove The Small Screw Holding The Thumb Turn
Look for a tiny screw on the side of the thumb turn. Use a screwdriver to take this screw out. This screw keeps the thumb turn fixed in place.
Pull The Thumb Turn Straight Out
After removing the screw, gently pull the thumb turn away from the door. It should slide off with little effort. Do not force it to avoid breaking the piece.
Keep The Thumb Turn And Screw Safe
Store the thumb turn and its screw in a safe place. You might need them if you plan to reinstall the lock later. These small parts are easy to lose.
Unscrew The Interior Plate
Removing a Quickset deadbolt starts with unscrewing the interior plate. This step is important to access the lock’s inner parts. The interior plate holds the lock mechanism firmly against the door. Removing it carefully ensures the lock can be taken out without damage.
Prepare a screwdriver that fits the screws well. Using the right tool helps avoid stripping the screws. Look closely at the interior plate for the screws. They are usually small and may be hidden under a cover or trim.
Locate The Screws On The Interior Plate
First, find all screws holding the interior plate. Check around the edges carefully. Some screws may be on the sides or hidden under a small panel. Removing any covers gently is necessary to expose the screws.
Use The Correct Screwdriver
Choose a screwdriver that matches the screw heads. Most Quickset deadbolts use Phillips-head screws. A proper fit makes unscrewing easier and safer. Avoid forcing the screwdriver to prevent damage.
Remove The Screws Carefully
Turn each screw counterclockwise to loosen. Keep a steady hand to avoid slipping. Place the screws somewhere safe to avoid losing them. Once all screws are out, the interior plate can be taken off.
Detach The Exterior Keypad
Detaching the exterior keypad is the first step to remove a Quickset deadbolt. The keypad controls the locking mechanism. Removing it carefully protects the lock and keypad from damage.
Start by locating the screws holding the keypad in place. They are usually on the interior side of the door. These screws keep the keypad attached firmly.
Find The Screws On The Interior Side
Open the door to access the inside part of the lock. Look for two or three screws near the deadbolt. Use a screwdriver to remove these screws slowly. Keep the screws safe for reassembly or replacement.
Pull The Keypad Away From The Door
After unscrewing, gently pull the keypad away from the door surface. The keypad might feel tight at first. Wiggle it slightly to loosen it without forcing too hard.
Disconnect The Cable (if Present)
Some Quickset keypads connect with a cable to the lock. Check for a small cable behind the keypad. Carefully unplug the cable by pressing the clip and pulling it out. Avoid pulling the cable itself.

Credit: www.youtube.com
Extract The Deadbolt Latch
Removing the deadbolt latch is a key step in taking out a Quickset deadbolt. This part holds the door securely closed. You must carefully remove it to avoid damage to the door.
Focus on the latch itself, not the whole lock. The latch sits inside the edge of the door. It has a metal piece that slides in and out to lock and unlock.
Locate The Deadbolt Latch
Open the door and look at the edge where the latch is. It usually has a small rectangular metal plate. This plate is called the faceplate. The latch is behind it, inside the door.
Remove The Faceplate Screws
Use a screwdriver to take out the screws holding the faceplate. Keep the screws safe. The faceplate will come off easily after this step. This exposes the latch for removal.
Slide Out The Latch
Push or pull the latch straight out from the door edge. Sometimes it needs a little wiggle. Avoid forcing it too hard. The latch should come out smoothly if screws are removed.
Inspect The Latch For Damage
Check the latch for wear or damage. A broken latch can cause lock problems. Replace the latch if it looks bent or cracked before installing a new lock.
Troubleshooting Common Issues
Removing a Quickset deadbolt can sometimes bring unexpected problems. These issues can slow down the process or stop it altogether. Knowing common problems helps fix them fast. It saves time and avoids extra damage.
Here are some common problems and easy ways to solve them during deadbolt removal.
Stuck Deadbolt Cylinder
The cylinder may not turn or come out easily. Dirt or rust inside can cause this. Spray a little lubricant into the lock. Wait a few minutes, then try turning or pulling the cylinder again. Use gentle force to avoid breaking the lock.
Screws Won’t Unscrew
Screws may be tight or stripped. Use a screwdriver that fits perfectly. Apply pressure while turning slowly. If stuck, try a rubber band between the screw and screwdriver for extra grip. Avoid using too much force to prevent damage.
Deadbolt Not Aligning Properly
The deadbolt may not line up with the strike plate. This blocks removal. Check the bolt and plate for dirt or misalignment. Adjust the strike plate slightly with a screwdriver. Make sure the bolt slides smoothly before trying again.
Cover Plate Hard To Remove
The cover plate can be painted or stuck. Use a flat tool to gently pry it up. Work slowly around the edges to avoid bending the plate. Heat from a hairdryer can soften paint, making removal easier.

Credit: diy.stackexchange.com
Tips For Reinstallation Or Replacement
After removing a Quickset deadbolt, reinstalling or replacing it needs care. Proper steps ensure the lock works well and stays secure. Pay attention to details during this process. This avoids problems like misalignment or loose parts.
Follow simple tips to make the reinstallation or replacement smooth. These tips help keep your door safe and your lock functioning correctly.
Preparing The Door And Lock Components
Clean the door surface before installing the lock. Remove dust and dirt from the hole and surrounding area. Check the parts of the deadbolt for damage or wear. Replace any broken or worn pieces to avoid future issues.
Aligning The Deadbolt Correctly
Make sure the deadbolt fits well in the door hole. The lock and latch must line up with the strike plate on the door frame. Test the bolt movement before fully tightening screws. Proper alignment ensures smooth locking and unlocking.
Securing Screws Firmly But Carefully
Tighten screws evenly to hold the lock in place. Avoid overtightening to prevent damage to the lock or door. Use the right screwdriver to avoid stripping screws. Check all screws after installation for tightness.
Testing Lock Operation Thoroughly
Test the key and thumb turn several times. Make sure the deadbolt moves smoothly without sticking. Check the lock from both inside and outside the door. Confirm that the door closes and locks securely every time.
Frequently Asked Questions
How Do I Remove A Quickset Deadbolt Lock?
To remove a Quickset deadbolt, first unscrew the interior screws. Then, detach the interior and exterior parts carefully. Finally, pull out the deadbolt mechanism from the door edge.
What Tools Are Needed To Remove Quickset Deadbolt?
You need a Phillips screwdriver or a drill with a screwdriver bit. Optionally, use a flathead screwdriver to help pry parts gently.
Can I Remove Quickset Deadbolt Without A Key?
Yes, by unscrewing the interior side, you can access the lock mechanism. You do not need the key to remove the deadbolt.
How Long Does It Take To Remove A Quickset Deadbolt?
Removing a Quickset deadbolt usually takes about 5 to 10 minutes. It depends on your familiarity with door hardware and tools.
Conclusion
Removing a Quickset deadbolt is easier than it seems. With the right tools and steps, you can do it yourself. Take your time and follow each step carefully. This helps avoid damage to your door or lock. Once removed, you can replace or fix the deadbolt as needed.
Simple tasks like this save money and give you control over home security. Keep this guide handy for future lock projects. You’ve got this!