Have you ever faced the frustration of a deadbolt lock that’s come apart? Whether you took it apart for repairs or it just fell apart unexpectedly, putting it back together can feel confusing.
But don’t worry—you can fix it yourself, even if you’re not a locksmith. In this guide, you’ll discover simple, step-by-step instructions to reassemble your deadbolt lock quickly and confidently. Keep reading, and by the end, you’ll have your lock working smoothly again, keeping your home safe and giving you peace of mind.
Tools Needed
Putting a deadbolt lock back together requires the right tools. Having these tools ready makes the job easier and faster. Using the correct tools also helps avoid damage to the lock parts.
Gathering tools before starting saves time. It lets you focus on the task without interruptions. Below are the essential tools you need for reassembling a deadbolt lock.
Screwdriver Set
A screwdriver set is necessary. Most deadbolts use Phillips or flathead screws. A set with multiple heads fits different screws perfectly. Choose one with comfortable handles for better grip.
Needle-nose Pliers
Needle-nose pliers help hold small parts firmly. They are perfect for handling tiny springs and pins. These pliers give precision and control during assembly.
Allen Wrenches
Some deadbolts require Allen wrenches. These tools fit hex screws found in many locks. A set with various sizes ensures the right fit. Allen wrenches prevent stripping screws.
Lubricant
Lubricant keeps the lock working smoothly. Use a dry lubricant to avoid dirt build-up. Apply it on moving parts before full assembly. It helps the deadbolt slide easily.
Clean Cloth
A clean cloth is useful for wiping parts. It removes dust and old grease. Keeping parts clean improves lock performance and lifespan.
Identify Deadbolt Parts
Start by knowing each part of the deadbolt lock: the bolt, cylinder, and thumb turn. These pieces fit together to secure your door properly. Understanding them helps you put the lock back in place with ease.
Knowing each part of a deadbolt helps you put it back together correctly. A deadbolt has several pieces that work as one unit. Understanding these parts prevents mistakes and saves time.
Each piece has a simple job. Together, they keep your door secure. Let’s look at the main parts of a deadbolt.
Exterior Key Cylinder
This is the part you see on the outside of the door. It holds the keyhole. Turning the key here moves the bolt inside the door.
Interior Thumb Turn
Located on the inside of the door, this piece lets you lock or unlock without a key. You turn it with your hand to move the bolt.
Deadbolt Bolt
The bolt slides into the door frame to lock the door. It is a thick metal piece that moves back and forth when you turn the key or thumb turn.
Strike Plate
The strike plate is fixed to the door frame. It catches the bolt when the door locks. It helps keep the door secure and in place.
Connecting Mechanism
This part links the key cylinder and thumb turn to the bolt. It transfers movement from turning the key or thumb turn to sliding the bolt.
Remove Old Deadbolt
Removing an old deadbolt is the first step before installing a new one. It helps ensure the new lock fits properly and works well. This process is simple and takes only a few minutes.
Gather a screwdriver and a few tools. Keep the screws safe for later use. Follow each step carefully to avoid damage.
Locate The Screws Holding The Deadbolt
Find the screws on the interior side of the door. These screws hold the lock together. Use a screwdriver to remove them. Keep the screws in a small container.
Remove The Interior And Exterior Lock Pieces
After removing screws, gently pull the interior lock piece off. Then, remove the exterior piece from the other side of the door. Both parts should come off easily.
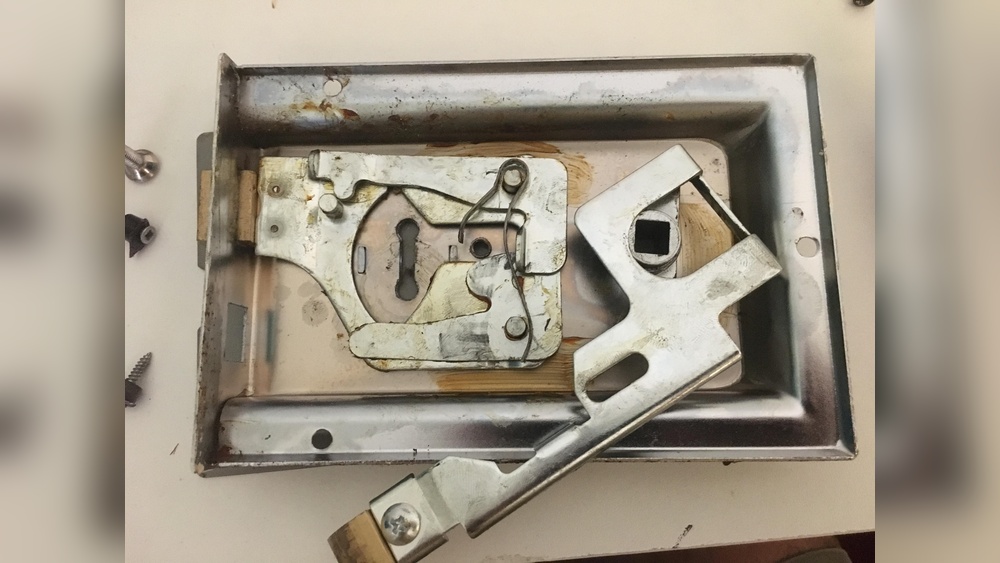
Take Out The Deadbolt Mechanism
Look inside the door edge for the deadbolt mechanism. It slides out once the lock pieces are removed. Use a screwdriver if it feels stuck. Pull it out carefully.
Remove The Strike Plate
Open the door and find the strike plate on the frame. Unscrew it with a screwdriver. This plate holds the bolt in place when locked. Removing it helps with new lock installation.

Credit: support.shopyalehome.com
Assemble Deadbolt Components
Assembling the deadbolt components is the key step to restore your lock’s function. This process involves putting together the main parts carefully. Each component must fit correctly for the lock to work smoothly.
Follow these steps to assemble the deadbolt parts properly. Take your time and check each piece as you go. Proper assembly ensures your door stays secure and easy to lock and unlock.
Attach The Bolt
Start by positioning the bolt into the door edge. Slide the bolt into its slot so it moves freely. Make sure the bolt faceplate sits flush with the door edge. Secure it with screws, tightening them evenly. The bolt should extend and retract smoothly.
Install The Cylinder
Place the cylinder through the hole on the door’s outside. Align it so the tailpiece fits inside the bolt mechanism. Push the cylinder firmly until it sits flush. Attach the cylinder with screws through the inside faceplate. Confirm the key turns without resistance.
Secure The Thumb Turn
Insert the thumb turn on the inside of the door. Align its spindle with the cylinder’s tailpiece. Press the thumb turn in place, ensuring it fits tightly. Fasten it with screws to hold it firmly. Test the thumb turn to make sure it locks and unlocks the bolt easily.
Install Deadbolt On Door
Installing a deadbolt on a door is a key step to secure your home. The process needs care and focus to ensure the lock works well. Proper installation helps the deadbolt fit tightly and operate smoothly. Follow these steps to put your deadbolt back together correctly.
Align The Deadbolt
Start by placing the deadbolt mechanism inside the door edge. Make sure the bolt aligns with the strike plate on the door frame. Check that the bolt slides in and out without resistance. Proper alignment prevents jamming and ensures smooth locking.
Insert And Tighten Screws
Use the provided screws to secure the deadbolt to the door. Insert screws through the lock’s faceplate and tighten them evenly. Do not overtighten; this can damage the lock or door. Tight screws keep the deadbolt steady and improve security.

Credit: www.youtube.com
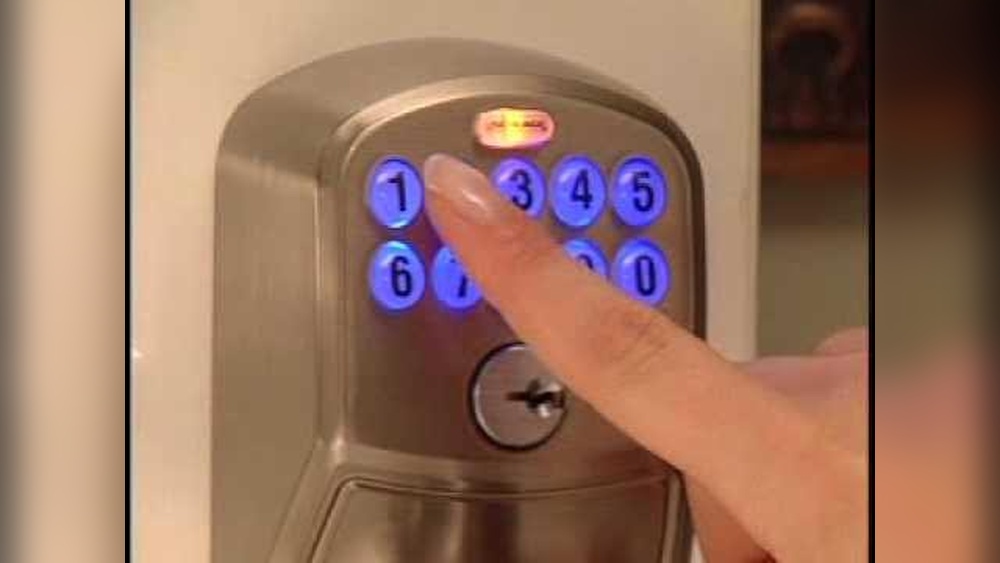
Test Lock Functionality
Testing the lock functionality is a key step after putting a deadbolt lock back together. It ensures the lock works smoothly and secures your door properly. A well-functioning lock keeps your home safe and gives peace of mind.
Check Locking Mechanism
Turn the key or thumb turn slowly to test the lock. Listen for any unusual sounds like grinding or sticking. The bolt should move out and retract fully without resistance. Try locking and unlocking several times to confirm smooth operation. Check both sides of the door to make sure the lock works equally well.
Adjust If Necessary
If the lock feels stiff or won’t turn fully, some parts may need adjustment. Loosen screws slightly and realign the lock or strike plate. Tighten the screws back once the bolt moves freely. Test the lock again after each adjustment. Small changes can fix most problems and improve lock performance.
Tips For Maintenance
Keeping your deadbolt lock in good shape helps it work smoothly and last longer. Simple care steps prevent problems and keep your home safe.
Regular maintenance makes sure the lock parts fit well and move easily. It also stops rust and dirt from causing trouble.
Clean The Lock Mechanism Regularly
Remove dust and dirt from inside the lock. Use a soft brush or compressed air. Avoid using water or harsh chemicals. Clean parts help the lock turn smoothly.
Lubricate With The Right Product
Use graphite powder or a silicone-based lubricant. Spray it lightly inside the keyhole and on moving parts. Oil-based lubricants can attract dirt and cause jams.
Tighten Loose Screws
Check screws on the lock and strike plate often. Tighten any loose ones with a screwdriver. Loose screws can misalign the lock and make it hard to use.
Inspect For Wear And Damage
Look at the lock parts closely for signs of wear or damage. Replace any broken or worn pieces quickly. Damaged parts reduce security and cause lock failure.
Test The Lock Function
Turn the key or thumb turn several times after maintenance. The lock should move smoothly without sticking. Fix any issues before the lock gets stuck.

Credit: www.reddit.com
Frequently Asked Questions
How Do I Reassemble A Deadbolt Lock Correctly?
To reassemble a deadbolt lock, align the internal parts properly. Insert the bolt mechanism first, then attach the exterior and interior plates. Secure with screws, ensuring the latch moves smoothly before fully tightening.
What Tools Are Needed To Put A Deadbolt Back Together?
You typically need a screwdriver, pliers, and sometimes a hammer. A Phillips or flathead screwdriver is essential for removing and tightening screws. Pliers help adjust small parts, while a hammer assists with gentle taps if needed.
How Can I Test A Deadbolt After Reassembly?
Insert the key and turn it to check smooth operation. Also, test the thumb turn on the inside. Ensure the bolt extends and retracts fully without resistance or sticking.
Why Is My Deadbolt Not Locking After Reassembly?
This often occurs due to misaligned parts or loose screws. Check the bolt alignment and tighten all screws properly. Make sure the latch moves freely without obstruction in the strike plate.
Conclusion
Putting a deadbolt lock back together is easier than it seems. Follow each step carefully and take your time. Make sure all parts fit well and turn smoothly. Test the lock before fixing it to the door. This helps avoid future problems.
With patience, you can secure your home by yourself. Practice makes perfect. Don’t rush; small details matter a lot. You now have the basic knowledge to handle deadbolt assembly. Keep your tools ready and stay safe while working.