Are you looking to control four LED lights with just one switch? It might seem tricky at first, but once you know the simple steps, it becomes easy and efficient.
Imagine turning on all your lights at once without reaching for multiple switches. This guide will walk you through the exact process, saving you time and hassle. By the end, you’ll have a clear plan to make your lighting setup smarter and more convenient.
Ready to get started? Let’s dive in.
Tools And Materials Needed
Connecting four LED lights to one switch requires specific tools and materials. Preparing the right items ensures a smooth and safe installation. This section explains what you need for this task. Read carefully to gather all essential parts.
Types Of Led Lights
Choose LED lights that fit your project needs. Common options include strip lights, bulb lights, and panel lights. Each type uses different power levels and connectors. Select LEDs that work well together for consistent brightness.
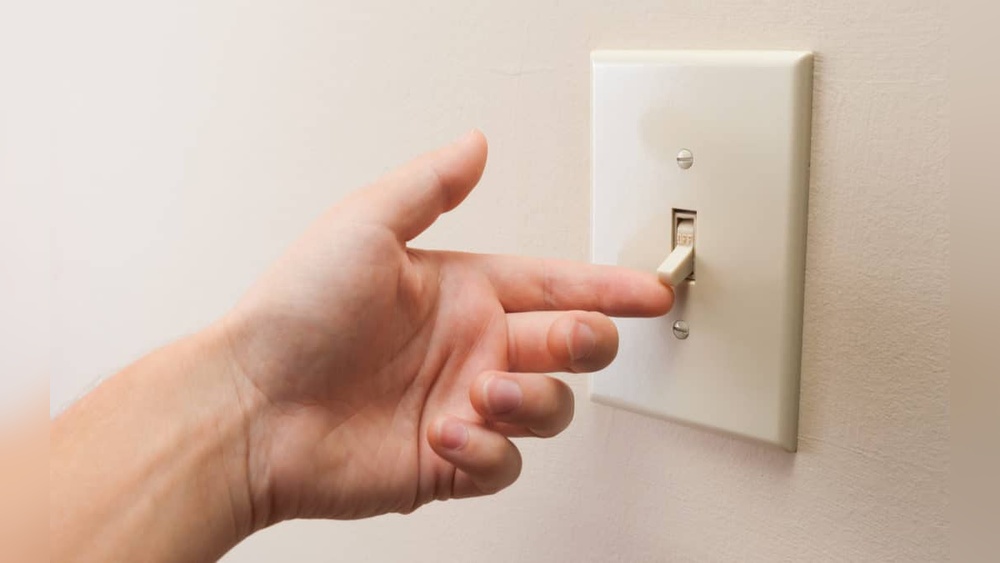
Choosing The Right Switch
The switch controls all four LED lights at once. Pick a switch rated for the total power of your LEDs. A simple toggle or rocker switch works well. Ensure the switch is easy to install and use.
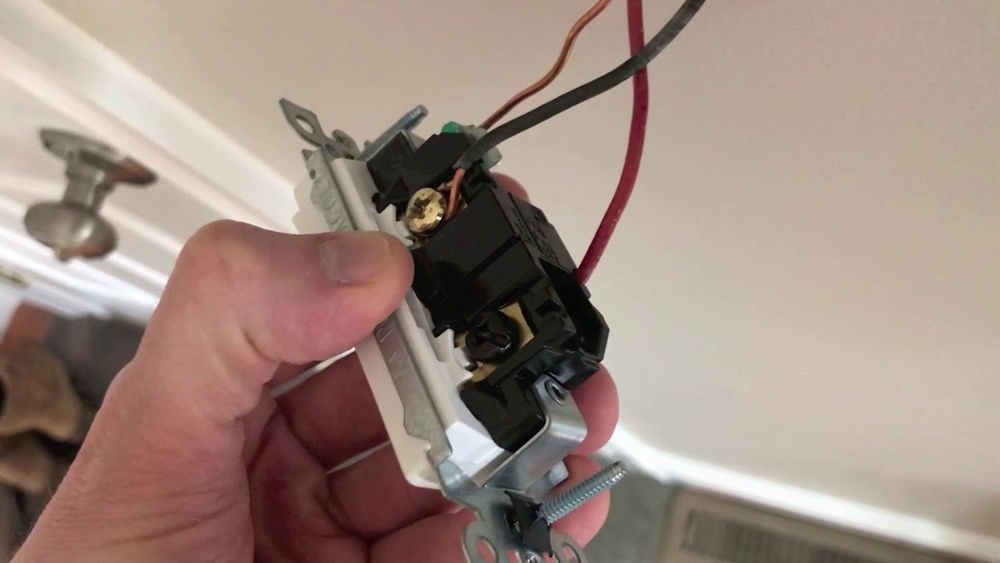
Wires And Connectors
Use wires that handle the LED current safely. Copper wires with proper thickness prevent overheating. Connectors like wire nuts or crimp connectors secure the wiring. Good connections avoid flickering and power loss.

Credit: diy.stackexchange.com
Safety Precautions
Working with electrical components like LED lights requires care and attention. Safety comes first to avoid accidents and damage. Follow simple safety steps before connecting your LED lights to one switch. These steps protect you and your equipment.
Turning Off Power
Always switch off the main power before starting any electrical work. This stops electricity flow and lowers the risk of shock. Use the circuit breaker or fuse box to cut the power. Check twice to make sure the power is off before touching wires.
Using Insulated Tools
Use tools with insulated handles for all wiring tasks. Insulated tools prevent electrical current from passing through your body. They keep you safe while working with live wires. Avoid using metal tools without insulation to reduce shock risk.
Checking Voltage Compatibility
Verify that your LED lights and switch match the voltage of your home circuit. Mismatched voltage can cause damage or fire. Look for voltage ratings on the light and switch labels. Use only components designed for your electrical system.
Wiring Basics For Leds
Wiring LED lights correctly is key to a safe and bright setup. Understanding the basics helps you connect four LED lights to one switch without issues. This section covers the essential wiring concepts for LEDs.
Knowing how to connect LEDs and use resistors protects your lights. It also makes sure they work well together. Learn simple steps to handle wiring like a pro.
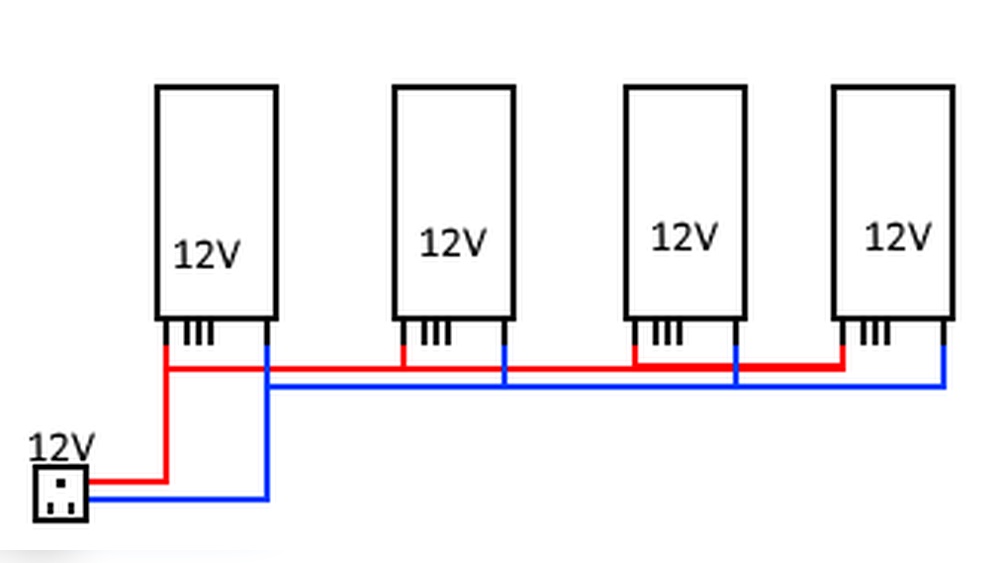
Understanding Series And Parallel Connections
LEDs can be wired in two main ways: series and parallel. In a series connection, LEDs link one after another. Current flows through each LED in order. If one LED breaks, the whole circuit stops working.
Parallel wiring connects each LED directly to the power source. Each LED gets full voltage. If one LED fails, others stay lit. Parallel is best for consistent brightness across all lights.
Calculating Resistors
Resistors control the current going to each LED. They keep LEDs from burning out. Use the formula: Resistor = (Power Supply Voltage – LED Voltage) ÷ LED Current.
This calculation ensures the right resistor size. Too small a resistor can damage LEDs. Too large makes them dim. Correct resistors help LEDs last longer.
Identifying Positive And Negative Leads
LEDs have two leads: positive (anode) and negative (cathode). The longer lead is usually positive. The shorter lead is negative. Connecting them wrong stops the LED from lighting.
Check the flat side of the LED base too. It marks the negative lead. Correct polarity is essential for proper LED function.
Credit: www.youtube.com
Connecting Leds To One Switch
Connecting multiple LED lights to one switch is a simple way to control all lights together. It saves space and makes your setup cleaner. This method works well for small projects or home lighting. You only need basic tools and some wiring knowledge.
Understanding how to wire LEDs correctly is important. The right connection ensures all lights work without damage. Follow clear steps to connect four LED lights to one switch safely and effectively.
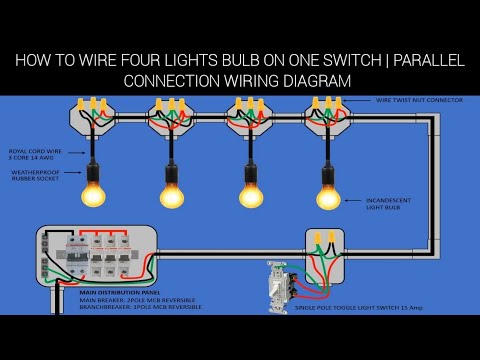
Wiring Leds In Parallel
Connect all LED positive terminals to one wire. Do the same for all negative terminals. This setup is called wiring in parallel. It allows each LED to get the same voltage. If one LED fails, the others stay on.
Use a wire stripper to prepare wires for connection. Twist the positive wires together and do the same for negatives. Use wire connectors or electrical tape to secure the joins. Check that no bare wires touch each other.
Connecting Switch To Power Source
Identify the power source, usually a battery or adapter. Connect one terminal of the switch to the positive side of the power source. Connect the other terminal of the switch to the positive wire of the LED group. Connect the LED negative wire directly to the power source negative terminal.
The switch acts as a gate. It controls the flow of electricity to the LEDs. Make sure all connections are tight to avoid loose contacts.
Testing The Circuit
Turn the switch on to test the LEDs. All four lights should glow brightly and evenly. If any LED does not light, check its wiring first. Make sure no wires are loose or crossed.
Turn the switch off to ensure the lights go out. This confirms the switch controls the whole circuit. Fix any problems before final installation.
Troubleshooting Common Issues
Troubleshooting common issues helps you fix problems with LED lights connected to one switch. It saves time and avoids frustration. Most problems have simple solutions. Understanding these issues makes your setup more reliable.
Leds Not Lighting Up
Check the power source first. Make sure the switch is on. Inspect the wiring for loose connections. Confirm the LEDs are correctly connected to positive and negative terminals. Test each LED separately to find faulty ones. Replace any damaged LEDs. Verify the power supply voltage matches the LED requirements.
Flickering Lights
Flickering often shows a loose connection. Tighten all wiring and terminals. Check the switch for damage or wear. Use a stable power supply without voltage drops. Avoid overloading the circuit with too many LEDs. Use resistors if necessary to balance current. Replace flickering LEDs if the problem stays.
Overheating Components
Overheating is a sign of too much current or poor ventilation. Use LEDs with correct wattage and voltage ratings. Add heat sinks or cooling fans for better airflow. Avoid clustering LEDs too close together. Check for short circuits or damaged wires. Turn off the system immediately if components become hot. Replace any overheated parts to prevent damage.
Tips For Neat And Safe Installation
Installing four LED lights on one switch needs care and attention. A neat and safe setup protects your home and keeps the lights working well. Follow these tips for a clean and secure installation.
Securing Wires
Keep wires tight and organized. Use wire clips or ties to hold wires in place. Avoid loose wires that can cause accidents or damage. Secure wires inside walls or on surfaces to prevent trips or pulls.
Using Proper Insulation
Cover all wire connections with good insulation. Use electrical tape or wire nuts to avoid shorts. Proper insulation stops sparks and electric shocks. Always check that no bare wire is visible after connections.
Labeling Connections
Mark each wire and connection clearly. Use tags or colored tape to identify wires. Labeling helps during future repairs or upgrades. It saves time and avoids confusion when working on the switch or lights.

Credit: www.youtube.com
Frequently Asked Questions
How Do I Wire 4 Led Lights To One Switch?
Connect the LED lights in parallel to the switch. Use appropriate gauge wire and ensure correct polarity. This setup allows all LEDs to operate simultaneously from one switch.
What Type Of Switch Works For Multiple Led Lights?
A standard single-pole switch works well for controlling multiple LED lights. Ensure the switch rating matches your LED circuit’s voltage and current requirements for safety.
Can I Use One Power Source For All 4 Leds?
Yes, you can power all 4 LEDs from one power source if wired correctly in parallel. Make sure the power source provides sufficient voltage and current for all LEDs combined.
Do Led Lights Need Resistors When Connected To One Switch?
Yes, resistors are necessary to prevent LED damage. Use individual resistors for each LED or a suitable resistor for the whole parallel circuit to control current flow safely.
Conclusion
Connecting four LED lights to one switch is simple and practical. Follow the steps carefully for safe wiring. Always check connections twice before turning on power. This setup saves space and controls all lights together. You can use this method in many rooms.
It helps keep your lighting neat and organized. Take your time and work slowly for best results. Enjoy the convenience of controlling multiple lights with one switch.