Are you tired of your wall heater running non-stop, wasting energy and driving up your bills? Learning how to hook up a thermostat to your wall heater can give you full control over your home’s temperature and save you money.
Imagine walking into a warm room exactly when you want it, without lifting a finger. In this guide, you’ll discover simple, step-by-step instructions to connect a thermostat quickly and safely. Keep reading, and you’ll be able to enjoy cozy comfort and smarter energy use in no time.

Credit: forums.wyze.com
Tools And Materials Needed
Before hooking up a thermostat to a wall heater, gather all necessary tools and materials. Having everything ready saves time and prevents frustration. It also ensures a smooth and safe installation process.
Each item plays a key role in connecting the thermostat correctly. Using the right tools avoids damage to the heater or wiring. Materials must fit your specific heater model and thermostat type.
Basic Hand Tools
A screwdriver set is essential, including flathead and Phillips heads. Wire strippers help remove insulation from wires without cutting them. Needle-nose pliers assist in bending and holding wires during connection. A voltage tester checks if power is off before starting work.
Thermostat And Wall Heater Components
Choose a thermostat compatible with your wall heater’s voltage and power rating. You need mounting screws and a thermostat wall plate for secure fixing. The wall heater must have accessible wiring terminals for connection.
Electrical Materials
Use electrical wire rated for your heater’s power, usually 14 or 12 gauge. Wire nuts secure wire connections safely. Electrical tape insulates exposed wire ends and prevents short circuits.
Safety Precautions
Safety is the top priority when hooking up a thermostat to a wall heater. Electrical work can be risky. Following clear safety steps protects you and your home. It prevents accidents and damage.
Read all instructions before starting. Use proper tools and safety gear. Work slowly and carefully to avoid mistakes.
Turn Off The Power
Always switch off the power at the circuit breaker. This stops electricity from flowing to the heater. Double-check with a voltage tester to confirm power is off. Never work on live wires.
Use Insulated Tools
Use tools with insulated handles. They reduce the risk of electric shock. Avoid metal tools without insulation. Keep tools dry and clean during work.
Follow Wiring Codes
Stick to local electrical codes and standards. Correct wiring prevents short circuits and fires. Use the right wire gauge and connectors. Secure all connections tightly.
Wear Safety Gear
Wear safety glasses to protect your eyes. Use gloves to avoid cuts and shocks. Wear long sleeves to protect your skin from sparks or sharp edges.
Check For Damage
Inspect the thermostat and heater for damage before installation. Do not use broken or worn parts. Replace damaged wires or components to ensure safety.
Test The System
After installation, turn power back on carefully. Test the thermostat and heater operation. Look for any unusual sounds, smells, or heat. Turn off power immediately if anything seems wrong.
Locating The Wall Heater Wiring
Locating the wiring of your wall heater is the first step in hooking up a thermostat. Knowing where the wires are helps you connect everything safely and correctly. This process requires care and attention to detail.
Start by turning off the power to the heater at the circuit breaker. This step is crucial to avoid electric shock. Next, find the wall heater unit and remove its cover. Inside, you will see several wires that connect the heater to the home’s electrical system.
Identify The Power Supply Wires
Look for the wires coming from the circuit breaker box. These are usually black and white. The black wire carries the current, while the white wire is neutral. You must correctly identify these to connect the thermostat properly.
Find The Heater Control Wires
These wires control the heater’s operation. They often connect to a switch or relay inside the heater. They might be red or another color. Trace these wires carefully to understand their path.
Use A Voltage Tester Safely
A voltage tester checks if the wires have electricity. After turning off the power, test the wires to confirm no current flows. This step ensures safety before handling wires. Always follow safety instructions when using the tester.
Label The Wires For Easy Reference
Label each wire with tape and a marker. This helps avoid confusion during installation. Clear labels make it easier to connect the thermostat wires correctly later on.

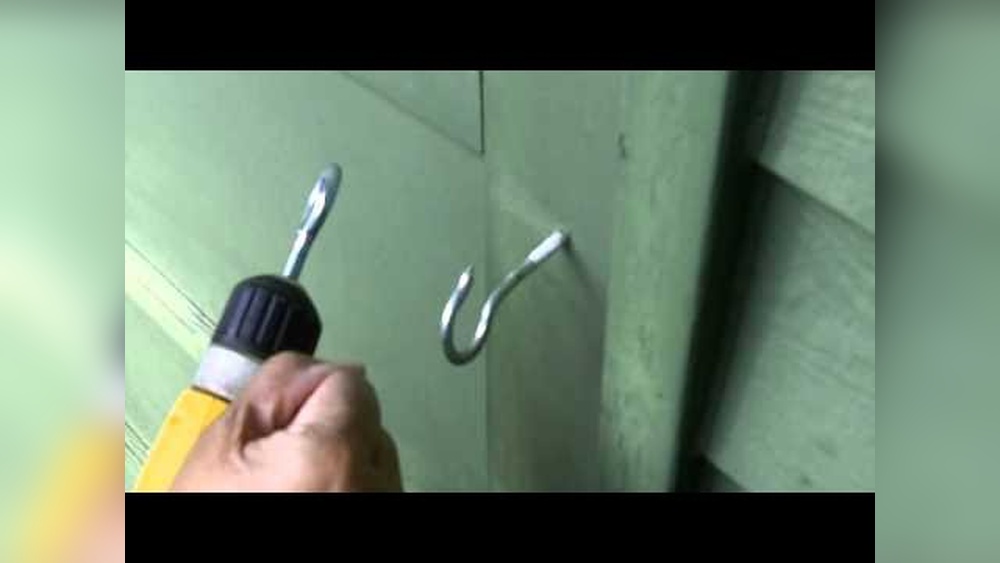
Credit: www.reddit.com
Choosing The Right Thermostat
Choosing the right thermostat is key for your wall heater’s performance. It controls the temperature and helps save energy. Picking the right model means your room stays comfortable without wasting power.
Not all thermostats fit every heater. Some work better with electric heaters, while others suit gas models. Understanding your heater type helps find a compatible thermostat.
Types of ThermostatsMechanical thermostats use a simple dial and spring system. They are easy to use but less precise. Digital thermostats show exact temperatures and allow better control.
Programmable thermostats let you set schedules. They turn off or lower heat when not needed. Smart thermostats connect to Wi-Fi and can be controlled from your phone.
Compatibility with Wall HeatersCheck your heater’s power type: electric or gas. Some thermostats only work with low-voltage heaters. High-voltage heaters may need special thermostats designed for their electrical load.
Read the heater’s manual or labels to find voltage and wiring info. Choose a thermostat that matches these specifications to avoid damage or poor performance.
Energy Efficiency FeaturesLook for thermostats with energy-saving modes. These help reduce electricity bills by adjusting temperatures automatically. Features like adaptive learning or vacation mode add convenience and savings.
Thermostats with clear displays and easy controls encourage better use. Efficient thermostats keep your heater running smartly and reduce waste.
Wiring The Thermostat
Wiring the thermostat to a wall heater is a crucial step. It controls the heater’s operation and keeps your room comfortable. Proper wiring ensures safety and efficient heating. Follow the steps carefully to avoid errors and damage. Let’s start by identifying the wires.
Identifying The Wires
First, turn off the power to the heater. Safety is important. Look at the wires coming from the wall and the heater. Usually, you will see a few different wires: live, neutral, and ground. The live wire often has a black or red color. The neutral wire is usually white or blue. The ground wire is green or bare copper. Use a voltage tester to be sure. Label each wire to avoid confusion later.
Connecting The Wires To The Thermostat
Match the wires from the wall to the thermostat terminals. The live wire connects to the terminal marked “L” or “Line.” The neutral wire goes to the terminal marked “N.” Attach the ground wire to the green terminal or screw. Tighten all screws firmly to prevent loose connections. Double-check each wire before restoring power. Proper connection helps the thermostat control the heater safely and efficiently.

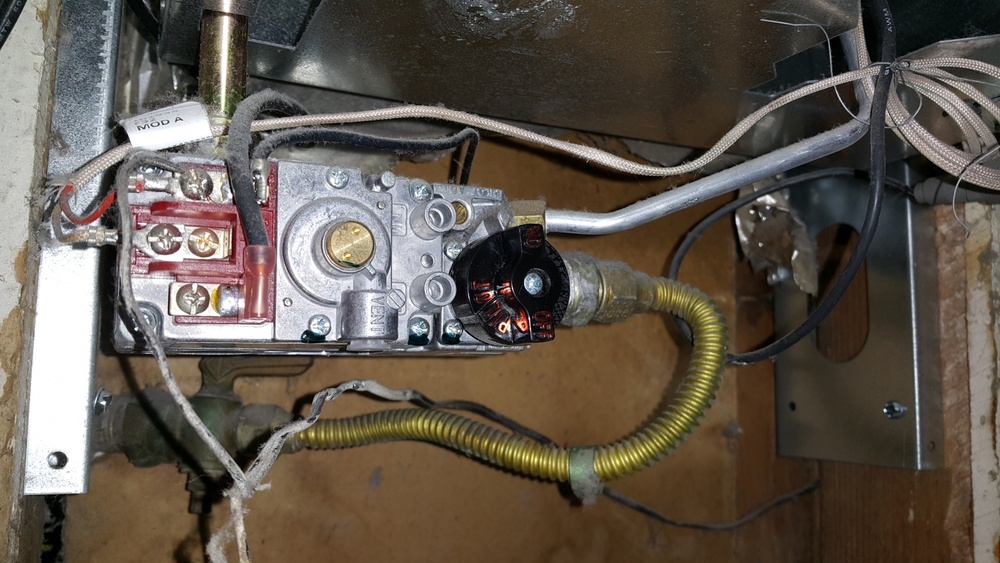
Credit: diy.stackexchange.com
Mounting The Thermostat
Mounting the thermostat is a crucial step in hooking it up to a wall heater. The right placement ensures the thermostat reads the room temperature accurately. This helps keep your space comfortable and saves energy. Careful mounting also protects the device from damage.
Choose a spot on an interior wall. Avoid areas near drafts, direct sunlight, or heat sources. These can cause false readings and improper heating.
Selecting The Perfect Location
Pick a height about 5 feet from the floor. This is where the thermostat can best sense the room’s average temperature. Keep it away from windows, doors, or vents. These areas have changing air temperatures.
Preparing The Wall Surface
Use a clean, flat surface for mounting. Remove any dust or dirt. This helps the thermostat stay secure. Use a level tool to mark the mounting holes straight. This prevents the thermostat from tilting.
Attaching The Thermostat Base
First, separate the thermostat body from its base. Align the base with the marked holes. Use screws to fix it firmly to the wall. Do not overtighten. This may crack the base or wall.
Connecting The Wiring
Follow the wiring diagram that came with your thermostat. Connect wires to the correct terminals on the base. Make sure each wire is tight and secure. Poor connections can cause the heater to malfunction.
Final Assembly And Testing
Snap the thermostat body back onto the base. Turn on the power to the heater circuit. Set the thermostat to a temperature higher than the room’s current level. Check if the heater starts. Adjust settings if needed.
Testing The Setup
Testing the setup is a key step after hooking up a thermostat to a wall heater. It ensures everything works correctly and safely. This step helps avoid problems like overheating or no heat at all. Take your time to check each part carefully.
Checking The Power Supply
First, make sure the power is on. Look at the breaker or switch controlling the heater. The thermostat needs power to function. Use a voltage tester to confirm electricity reaches the thermostat.
Setting The Thermostat Temperature
Set the thermostat to a temperature higher than the room’s current level. This action tells the heater to turn on. Watch if the heater responds to the change. The heater should start warming the room shortly after.
Observing Heater Response
Listen for sounds from the heater, like a fan or heating element activating. Feel if warm air or heat comes from the heater. If the heater does not respond, check wiring connections again. Ensure all wires are tight and correctly placed.
Testing The Thermostat Controls
Try lowering and raising the temperature on the thermostat. Watch how the heater reacts each time. The heater should turn off when the room reaches the set temperature. It should turn back on if the temperature drops below the set point.
Verifying Safety Features
Check if safety features like automatic shutoff work. Overheating protection is critical for safe use. The heater should stop if it gets too hot. This feature prevents fire hazards and damage to the heater.
Troubleshooting Common Issues
Setting up a thermostat with a wall heater can sometimes lead to issues. Troubleshooting these problems helps ensure your heater works well and keeps your space warm. Understanding common mistakes saves time and frustration. This section covers typical problems and easy fixes to get your system running smoothly.
Check Power Supply And Connections
First, verify the power supply to your thermostat and heater. A loose wire or tripped circuit breaker often causes issues. Make sure all wires are secure and the breaker is on. A lack of power stops the thermostat from controlling the heater properly.
Verify Thermostat Settings
Incorrect thermostat settings block proper heating. Confirm the thermostat is set to “heat” mode, not “cool” or “off.” Set the temperature higher than the room temperature to trigger the heater. Double-check the temperature scale, Celsius or Fahrenheit, matches your preference.
Inspect The Heater’s Thermostat Compatibility
Not all thermostats work with every wall heater. Using the wrong type can cause control errors or no response. Check the heater’s manual for compatible thermostats. Choose a model designed for your heater’s voltage and heating element type.
Look For Faulty Thermostat Sensors
Thermostats use sensors to measure room temperature. Dust, dirt, or damage can stop sensors from working well. Clean the thermostat gently to remove dust. Replace the thermostat if the sensor is broken or inaccurate.
Check For Heater Malfunctions
The problem may be in the heater, not the thermostat. A faulty heating element or internal wiring issue can prevent heat output. Test the heater separately or call a technician if you suspect a heater fault. Fixing the heater restores proper function.
Maintaining Your Thermostat And Heater
Maintaining your thermostat and wall heater helps keep them working well. Regular care prevents problems and saves energy. Simple steps can extend their life and improve comfort in your home.
Clean parts and check settings often. This keeps the heater safe and efficient. A well-maintained system uses less power and heats better.
Cleaning The Thermostat And Heater
Dust and dirt can block sensors and vents. Use a soft cloth to wipe the thermostat’s surface. Avoid using water or sprays on it.
For the heater, gently vacuum vents and grills. Clear any dust that can reduce airflow. Clean parts help the heater run smoothly.
Checking The Wiring And Connections
Loose wires cause poor performance or safety risks. Turn off power before inspecting connections. Tighten any loose wires carefully.
Look for damaged wires or corrosion. Replace parts if you see wear. Proper wiring keeps the system safe and reliable.
Testing The Thermostat Function
Test the thermostat regularly to ensure it controls temperature well. Set it to a few degrees above room temperature. Listen for the heater turning on.
Lower the setting and check if the heater stops. This simple test shows if the thermostat works right. Fix issues early to avoid bigger problems.
Frequently Asked Questions
How Do I Connect A Thermostat To A Wall Heater?
To connect a thermostat to a wall heater, first turn off power. Then, wire the thermostat to the heater’s control terminals following the manufacturer’s instructions. Finally, restore power and test the setup to ensure proper operation and temperature control.
What Tools Are Needed To Hook Up A Thermostat?
You need a screwdriver, wire stripper, voltage tester, and electrical tape. These tools help safely connect wires and ensure the thermostat is properly installed. Always turn off power before starting to avoid electrical hazards during installation.
Can Any Thermostat Work With A Wall Heater?
Not all thermostats are compatible with wall heaters. Use a thermostat designed for electric baseboard or wall heaters. Check voltage and wiring requirements to match your heater’s specifications for safe and efficient operation.
How Do I Test If The Thermostat Is Working Correctly?
After installation, set the thermostat to a higher temperature than room temperature. Listen for the heater to activate or feel warmth near the heater. Use a voltage tester if needed to confirm the thermostat sends power to the heater.
Conclusion
Hooking up a thermostat to a wall heater is simple and practical. Follow the steps carefully to ensure safe installation. Double-check all connections before turning the power on. A properly installed thermostat saves energy and controls room temperature well. Enjoy a comfortable home without high heating bills.
Take your time and ask for help if needed. Now, you can keep your space warm and cozy with ease.