Are you struggling to hook up your LiftMaster wall remote and want a simple, step-by-step guide? You’re not alone.
Setting up your garage door remote can feel confusing, but once you know the right moves, it’s quick and easy. You’ll discover clear instructions that will get your LiftMaster remote working smoothly in no time. Keep reading, and you’ll be controlling your garage door like a pro—no more frustration, just convenience.
Plus, we’ll point you to helpful YouTube videos that show exactly what to do, making the process even simpler for you.
Credit: allsecurityequipment.com
Tools And Materials Needed
Before starting to hook up a LiftMaster wall remote, gather all tools and materials. This makes the process smoother and faster. Having everything ready helps avoid interruptions and mistakes.
Basic Tools
A Phillips screwdriver is essential for removing and securing screws. A flathead screwdriver might also be needed to pry open some parts. A drill can help if new holes are required for mounting.
Liftmaster Wall Remote Kit
The kit usually includes the remote, mounting bracket, and screws. Check the package to confirm all parts are present. Using the official kit ensures compatibility with your garage door opener.
Batteries
Most LiftMaster remotes need batteries to work. Use fresh batteries for best performance. Check the remote’s manual to know the correct battery type.
Safety Gear
Safety goggles protect your eyes from dust or debris. Gloves can protect your hands while handling tools. Use these to stay safe during installation.
Safety Precautions
Safety is the top priority when hooking up a LiftMaster wall remote. This device controls your garage door, which can be heavy and dangerous. Taking the right safety steps keeps you and others safe during installation.
Follow these safety precautions carefully. They prevent accidents and protect your property.
Turn Off Power Before Starting
Always switch off the garage door opener’s power before installation. Unplug the unit or turn off the circuit breaker. This avoids electric shock or accidental door movement.
Keep Children And Pets Away
Ensure children and pets are not near the work area. Garage doors can close suddenly. Keep the space clear to avoid injuries.
Use Proper Tools And Equipment
Use the right tools for the job. A screwdriver, drill, and ladder may be needed. Using the proper tools helps avoid slips and mistakes.
Follow Manufacturer Instructions
Read the LiftMaster manual carefully. Follow each step exactly. Ignoring instructions can cause damage or unsafe operation.
Check Door Movement After Installation
Test the garage door after hooking up the remote. Watch for smooth, safe movement. Stop immediately if the door behaves oddly.
Locating The Wall Remote Wiring
Finding the wiring for your LiftMaster wall remote is the first step. This wiring connects the remote to your garage door opener. Knowing where these wires are helps with safe and correct installation.
The wiring usually runs from the garage door opener motor unit to the wall control panel. You may see a small bundle of wires near the motor or along the garage wall.
Check Near The Garage Door Opener
Look close to the main motor unit. The wires for the wall remote often start here. They may be tucked behind the motor or attached to the side.
Use a flashlight if the area is dark. Look for a small set of low-voltage wires, usually two or three in number.
Follow The Wall Control Panel Wiring
The wall control panel is where you press buttons to open or close the door. Check behind this panel. Wires run from the panel back to the motor unit.
Carefully remove the cover plate of the wall control. Notice the wires attached to the terminals inside. These wires connect to the motor unit.
Look Along The Garage Wall
Sometimes the wiring is hidden inside the wall or along the surface. Check the path between the motor and the control panel. Wires may be held by clips or staples.
Make sure to note the color and position of each wire. This will help during reconnection or replacement.

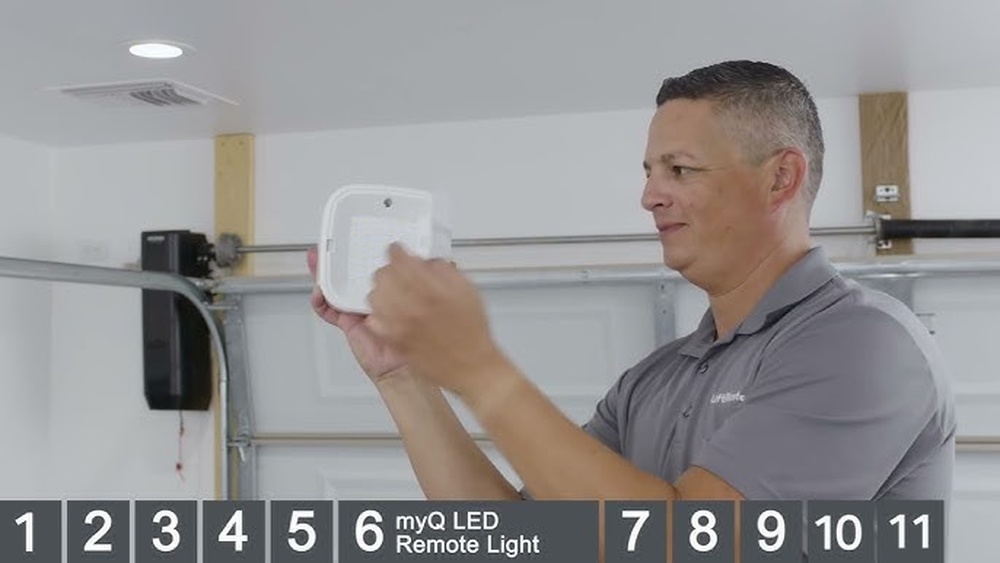
Credit: www.youtube.com
Turning Off Power
Turning off the power is a key step before you hook up a Liftmaster wall remote. It keeps you safe from electric shock. Also, it stops the garage door from moving while you work. This step protects both you and the device.
Power off means no electricity flows to the garage door opener. It helps avoid accidents during installation or repair. Always double-check that the power is really off. Safety first.
Locate The Power Source
Find the power source that supplies your garage door opener. Usually, it is a wall outlet or circuit breaker. Knowing this helps you turn off the right switch. Avoid guessing to prevent any risks.
Unplug The Garage Door Opener
Pull the plug from the outlet to cut the power. This is the easiest way to turn off the device. Make sure your hands are dry for safety. Keep the plug out until you finish installing the remote.
Use The Circuit Breaker
If you cannot reach the plug, use the circuit breaker. Switch off the breaker that controls the garage door opener. Label the breaker for easy identification next time. This method cuts power completely and safely.
Verify Power Is Off
Press the garage door button on the wall panel. The door should not move or respond. No noise or light means power is off. Confirm before starting to hook up your remote.
Connecting The Wires
Connecting the wires is a key step in setting up your LiftMaster wall remote. It ensures the remote can communicate with the garage door opener. This step requires careful attention to wire color and terminal placement. Follow each part closely to avoid mistakes and make the remote work perfectly.
Identifying Wire Colors
LiftMaster wall remotes usually have two wires. These wires come in different colors, often red and white. The colors help you know which wire goes where. Check your remote and opener manual to confirm the colors. Using the wrong wire can cause the remote to fail. Take your time to match the colors correctly.
Attaching Wires To Terminals
Next, connect the wires to the correct terminals on the opener. Terminals are small screws or clips marked with labels like “Wall” or “Remote.” Loosen the screws gently before attaching the wires. Insert the wire ends firmly under the screws. Tighten the screws to hold the wires in place. Ensure the wires do not touch each other. This keeps the circuit safe and working well.
Mounting The Wall Remote
Mounting the LiftMaster wall remote is an important step. It keeps your remote safe and easy to reach. A well-mounted remote adds convenience to your garage routine. Follow simple steps to place it in the best spot.
Choose a location near your garage door. Make sure it is within easy reach. Avoid places where the remote might get wet or dirty. Mounting it properly helps prevent accidental drops and damage.
Choose The Right Spot For Mounting
Pick a spot close to the garage door. It should be at a comfortable height for all users. Avoid areas with direct sunlight or moisture. Look for a flat surface to mount the remote securely.
Prepare The Surface And Tools
Clean the wall or surface where the remote will go. Use a cloth to remove dust and dirt. Gather tools like a drill, screws, and a screwdriver. Having tools ready makes mounting faster and easier.
Attach The Mounting Bracket
Hold the bracket against the wall. Mark the screw holes with a pencil. Drill small pilot holes for easier screwing. Secure the bracket firmly with screws. Ensure the bracket does not wobble.
Place The Remote On The Bracket
Slide the remote into the mounted bracket. Check that it fits tightly and does not fall out. Test the remote by pressing buttons while mounted. Adjust the position if needed for better access.
Testing The Remote
Testing the LiftMaster wall remote is a key step after installation. It ensures the remote works properly with your garage door opener. A well-tested remote saves time and avoids frustration. Follow simple steps to confirm the remote sends signals and controls the door smoothly.
Checking The Battery Power
Start by checking the remote’s battery. A weak or dead battery can stop the remote from working. Remove the battery cover and look inside. Replace old batteries with fresh ones. Use standard batteries recommended by LiftMaster for best results.
Pressing The Button To Test Signal
Stand near the garage door. Press the remote button once. Watch if the door moves up or down. If it does, the remote sends the signal correctly. If not, try pressing again. No movement means the remote may need reprogramming or battery check.
Testing At Different Distances
Move away from the door to test the remote range. Start a few feet away and press the button. Gradually increase the distance and test again. The remote should work within 30 to 50 feet. If it stops working too soon, check the antenna or battery.
Resetting The Remote If Needed
If the remote fails to operate the door, try resetting it. Consult your LiftMaster manual for reset steps. Usually, this involves pressing a reset button or reprogramming the remote. After reset, test the remote again to ensure it functions properly.
Troubleshooting Common Issues
Troubleshooting common problems helps fix your Liftmaster wall remote quickly. These issues may stop your garage door from working well. Checking simple problems first can save time and effort. Follow these tips to solve common problems easily.
Remote Not Responding
Check the remote battery first. Weak batteries often cause no response. Replace with new batteries to test. Ensure the remote is within range of the opener. Walls and objects can block signals. Try pressing the button closer to the opener. Reset the remote by following the manual steps. This can fix software glitches. If the remote still does not respond, check if it is paired with the opener correctly.
Door Not Moving
Look for obstructions in the door path. Objects or debris can stop door movement. Check the door tracks for damage or dirt. Clean and straighten bent tracks. Test the door manually to see if it moves smoothly. Listen for strange noises from the motor. Noises can indicate mechanical issues. Make sure the remote is sending the signal. If the door does not move, the problem may be inside the opener unit.
Power Issues
Confirm the opener is plugged in properly. Loose plugs cause power loss. Check the circuit breaker or fuse box. A tripped breaker stops power flow. Look for any visible damage to the power cord. Replace damaged cords immediately. Test the wall remote’s power supply if it uses batteries. Power problems may stop the opener from working. Fixing power issues often restores normal operation quickly.
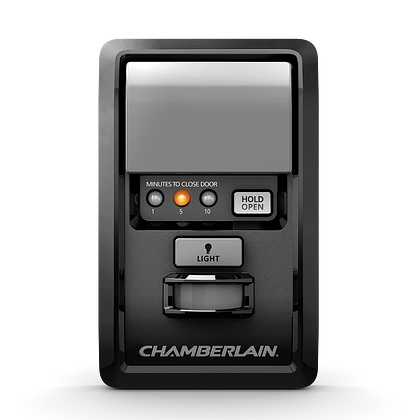
Credit: www.chamberlain.com
Frequently Asked Questions
How Do I Program A Liftmaster Wall Remote?
To program, press and hold the remote’s button. Then, press the “Learn” button on the Liftmaster opener. Release both once the light blinks. This syncs the remote to your garage door opener.
What Tools Are Needed To Hook Up A Liftmaster Remote?
You generally need no special tools. Just the Liftmaster wall remote and your garage door opener. Follow the programming steps carefully for easy setup.
Can I Use Multiple Remotes With One Liftmaster Opener?
Yes, you can program multiple remotes. Each remote must be synced by pressing the opener’s “Learn” button before programming the remote. This allows multiple users to operate the door.
How Do I Reset My Liftmaster Wall Remote?
Press and hold the “Learn” button on the opener for 6 seconds until the LED turns off. This clears all remote codes. Reprogram remotes as needed afterward.
Conclusion
Hooking up a LiftMaster wall remote is simple with clear steps. Follow the instructions carefully for safe and correct setup. Test the remote to ensure it works well with your garage door. Take your time and double-check each connection. This helps avoid mistakes and keeps your system running smoothly.
Enjoy the convenience of controlling your garage door from the wall. Stay safe and use the remote as needed. Now, you are ready to manage your LiftMaster easily and confidently.