Are you ready to hang shelves, pictures, or heavy decorations but unsure how to start? Knowing how to drill a hole for a wall anchor is the key to making your project strong and secure.
If you drill in the wrong spot or use the wrong technique, your anchor might fail, causing damage or accidents. This guide will show you exactly how to drill the perfect hole, step by step. By the end, you’ll feel confident and ready to tackle your wall projects like a pro.
Keep reading to learn the simple tricks that make all the difference.
Choosing The Right Anchor
Choosing the right anchor is important for a strong hold. The anchor must fit the wall type and the item weight. A wrong anchor can cause damage or fail to hold. Understanding different anchors helps to pick the best one.
Types Of Wall Anchors
There are many wall anchors. Plastic expansion anchors are common for light loads. They expand when a screw is inserted. Toggle bolts work well for hollow walls. They open behind the wall for extra support. Molly bolts are metal and good for medium loads. Choose based on wall material and weight.
Selecting Anchor Size
Anchor size depends on the screw and load. The anchor must fit the drill bit size. A too small anchor will not hold well. A too large anchor may damage the wall. Match the anchor size to the screw and weight carefully.
Material Compatibility
Wall material affects anchor choice. Drywall needs different anchors than concrete or brick. Plastic anchors suit drywall but not masonry. Metal anchors work well for concrete. Use anchors designed for the wall type to avoid slipping or damage.

Credit: www.reddit.com
Gathering Tools And Materials
Before drilling a hole for a wall anchor, gather the right tools and materials. Having everything ready saves time and avoids mistakes. It also helps you work safely and efficiently. Below are the key items needed for this task.
Drill And Drill Bits
Choose a drill that feels comfortable in your hand. A cordless drill works well for most jobs. Pick drill bits that match the size of your wall anchor. Use masonry bits for brick or concrete walls. For drywall or wood, standard bits are fine. Check the drill bit for damage before starting.
Measuring Tools
Use a tape measure to find the exact spot for the hole. A pencil helps mark the drilling point clearly. A level tool ensures the hole is straight if needed. Double-check measurements before drilling to avoid errors. Accurate marking means a secure and neat wall anchor.
Safety Gear
Wear safety glasses to protect your eyes from dust and debris. Use ear protection if the drill is loud. Gloves can protect your hands but make sure they do not reduce grip. Keep a dust mask handy, especially when drilling into concrete. Safety gear keeps you safe and comfortable while working.
Preparing The Wall
Preparing the wall before drilling is crucial for a secure hold. It ensures the anchor fits properly and prevents damage. Taking time at this stage saves effort later. Follow these steps carefully for the best results.
Locating Studs
Use a stud finder to locate wooden beams behind the drywall. Studs provide strong support for heavy items. Mark their edges with a pencil. Avoid drilling directly into the center of a stud for wall anchors. Anchors work best in drywall or masonry between studs.
Marking Drill Points
Measure and mark the exact spot where the hole will go. Use a level to keep marks straight and even. Make small pencil dots to avoid large marks on the wall. Double-check the measurements before drilling. Accurate marks prevent mistakes and uneven hanging.
Checking For Obstructions
Check for electrical wires, pipes, or other hidden objects inside the wall. Use a wire detector or stud finder with wire sensing. Avoid drilling near outlets and switches. Hitting wires or pipes can cause damage or injury. Safety first to protect your home and yourself.

Credit: www.picturehangsolutions.com
Drilling The Hole
Drilling the hole correctly is a key step for a strong wall anchor hold. A precise hole prevents damage and ensures the anchor fits well. Use the right tools and methods to make the process smooth and safe.
Setting Drill Speed
Choose a slow to medium drill speed for better control. High speeds may cause the drill bit to slip or overheat. Adjust the speed based on your wall material. For drywall, use lower speeds. For concrete or brick, a higher speed is okay but not too fast.
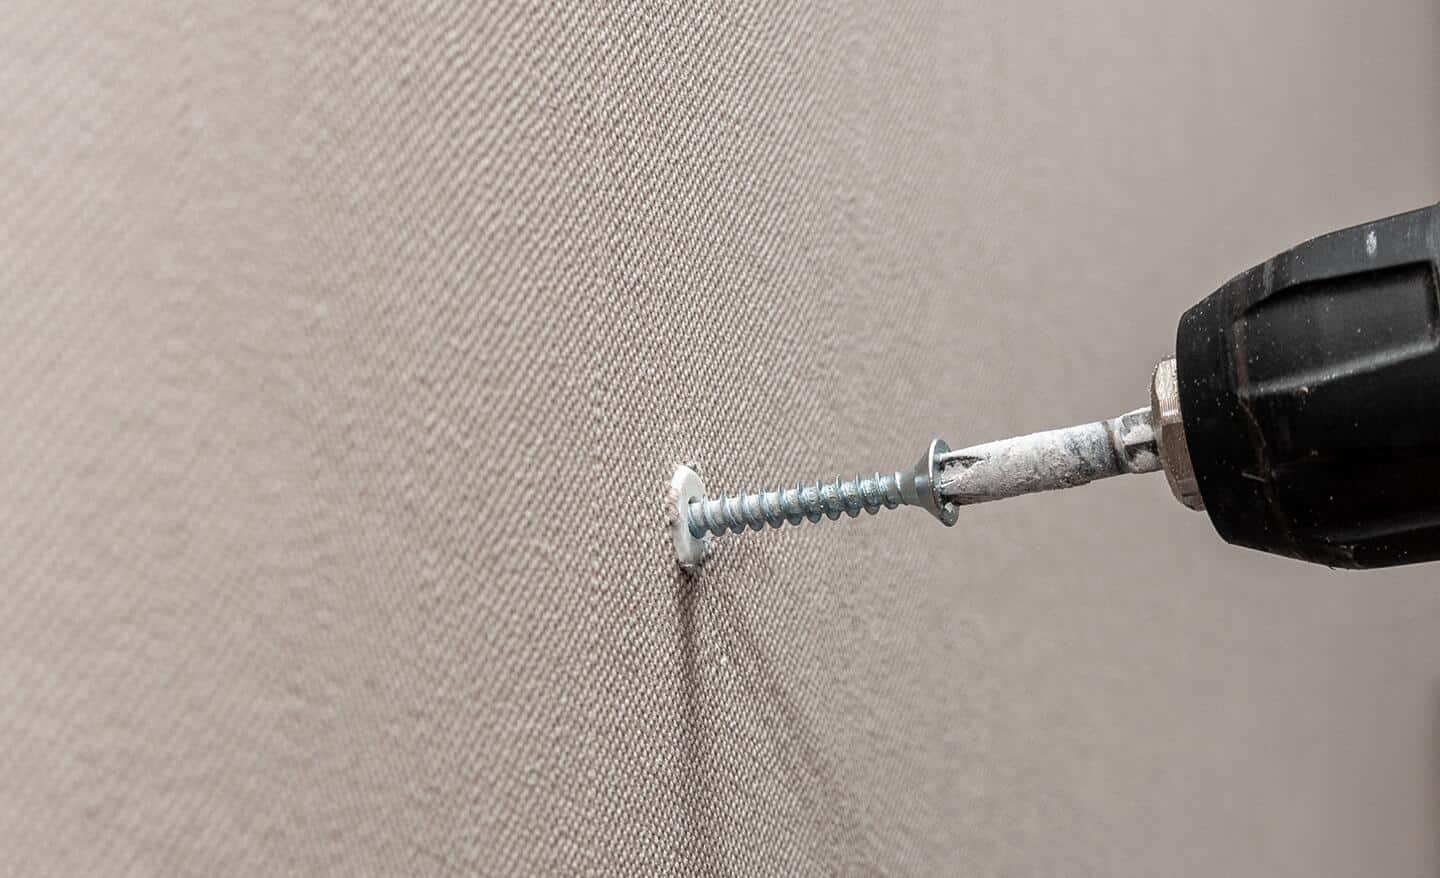
Drilling Technique
Hold the drill steady and straight against the wall. Start drilling slowly to avoid slipping. Apply gentle pressure, let the drill do the work. Pull the drill out occasionally to clear dust. This helps keep the hole clean and smooth.
Maintaining Hole Depth
Measure the anchor length before drilling. Mark the drill bit with tape at the right depth. Drill until the tape reaches the wall surface. This prevents drilling too deep or too shallow. A proper hole depth keeps the anchor secure and stable.
Installing The Anchor
Installing the anchor is a key step after drilling the hole. It holds the screw firmly in place. Proper installation prevents damage and ensures stability. Follow simple steps to insert and secure the anchor correctly.
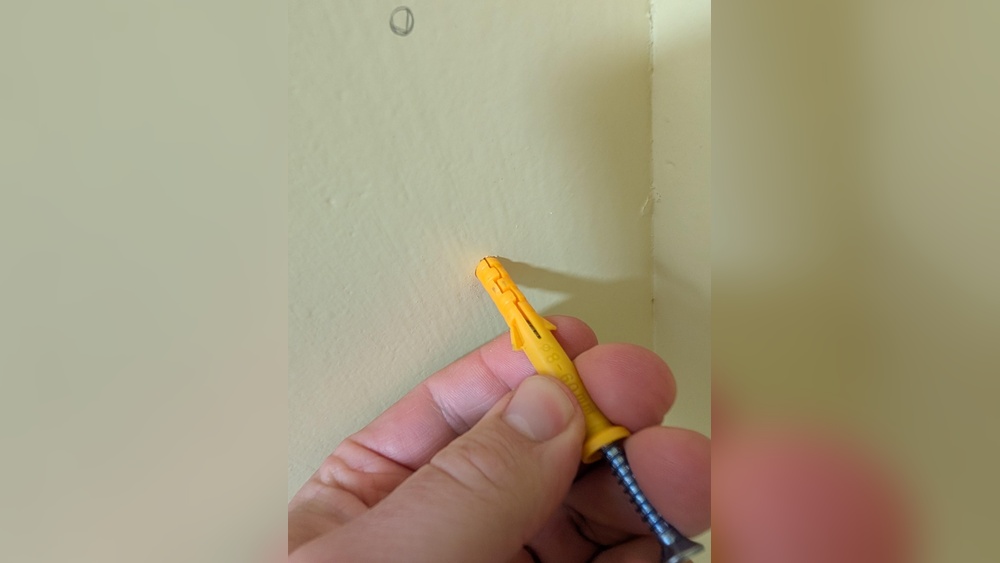
Inserting The Anchor
Push the anchor gently into the drilled hole. If it does not fit, tap it lightly with a hammer. The anchor should sit flush with the wall surface. Avoid forcing it in, to prevent cracking.
Ensuring Anchor Stability
Check that the anchor is tight and does not wiggle. A loose anchor can fall out or cause damage. If it moves, remove and try a larger anchor size. Stability is crucial for a strong hold.
Testing The Anchor
Insert the screw into the anchor slowly. Turn the screw until it feels secure. Do not overtighten, as it can break the anchor. Gently pull on the screw to test strength. A firm hold means the anchor is installed right.
Credit: www.homedepot.com
Tips For Troubleshooting
Troubles can happen when drilling holes for wall anchors. Knowing how to fix common problems saves time and keeps your project strong.
Here are simple tips to handle cracks, loose anchors, and hole size issues. These solutions help you get the best hold from your anchors.
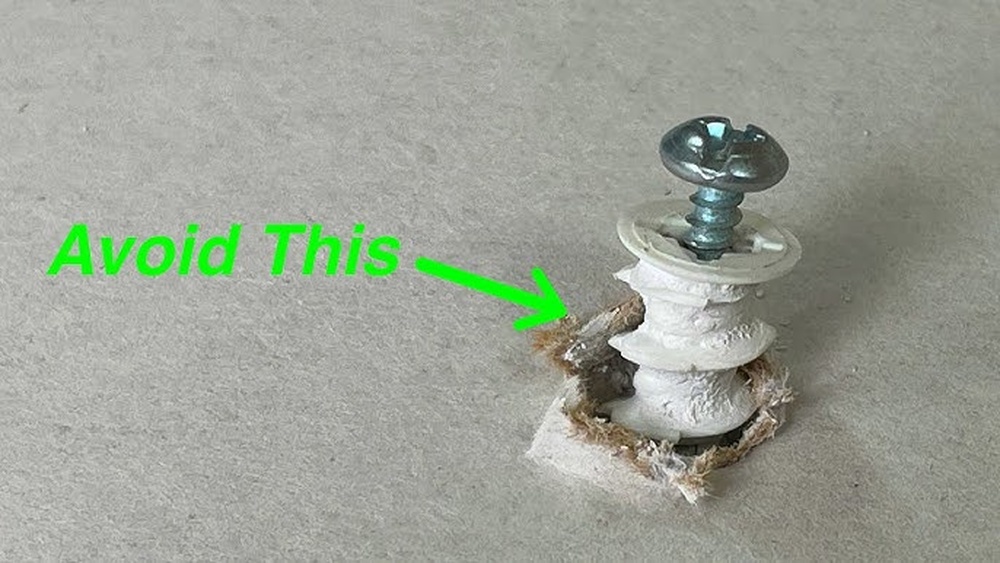
Dealing With Cracks
Cracks can weaken the wall and make anchors fail. Avoid drilling too close to edges or old holes. Use a smaller drill bit to start, then widen carefully.
Fill small cracks with wall filler before drilling. Let it dry fully. Drill gently to stop cracks from spreading.
Fixing Loose Anchors
Loose anchors do not hold weight well. Remove the anchor and check the hole size. If too big, fill the hole with wood glue or filler.
Wait for it to dry, then drill a new hole slightly smaller. Insert the anchor firmly to make it tight and secure.
Adjusting Hole Size
The right hole size is key for a strong anchor fit. Use the anchor package to find the correct drill bit size. Drill slowly and stop often to check the hole.
If the hole is too small, widen it bit by bit. Too large? Fill and start again for a secure anchor.
Frequently Asked Questions
How Do I Choose The Right Drill Bit Size?
Select a drill bit slightly smaller than the wall anchor diameter. This ensures a snug fit for strong support. Check the anchor package for recommended drill bit size to avoid damage or loose fittings.
What Wall Types Need Specific Drill Bits?
Concrete, brick, and drywall require different drill bits. Use masonry bits for concrete or brick. Standard bits work well for drywall. Choosing the correct bit prevents damage and ensures proper anchor installation.
How Deep Should I Drill For A Wall Anchor?
Drill a hole slightly deeper than the anchor length. This allows full anchor insertion without resistance. Mark the drill bit with tape to maintain consistent hole depth.
Can I Reuse A Drilled Hole For Another Anchor?
Reusing holes weakens the wall’s grip. It’s better to drill a new hole nearby. This ensures the anchor holds firmly and prevents potential wall damage.
Conclusion
Drilling a hole for a wall anchor is simple with the right steps. Measure carefully and use the correct drill bit size. Keep the drill steady and drill straight into the wall. Clean the hole before inserting the anchor for a secure fit.
Taking your time ensures strong support for your items. Practice makes perfect, so don’t worry if it feels tricky at first. With patience, your walls will hold anchors safely and firmly. Now, you are ready to hang shelves, pictures, or other items with confidence.