Are you struggling to hang something heavy on your wall without worrying it might fall? Installing expanding wall anchors can be the simple solution you need.
These little tools give your screws extra grip, making sure your shelves, mirrors, or decorations stay put. In this guide, you’ll learn exactly how to install expanding wall anchors step-by-step, even if you’ve never done it before. By the end, you’ll feel confident tackling your next wall project with ease and safety.
Keep reading to discover the easy tricks that professionals use!
Types Of Expanding Wall Anchors
Expanding wall anchors come in different types. Each type fits specific needs and wall materials. Choosing the right anchor helps hold items securely. Understanding these types makes installation easier and safer.
Below are common types of expanding wall anchors. Each has unique features and uses.
Plastic Expansion Anchors
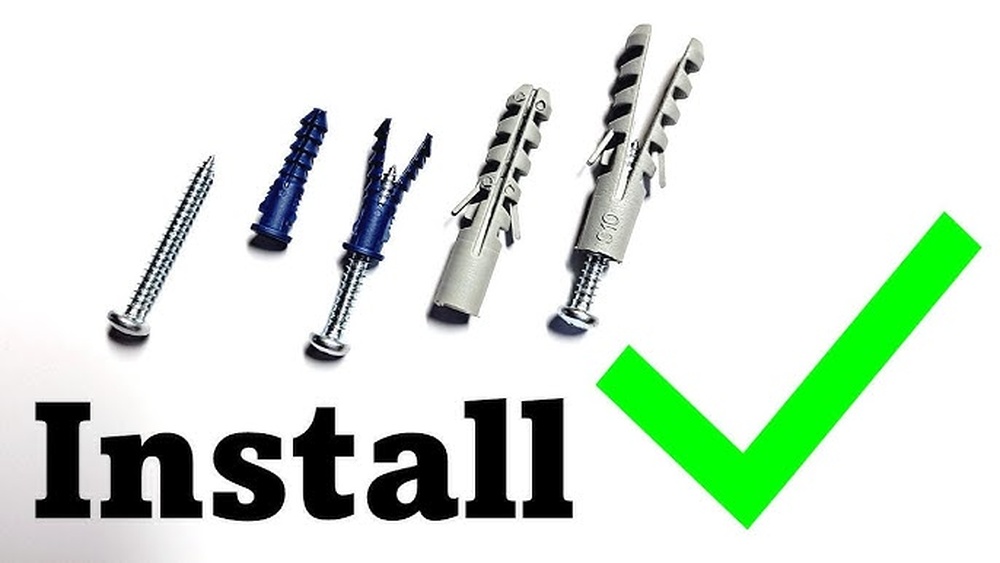
Plastic expansion anchors are simple and affordable. They work well in drywall and light materials. Insert the anchor into a drilled hole. Screwing into it causes the plastic to expand. This expansion grips the wall tightly.
Metal Toggle Bolts
Metal toggle bolts are strong and reliable. They have spring-loaded wings that open behind the wall. This spreads the load over a larger area. Perfect for heavy items on hollow walls. Installation needs a larger hole for the wings.
Molly Bolts
Molly bolts are metal anchors with expandable sleeves. Insert them into a hole and tighten the screw. The sleeve expands inside the wall for a firm hold. Ideal for medium-weight objects on drywall or plaster.
Self-drilling Anchors
Self-drilling anchors have sharp tips to drill their own hole. They save time by eliminating pre-drilling. Made from metal or plastic for different strengths. Great for quick fixes and light to medium loads.
Tools And Materials Needed
Installing expanding wall anchors requires a few basic tools and materials. Having the right items makes the job easier and safer. This section covers the essential tools you need to complete the task.
Drill And Drill Bits
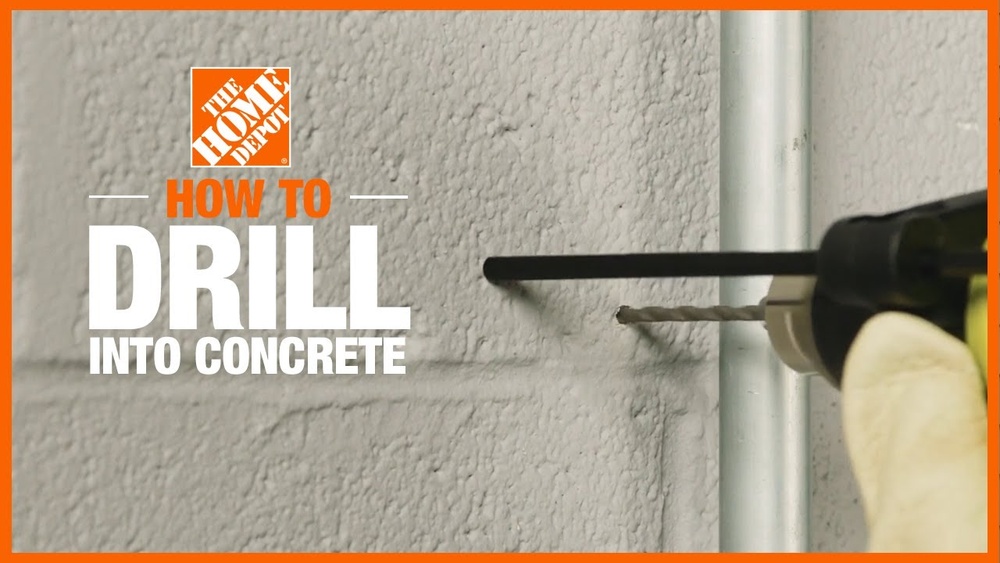
A drill is crucial for making holes in the wall. Use the correct drill bit size for the anchor. The bit must match the anchor diameter exactly. This ensures a tight fit and strong hold.
Screwdriver
A screwdriver helps insert and tighten screws into the anchors. Choose a screwdriver that fits the screw head well. This prevents slipping and damage to the screw or wall.
Hammer
A hammer is useful to gently tap the anchor into the drilled hole. Light taps help seat the anchor flush with the wall surface. Avoid heavy hits that could break the anchor.
Measuring Tape
Use measuring tape to mark the exact spot for drilling. Measure carefully to place anchors evenly and correctly. Accurate measurements prevent mistakes and wasted anchors.
Pencil
A pencil marks the drilling points on the wall. Use a sharp pencil for clear, precise marks. This guides your drilling and keeps the installation neat.
Preparing The Wall
Preparing the wall is the first step to a strong hold for expanding wall anchors. This stage sets the base for a secure and lasting installation. Careful preparation helps avoid mistakes and ensures the anchors hold tightly.
Take your time in this phase. It saves effort later and keeps the wall intact.
Selecting The Right Location
Choose a spot that matches the weight and size of the item. Avoid weak or crumbly areas on the wall. A solid surface holds anchors better and supports more weight. Check the wall type, like drywall or concrete, to pick the right anchor size.
Marking Anchor Points
Use a pencil to mark the exact spots for anchors. Measure twice to avoid errors. Mark points clearly for easy drilling. Proper spacing between points prevents cracks and keeps the wall strong. Accurate marks guide the drill and save time.
Checking For Obstructions
Scan the wall for pipes, wires, or studs behind the surface. Use a stud finder or small drill to check. Avoid drilling into electrical wires or plumbing. Finding obstructions prevents damage and keeps installation safe. Clear walls make anchor placement easier and safer.
:strip_icc()/bhg-how-to-use-drywall-anchors-03-22685_67TCQUEaKuw8tgDwrg_ePe-78bf23933c5b4508aa34ed1e92636691.jpg)
Credit: www.bhg.com
Drilling The Hole
Drilling the hole is the first key step in installing expanding wall anchors. A properly drilled hole ensures the anchor fits tightly and holds firmly. Taking time during this step saves effort later and keeps your project strong.
Choosing The Correct Drill Bit Size
Select a drill bit that matches the anchor’s diameter. Too small a bit will not fit the anchor. Too large makes the anchor loose and weak. Check the anchor package for the exact size recommendation. Use a clean, sharp bit for the best results.
Drilling At The Correct Depth
Drill deep enough for the entire anchor to fit inside the wall. Mark the drill bit with tape for a clear stopping point. Drill slowly and steadily. Avoid going deeper than needed to keep the wall strong.
Cleaning The Hole
Remove dust and debris from the hole after drilling. Use a brush or a vacuum to clean it out. A clean hole helps the anchor grip better. Do not skip this step for a secure hold.
Installing The Anchor
Installing wall anchors properly ensures a strong hold for your fixtures. Each type of anchor has a unique way to fit and expand inside the wall. Follow these steps to install various expanding wall anchors effectively. Take your time to match the anchor with the right method.
Inserting Plastic Anchors
Start by drilling a hole slightly smaller than the anchor. Push the plastic anchor into the hole until it sits flush with the wall. Use a hammer gently if it doesn’t slide in easily. Insert the screw into the anchor and tighten it slowly. The anchor will expand and grip the wall securely.
Setting Toggle Bolts
Drill a large hole to allow the toggle wings to pass through. Thread the screw through the object you want to hang. Pinch the toggle wings closed and push them inside the hole. Pull back gently on the screw to open the wings behind the wall. Tighten the screw until the object is firmly fixed.
Expanding Molly Bolts
Drill a hole matching the molly bolt size. Insert the molly bolt into the hole until it is flush. Use a screwdriver to turn the screw slightly. This action expands the legs behind the wall for a secure hold. Remove the screw, place your fixture, then reinsert and tighten the screw.
Using Self-drilling Anchors
Choose the right size anchor for your project. Position the anchor tip against the wall surface. Screw the anchor into the drywall using a screwdriver or drill. It cuts its own thread as it goes in. Insert the screw into the anchor and tighten it for a firm grip.

Credit: www.youtube.com
Securing The Fixture
Securing the fixture is the key step after placing the expanding wall anchor. This step ensures your item stays firmly attached to the wall without slipping or falling. Proper securing protects both the fixture and the wall from damage.
Aligning The Fixture
Place the fixture carefully over the anchor hole. Check that the holes in the fixture line up exactly with the anchors. Misalignment can cause the screws to go in crooked. Take your time to get it right before moving forward.
Driving The Screw
Insert the screw into the anchor using a screwdriver or drill. Turn the screw slowly and steadily. As the screw tightens, the anchor expands inside the wall. This expansion locks the anchor firmly in place. Stop tightening once you feel resistance to avoid stripping the anchor.
Testing The Stability
After securing, gently pull or push the fixture. It should feel solid and not move. If it wobbles or feels loose, tighten the screw a bit more. Proper stability means the anchor and screw hold the fixture well. This step prevents future accidents or damage.
Common Mistakes To Avoid
Installing expanding wall anchors seems simple but often involves mistakes. These errors can weaken the hold or damage the wall. Avoiding common pitfalls helps ensure a strong, secure fit. Below are frequent mistakes to watch out for during installation.
Using Wrong Anchor Size
Choosing the right anchor size matters. A small anchor may not hold heavy items. A large anchor can crack the wall. Match the anchor size to the screw and weight load. Check the package instructions before starting.
Over-tightening Screws
Screws must be snug but not too tight. Over-tightening can break the anchor or wall. Turn the screw slowly and stop when it feels firm. This keeps the anchor secure without damage.
Ignoring Wall Material
Different walls need different anchors. Drywall, concrete, and brick vary in strength. Use anchors made for your wall type. Using the wrong anchor weakens the hold and risks damage.
Skipping Pilot Holes
Pilot holes guide the anchor and prevent cracks. Skipping this step makes insertion harder. Drill a hole matching the anchor size. This ensures a smooth, secure fit in the wall.

Credit: www.youtube.com
Frequently Asked Questions
What Tools Are Needed To Install Expanding Wall Anchors?
You need a drill, drill bit, screwdriver, hammer, and expanding wall anchors. These tools help create a secure hold in walls for heavy objects.
How Do Expanding Wall Anchors Work In Drywall?
They expand inside the drywall when a screw is inserted. This expansion creates a strong grip and prevents the anchor from pulling out.
Can Expanding Wall Anchors Support Heavy Loads?
Yes, they can support moderate to heavy loads. Always check the anchor’s weight rating and choose the correct size for safety.
How To Choose The Right Size Expanding Wall Anchor?
Select an anchor size based on the screw diameter and wall thickness. Proper sizing ensures a secure and stable installation.
Conclusion
Installing expanding wall anchors is simple and helps secure heavy items. Choose the right size for your wall and drill a proper hole. Insert the anchor carefully, then tighten the screw to expand it inside the wall. This method keeps shelves and fixtures stable and safe.
Practice these steps to build confidence and avoid mistakes. With patience, you can complete the task quickly and correctly. Strong walls mean safer homes and better support for your belongings. Give it a try and see the difference expanding wall anchors make.