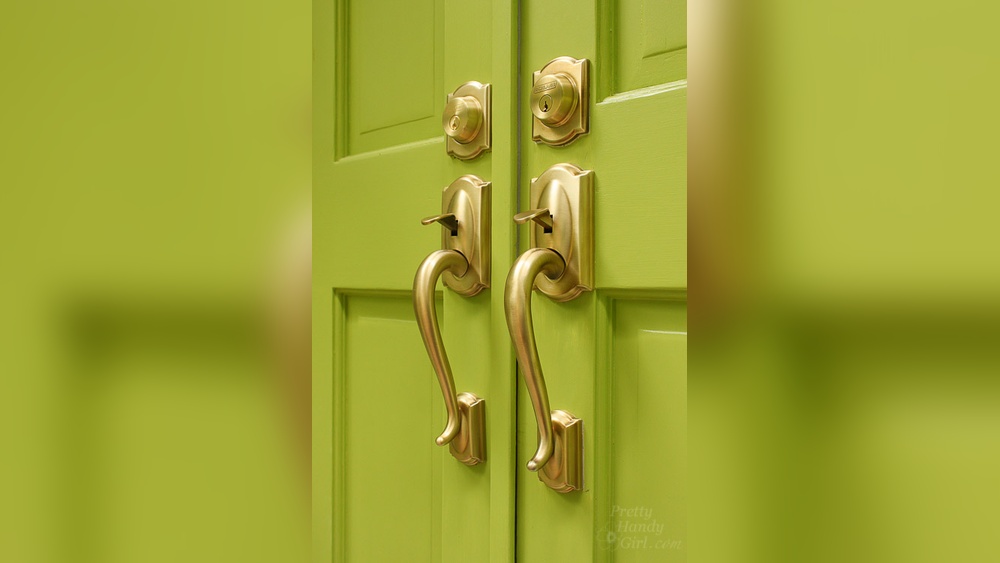
Your front door handle and deadbolt are more than just hardware—they protect your home and add to its curb appeal. If they’re worn out, loose, or not working properly, it’s time for a change.
But maybe you’re worried that replacing them will be complicated or expensive. What if you could do it yourself, quickly and easily, with just a few simple tools? In this guide, you’ll learn exactly how to replace your front door handle and deadbolt step by step.
By the end, you’ll feel confident, save money, and make your home safer—all without calling a locksmith. Ready to get started? Let’s dive in.
Tools And Materials Needed
Replacing a front door handle and deadbolt requires a few basic tools and materials. Having the right items ready makes the job easier and faster. This section lists everything needed for a smooth replacement process.
Essential Tools
A screwdriver is necessary for removing and installing screws. Both flathead and Phillips head screwdrivers may be required.
A drill helps to speed up screw removal and installation. Use drill bits that match the screws’ size.
A tape measure ensures correct placement of the new handle and deadbolt. Accurate measurements prevent mistakes.
A pencil is useful for marking spots on the door for drilling or aligning parts.
A hammer might be needed to gently tap components or pins into place.
Required Materials
New front door handle and deadbolt set. Choose a set that fits your door’s thickness and style.
Replacement screws often come with the new hardware. Keep some extra screws on hand just in case.
Wood filler can fill old screw holes if they become loose or damaged.
Sandpaper smooths the door surface before installing new parts. This helps the hardware fit better.
Lubricant like graphite powder keeps the lock working smoothly after installation.
Removing The Old Door Handle
Removing the old door handle is the first step in replacing it. This part is easy but needs care. You must take out the parts without breaking anything. Follow these simple steps to remove the old handle and deadbolt.
Work slowly. Keep all screws and parts safe. This will help when you install the new handle.
Locate And Unscrew Mounting Screws
Find the screws holding the door handle. These are usually on the inside part of the door. Use a screwdriver to turn the screws counterclockwise. Keep the screws in a small container to avoid losing them.
Some handles have hidden screws under small covers. Pry off these covers gently with a flat tool. Then, remove the screws under the cover carefully.
Remove Handle And Latch Mechanism
After removing the screws, pull the door handles from both sides. They should come off easily. Next, take out the latch mechanism from the door edge. Push or pull it out carefully to avoid damage.
Check if any parts are stuck. Use a screwdriver or small tool to loosen them gently. Removing the old latch clears the way for the new deadbolt and handle.
Removing The Old Deadbolt
Removing the old deadbolt is the first step in replacing your front door handle and deadbolt. This process helps prepare your door for the new hardware. It involves taking apart the existing lock and carefully pulling it out.
Work slowly and keep track of all parts. This will make installation easier later. Use basic tools like a screwdriver for this task.
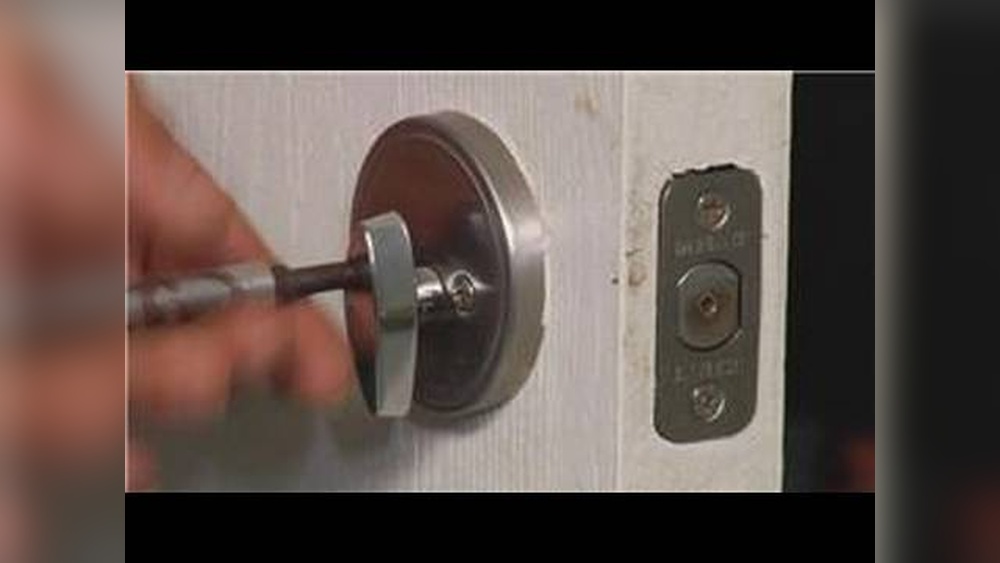
Unscrew Deadbolt Components
Start by locating the screws on the interior side of the door. These screws hold the deadbolt in place. Use a screwdriver to remove them completely.
Keep the screws safe. You may need them for reference or reuse. After removing the screws, the deadbolt cover should come off easily.
Extract Deadbolt From Door
Once the screws and cover are removed, grasp the deadbolt firmly. Pull it straight out from the edge of the door. It may require a little wiggling to release it.
Check the door edge for any leftover parts. Clean the area before installing the new deadbolt. This ensures a smooth fit and proper function.

Credit: www.youtube.com
Preparing The Door For New Hardware
Preparing your door for new hardware is a key step in the replacement process. It ensures the new handle and deadbolt fit perfectly and work smoothly. Taking time to prepare the door helps avoid issues later. Follow these steps to get your door ready.
Clean And Inspect Door Holes
Start by cleaning the holes where the handle and deadbolt will go. Remove dirt, dust, and old paint with a cloth or brush. Check if the holes are the right size for the new hardware. Look for cracks or damage around the holes. Fix any problems before installing new parts. Clean holes help the hardware fit tight and work well.
Adjust Door If Necessary
Check the door’s alignment with the frame. Open and close the door slowly to see if it sticks or rubs. Tighten or loosen the hinges to fix any misalignment. Use a plane or sandpaper to smooth rough edges if the door does not close properly. A well-adjusted door makes the new handle and deadbolt work better and last longer.
Installing The New Deadbolt
Installing the new deadbolt is a key step in securing your front door. It ensures your home stays safe and your lock works smoothly. Follow each step carefully for the best results. A properly installed deadbolt offers strong protection and easy use.
Insert Deadbolt Mechanism
Start by sliding the deadbolt mechanism into the edge of the door. Make sure the bolt faces the correct direction. Push it in until it fits flush with the door edge. Check that the bolt moves freely by turning the thumb turn or key.
Attach Exterior And Interior Plates
Place the exterior plate with the keyhole on the outside of the door. Align it with the deadbolt mechanism. Then, fit the interior plate with the thumb turn on the inside. Ensure both plates line up with the screw holes and the bolt.
Secure With Screws
Use the screws provided to fasten the exterior and interior plates. Tighten them evenly to avoid misalignment. Do not overtighten, or the plates may warp. Test the lock by turning the key and thumb turn to confirm smooth operation.
:strip_icc()/install-door-handle-precut-holes-door-d17ced21-5ec4cbfadb9446e6b392e1246c950779.jpg)
Credit: www.bhg.com
Installing The New Door Handle
Installing the new door handle is the next step after removing the old one. This part of the process requires careful positioning and securing. Proper installation ensures your door locks and opens smoothly. Follow these simple steps to fit your new handle and deadbolt correctly.
Position Latch And Handle
Start by placing the latch into the door’s edge hole. Make sure the latch faceplate sits flush with the door surface. The latch bolt should point towards the door frame. Next, align the exterior handle on the front side of the door. Hold it steady while fitting the interior handle on the opposite side. Check that both handles fit well through the latch mechanism.
Attach And Tighten Screws
Insert the screws through the interior handle into the exterior side. Tighten the screws evenly to secure both handles. Avoid over-tightening to prevent damage to the door or handle. Test the handle operation by turning it several times. The latch should move smoothly without sticking. Tighten screws more if needed for a firm fit.
Testing The Lock And Handle
Testing the lock and handle is a key step after installation. It ensures your new front door hardware works properly and keeps your home safe. Take time to check both the lock and handle thoroughly. This step helps avoid problems later.
Check Lock Functionality
Start by inserting the key into the deadbolt. Turn the key slowly to test locking and unlocking. Make sure the deadbolt moves smoothly without sticking. Test the lock from both inside and outside. The key should turn easily both ways. Check if the deadbolt fully extends into the door frame. This confirms a secure lock. If it doesn’t, adjust the strike plate or screws.
Ensure Smooth Handle Operation
Grab the door handle and turn it several times. The handle should move freely without resistance. Press the latch to open and close the door. The latch should retract easily and spring back when released. Test the handle from both sides of the door. Make sure it returns to the starting position every time. Tighten any loose screws on the handle and plate. Smooth operation means the handle is installed correctly.

Credit: www.youtube.com
Tips For Maintenance And Security
Proper maintenance and security are key to keeping your front door handle and deadbolt working well. Small efforts can prevent big problems and keep your home safe. Regular care extends the life of your locks and handles. It also stops unwanted visitors from entering easily.
Keep Locks Clean And Lubricated
Dirt and dust can block the lock mechanism. Clean your locks with a soft cloth often. Use a graphite or silicone spray to lubricate the lock. Avoid oil-based lubricants because they attract dirt. Lubrication helps the key turn smoothly.
Check For Loose Screws And Parts
Loose screws weaken your door’s security. Tighten all screws on the handle and deadbolt regularly. Check the strike plate on the door frame too. A firm strike plate makes it harder to force the door open.
Test Locks Regularly
Test your locks to ensure they work properly. Lock and unlock several times to check smooth operation. Fix any stiffness or jamming quickly. A faulty lock is a security risk.
Replace Worn Or Damaged Parts
Replace any broken or worn parts immediately. Old locks are easier to break. Use parts that match your lock brand and model. Proper parts ensure better security and fit.
Use High-quality Locks
Choose locks rated for security and durability. Higher quality locks resist picking and forced entry. Check for certifications like ANSI or BHMA ratings. Strong locks protect your home better.
Frequently Asked Questions
How Do I Remove An Old Front Door Handle?
Start by unscrewing the screws on the interior side of the handle. Pull the handle apart gently. Remove the latch mechanism from the door edge. Keep all screws and parts organized for reassembly. This ensures easy installation of the new handle.
What Tools Are Needed To Replace A Deadbolt?
You need a screwdriver, tape measure, and new deadbolt set. Optionally, use a drill for pilot holes. These basic tools make the replacement process smooth and efficient. Having the right tools saves time and effort.
Can I Replace A Door Handle Without Professional Help?
Yes, replacing a door handle is a simple DIY task. Follow step-by-step instructions and take your time. Basic tools and some patience are all you need. This saves money and gives you a sense of accomplishment.
How To Align A New Deadbolt Properly?
Ensure the deadbolt latch fits the strike plate hole. Adjust the strike plate position if needed. Use a level to keep the lock straight. Proper alignment ensures smooth locking and enhances security.
Conclusion
Replacing a front door handle and deadbolt is simple and quick. Just follow the steps carefully and take your time. Having a secure door helps keep your home safe. You can save money by doing this yourself. No need to call a locksmith for basic changes.
Feel proud when you finish the job. Your door will look fresh and work well. Try this project for a small but useful home upgrade.