Have you ever stared at your door’s deadbolt, wondering how to remove it without causing damage? Whether you’re upgrading your lock, fixing a jam, or just curious about how it works, taking a deadbolt off your door might seem tricky.
But it doesn’t have to be. In this guide, you’ll discover simple, step-by-step instructions that anyone can follow. By the end, you’ll feel confident handling your door lock like a pro—and save time and money along the way. Ready to get started?
Let’s dive in.
Tools Needed
Locating the deadbolt screws is the first step to remove the deadbolt from a door. These screws keep the lock firmly attached. Finding them helps you know where to start unscrewing.
Deadbolt screws usually sit on the interior side of the door. They hold the two main parts of the lock together. Identifying these screws allows smooth removal without damaging the door.
Check The Interior Side Of The Door
Look closely at the inside of the door where the lock is. The deadbolt screws are often visible here. They may be on the faceplate or the lock’s mounting plate.
Sometimes a cover plate hides the screws. Gently remove this cover to reveal the screws underneath.
Identify The Screw Type
Deadbolt screws come in different types. Most use Phillips head screws, but some use flathead or Torx screws. Knowing the screw type helps you pick the right screwdriver.
Using the correct tool prevents stripping the screws and makes removal easier.
Note The Number Of Screws
Count how many screws hold the deadbolt. Usually, there are two or three screws. This number tells you how many screws to remove before the lock comes off.
Make sure to keep all screws safe for reinstallation or replacement.
Locate The Deadbolt Screws
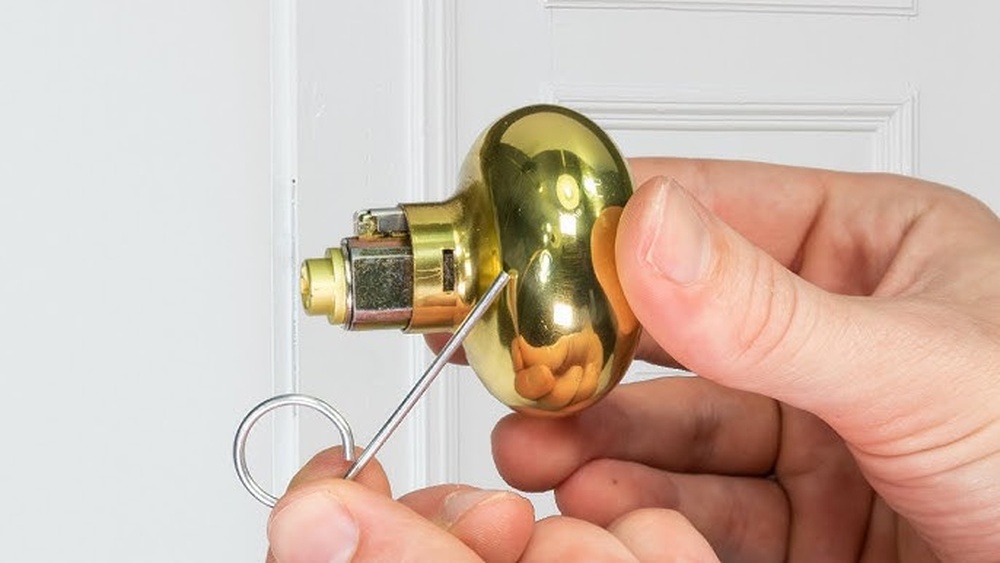
The interior thumb turn is a small knob on the inside of a deadbolt. It allows you to lock or unlock the door without a key. Removing this part is the first step to take the deadbolt off. This process is simple and needs only a few tools.
Start by locating the screws holding the thumb turn in place. Usually, these screws are visible on the interior side of the door. Removing them will let you take off the thumb turn easily.
Gather The Right Tools
You need a screwdriver that fits the screws. Most deadbolts use a Phillips head screwdriver. Sometimes, a flathead screwdriver works better. Check the screw type before starting.
Unscrew The Interior Thumb Turn
Turn the screwdriver counterclockwise to remove the screws. Keep the screws safe; you will need them later. Once the screws are out, gently pull the thumb turn away from the door.
Handle The Thumb Turn With Care
The thumb turn can be delicate. Pull it straight out to avoid damaging the mechanism inside. If it feels stuck, wiggle it slightly. Do not use too much force to prevent breakage.
Remove The Interior Thumb Turn
Removing the exterior lock cylinder is a key step in taking off a deadbolt. This part is the visible lock on the outside of your door. It holds the lock mechanism in place. To remove it, you need to unscrew it carefully. Doing this allows access to the internal parts of the deadbolt.
Unscrewing the exterior lock cylinder does not require special tools. A simple screwdriver usually works well. Take your time to avoid damaging the door or the lock. This step is straightforward but important for a smooth deadbolt removal.
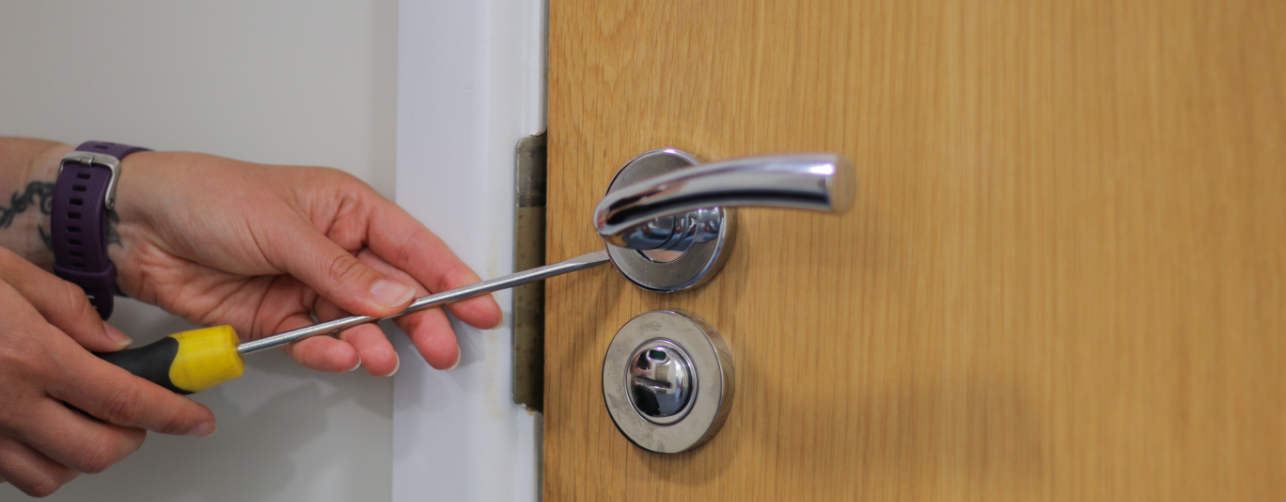
Locate The Screws Holding The Cylinder
First, find the screws that secure the exterior lock cylinder. These screws are often on the edge of the door. Look carefully near the lock faceplate. Some deadbolts have screws hidden under a cover. Remove the cover gently to see the screws.
Use The Correct Screwdriver
Select a screwdriver that fits the screws perfectly. Using the wrong size can strip the screw heads. Most exterior cylinders use Phillips-head screws. Turn the screwdriver counterclockwise to loosen the screws. Keep the screws safe for later use.
Pull The Cylinder Out Gently
After unscrewing, pull the cylinder straight out. Avoid twisting or forcing it. Sometimes the cylinder sticks due to dirt or paint. Wiggle it gently until it moves free. Removing the cylinder reveals the inside lock parts.
Credit: doorcontrolsdirect.co.uk
Unscrew The Exterior Lock Cylinder
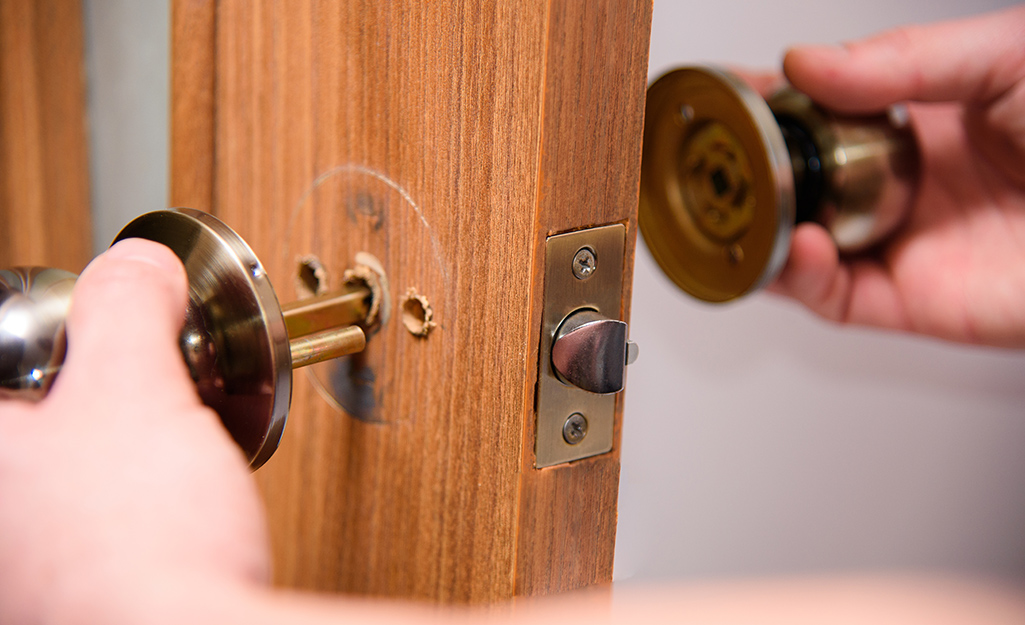
Removing the deadbolt mechanism is a key step to take the lock off your door. This part holds the bolt inside the door and controls locking. Removing it carefully helps you avoid damage and makes repair or replacement easier.
Follow simple steps to take out the mechanism. Use basic tools and work slowly. Keep all pieces safe for later use or replacement.
Locate And Remove The Screws
Look for screws on the edge of the door. These screws hold the deadbolt mechanism in place. Use a screwdriver to remove them. Turn screws counterclockwise until they come out completely.
Keep screws in a safe spot. You will need them to put the lock back or install a new one.
Pull Out The Deadbolt Mechanism
After removing screws, gently pull the deadbolt mechanism from the door. Use your fingers or a flat tool to help if it is tight. Avoid forcing it to prevent damage.
The mechanism should slide out smoothly. If stuck, check for hidden screws or parts still holding it.
Inspect The Mechanism And Door Cavity
Look inside the door cavity after removing the mechanism. Clean any dirt or old grease inside. Check the mechanism for wear or damage. This helps decide if you need a repair or new lock.
Use a cloth or small brush to clean the cavity. Keep the area dry before installing a new part.
Take Out The Deadbolt Mechanism
Removing the strike plate is a key step in taking a deadbolt off a door. The strike plate holds the bolt in place and secures the door when locked. Taking it off helps free the deadbolt mechanism for easier removal.
Strike plates are usually fixed with screws. These screws need to be removed carefully. After the strike plate is off, the bolt can slide out smoothly from the door frame.
Locate The Strike Plate
First, find the strike plate on the door frame. It is the metal piece where the deadbolt enters. It sits flush with the door jamb, often secured by two screws.
Remove The Screws
Use a screwdriver that fits the screws well. Turn the screws counterclockwise to loosen and remove them. Keep the screws safe for reinstallation later.
Take Off The Strike Plate
After removing the screws, gently pull the strike plate away from the door frame. If stuck, tap lightly with a flat tool to loosen it. Set the strike plate aside carefully.

Credit: www.youtube.com
Remove The Strike Plate
Removing a deadbolt from a door requires care and attention. Safety comes first. Taking the right steps can prevent injuries and damage. Always prepare before starting the task.
Wear Protective Gear
Wear gloves to protect your hands from sharp edges. Safety glasses guard your eyes from dust and debris. Use sturdy shoes to avoid foot injuries.
Use The Right Tools
Choose tools made for the job. Incorrect tools cause slips and damage. Keep tools in good condition for better control.
Work In A Well-lit Area
Good lighting helps you see screws and small parts. Avoid working in dark or cluttered spaces. Clear the area to move freely and safely.
Check Door Stability
Make sure the door is steady and won’t move. A swinging door can cause accidents. Hold the door or secure it before you start.
Keep Children And Pets Away
Children and pets distract you and risk injury. Keep them in another room while you work. This keeps everyone safe and focused.
Credit: www.homedepot.com
Frequently Asked Questions
How Do I Remove A Deadbolt From A Door?
To remove a deadbolt, first unscrew the interior side screws. Then, pull both interior and exterior parts apart. Finally, remove the latch from the door edge by unscrewing it.
What Tools Are Needed To Take Off A Deadbolt?
You typically need a Phillips screwdriver and sometimes a flathead screwdriver. A drill may be helpful for stuck screws. A putty knife can assist in prying if necessary.
Can I Remove A Deadbolt Without Damaging The Door?
Yes, by carefully unscrewing and gently pulling parts, you can avoid damage. Avoid forcing components or using excessive leverage to keep the door intact.
How Long Does It Take To Remove A Deadbolt Lock?
Removing a deadbolt usually takes 10 to 20 minutes. Time varies depending on screw condition and lock type. Proper tools speed up the process.
Conclusion
Removing a deadbolt from a door can be simple with the right steps. Take your time and follow the instructions carefully. Use basic tools and stay safe while working. After removal, you can replace or repair the lock as needed.
This task saves money and avoids hiring a locksmith. Practice makes the process easier next time. Keep your door secure by choosing the right lock afterward. Now, you are ready to handle deadbolt removal confidently.