Are you tired of fumbling with your fan light switch every time you want to brighten up the room? Changing it yourself might sound tricky, but it’s easier than you think.
Imagine saving time and money by fixing this common problem on your own. In this guide, you’ll discover simple, step-by-step instructions that anyone can follow. Keep reading, and soon you’ll have full control over your fan’s light switch—no electrician needed.
Ready to get started? Let’s dive in!
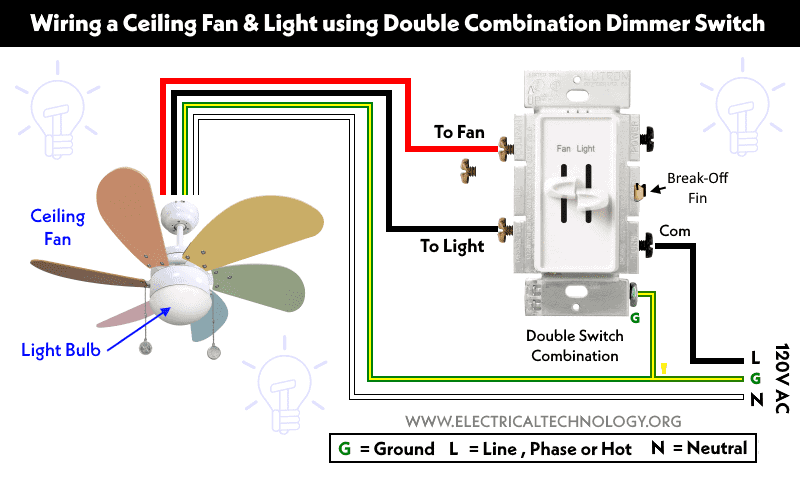
Credit: www.electricaltechnology.org
Tools And Materials Needed
Changing a fan light switch requires specific tools and materials. Having the right items ready makes the process smoother and safer. This section lists everything needed for the task.
Gathering tools and materials before starting saves time. It helps avoid interruptions and reduces mistakes. Below are the essential items to prepare.
Basic Tools For The Job
A screwdriver set is necessary to remove and install screws. Use both flathead and Phillips screwdrivers for different screws. A voltage tester ensures the power is off before you start. Wire strippers help prepare wires for connection. Needle-nose pliers make handling small wires easier.
Materials To Replace The Switch
Buy a fan light switch compatible with your fan model. Get electrical tape to secure wire connections. Wire nuts are needed to join wires safely. Keep extra screws in case some are lost or damaged.
Safety Equipment
Wear insulated gloves to protect against electric shock. Use safety goggles to guard your eyes from dust or sparks. A sturdy ladder helps reach the fan safely. Make sure the ladder is stable before climbing.
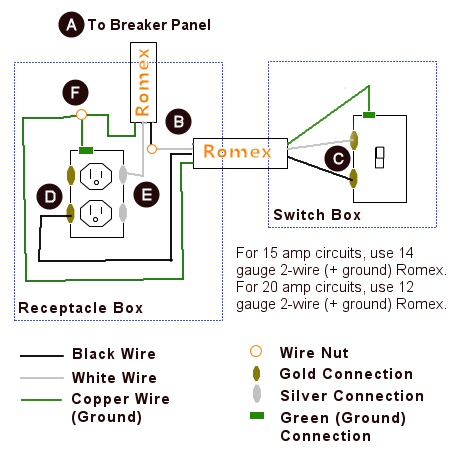
Credit: www.oneprojectcloser.com
Safety Precautions
Turning off the power is the first and most important step in changing a fan light switch. It keeps you safe from electric shock. Always treat electricity with respect. Taking this step seriously prevents accidents and injuries.
Before starting any work, make sure the power is completely off. This allows you to work without any risk. Even a small electric shock can be dangerous. So, never skip this step.
Locate The Circuit Breaker
Find your home’s circuit breaker box. It is usually in the basement, garage, or utility room. Open the box and look for the label that controls the fan light. If it is not labeled, turn off the main power switch to be safe.
Switch Off The Correct Breaker
Flip the breaker switch to the off position. This stops electricity from reaching the fan light switch. Double-check by turning the fan light switch on and off. It should not work if the power is off.
Test For Power
Use a voltage tester or a non-contact tester. Place it near the wires or switch. If the tester does not light up or beep, the power is off. Never touch wires without testing first.
Inform Others In The House
Tell everyone in your home about the power shutoff. This avoids someone turning the breaker back on by mistake. Put a note on the breaker box as a reminder.
Turning Off Power
Removing the old fan light switch is the first step in changing it safely. This task requires care to avoid electrical hazards. Follow clear steps to access and disconnect the switch properly.
Accessing The Switch Box
Start by turning off the power at the circuit breaker. Check the switch to ensure no electricity flows. Use a voltage tester for safety.
Remove the switch cover plate with a screwdriver. Unscrew the mounting screws holding the switch. Gently pull the switch out from the wall box.
Disconnecting Wires
Note the wire connections before removing them. Take a photo or label each wire for reference.
Loosen the terminal screws or release the wires from push-in connectors. Carefully disconnect all wires from the old switch. Keep wires separated to avoid contact.
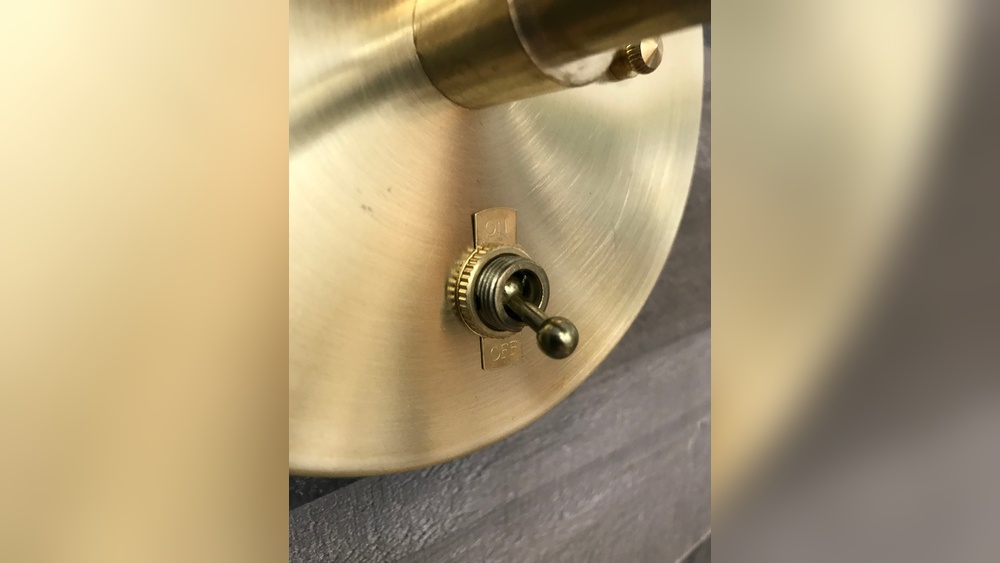
Removing The Old Switch
Installing the new fan light switch is a key step in the replacement process. Handle the wires and switch carefully to ensure safety and proper function. Follow each step closely for a smooth installation.
Connecting The Wires
First, match the wires from the wall to the new switch. Usually, black or red wires are hot, and white wires are neutral. Connect the wires using wire nuts or screws on the switch. Make sure the connections are tight and secure. Double-check that no bare wire is exposed to avoid shorts.
Securing The Switch
Push the connected wires gently back into the electrical box. Align the switch with the mounting holes on the box. Use screws to fasten the switch firmly in place. Avoid overtightening, which can crack the switch or wall plate. Finally, attach the switch cover plate and tighten its screws.
Choosing A Replacement Switch
Testing the new fan light switch is an important step. It ensures the switch works correctly and safely. This process helps avoid problems like flickering lights or unresponsive switches. Follow these steps to check the new switch carefully and confidently.
Turn On The Power
First, restore the power at the circuit breaker. Do this before testing the switch. Turning on the power lets you check if the switch controls the fan and light properly. Always be cautious when dealing with electricity.
Operate The Switch
Next, use the switch to turn the fan and light on and off. Test all settings if the switch has multiple functions. Watch for smooth operation without any strange noises or delays. This step confirms the switch is installed right.
Check For Flickering Or Sparks
Look closely for any flickering lights or sparks around the switch. These signs indicate a loose connection or wiring problem. If you see flickering or sparks, turn off the power immediately. Fix the issue before using the switch again.
Listen For Unusual Sounds
Listen to the fan and switch while operating. Strange buzzing or clicking sounds could mean trouble. These noises might show that the switch is faulty or not compatible. If sounds appear, consider replacing the switch or checking wiring.
Test The Fan Speed Settings
If your switch controls fan speeds, test each speed level. Make sure the fan changes speed smoothly. No sudden stops or noise changes should happen. This check confirms the switch handles all fan functions correctly.
Installing The New Switch
Troubleshooting common issues with your fan light switch helps restore function quickly. Problems like a switch not working or flickering lights often have easy fixes. Checking connections can solve many issues safely.
Switch Not Working
First, check if the power is off before touching wires. Test the switch with a voltage tester to see if it gets power. Replace the switch if it feels loose or does not click. A faulty switch can stop the fan light from turning on.
Flickering Lights
Flickering lights usually mean a bad connection or a weak bulb. Tighten the bulb by turning it gently but firmly. If flickering continues, try a new bulb. Loose wires inside the switch or fixture can also cause flicker.
Loose Connections
Loose connections are a common cause of light switch problems. Turn off power before checking wires. Tighten wire nuts and screws holding wires in place. Secure connections prevent sparks and ensure the fan light works well.
Testing The New Switch
Maintaining fan light switches keeps them working well for a long time. Small care steps stop problems before they start. A clean and well-checked switch is safer to use. It also helps avoid unexpected breakdowns. Regular care saves money on repairs later.
Follow these simple tips to keep your fan light switch in good shape. These easy steps take only a few minutes but make a big difference.
Cleaning The Fan Light Switch
Dust and dirt can build up on the switch surface. Wipe the switch gently with a dry cloth. Avoid using water or wet cleaners. For stubborn dirt, use a soft brush carefully. Keep the area around the switch clean too.
Checking For Loose Connections
Loose wires cause flickering lights or switch failures. Turn off the power before checking wires. Tighten any loose wire connections inside the switch box. If unsure, call a professional electrician. Regular checks prevent electrical hazards.
Replacing Old Or Damaged Switches
Old switches can wear out and stop working properly. Replace switches that feel hot or make buzzing sounds. Choose a switch with the right voltage and rating. Turn off power before replacing the switch. This keeps your fan light safe and reliable.
Testing The Switch Regularly
Test the switch every few months to ensure it works well. Turn the fan light on and off several times. Listen for unusual sounds or delays. Early detection of problems helps fix issues fast. Good testing habits extend switch life.

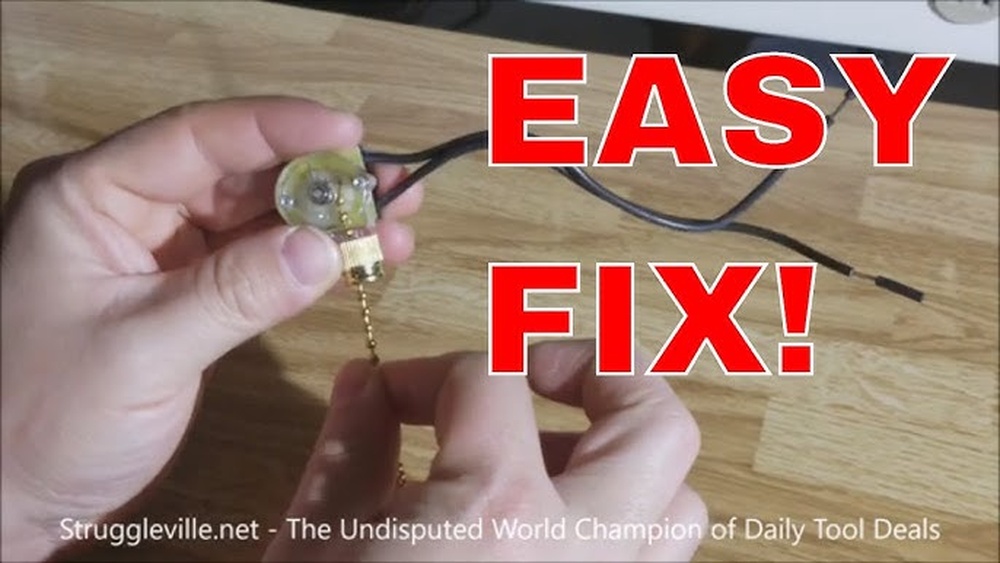
Credit: www.youtube.com
Frequently Asked Questions
How Do I Safely Turn Off Power Before Changing Fan Light Switch?
Always turn off the circuit breaker controlling the fan light. Use a voltage tester to confirm no power is present before starting work.
What Tools Do I Need To Replace A Fan Light Switch?
You need a screwdriver, voltage tester, wire stripper, electrical tape, and a new fan light switch. These tools ensure a safe and proper installation.
Can I Replace A Fan Light Switch Myself?
Yes, if you follow safety steps and have basic electrical knowledge. If unsure, consult a licensed electrician to avoid hazards.
How Do I Connect Wires To The New Fan Light Switch?
Match the wires by color: usually black to black (hot), white to white (neutral), and green or bare wire to ground. Secure connections tightly.
Conclusion
Changing a fan light switch is simple with the right steps. Always turn off the power first to stay safe. Use the right tools and follow instructions carefully. Double-check your work before turning the power back on. Taking your time helps avoid mistakes and keeps things working well.
Now, you can enjoy better control of your fan light at home. This small task saves money and gives you confidence for future projects. Give it a try—you might find it easier than you thought.