Is your old light switch flickering or feeling loose? Changing it might seem tricky, but you can do it yourself—and save money and time.
Imagine flipping a switch that works perfectly every time, making your home safer and more comfortable. In this guide, you’ll learn simple steps to replace your old light switch quickly and safely. Keep reading, and you’ll gain the confidence to tackle this easy home fix today.
Tools And Materials Needed
Changing an old light switch requires specific tools and materials. Having the right items makes the job safer and easier. Prepare everything before starting to avoid delays.
Gathering tools and materials also helps you work quickly. You will need both common tools and some special items. Keep them close by as you work.
Essential Tools For The Job
First, get a screwdriver set with flathead and Phillips heads. These help remove switch covers and screws. A voltage tester is crucial to ensure the power is off. Wire strippers help prepare wires for the new switch. Needle-nose pliers assist in bending and holding wires. A flashlight or headlamp is useful if the area is dark.
Materials Needed
Choose a replacement light switch that matches your current one. Electrical tape secures wire connections and improves safety. Wire nuts connect wires safely inside the switch box. A new switch plate cover may be needed if the old one is damaged. Have a pair of gloves for hand protection and safety glasses to protect your eyes.
Safety Equipment
Turn off the power at the circuit breaker before starting. Use insulated tools to avoid electric shocks. Wear gloves to protect your hands from sharp edges. Safety glasses prevent debris or sparks from hurting your eyes. Keep a first aid kit nearby just in case of small injuries.

Credit: www.youtube.com
Safety Precautions
Safety is the top priority before changing an old light switch. Electricity can cause shocks or fires. Taking the right safety steps protects you and your home.
Follow these simple safety precautions carefully. They help prevent accidents and make the job easier.
Turn Off The Power
Switch off the circuit breaker that controls the light switch. Do not rely on the switch itself to cut power. Use a tester to confirm no electricity flows to the switch.
Use Proper Tools
Choose insulated screwdrivers and pliers. These tools reduce the chance of electric shock. Avoid using metal tools without insulation.
Wear Safety Gear
Wear rubber-soled shoes to avoid grounding yourself. Use safety glasses to protect your eyes from dust and debris. Avoid loose clothing or jewelry near wires.
Work In A Dry Area
Make sure the workspace is dry. Water and electricity are a dangerous mix. Avoid working in wet conditions or with damp hands.
Keep Children And Pets Away
Keep kids and pets out of the workspace. Distractions can cause accidents. A clear area helps you focus on the task.
Turning Off The Power
Turning off the power is the first and most important step before changing an old light switch. Working with electricity can be dangerous. Always make sure the electricity is completely off to avoid shocks or injury.
Take your time and double-check that the power is off. This step protects you and ensures the job goes smoothly. Safety is key in any electrical task.
Locate The Circuit Breaker
Find your home’s main electrical panel. It is usually in the basement, garage, or a utility room. The panel contains circuit breakers that control power to different parts of your home.
Turn Off The Correct Breaker
Look for the breaker labeled for the room or area with the light switch. Flip the breaker switch to the “off” position. This cuts power to the light switch you want to change.
Test The Power Is Off
Use a voltage tester or a simple light bulb tester on the switch. Confirm no electricity flows before touching wires. If unsure, test multiple times or ask for help.
Warn Others In The Home
Tell everyone in your home that you turned off the power. This prevents someone from turning it back on accidentally. Safety for everyone is important during the work.
Removing The Old Switch
Removing an old light switch is the first step in replacing it safely. Take your time and follow each step carefully. Safety matters most. Make sure the power is off at the breaker before you start. This part will guide you through removing the switch without damage.
Unscrewing The Cover Plate
Start by locating the screws on the cover plate. Use a screwdriver that fits well to avoid stripping screws. Turn the screws counterclockwise until they come out. Place the screws somewhere safe. Gently pull the cover plate away from the wall. If it sticks, wiggle it slightly. Avoid using force to prevent breaking the plate.
Detaching The Switch From The Wall
Look for screws holding the switch to the electrical box. These are usually on the front of the switch. Use the screwdriver to remove them carefully. Pull the switch straight out from the wall. Do this slowly to see the wires connected behind it. Support the switch with one hand to avoid pulling wires.
Identifying Wire Connections
Observe how wires connect to the switch. Usually, there are two or three wires attached. Note the color of each wire. Black or red wires are hot wires. White wires are neutral. Green or bare wires are ground wires. Take a picture or write down the wire positions. This helps during installation of the new switch.
Preparing The New Switch
Preparing the new switch is an important step before installation. It ensures the switch works properly and safely. Take time to check the details of your new switch. This will help avoid mistakes and save time during replacement.
Matching Switch Types
Choose a switch that matches your old one in style and function. Single-pole switches control one light from one spot. Three-way switches control a light from two different places. Make sure the new switch type is the same as the old one. This keeps your lighting working as expected.
Checking Wire Compatibility
Look at the wires connected to your old switch. Check their size and type. Most switches use standard wires, but some need special ones. Confirm that the new switch can connect to your wires. This helps prevent loose connections and electrical problems. Proper wire compatibility keeps your home safe.
:max_bytes(150000):strip_icc()/how-to-replace-a-light-switch-1824670_07_newswitch_40431-69f2872f4a734dc89e3c2bed8711fc69.jpg)
Credit: www.thespruce.com
Connecting The Wires
Connecting the wires is a key step when changing an old light switch. It ensures the switch works safely and correctly. You must handle the wires carefully and attach them properly to the switch terminals. This step needs focus and care.
Attaching Wires To Terminals
Start by identifying each wire. Usually, the black or red wire is the live wire. The white wire is neutral. The green or bare wire is ground. Attach the live wire to the brass or dark screw terminal. Connect the neutral wire to the silver terminal if your switch has one. Attach the ground wire to the green screw terminal. Wrap the wire clockwise around the screw. This keeps the wire tight when you tighten the screw.
Securing Wire Connections
After attaching wires, check each connection. Make sure wires are tight and do not move. Loose wires cause flickering or no power. Use a screwdriver to tighten each screw firmly. Avoid over-tightening to prevent damage. Cover exposed wire ends with electrical tape if needed. This adds safety and prevents short circuits. Double-check all wires before pushing the switch back into the wall box.
Installing The New Switch
After installing the new light switch, restoring power is the next step. This step is crucial to check if the switch works correctly. Follow the safety steps carefully to avoid any electrical hazards.
Testing the switch ensures that your work is done properly. It also helps find any connection issues before finalizing the installation.
Turning The Circuit Breaker On
Locate your home’s circuit breaker panel. Find the switch that controls the power to the light switch you replaced. Flip the breaker to the “On” position. This action restores electricity to the switch and connected light fixture.
Wait a few seconds after turning on the breaker. This pause allows the electrical system to stabilize. Avoid touching any wires or metal parts during this process.
Verifying Switch Functionality
Go to the light switch location. Press the switch up or down to test its function. The light should turn on and off smoothly without flickering.
If the light does not respond, double-check your wiring connections. Ensure the switch is firmly secured in the wall box. Confirm that the circuit breaker is fully on.
Working correctly means the switch is ready for daily use. If problems persist, consider consulting a professional electrician for help.
Restoring Power And Testing
Upgrading an old light switch offers a chance to improve your home’s function and style. Simple tips can help you plan better for future switch replacements. These tips save time, money, and effort later. They also make sure your electrical system stays safe and efficient.
Choose Switches With Easy Installation Features
Select switches designed for quick and simple installation. Look for models with clear instructions and user-friendly wiring. This reduces mistakes and speeds up the upgrade process. It also lowers the risk of damage or injury.
Consider Smart Switch Options
Smart switches add convenience and control to your home lighting. They allow remote operation using a phone or voice commands. Choose smart switches compatible with your existing home system. This makes future upgrades easier and more useful.
Pick Durable And High-quality Materials
Use switches made from strong, long-lasting materials. This prevents frequent replacements and repairs. High-quality switches maintain appearance and function over time. They also provide better safety and reliability.
Plan For Standardized Wiring
Maintain standard wiring setups for all switches in your home. Standard wiring simplifies future upgrades and repairs. It helps electricians work faster and more safely. Keep a clear record of your home’s wiring layout.
Choose Switches With Energy-saving Features
Energy-saving switches reduce electricity use and costs. Look for switches with dimmer or timer functions. These features improve comfort and save money on power bills. They also support a greener lifestyle.

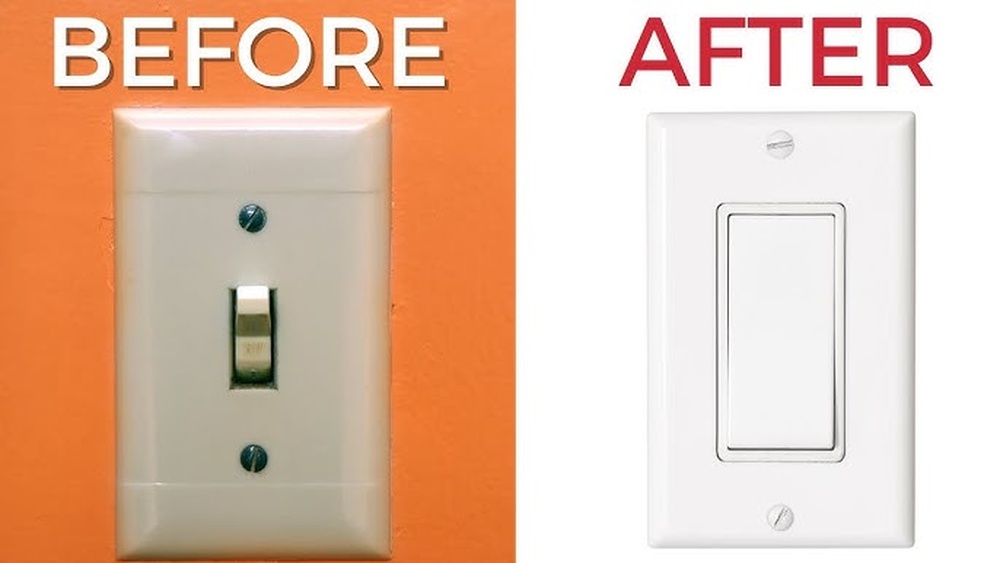
Credit: www.reddit.com
Frequently Asked Questions
How Do I Safely Turn Off Power Before Changing A Switch?
Always switch off the circuit breaker for the switch’s circuit. Use a voltage tester to confirm no power is present before starting work. This ensures your safety during the replacement process.
What Tools Are Needed To Replace An Old Light Switch?
You’ll need a screwdriver, voltage tester, wire stripper, and possibly needle-nose pliers. These tools help remove the old switch and connect the new one properly.
How Do I Identify Wires On My Old Light Switch?
Typically, black or red wires are hot, white is neutral, and green or bare is ground. Use a voltage tester to confirm wire functions before disconnecting anything.
Can I Replace A Light Switch Without Electrical Experience?
Basic electrical knowledge is helpful, but if unsure, consult a professional. Safety is critical when working with electricity to avoid risks and ensure proper installation.
Conclusion
Changing an old light switch can save time and money. It is simple with the right steps and tools. Always turn off the power to stay safe. Take your time to connect wires correctly. Test the switch before putting the cover back on.
Enjoy the fresh, working switch in your home. Small repairs like this build confidence in DIY tasks. Give it a try and brighten your space today.