Are you looking to control several lights with just one switch? It’s easier than you might think, and it can make your space more convenient and stylish.
Imagine turning on all your favorite lights with a single flick—no more walking around flipping multiple switches. In this guide, you’ll discover simple steps to add multiple lights to one switch, saving you time and effort. Keep reading, and by the end, you’ll have the confidence to upgrade your lighting setup yourself.

Credit: www.youtube.com
Tools And Materials Needed
Adding multiple lights to one switch requires specific tools and materials. Having the right items makes the work safer and easier. It also helps to finish the task faster and better.
Gathering everything before starting is important. This step avoids interruptions and confusion during installation. Prepare all tools and materials to ensure a smooth process.
Electrical Wire
Use electrical wire rated for your home’s voltage. Common types are 14/2 or 12/2 wire with a ground. These wires carry power from the switch to the lights safely.
Light Switch
Choose a switch that matches your needs. A single-pole switch usually works for controlling multiple lights. Make sure it fits your existing switch box.
Wire Connectors
Wire connectors join the wires securely. They prevent loose connections that cause shorts or sparks. Twist-on wire nuts are common and easy to use.
Screwdriver
A screwdriver helps to remove and attach switch covers and terminals. Use a flathead or Phillips head screwdriver depending on the screws.
Voltage Tester
A voltage tester checks if wires have power. It ensures safety before touching any wires. Use it to confirm the circuit is off before working.
Wire Stripper
Wire strippers remove insulation from wire ends. They expose clean wire for connections. Use a good quality stripper for clean cuts.
Electrical Tape
Wrap electrical tape around wire connectors for extra safety. It helps to keep connections tight and protected. Use tape made for electrical use.

Credit: diy.stackexchange.com
Safety Precautions
Working with electrical wiring can be dangerous without proper safety steps. Taking precautions protects you from shocks and accidents. Always treat electricity with respect. Safety is the first priority before starting any work on your lights.
Turn Off Power At The Circuit Breaker
Always switch off the power from the main circuit breaker. Do not rely on just turning off the wall switch. Use a voltage tester to confirm no power flows to the wires. This step prevents electric shocks during installation.
Use Proper Tools And Equipment
Choose insulated tools made for electrical work. Avoid using metal tools without protection. Wear rubber-soled shoes and gloves to reduce shock risk. Proper tools help you work safely and efficiently.
Check Wire Ratings And Compatibility
Use wires that match the power load of your lights. Overloaded wires can cause overheating and fires. Verify the switch and wires are rated for the total wattage. This ensures a safe and stable connection.
Follow Local Electrical Codes
Local codes set rules for safe electrical installations. Study these codes before starting your project. Use approved materials and methods to meet code requirements. Compliance helps avoid hazards and legal issues.
Consult A Professional If Unsure
Electrical work can be complex for beginners. If you feel unsure, call a licensed electrician. Professionals ensure the job is done safely and correctly. It is better to seek help than risk injury.
Planning Your Wiring Layout
Planning your wiring layout is the first step to add multiple lights to one switch. It helps you avoid mistakes and saves time. A clear plan ensures all lights work together without issues. Start by understanding your room’s layout and where each light will go.
Choosing The Right Switch
Pick a switch that supports multiple lights. A single-pole switch works for most setups. For bigger setups, consider a dimmer switch or a smart switch. Check the switch’s voltage and current ratings. It must handle the total load of all lights combined. A good switch keeps your wiring safe and efficient.
Mapping Light Fixtures
Draw a simple map of your room and mark each light fixture. Note the distance between the switch and each light. Plan the wiring path clearly to avoid crossing wires. Group lights close to each other for easier wiring. Label each fixture on your map for quick reference during installation.
Turning Off Power Safely
Turning off power safely is the first and most important step before working with electrical switches. It prevents shocks and accidents. Always treat electricity with respect and caution. Follow these easy steps to ensure safety.
Locate The Correct Circuit Breaker
Find the main electrical panel in your home. Look for the breaker that controls the room or area where you will work. It is often labeled for easy identification.
Switch Off The Circuit Breaker
Flip the correct breaker to the OFF position. This stops power flow to the switch and lights. Double-check by turning on the switch to see if the lights stay off.
Use A Voltage Tester
Use a voltage tester on the switch wires. This tool confirms no electricity is present. Test each wire carefully to be sure the power is off.
Wear Protective Gear
Wear insulated gloves and safety glasses. These protect against accidental shocks and sparks. Safety gear is a simple way to stay safe.
Removing Existing Switch And Fixtures
Start by turning off the power to avoid accidents. Remove the old switch and light fixtures carefully. This clears the space for wiring multiple lights to one switch.
Turn Off Power At The Circuit Breaker
Safety is the first step. Switch off the power at the circuit breaker. This prevents any electrical shock. Double-check by flipping the light switch. The lights should not turn on. Use a voltage tester for extra safety. Make sure no electricity flows through the wires.
Remove The Switch Cover Plate
Use a screwdriver to remove the cover plate. Keep the screws safe for later use. Take off the plate gently. This exposes the switch and wiring. Work carefully to avoid damaging the wall. A clear view helps in the next steps.
Disconnect The Switch Wires
Note the wire positions before disconnecting. Take a photo or label the wires for reference. Loosen the screws holding the wires. Remove the wires from the switch terminals. Pull the switch out from the wall box. Keep the wires separated to avoid contact.
Unscrew And Remove Light Fixtures
Find the screws or clips holding the fixture. Use a screwdriver to loosen them. Carefully lower the fixture from the ceiling or wall. Disconnect the fixture wires from the house wires. Twist the wire nuts off to separate wires. Set the fixtures aside safely.
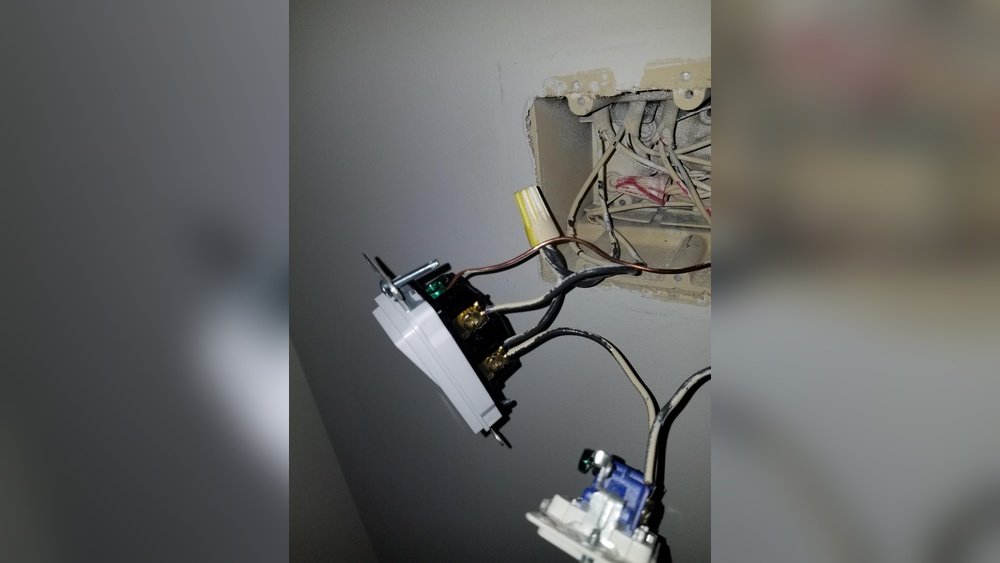
Inspect Wires And Wall Box
Check the wires for damage or fraying. Replace any damaged wires before continuing. Look inside the wall box for space. Ensure it can hold new wiring and switches. Clear any debris or old wire nuts. A clean workspace makes installation easier.
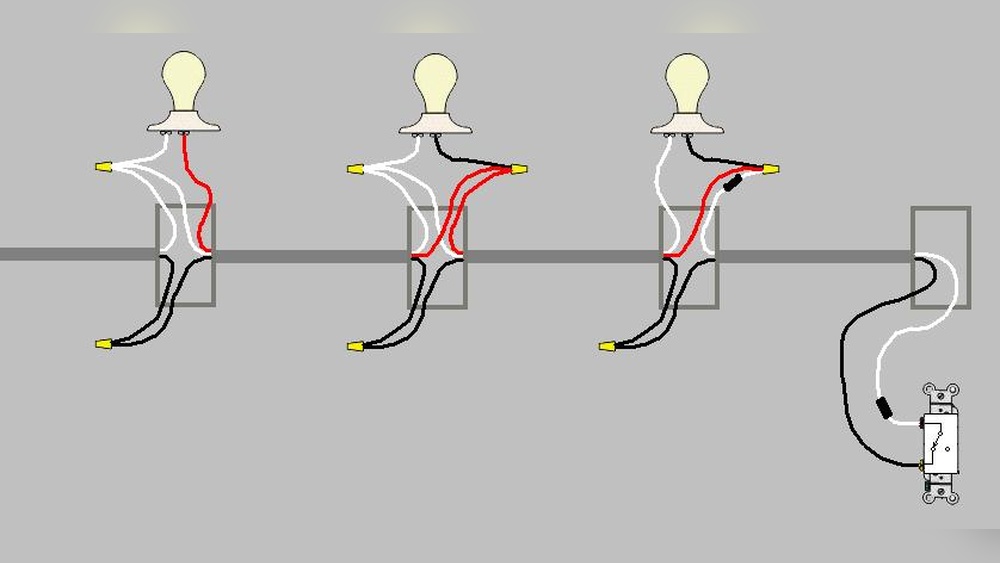
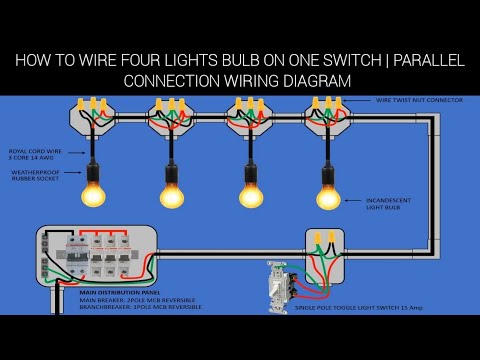
Wiring Multiple Lights To One Switch
Connecting several lights to a single switch saves space and simplifies control. It allows you to turn on or off multiple fixtures at once. This setup is useful for hallways, rooms, or outdoor areas. Correct wiring is important for safety and functionality. Follow these steps to wire multiple lights to one switch correctly.
Connecting The Switch
Start by turning off power at the breaker. Use a voltage tester to ensure no electricity flows. Connect the black (hot) wire from the power source to the switch’s input terminal. Then, connect a black wire from the switch’s output to the first light fixture. This wire carries power to the lights. Secure all connections tightly to avoid loose wiring.
Linking Light Fixtures
Run a black wire from the first fixture’s output to the next fixture’s input. Repeat this for each light you want to add. Connect all white (neutral) wires together in the fixture boxes. This completes the return path for the electricity. Also, connect all ground wires (bare or green) to each fixture and the switch box.
Securing Wire Connections
Use wire nuts to join wires securely. Twist wires together and screw on wire nuts firmly. Wrap wire nuts with electrical tape for extra safety. Push wires neatly into the boxes without crowding. Tighten switch and fixture screws to hold wires in place. Proper connections prevent shorts and ensure long-lasting performance.
Testing Your Setup
Testing your lighting setup is a key step after wiring multiple lights to one switch. This ensures everything works safely and correctly. Proper testing can help spot wiring errors and prevent electrical issues.
Take your time and follow the steps carefully. Check each light and the switch function to confirm a smooth setup. Testing avoids surprises and saves time on repairs later.
Turn On The Power Supply
Start by turning on the main power supply to the circuit. Make sure the breaker or fuse controlling the lights is switched on. This step powers the switch and all connected lights.
Check Each Light Individually
Flip the switch and observe each light. All lights should turn on together. If one light stays off, check its wiring and bulb. Replace any faulty bulbs before moving on.
Test The Switch Operation
Turn the switch on and off several times. The lights must respond instantly and without flickering. Flickering or delays may indicate loose connections or wiring issues.
Inspect For Safety Hazards
Look for any signs of overheating or burning smells near the switch or lights. Warm switches or flickering lights can signal electrical problems. Turn off the power if you notice anything unusual.
Use A Voltage Tester
Use a voltage tester to confirm power flow at the switch and light sockets. This tool helps verify correct wiring and safe voltage levels. It is simple and effective for troubleshooting.
Troubleshooting Common Issues
Troubleshooting is a key step in adding multiple lights to one switch. Problems can happen even with simple wiring. Knowing common issues saves time and effort. Below are common problems and how to fix them.
Switch Not Controlling All Lights
Sometimes, one or more lights do not respond to the switch. This usually means a wiring error. Check if all wires connect to the switch terminals properly. Loose connections or missing wires can cause this.
Make sure the lights are on the same circuit and switch. Using a voltage tester helps find where power stops. Confirm all bulbs work by testing them individually. Replace any faulty bulbs.
Lights Flickering Or Not Turning On
Flickering lights often indicate poor wiring or bad connections. Inspect wire nuts and terminals for tightness. Replace damaged wires or connectors to ensure good contact.
Sometimes, the switch itself is faulty. Try replacing the switch with a new one. Also, check if the circuit breaker is tripped or loose. Reset or tighten the breaker as needed.
Finalizing Installation
Finalizing the installation of multiple lights on one switch is a key step. It ensures everything works properly and looks neat. This stage involves covering the switch and checking safety before turning the power back on. Taking time here prevents problems later.
Replacing Switch Cover
Start by carefully placing the switch cover back. Align it with the switch and wall plate. Use a screwdriver to tighten the screws gently. Avoid over-tightening to prevent cracking the cover. A clean and secure cover gives a finished look.
Restoring Power And Safety Check
Turn the power back on at the breaker box. Test the switch by flipping it on and off. Check that all connected lights work as expected. Look for any flickering or unusual sounds. If everything is normal, the installation is safe.
Credit: www.youtube.com
Frequently Asked Questions
How Many Lights Can One Switch Control Safely?
One switch can control multiple lights, usually up to 10 or more. The limit depends on the switch’s wattage rating and wiring capacity. Always check the switch specifications and electrical codes to ensure safe operation without overloading the circuit.
What Wiring Method Is Best For Multiple Lights?
Using a parallel wiring method is best for multiple lights. It ensures each light gets equal voltage and can operate independently. This setup also prevents one light from affecting others if it fails, maintaining consistent performance.
Can I Use A Dimmer Switch For Multiple Lights?
Yes, you can use a dimmer switch for multiple lights if the total wattage is within its capacity. Ensure the dimmer is compatible with the light bulbs used, such as LED or incandescent, to avoid flickering or damage.
Is It Necessary To Turn Off Power Before Wiring Lights?
Absolutely, always turn off the power at the circuit breaker before wiring lights. This precaution prevents electrical shock and ensures safe installation. Use a voltage tester to confirm the power is off before starting any electrical work.
Conclusion
Adding multiple lights to one switch can save space and energy. Plan your wiring carefully and follow safety rules. Use the right tools and parts for a smooth job. Double-check connections before turning on the power. This simple setup can brighten rooms easily and efficiently.
Take your time and ask for help if needed. Enjoy better control over your lighting with one switch.