Have you ever needed to move a light switch just a bit farther away but didn’t know how to extend the cable safely? If you’re facing this common problem, you’re in the right place.
Extending a light switch cable might sound tricky, but with the right steps, you can do it yourself without calling an electrician. Imagine the satisfaction of fixing this on your own, saving time and money while keeping your home safe.
Keep reading, and you’ll learn simple, clear instructions to extend your light switch cable the right way. Your next DIY project just got a lot easier!
Tools And Materials Needed
Extending a light switch cable requires the right tools and materials. Having everything ready makes the task easier and safer. This section lists the essential items you need before starting.
Essential Tools
- Screwdriver: To open the switch box and secure wires.
- Wire stripper: To remove insulation from the wires.
- Voltage tester: To check if the power is off.
- Wire cutter: To cut cables to the right length.
- Electrical tape: To insulate wire connections.
- Needle-nose pliers: To bend and twist wires.
Required Materials
- Extension cable: Same type and gauge as the existing wire.
- Wire connectors: To join wires safely and securely.
- Switch box: If the current box is too small or damaged.
- Cable clips: To fasten the cable along walls.
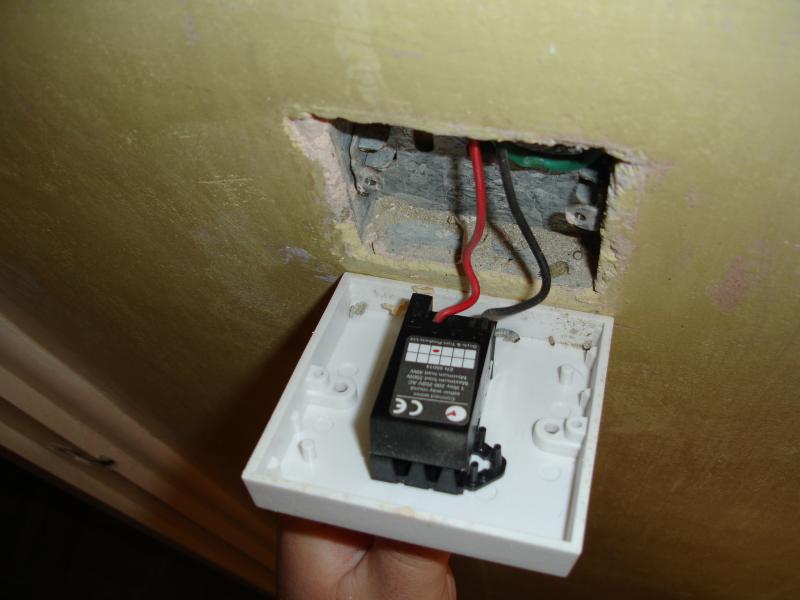
Credit: www.diynot.com
Safety Precautions
Working with electrical wiring can be risky. Safety is the top priority when extending a light switch cable. Taking the right precautions prevents accidents and injuries. Follow these simple safety steps to protect yourself and your home.
Power Shutoff
Always turn off the power at the main circuit breaker. This stops electricity from flowing to the switch. Double check that the correct breaker is off before starting work. Do not trust the switch position alone.
Using Protective Gear
Wear insulated gloves to avoid shocks. Safety glasses protect your eyes from sparks or debris. Use tools with insulated handles for extra protection. Dress in non-conductive clothing to reduce risk.
Checking For Live Wires
Use a voltage tester to check wires before touching them. Test each wire separately to confirm no current is present. Never assume wires are dead without testing. This step is crucial for safe handling.
Preparing The Existing Cable
Preparing the existing cable is the first step to extend a light switch cable safely. This process ensures the wires are ready for connection without damage. Careful preparation helps avoid electrical problems and keeps the work clean.
Removing The Switch Cover
Start by turning off the power at the breaker. Use a screwdriver to remove the screws on the switch cover. Gently pull the cover away from the wall. Keep the screws safe for later use. Removing the cover gives access to the wires inside.
Identifying Wire Types
Look closely at the wires connected to the switch. You usually find three types: live, neutral, and ground. The live wire is often brown or red. The neutral wire is blue or black. The ground wire is green or yellow-green. Knowing each wire helps connect the extension correctly.
Cutting And Stripping Wires
Use wire cutters to trim the wire ends if needed. Leave enough length to work with safely. Strip about half an inch of insulation from the wire tips. Use a wire stripper for a clean job. Exposed wires must be neat for a strong connection.
Choosing The Right Extension Cable
Choosing the right extension cable is important for safety and performance. It ensures your light switch works well without any risk. The correct cable prevents electrical problems and keeps your home safe.
Pick a cable that fits the existing setup. Check the size and type carefully. Also, consider how long the extension cable needs to be. These details affect the quality and safety of the connection.
Matching Cable Specifications
Use a cable with the same thickness as the original. The thickness is called the gauge or cross-sectional area. This ensures it can handle the same electrical load. Using a thinner cable can cause overheating and fire risks.
Match the cable material too. Copper cables are common and reliable. Avoid mixing different types to stop poor connections or corrosion. Also, check the insulation type to fit your home environment.
Cable Length Considerations
Choose a cable length that fits your needs exactly. Too short means it won’t reach; too long adds resistance. Extra length can lower voltage and reduce light brightness.
Measure the distance from the switch to the power source. Add a little extra for safety but keep it as short as possible. This maintains good electrical flow and prevents power loss.
Connecting The Extension Cable
Connecting the extension cable is a key step in extending a light switch cable. It ensures the new length works safely and correctly. Careful connection prevents electrical faults and keeps your home safe.
The process involves joining wires securely and matching their polarity. Use the right tools and materials to make the connection strong and lasting.
Using Wire Connectors
Wire connectors join the original cable to the extension cable. Choose connectors that fit the wire size. Push stripped wire ends into the connector firmly. This prevents loose connections and sparks.
Twist the connector slightly to lock wires inside. A tight fit stops wires from pulling out. Wire connectors are easy to use and safe for home wiring.
Twisting And Securing Wires
Strip about half an inch of insulation from each wire end. Hold the two wires side by side. Twist them clockwise tightly to join firmly.
Cover the twisted wires with electrical tape or use a wire nut. This protects the connection from moisture and damage. Secure wires fully to avoid shorts or breaks.
Ensuring Proper Polarity
Match the wires by color or marking. Usually, black or red is live, white is neutral, and green or bare is ground. Connect live to live, neutral to neutral, and ground to ground.
Wrong polarity can cause the light switch to fail or create hazards. Double-check each wire before finalizing the connection. Correct polarity guarantees safe and reliable operation.
Securing And Insulating Connections
Securing and insulating connections is a key step when extending a light switch cable. It keeps the wires safe and prevents electrical shorts. Proper insulation protects against shocks and ensures long-lasting performance. Taking time to secure connections reduces the risk of loose wires that could cause problems later.
Using the right materials for insulation also helps maintain a neat and organized setup. This section covers two common methods to secure and insulate your cable connections.
Using Electrical Tape
Electrical tape is a simple and effective option to cover wire joints. Wrap the tape tightly around the exposed wires to block any contact with other surfaces. Use several layers to build a strong, protective barrier. Choose high-quality tape that resists heat and moisture.
Make sure the tape covers all bare wire. Press the tape firmly to avoid gaps where moisture can enter. Electrical tape is flexible and easy to remove if you need to check the connection later.
Heat Shrink Tubing Options
Heat shrink tubing offers a professional finish and strong protection. Slide the tubing over the wire before connecting the cables. After joining the wires, move the tubing to cover the exposed area.
Use a heat gun or lighter carefully to shrink the tubing. It will tighten around the connection, sealing it completely. Heat shrink tubing comes in different sizes and colors for easy identification.
This method provides a durable seal that resists wear and harsh conditions better than tape. It also keeps the connection neat and secure.
Reinstalling The Light Switch
Reinstalling the light switch is the final step after extending the cable. It ensures the switch works safely and properly. This process requires care and attention to detail. Follow each step closely for a successful installation.
Mounting The Switch Back
Place the light switch back into the electrical box carefully. Align the screw holes on the switch with those on the box. Use a screwdriver to secure the switch with screws. Tighten the screws firmly but avoid over-tightening. The switch should sit flush against the wall. Check that the switch does not move or wobble.
Testing The Connection
Turn the power back on at the circuit breaker. Flip the light switch to check if the light turns on. Test the switch several times to ensure a steady connection. If the light does not respond, turn off the power and check wiring. Correct any loose or wrong connections before testing again. A properly connected switch makes the light work smoothly.

Credit: www.lets-do-diy.com
Troubleshooting Common Issues
Extending a light switch cable can sometimes cause small problems. These issues stop the switch from working well or make the lights act strangely. Knowing common problems helps fix them fast. This saves time and keeps your home safe.
Switch Not Working
The switch may not work if the wires are wrong. Check the wire colors match the original setup. Tighten any loose screws on the switch terminals. Sometimes, the switch itself could be broken. Replace it if nothing else works.
Flickering Lights
Lights that flicker often mean a bad connection. The wire may not be fully inside the terminal. Push the wire in and tighten the screw. Using the wrong wire size can also cause flickers. Make sure the cable matches the switch rating.
Loose Connections
Loose wires cause many problems like sparks or no power. Always strip the wire ends just right. Too much or too little exposed wire can cause bad contact. Twist wire strands tightly before inserting. Use wire nuts or terminal screws to hold wires firmly.

Credit: www.youtube.com
Frequently Asked Questions
How Do I Safely Extend A Light Switch Cable?
Turn off the power at the circuit breaker before starting. Use appropriate wire connectors and matching wire gauge. Connect wires securely and insulate with electrical tape. Always follow local electrical codes to ensure safety.
What Tools Are Needed To Extend A Light Switch Cable?
You need wire strippers, a screwdriver, wire connectors, electrical tape, and a voltage tester. A measuring tape and replacement cable of the right gauge are essential. These tools help ensure a safe and secure extension.
Can I Use Any Cable To Extend A Light Switch?
No, use cable matching the original wire gauge and type. Using incorrect cable risks overheating and electrical hazards. Always check local electrical codes to select the proper cable for safety and compliance.
How Long Can A Light Switch Cable Extension Be?
Extensions should be as short as possible to reduce voltage drop. Generally, keep extensions under 10 feet unless specified by code. Longer extensions may require thicker cables to maintain safety and performance.
Conclusion
Extending a light switch cable can be simple and safe. Always turn off the power before starting work. Use the right tools and follow proper steps carefully. Double-check your connections to avoid problems later. Taking your time helps prevent mistakes and keeps you safe.
With patience, you can finish the task without trouble. This skill can save money and improve your home’s wiring. Try it yourself, but don’t rush. Safety first, always.