Are your old kitchen cabinet hardware looking worn out or outdated? You don’t need to replace them to give your kitchen a fresh, new look.
Painting your cabinet hardware is an easy and affordable way to transform your space without breaking the bank. In this guide, you’ll learn simple steps to paint your hardware like a pro, even if you’ve never done it before. By the end, you’ll have beautiful, updated handles and knobs that make your kitchen feel brand new.
Ready to get started? Let’s dive in!

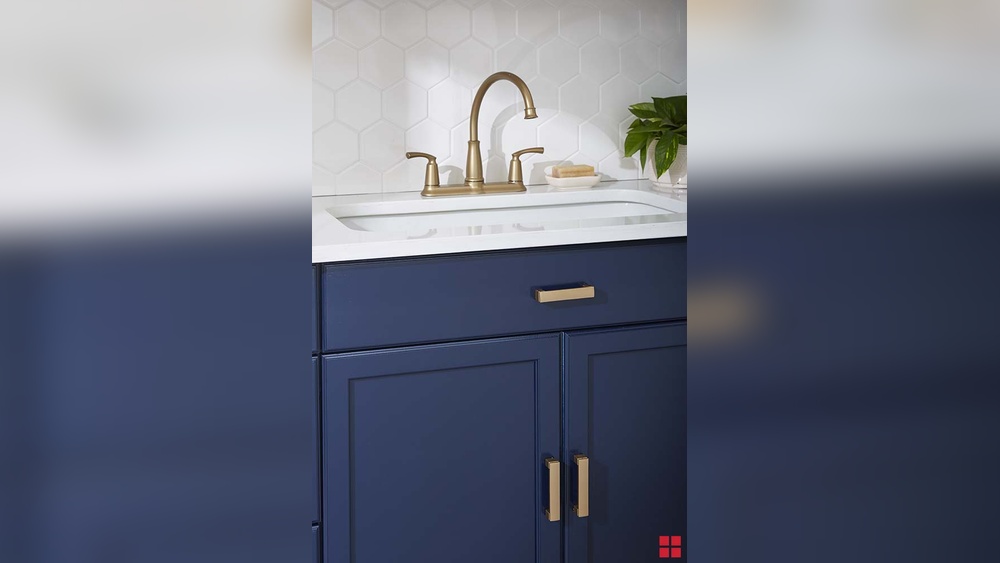
Credit: www.kylieminteriors.ca
Gathering Supplies
Gathering the right supplies is the first step in painting old kitchen cabinet hardware. It makes the project easier and helps you get a smooth finish. Having everything ready saves time and avoids frustration. Focus on quality tools and materials for the best results.
Choosing The Right Paint
Pick paint designed for metal surfaces. Spray paint works well for small hardware pieces. Look for paint that resists chipping and rust. Satin or semi-gloss finishes give a nice shine. Avoid regular wall paint; it may peel or crack quickly.
Essential Tools And Materials
Start with a screwdriver to remove hardware from cabinets. Use sandpaper or a wire brush to clean old paint and rust. Clean the pieces with soap and water. Use painter’s tape and newspaper to protect surfaces. Gloves and a mask keep you safe from fumes. A small container for soaking hardware helps remove dirt. Make sure to have a well-ventilated space for painting.
Removing Cabinet Hardware
Removing old cabinet hardware is the first step in refreshing your kitchen. It helps you prepare the pieces for painting. Taking off handles and knobs carefully keeps them safe from damage. This way, the paint will stick better and look smooth. Organizing the parts after removal saves time during reassembly.
Organizing Screws And Pieces
Keep screws and hardware parts together in small containers. Use cups or trays to separate pieces from each cabinet door or drawer. This stops screws from mixing up or getting lost. Organizing parts makes it easier to find them later. It also speeds up the process of putting everything back.
Labeling For Easy Reassembly
Label each set of screws and hardware with a marker or tape. Mark the door or drawer number on each container or bag. This helps you remember where each piece belongs. Labeling prevents confusion and saves time during reinstallation. You will avoid mistakes and keep your kitchen organized.
Cleaning And Prepping
Cleaning and prepping old kitchen cabinet hardware is the first step for a smooth paint job. Proper preparation helps the paint stick well and last longer. It removes dirt and grease that can stop the paint from adhering. Also, sanding creates a rough surface for the paint to grip.
Removing Dirt And Grease
Start by taking off all hardware from the cabinets. Use warm water and mild soap to wash each piece. A soft brush helps get into small crevices. For tough grease, use a degreaser or vinegar. Rinse well and dry completely before moving on. Clean hardware ensures paint sticks better and looks smooth.
Sanding For Better Adhesion
Lightly sand the hardware with fine-grit sandpaper. Sanding removes old finish and scratches the surface. This step helps the new paint hold on tightly. Wipe off dust with a damp cloth after sanding. Make sure each piece is dry before painting. This simple step improves the paint’s durability and finish.
Applying Primer
Applying primer is a key step before painting old kitchen cabinet hardware. It creates a smooth base and helps paint stick better. Primer also stops rust and makes the finish last longer. Preparing the hardware well with primer gives a professional look.
Selecting Primer Types
Choose the right primer for your hardware material. Metal hardware needs a rust-inhibiting primer. For plastic or wood, use a primer made for those surfaces. Spray primers offer even coverage and reach small details easily. Oil-based primers are durable but take longer to dry. Water-based primers dry fast and clean up easily. Match the primer with your paint for best results.
Tips For Smooth Application
Clean the hardware before priming. Remove dust, grease, and old paint flakes. Use light sanding to roughen the surface. This helps the primer stick well. Apply thin, even coats to avoid drips. Let each coat dry fully before adding the next. Use a spray primer or small brush for better control. Work in a well-ventilated area to speed drying and reduce fumes.
Painting The Hardware
Painting old kitchen cabinet hardware is a smart way to refresh your kitchen without a big cost. The right paint and method can make old knobs and handles look new. Careful painting also protects the hardware from wear and tear. This section covers key tips for painting hardware effectively.
Using Spray Paint Vs. Brush
Spray paint covers hardware quickly and evenly. It reaches tiny details and gives a smooth finish. Use spray paint outdoors or in a well-ventilated area to avoid fumes. Hold the can about 6 to 8 inches from the hardware for best results.
Brush painting offers more control for small areas. It works well for intricate designs or if you want a textured look. Choose a brush with fine, soft bristles to avoid streaks. Apply thin coats and let each dry before adding more.
Multiple Coats For Durability
One coat is never enough for kitchen hardware. Multiple thin coats build a strong, lasting finish. Let each coat dry fully before applying the next. This prevents drips and uneven spots.
Two to three coats usually give the best protection. A durable finish helps the hardware resist scratches and chips. Take your time for a professional look that lasts longer.
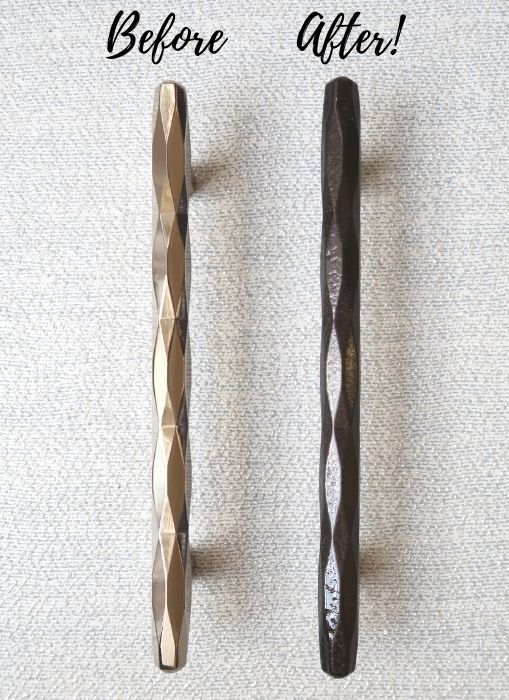
Credit: porchdaydreamer.com
Sealing And Finishing
Sealing and finishing are the last steps in painting old kitchen cabinet hardware. These steps protect the paint and make the hardware last longer. A good sealer stops scratches and fading. It also gives the hardware a nice shine or a smooth matte look.
Choosing the right sealer matters. It must match the paint type and the hardware use. The wrong sealer can ruin your work by peeling or yellowing the paint.
Choosing The Right Sealer
Pick a sealer made for metal surfaces. Clear acrylic spray sealers work well. They dry fast and keep colors bright. For a more durable finish, use a polyurethane sealer. It resists wear from daily use. Satin or matte finishes hide fingerprints and smudges. Glossy finishes add shine but show marks easily.
Drying And Curing Time
Let the sealer dry fully between coats. Usually, it takes one to two hours. Apply two or three thin coats for best protection. After the last coat, let the hardware cure. Curing means the sealer hardens completely. This can take up to 24 hours or more. Avoid using the hardware until curing finishes. This ensures a tough, long-lasting finish.
Reinstalling Hardware
Reinstalling hardware on old kitchen cabinets is a key step after painting. This step brings the whole cabinet makeover together. Proper reinstallation ensures the hardware looks good and works well. Take your time to fit each piece carefully. This avoids damage and keeps the cabinet functional.
Ensuring Proper Fit
Check each piece of hardware before installing. Make sure screws match the holes. Old holes may need slight adjustment or filling. Align handles and knobs straight. Loose screws can cause hardware to wobble. Use a screwdriver to tighten all screws firmly. Avoid overtightening to prevent stripping.
Final Touches For A Polished Look
Wipe hardware with a soft cloth to remove dust. Touch up any paint chips around the holes. Clear away fingerprints and smudges on the hardware. Inspect cabinets for missed spots or uneven paint. Add small felt pads behind hardware to protect cabinet surfaces. Step back and admire your refreshed kitchen cabinet hardware.
Maintenance Tips
Painting old kitchen cabinet hardware gives a fresh look. Keeping it nice needs some care. Simple maintenance helps the paint last longer. It keeps your kitchen looking neat and new.
Cleaning Painted Hardware
Use a soft cloth to clean painted hardware. Avoid harsh chemicals or scrubbing pads. Light soap with warm water works best. Gently wipe the surface to remove dirt. Dry with a clean towel to prevent water spots.
Preventing Chipping And Wear
Touch up small chips quickly to avoid bigger damage. Avoid hitting the hardware with hard objects. Use cabinet handles carefully to reduce wear. Consider a clear protective spray for extra defense. Regular care keeps the paint smooth and bright.

Credit: www.youtube.com
Frequently Asked Questions
How Do I Prepare Old Cabinet Hardware For Painting?
Clean the hardware thoroughly using soap and water. Remove rust and old paint with sandpaper or a wire brush. Dry completely before priming. Proper prep ensures paint adhesion and a smooth finish.
What Type Of Paint Works Best On Metal Hardware?
Use spray paint designed for metal surfaces. Oil-based or enamel spray paints provide durability and a smooth finish. Choose a paint labeled rust-resistant for longer-lasting results.
Should I Remove Hardware Before Painting?
Yes, remove all hardware from cabinets before painting. It prevents paint drips and ensures even coverage. Also, painting hardware separately is easier and more precise.
How Many Coats Of Paint Are Needed?
Apply 2-3 thin coats for best coverage. Allow each coat to dry fully before applying the next. Multiple thin layers prevent drips and create a professional look.
Conclusion
Painting old kitchen cabinet hardware can refresh your space quickly. It saves money and adds a personal touch. Choose the right paint and prepare surfaces well for best results. Take your time with each step for a smooth finish. Enjoy the new look without replacing the hardware.
Small changes bring big improvements. Try it and see the difference yourself.


