Are you ready to give your kitchen a fresh, stylish look without spending a fortune? Adding cabinet hardware is one of the easiest and most effective ways to transform your space instantly.
Whether you want sleek handles or classic knobs, choosing the right hardware can make your kitchen feel brand new. In this guide, you’ll learn simple, step-by-step tips to install cabinet hardware like a pro—no special tools or experience needed. Keep reading, and by the end, you’ll have the confidence to upgrade your kitchen and impress everyone who walks through your door.

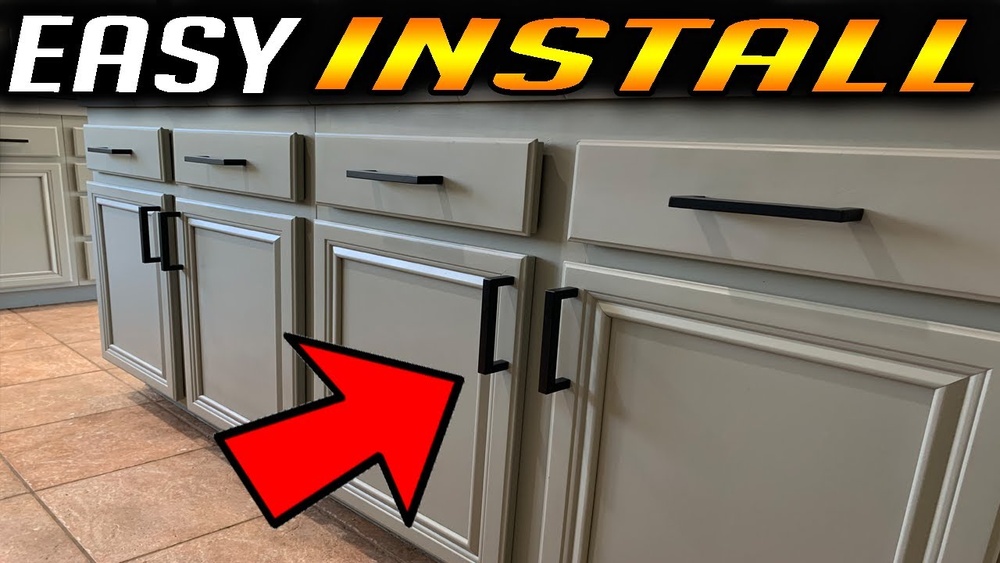
Credit: www.youtube.com
Choosing The Right Hardware
Choosing the right hardware for your kitchen cabinets is important. Hardware changes the look and feel of your kitchen. It also affects how easy your cabinets open and close. This section helps you pick hardware that fits your needs and style.
Types Of Cabinet Hardware
Cabinet hardware mainly includes knobs and pulls. Knobs are small and round or square. Pulls are longer and let you grab with your whole hand. Some pulls are sleek and straight, others are curved. Choose the type that feels comfortable and looks good.
Matching Hardware To Your Style
Hardware should match your kitchen’s style. For modern kitchens, choose simple, clean designs. For traditional kitchens, look for detailed or antique styles. Rustic kitchens work well with rough, natural finishes. Pick hardware that fits the room’s mood.
Materials And Finishes
Hardware comes in many materials like metal, plastic, and wood. Metal is the most popular and lasts long. Finishes include chrome, brass, nickel, and bronze. Shiny finishes give a bright look. Matte finishes offer a soft, subtle touch. Choose materials and finishes that suit your kitchen’s colors.
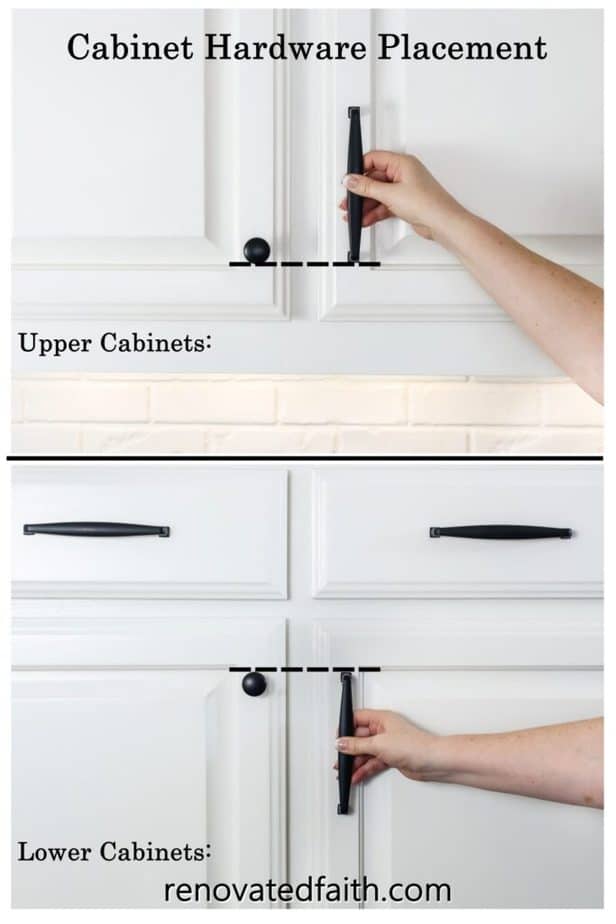
Credit: renovatedfaith.com
Tools And Materials Needed
Before you start adding hardware to your kitchen cabinets, gather all the necessary tools and materials. Having everything ready makes the job faster and easier. The right tools ensure the hardware fits well and looks great. Safety gear protects you during the process. Below are the key items you need for this project.
Essential Tools
- Power drill with drill bits
- Screwdriver (Phillips and flathead)
- Measuring tape or ruler
- Pencil for marking spots
- Level to keep hardware straight
- Center punch or nail for pilot holes
Hardware Components
- Cabinet knobs or pulls
- Screws matching the hardware
- Mounting templates (optional but helpful)
Safety Gear
- Safety glasses to protect your eyes
- Gloves to protect your hands
- Dust mask if drilling into old cabinets
Preparing Your Cabinets
Preparing your cabinets is the first step before adding new hardware. This step ensures the new handles or knobs fit perfectly and look great. Taking time here helps avoid mistakes and saves effort later. Let’s break down the preparation into three simple tasks.
Cleaning And Inspection
Start by cleaning the cabinet surfaces well. Use a mild cleaner and a soft cloth. Remove grease, dust, and dirt to get a clear view of the cabinet. Check for any damage like cracks or loose panels. Fix these issues before moving on. Clean cabinets make hardware installation easier and stronger.
Removing Old Hardware
Take off old handles or knobs carefully. Use a screwdriver that fits the screws exactly. Keep the screws if you plan to reuse them. Place the old hardware aside in case you want to reuse or recycle. Removing old hardware clears the way for new pieces and ensures a smooth finish.
Measuring And Marking
Measure the cabinet doors and drawers for proper hardware placement. Use a ruler or tape measure for accuracy. Mark the spots lightly with a pencil. Consistent marking ensures all handles align evenly. Double-check measurements before drilling any holes. This step makes your cabinets look neat and professional.
Installing Handles And Knobs
Installing handles and knobs is a simple way to update your kitchen cabinets. It changes the look and makes opening doors easier. The process needs some care to get the hardware straight and secure. Follow these steps to install your cabinet hardware with confidence.
Drilling Pilot Holes
Mark the spots where you want to place the handles or knobs. Use a ruler or template for even spacing. Drill small pilot holes to guide the screws. This prevents the wood from splitting. Choose a drill bit slightly smaller than the screw size.
Aligning Hardware
Place the handle or knob over the pilot holes. Check that it sits straight and level. Use a level tool or measure from cabinet edges. Adjust the position before you tighten any screws. Proper alignment gives a neat, professional look.
Securing With Screws
Insert screws through the inside of the cabinet door or drawer. Tighten them by hand or with a screwdriver. Avoid over-tightening to prevent damage to the hardware or wood. Make sure the handle or knob is firm and does not wiggle.
Tips For A Professional Finish
Adding hardware to kitchen cabinets can transform the whole room. A professional finish makes your cabinets look neat and stylish. Small details matter. Careful work brings the best results.
Avoiding Common Mistakes
Measure twice before drilling any holes. Wrong holes damage cabinets and waste hardware. Use a pencil to mark spots clearly. Drill slowly and keep the drill straight. Avoid rushing to prevent cracks or splits in the wood.
Double-checking Alignment
Check alignment often while installing handles or knobs. Use a ruler or level to keep everything straight. Cabinets look better when hardware lines up perfectly. Stand back and look at your work. Small shifts can make a big difference.
Finishing Touches
Wipe off pencil marks gently with a damp cloth. Tighten screws just enough. Too tight can strip holes or damage hardware. Test each handle or knob to ensure it feels secure. Clean fingerprints or dust for a polished look.
:max_bytes(150000):strip_icc()/SPR-where-to-put-knobs-and-handles-on-kitchen-cabinets-6373984-hero-f2b94cb045354a5783a3d927f83b5d21.jpg)
Credit: www.thespruce.com
Maintaining Your Hardware
Maintaining your kitchen cabinet hardware keeps it looking fresh and working well. Proper care stops damage and saves money on replacements. Small tasks done regularly make a big difference over time.
Cleaning Tips
Clean hardware often to avoid dirt build-up. Use a soft cloth and mild soap with warm water. Avoid harsh chemicals that can harm the finish. Dry the hardware well to prevent rust or water marks. Regular cleaning keeps handles and knobs shiny and smooth.
Tightening Loose Pieces
Check your hardware regularly for looseness. Loose screws cause handles to wobble or fall off. Use a screwdriver to tighten screws carefully. Do not overtighten to avoid stripping the screw holes. Tight hardware feels solid and improves cabinet use.
Replacing Damaged Hardware
Replace hardware that is cracked, bent, or broken. Damaged pieces look bad and may not work properly. Choose replacements that match the style and size of your current hardware. Use the right tools to remove old pieces and install new ones. New hardware refreshes your kitchen’s appearance instantly.
Frequently Asked Questions
How Do I Choose The Right Cabinet Hardware Size?
Measure your cabinet doors and drawers first. Choose hardware that fits comfortably. Typically, knobs are 1-2 inches, pulls 3-5 inches. Match size to cabinet style and function for easy use and aesthetic balance.
What Tools Are Needed To Install Cabinet Hardware?
You need a drill, screwdriver, measuring tape, and pencil. A level helps align hardware perfectly. These tools ensure precise placement and secure installation of knobs or pulls.
How Do I Find The Perfect Placement For Hardware?
Measure evenly from edges and center. For drawers, center hardware horizontally. For doors, place knobs 2-3 inches from the bottom or top corner. Consistency creates a professional look.
Can I Install Hardware On Existing Cabinets Easily?
Yes, it’s simple with the right tools. Mark new holes carefully to avoid mistakes. Use a drill for accurate holes. Installation usually takes under an hour per cabinet.
Conclusion
Adding cabinet hardware can change your kitchen’s look fast. Choose handles that fit your style and needs. Measure and mark carefully for best results. Use the right tools to avoid mistakes. Take your time during installation to keep things neat.
Small changes can make a big difference in your space. Enjoy your updated kitchen with fresh, new hardware. Simple steps lead to a great finish. Keep these tips handy for future projects. Your kitchen will feel new without much effort.


