Are you looking for an easy way to add snap fasteners to your clothes or craft projects? Dritz Snap Fastener Pliers are a simple tool that can make your job faster and neater.
But if you’ve never used them before, you might feel unsure about how to get the best results. In this guide, you’ll discover clear, step-by-step instructions that will help you master these pliers quickly. By the end, you’ll have the confidence to use them like a pro and create durable, professional-looking snaps every time.
Keep reading to find out how!

Credit: www.handicraft.com
Choosing The Right Snap Fasteners
Choosing the right snap fasteners is important for your project’s success. The right snaps hold fabric well and last longer. Using the wrong type can cause problems like poor grip or damage. Understanding different types, materials, and sizes helps you pick the best snaps for your needs.
Types Of Snap Fasteners
Snap fasteners come in several types. Sew-on snaps need stitching to attach. They work well on soft fabrics. Pry-on snaps have prongs that pierce fabric. These fit tightly but need careful handling. Press snaps use a special tool to close. They create a neat finish and strong hold. Choosing the type depends on fabric and use.
Materials And Sizes
Snap fasteners come in metal and plastic. Metal snaps are strong and durable. Plastic snaps are lightweight and good for kids’ clothes. Sizes vary from tiny to large. Small snaps suit delicate fabrics. Large snaps work best on heavy materials. Match size and material to your fabric thickness and project use.
Preparing Your Fabric
Preparing your fabric is the first step in using Dritz snap fastener pliers. Proper preparation helps the snaps fit well and last long. It also makes the process smoother and prevents damage to the fabric. Take your time to get the fabric ready before attaching snaps.
Marking Snap Positions
Start by deciding where to place the snaps on your fabric. Use a fabric marker or chalk to make small dots. These marks guide you to place the snaps evenly and straight. Measure twice to avoid mistakes. Clear markings help align the snap fasteners perfectly.
Reinforcing Fabric
Some fabrics need extra strength where snaps go. Thin or stretchy fabric can tear without support. Add a small piece of interfacing or fabric patch behind the snap area. Iron the interfacing to stick it well. This reinforcement keeps the fabric firm and ready for snaps.
Setting Up Dritz Snap Fastener Pliers
Setting up Dritz Snap Fastener Pliers correctly is key for smooth sewing. Proper setup helps place snaps securely on fabric. It also prevents damage to both the tool and materials. Take time to prepare the pliers before starting your project.
Installing The Correct Attachments
First, select the right attachments for your snaps. Dritz pliers come with different sizes for top and bottom snaps. Match the attachments to your snap size. Place the male and female parts on the correct sides of the pliers. Secure the attachments by tightening the screws. This ensures a firm hold during use.
Adjusting For Fabric Thickness
Next, adjust the pliers for your fabric’s thickness. Too much pressure can damage thin fabrics. Too little pressure can cause loose snaps on thick fabrics. Use the adjustment wheel or screw to set the right tension. Test on a scrap piece of fabric before working on your project. This step helps achieve perfect snap placement every time.
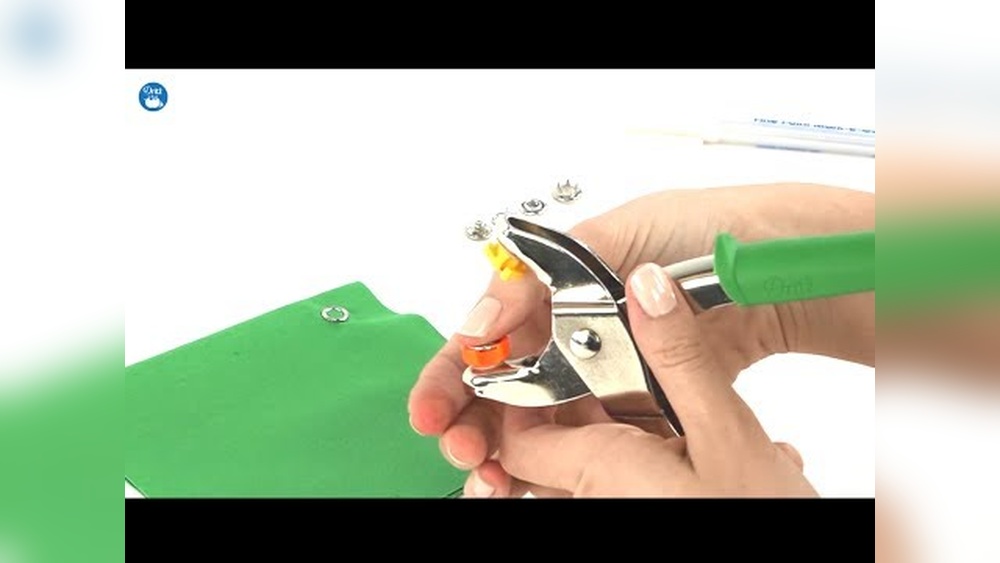
Attaching Snap Components
Attaching snap components with Dritz Snap Fastener Pliers is simple and quick. You get strong snaps that hold well on fabric. Follow clear steps to place each part correctly. This ensures your snaps work smoothly every time.
Placing The Cap And Socket
Start by positioning the cap on the fabric’s front side. The cap shows the decorative top. Place the socket on the back side of the fabric, aligning it with the cap. The socket holds the cap in place and allows snapping.
Insert both pieces into the pliers. The cap fits on the top jaw and the socket on the bottom jaw. Squeeze the pliers firmly. This presses the parts together without damaging the fabric. The cap and socket are now attached tightly.
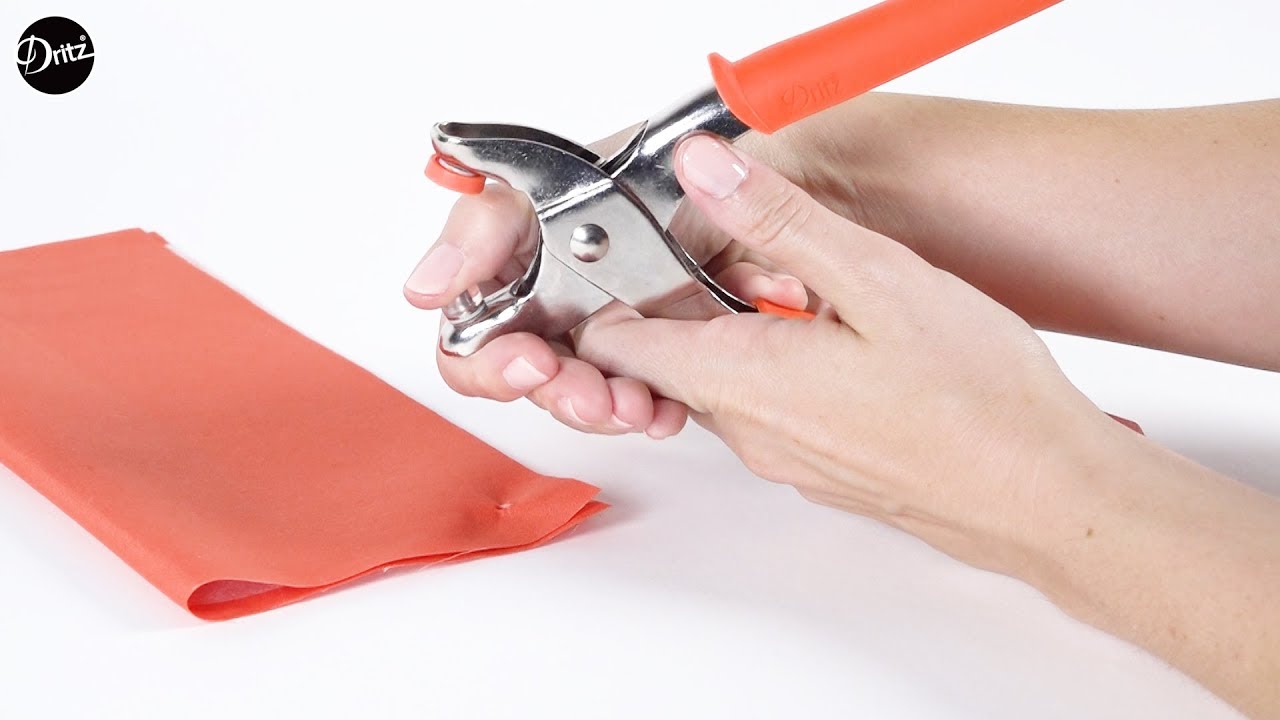
Securing The Stud And Post
Flip the fabric to the other side for the stud and post. The post goes through the fabric first. The stud fits on the post, creating the snap part that clicks with the socket.
Place the post and stud in the pliers. The post sits on the bottom jaw and the stud on the top jaw. Squeeze the pliers firmly again. This locks the stud and post securely. The snap is now ready for use.
Troubleshooting Common Issues
Using Dritz Snap Fastener Pliers can be simple. Still, some common problems might happen. These issues can slow down your project or cause frustration. This section helps you fix those problems fast. Keep your pliers working well and your snaps perfect.
Misaligned Snaps
Misaligned snaps happen when the parts do not match up. This can make the snap hard to close or weak. Check the snap pieces before pressing. Make sure the top and bottom parts line up straight.
Place the fabric flat and steady. Hold the pliers firmly and press slowly. Avoid moving the snap pieces during pressing. If they shift, release and try again carefully.
Loose Or Stuck Pliers
Loose pliers can cause poor snap attachment. Tighten the screw on the pliers to fix this. Use a screwdriver to adjust the tension gently. Do not over-tighten or it may break the tool.
Stuck pliers need cleaning. Remove any fabric bits or dirt from the jaws. Wipe the tool with a dry cloth. Lubricate the hinge with a drop of light oil. Open and close the pliers a few times to spread the oil.

Credit: www.handicraft.com
Caring For Your Pliers
Caring for your Dritz Snap Fastener Pliers is key to keeping them in good shape. Proper care helps the pliers last longer and work smoothly. Regular cleaning and correct storage protect the tools from damage and rust. Simple habits keep your pliers ready for any project.
Cleaning Tips
Wipe the pliers with a soft cloth after each use. Remove any dirt or fabric bits stuck in the jaws. Use a small brush to clean hard-to-reach areas. Avoid using water directly, as it can cause rust. If needed, apply a drop of light oil to the joints. This keeps the movement smooth and prevents stiffness.
Storage Recommendations
Store pliers in a dry place to avoid moisture buildup. Keep them in a toolbox or a protective case. Avoid tossing them with other tools to prevent scratches. Use a small pouch or wrap them in cloth for extra protection. Proper storage keeps your pliers safe and ready to use anytime.
Credit: www.youtube.com
Frequently Asked Questions
How Do I Use Dritz Snap Fastener Pliers Correctly?
To use Dritz snap fastener pliers, align the snap parts between the jaws. Squeeze firmly to secure snaps onto fabric. Ensure fabric is flat and snaps are properly positioned before applying pressure for best results.
What Fabrics Work Best With Dritz Snap Fastener Pliers?
Dritz snap fastener pliers work well on medium to heavy fabrics. Use them on denim, canvas, or upholstery material. Avoid very thin or delicate fabrics to prevent damage or improper snap fastening.
Can I Remove Snaps Installed With Dritz Pliers?
Yes, snaps can be carefully removed using a seam ripper or small pliers. Gently pry open the snap components without damaging fabric. Take care to avoid tearing the material during removal.
Are Dritz Snap Fastener Pliers Reusable For Multiple Projects?
Yes, these pliers are durable and designed for repeated use. They maintain consistent pressure to install snaps accurately. Clean and store them properly to extend their lifespan and performance.
Conclusion
Using Dritz snap fastener pliers makes attaching snaps simple and fast. These pliers help create strong, neat snaps on fabric. Practice a few times to get comfortable with the tool. Choose the right size snap for your project. Clean and align the fabric before pressing.
This tool saves time and improves your sewing results. Now, you can add snaps to clothes, bags, or crafts easily. Keep your pliers in good condition for long use. Enjoy creating with confidence and ease!