Are you looking to bring back the shine to your vintage copper cabinet hardware? Over time, copper can lose its glow and gather tarnish, making your beautiful cabinets look dull.
But don’t worry—you don’t have to replace them or spend hours scrubbing. In this guide, you’ll discover simple, effective ways to clean your copper hardware and restore its original charm. Keep reading, and you’ll learn easy tips that save you time and effort while making your cabinets stand out like new.
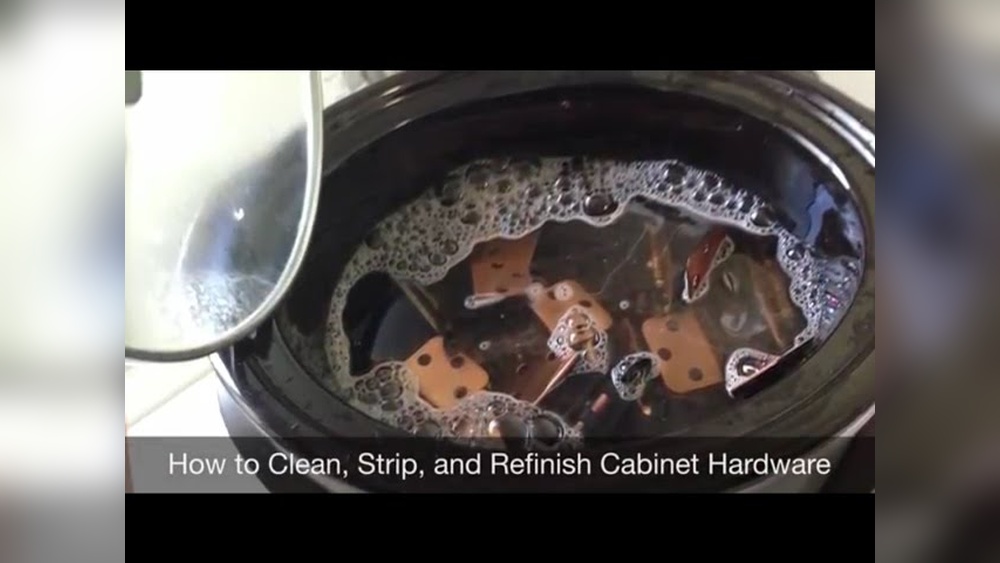
Credit: www.hometalk.com
Identify Vintage Copper Hardware
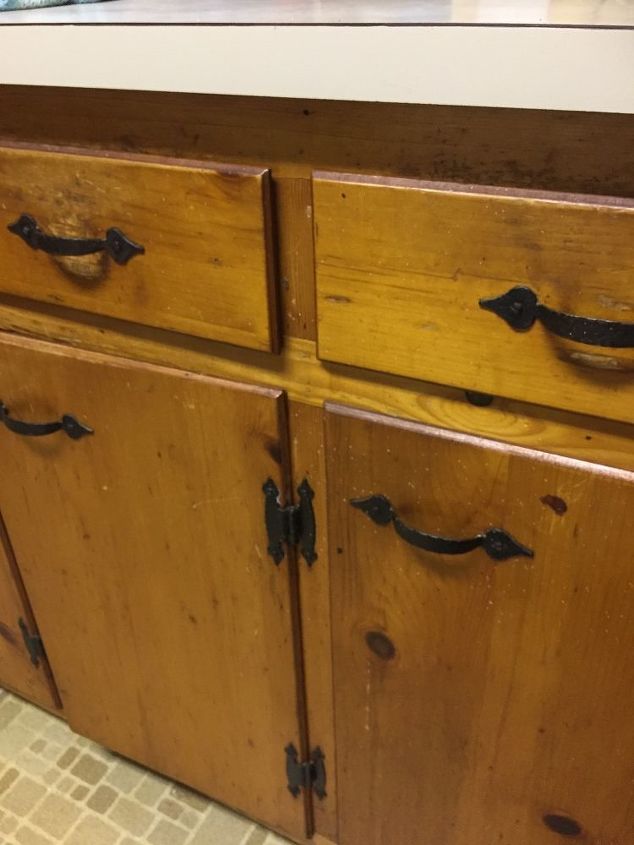
Identifying vintage copper cabinet hardware is the first step in proper cleaning. Copper has unique features that set it apart from other metals. Knowing these details helps preserve the hardware’s charm and value. This section explains how to spot vintage copper pieces easily.
Check For Patina And Age Marks
Patina is a natural layer that forms on copper over time. It often appears as green or brown spots. This layer shows the piece is old and authentic. Look closely for small scratches, dents, or worn areas. These marks tell the story of the hardware’s age and use. Avoid scrubbing off the patina. It adds character and protects the metal underneath.
Distinguish Copper From Other Metals
Copper has a warm, reddish-brown color. Brass and bronze can look similar but have more yellow or gold tones. Tap the hardware lightly; copper sounds softer than steel or iron. Copper is heavier than aluminum but lighter than iron. A simple magnet test works too. Copper is not magnetic, so the magnet will not stick. These tips help you confirm the metal before cleaning.
Gather Cleaning Supplies
Gathering the right supplies is the first step to clean vintage copper cabinet hardware. Proper tools and ingredients protect the metal and keep its shine. Using gentle, natural cleaners is best for old copper. Harsh chemicals can damage the finish or cause discoloration.
Prepare your cleaning area with soft cloths and small brushes. These help clean dirt from hard-to-reach spots. Having everything ready makes the process smoother and safer for your vintage pieces.
Natural Cleaning Ingredients
Use simple ingredients like lemon juice and baking soda. They break down tarnish without harming copper. White vinegar mixed with salt also works well. These natural cleaners are safe and easy to find in most homes.
Mix lemon juice and baking soda into a paste. Apply gently to the copper surface. Let it sit a few minutes, then wipe clean. Avoid soaking the hardware for too long to prevent damage.
Tools For Gentle Cleaning
Soft cloths are essential for wiping and drying. Microfiber cloths work best because they don’t scratch. Use old toothbrushes or small paintbrushes to reach crevices. Avoid steel wool or rough sponges that can scratch the metal.
Have cotton swabs handy for detailed areas. A bowl for mixing your cleaning paste is useful. Gloves protect your hands from acids in natural cleaners. Gather these tools before starting to clean.
Prepare The Hardware For Cleaning
Preparing vintage copper cabinet hardware for cleaning is an important first step. It helps protect the hardware and makes cleaning easier. Taking time to prepare ensures better results and prevents damage.
Remove Hardware Safely
Start by removing the hardware carefully. Use the right screwdriver to avoid scratching the copper. Keep screws and parts in a small container. This stops losing pieces during cleaning. Handle each item gently to protect the finish.
Dust And Wipe Surface
Next, dust off loose dirt and debris with a soft brush. Use a dry cloth to wipe the surface gently. This removes dust without scratching the copper. Avoid using water or harsh cleaners before cleaning. Clean surfaces allow better contact with cleaning agents.
Natural Cleaning Methods
Natural cleaning methods work well for vintage copper cabinet hardware. They use simple, safe ingredients you can find at home. These methods clean copper without harsh chemicals. They help keep the metal shiny and preserve its charm.
Natural ingredients also avoid damage to the copper’s surface. They gently remove tarnish and stains. Cleaning this way is easy and eco-friendly. Try these two effective techniques to brighten your copper hardware.
Lemon And Salt Paste Technique
Cut a lemon in half. Sprinkle salt on the cut side. Rub the lemon on the copper surface. The salt scrubs away dirt and tarnish. The lemon’s acid breaks down oxidation. Let the paste sit for a few minutes.
Use a soft cloth to wipe the area. Rinse with warm water and dry well. This method removes tough stains without scratching. It leaves a fresh, natural shine.
Vinegar And Baking Soda Solution
Mix equal parts white vinegar and water. Add a small amount of baking soda. The mixture will fizz. Use a soft brush or cloth to apply it.
Gently scrub the copper hardware. The vinegar dissolves grime and oxidation. Baking soda acts as a mild abrasive. Rinse the hardware with warm water. Dry completely with a clean towel.
This solution brightens copper and removes dullness. It is safe and effective for vintage pieces.
Commercial Cleaners For Copper
Commercial cleaners for copper offer a quick way to restore shine to vintage cabinet hardware. These products are specially made to remove tarnish and stains without damaging the metal. Choosing the right cleaner and using it safely helps keep your copper pieces beautiful for years.
Choosing The Right Product
Pick a cleaner made specifically for copper surfaces. Avoid harsh chemicals that can erode the metal. Look for products labeled safe for antique or vintage copper. Cream or liquid cleaners work well for removing tarnish and dirt.
Test the cleaner on a small hidden area first. This step checks for any adverse reaction. Choose a product with clear instructions. This makes the cleaning process easier and safer.
Application Tips And Safety
Wear gloves to protect your skin from chemicals. Work in a well-ventilated area to avoid inhaling fumes. Apply the cleaner with a soft cloth or sponge. Rub gently in circular motions to prevent scratching.
Rinse the hardware thoroughly with water after cleaning. Dry immediately with a soft towel to stop water spots. Repeat cleaning only if necessary. Over-cleaning can wear down the copper’s surface.
Cleaning Stubborn Tarnish
Cleaning stubborn tarnish from vintage copper cabinet hardware takes patience and care. Tarnish forms a dark layer on copper over time. It can be tough to remove with simple wiping.
Gentle tools and repeated efforts help restore shine without damage. Avoid harsh scrubbing that can scratch or wear the metal.
Using Soft Brushes And Cloths
Soft brushes reach small crevices and details on hardware. Choose a brush with natural or soft synthetic bristles. Avoid stiff brushes that may scratch copper.
Use a soft cloth for wiping surfaces gently. Microfiber or cotton cloths work best. Dip the cloth in a mild cleaning solution for better results.
Work in small sections. Brush or wipe softly to lift tarnish. This method protects the delicate finish of vintage pieces.
Repeated Cleaning Cycles
Stubborn tarnish rarely disappears after one cleaning. Multiple cycles loosen and remove layers gradually.
Apply your cleaning solution, wait a few minutes, then brush or wipe again. Repeat as needed, but stay gentle.
Allow hardware to dry between cycles. This prevents moisture damage and helps you see progress clearly.
Patience pays off. Repeated cleaning cycles restore copper’s warm glow without harm.
Polishing For Shine
Polishing vintage copper cabinet hardware brings back its original shine. It makes the pieces look bright and clean. Polishing also protects copper from tarnishing again fast. This step is important after cleaning and removing dirt or oxidation. Use the right polish and technique to avoid damage. Let’s explore how to do it well.
Selecting A Suitable Polish
Choose a polish made for copper or brass. Avoid harsh chemicals that can harm the surface. Cream-based or paste polishes work best for vintage pieces. They clean gently and add shine without scratching. Read product labels to check ingredients. Natural polishes with mild acids like lemon or vinegar also work. Test a small spot first to see the effect. Use a soft cloth to apply the polish evenly.
Buffing Techniques
Buffing removes polish residue and boosts shine. Use a clean, dry cloth for this step. Move the cloth in small circles over the hardware. Apply light pressure to avoid scratching copper. For intricate designs, use a soft brush or cotton swab. Keep buffing until the surface shines brightly. Avoid over-buffing, which may wear the finish. Regular buffing keeps copper hardware looking fresh and new.

Credit: wheelehouse.blogspot.com
Protecting Copper Hardware
Protecting copper hardware keeps it beautiful and lasting longer. Copper can tarnish and lose its shine over time. Dirt, moisture, and air cause this natural change. Taking steps to protect your copper cabinet hardware helps maintain its warm glow. It also prevents damage from daily use and the environment.
Applying Protective Coatings
Applying a clear protective coating shields copper from air and moisture. Use a clear lacquer or wax made for copper surfaces. Clean the hardware thoroughly before applying any coating. Make sure the surface is dry to avoid trapping moisture. Apply a thin, even layer with a soft cloth or brush. Let it dry fully before touching the hardware. Protective coatings reduce tarnish and make cleaning easier. Reapply coatings every few months for best results.
Regular Maintenance Tips
Regular maintenance keeps copper hardware looking fresh and shiny. Wipe hardware with a soft, dry cloth to remove dust daily. Avoid harsh chemicals and abrasive cleaners that can scratch copper. Use mild soap and water if deeper cleaning is needed. Dry the hardware completely after cleaning to stop water spots. Polish copper hardware occasionally with a copper-safe polish. Handle hardware gently to prevent scratches or dents. Regular care slows tarnish and keeps copper bright for years.
Reinstalling Cleaned Hardware
Reinstalling cleaned vintage copper cabinet hardware is the final step. It brings your cabinet back to life. This step requires care to keep the hardware safe and functional. Proper installation ensures the hardware looks great and works well for years.
Ensuring Proper Fit And Function
Check the hardware for any damage before reinstalling. Make sure screws and holes align correctly. Use original screws if possible. Tighten screws just enough to hold hardware firmly. Avoid over-tightening to prevent damage. Test the hardware by opening and closing doors or drawers. Confirm smooth movement and secure fit. Adjust screws if needed for perfect alignment.
Final Touches For Presentation
Wipe the hardware gently with a soft cloth. Remove fingerprints and dust to enhance shine. Avoid harsh cleaners that can dull copper’s finish. Consider applying a thin layer of wax to protect the surface. Polish softly to keep the copper glowing. Step back and admire your work. Cleaned and reinstalled hardware adds charm to any cabinet.

Credit: www.reddit.com
Frequently Asked Questions
How Do I Clean Vintage Copper Hardware Safely?
Use a mild soap and warm water to gently clean the hardware. Avoid harsh chemicals that can damage the patina. Dry thoroughly to prevent water spots and tarnish.
What Household Items Remove Tarnish From Copper Hardware?
Lemon juice and baking soda form an effective paste to remove tarnish. Apply gently with a soft cloth, then rinse and dry completely.
Can I Polish Vintage Copper Without Losing Its Patina?
Yes, use a gentle polish designed for copper. Avoid abrasive materials to maintain the original patina and vintage character.
How Often Should I Clean Vintage Copper Cabinet Hardware?
Clean vintage copper hardware every 3 to 6 months. Regular cleaning prevents buildup and maintains its shine without damaging the surface.
Conclusion
Cleaning vintage copper cabinet hardware takes patience and care. Use gentle cleaners and soft cloths to avoid damage. Regular cleaning keeps the copper bright and beautiful. Small steps make a big difference over time. Enjoy the warm, rich look of your hardware every day.
Simple methods work best and save your copper’s charm. Keep your cabinets looking fresh and classic with easy care. Your effort will bring out the true beauty of vintage copper.