Are you tired of the same old cabinet hardware that everyone else has? Imagine giving your kitchen or workspace a fresh, personal touch with custom cabinet door hardware made just for you.
You don’t need to be a pro or spend a fortune to create pieces that stand out and reflect your style. In this guide, you’ll discover simple, step-by-step ways to craft your own hardware that fits your cabinets perfectly. Ready to transform your space and impress everyone who sees it?
Keep reading, because your unique cabinet upgrade starts here.

Credit: imperialcabinets.net
Choosing Materials
Choosing the right materials is key to making custom cabinet door hardware. The material affects the look, feel, and durability of your hardware. Picking materials that suit your style and needs helps create pieces that last long and look great.
Wood Options
Wood offers a warm and natural look. Common choices include oak, maple, and walnut. Oak is strong and has a classic grain. Maple is smooth and light-colored. Walnut is rich and dark. Wood can be carved or shaped easily. It can also be stained or painted to match your decor.
Metal Choices
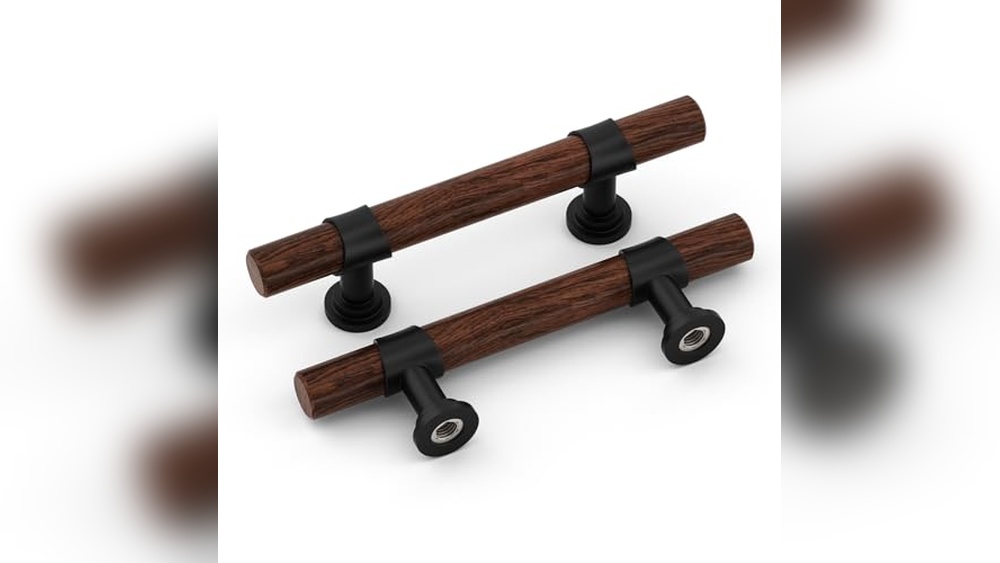
Metal is sturdy and adds a modern or industrial touch. Popular metals include brass, stainless steel, and aluminum. Brass has a warm, golden tone. Stainless steel is sleek and resists rust. Aluminum is lightweight and affordable. Metal hardware can be polished, brushed, or matte. It holds up well in kitchens and bathrooms.
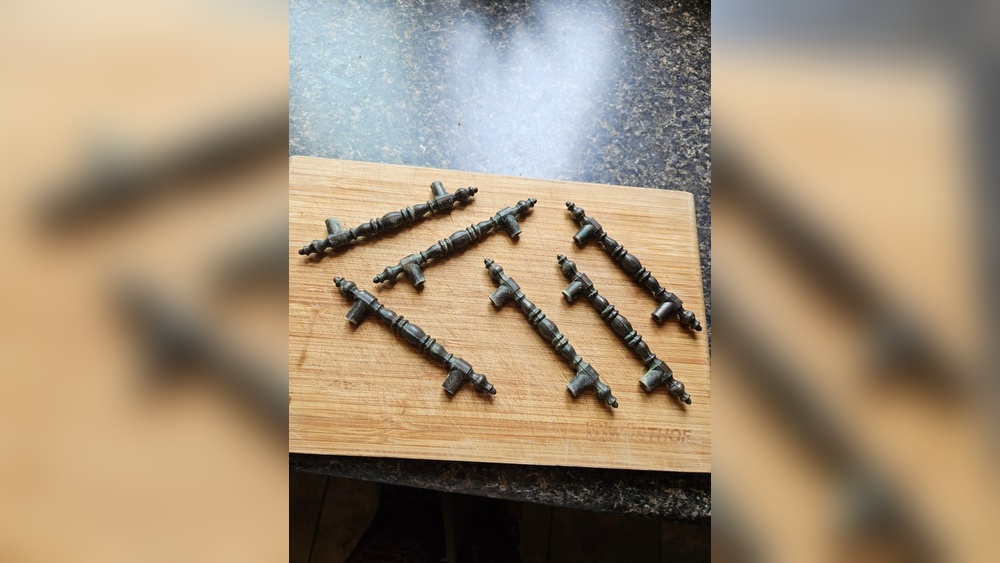
Hardware Components
Hardware includes knobs, pulls, hinges, and backplates. Choose components that fit your cabinet style and size. Knobs are simple and easy to install. Pulls offer a strong grip and come in many shapes. Hinges must support the door’s weight smoothly. Backplates add extra detail and protect the wood. Pick hardware that matches your chosen wood or metal for a unified look.
Tools Needed
Creating custom cabinet door hardware starts with having the right tools. These tools help you cut, drill, and finish your project with precision. Prepare them before you begin for a smooth process.
Cutting Tools
Sharp cutting tools make shaping your hardware easier. A hacksaw or a small metal saw works best. Use a file to smooth rough edges after cutting. These tools help you get the right size and shape.
Drilling Equipment
A drill is essential for making holes in your hardware. Choose a drill with variable speed control. Use drill bits suitable for metal or wood, depending on your material. A clamp keeps the hardware steady during drilling.
Finishing Supplies
Finishing gives your hardware a polished look. Sandpaper helps remove small scratches and smooth surfaces. Use paint or metal polish for a clean finish. A soft cloth is useful for applying polish evenly.
Designing Your Hardware
Designing your cabinet door hardware is the first step to making custom pieces. This process helps you create handles and knobs that fit your cabinets perfectly and look great. Careful planning makes sure your hardware works well and matches your style.
Each step in the design phase matters. From measuring the doors to choosing the right style, every detail counts. Take your time to plan carefully for the best results.
Measuring Cabinet Doors
Start by measuring the width and height of your cabinet doors. Use a tape measure for accurate results. Note the thickness of the door too. This helps decide the size and type of hardware that fits well.
Measure twice to avoid mistakes. Write down all measurements clearly. These numbers guide your design and make sure the hardware fits securely.
Sketching Designs
Draw simple sketches of your hardware ideas. Use pencil and paper or a drawing app. Focus on the shape and size of handles or knobs. Sketching helps visualize your design before making it.
Try different shapes and patterns. Keep the sketches clear and neat. These drawings guide the making process and ensure your vision comes to life.
Selecting Styles
Choose styles that match your cabinet and room decor. Decide if you want modern, classic, or rustic looks. Think about the finish, like matte, shiny, or brushed metal.
Pick styles that feel comfortable to use. Good hardware is both attractive and practical. Your chosen style should enhance the cabinet’s appearance and function.
Cutting And Shaping
Cutting and shaping are key steps in making custom cabinet door hardware. These processes give your hardware the right size and form. Precision is important. It ensures the hardware fits perfectly and looks great. Careful cutting and shaping also improve the hardware’s strength and durability.
Preparing Materials
Start by choosing strong, suitable materials like metal or wood. Measure the pieces carefully before cutting. Mark the lines clearly using a pencil or marker. Keep the workspace clean and organized. This helps avoid mistakes and accidents. Use safety gear like gloves and goggles for protection.
Cutting Techniques
Select the right tool for your material. Use a hacksaw or metal shear for metal. For wood, try a fine-toothed saw or jigsaw. Cut slowly along the marked lines. Steady hands make cleaner cuts. Check the edges often to keep them straight. Avoid forcing the tool, as it can cause rough edges.
Sanding And Smoothing
After cutting, smooth the edges with sandpaper. Start with coarse grit to remove big burrs. Then switch to finer grit for a smooth finish. Sand evenly to avoid uneven surfaces. This step prevents splinters and sharp edges. A smooth finish makes painting or staining easier.
Assembling Components
Assembling the components of custom cabinet door hardware is a key step. It brings all parts together to create a sturdy and attractive finish. Proper assembly makes the hardware last longer and work smoothly.
This process needs care and attention to detail. Each piece must fit well to avoid problems later. Following clear steps helps you achieve a professional look and strong hold.
Attaching Handles And Knobs
Start by placing the handle or knob in the right spot on the door. Use a pencil to mark holes for screws. Align handles evenly for a balanced look.
Next, hold the handle steady while inserting screws from the back. Tighten screws by hand at first to avoid stripping.
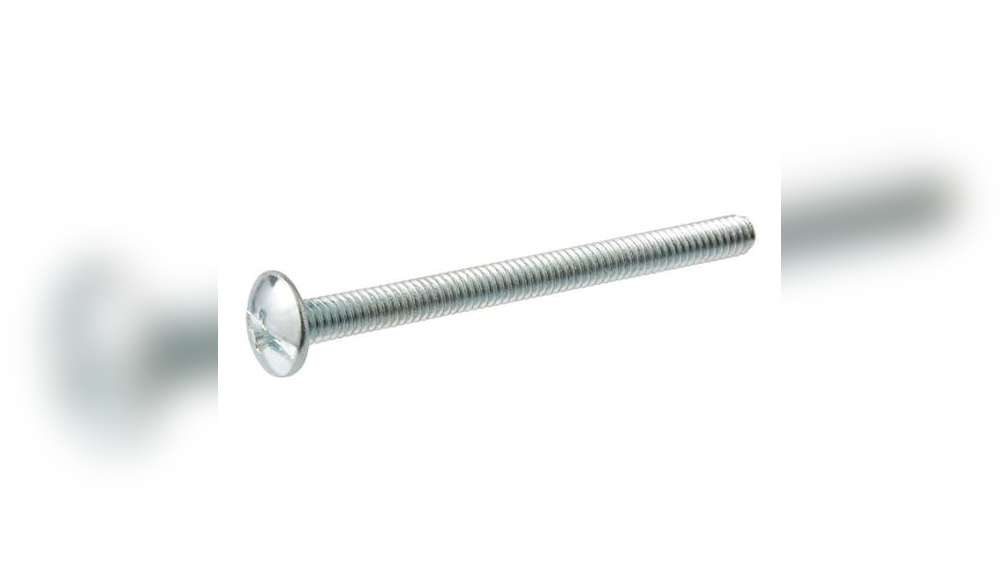
Using Screws And Fasteners
Select screws that match your hardware and door thickness. Use a screwdriver or drill on low speed. This prevents damage to the wood or hardware.
Check screws often during assembly. Replace any that are too short or weak. Fasteners must hold parts firmly without wobbling.
Ensuring Stability
Test each handle or knob by gently pulling or turning it. Make sure it feels secure and does not move. Loose hardware can cause damage over time.
Add washers if needed to improve grip and prevent loosening. Double-check all screws after assembly for tightness.

Credit: www.amazon.com
Finishing Touches
Finishing touches give your custom cabinet door hardware a perfect look. They protect the wood and metal parts. These steps help the hardware last longer and shine brighter.
Small details make a big difference in the final product. Follow these simple steps to complete your project with care and style.
Painting And Staining
Painting or staining changes the color and feel of the wood. Use light coats to avoid drips and uneven spots. Let each coat dry fully before adding another. Choose colors that match your room’s style. Stain shows the wood grain while paint covers it.
Applying Protective Coatings
Protective coatings keep your hardware safe from scratches and moisture. Clear varnish or polyurethane works well. Apply thin layers with a soft brush. Allow each layer to dry before the next. This step keeps your hardware looking new for years.
Polishing Hardware
Polishing metal parts makes them shine and feel smooth. Use a soft cloth and gentle polish. Rub in small circles to bring out the shine. Avoid harsh chemicals that can damage the finish. Polished hardware adds a clean, fresh look to your cabinets.
Installing Custom Hardware
Installing custom cabinet door hardware is a simple way to change the look of your cabinets. It adds style and function. Follow clear steps to make sure your hardware fits perfectly and stays secure. This guide shows you how to place, drill, and attach your custom pieces with ease.
Marking Placement
Start by deciding where to place the hardware on the cabinet door. Use a measuring tape to find the center or the spot you prefer. Mark the spot lightly with a pencil. Make sure the marks are even on all doors for a uniform look. Double-check measurements before drilling.
Drilling Holes
Choose a drill bit that matches the size of your hardware screws. Drill holes carefully on the marks you made. Drill straight and slow to avoid splitting the wood. Clean any dust from the holes to help screws fit better. Take your time to ensure accuracy.
Securing Hardware
Place the hardware over the holes. Insert screws through the hardware into the drilled holes. Tighten screws using a screwdriver until the hardware feels firm. Avoid over-tightening to prevent damage. Check that the hardware is level and secure after installation.
Maintenance Tips
Proper care keeps your custom cabinet door hardware looking good and working well. Regular maintenance stops wear and tear early. It also helps your hardware last longer. Follow these simple tips to keep your cabinet hardware in top shape.
Cleaning Methods
Use a soft cloth to wipe down the hardware. Avoid harsh chemicals that can damage the finish. Warm water and mild soap work best. Dry the hardware well after cleaning to prevent rust. Clean your hardware at least once a month.
Avoiding Damage
Do not use abrasive pads or steel wool on hardware. These scratch and harm the surface. Avoid hitting or pulling hardware too hard. Use gentle force when opening or closing cabinets. Keep sharp objects away from the hardware to prevent dents.
Regular Inspections
Check your hardware every few months. Look for loose screws or parts. Tighten any loose screws with a screwdriver. Replace broken or worn pieces quickly. Regular checks prevent bigger problems later on.

Credit: www.amazon.com
Frequently Asked Questions
What Materials Are Best For Custom Cabinet Door Hardware?
The best materials include brass, stainless steel, and zinc alloy. These offer durability and aesthetic appeal. Choose based on your cabinet style and budget. Proper material ensures long-lasting, stylish hardware that complements your kitchen or furniture design.
How Do I Measure For Custom Cabinet Hardware?
Measure the distance between existing holes or desired handle placement. Use a ruler or tape measure for accuracy. Ensure measurements align with your cabinet doors for a precise fit. Accurate measuring prevents installation errors and hardware mismatches.
Can I Install Custom Cabinet Hardware Myself?
Yes, with basic tools and patience, you can install hardware yourself. Follow instructions carefully and use a drill, screwdriver, and level. DIY installation saves money and personalizes your space. Take your time to ensure proper alignment and secure fixing.
What Tools Are Needed To Make Custom Cabinet Hardware?
Essential tools include a drill, screwdriver, measuring tape, and file. You may also need sandpaper and a saw for shaping. These tools help you create precise, smooth, and well-finished hardware pieces. Proper tools ensure professional-quality results.
Conclusion
Creating custom cabinet door hardware adds a personal touch to any space. It lets you choose styles that fit your taste perfectly. The process is simple and rewarding. You can save money by making your own hardware. Plus, it gives your cabinets a unique look.
Try different materials and designs to find what suits you best. Enjoy the satisfaction of crafting something useful and beautiful. Custom hardware can transform your cabinets and brighten your room. Give it a try and see the difference yourself.