When you’re working on tongue-and-groove or finish projects, choosing the right nail can make all the difference. Using the wrong type might cause damage or make your work look sloppy.
So, what nail should you pick to get a strong hold and a clean finish every time? If you want your project to last and impress, keep reading—you’ll discover exactly which nail is best for fastening tongue-and-groove and finish work.
This simple choice can save you time, effort, and frustration.

Credit: www.woodcraft.com
Types Of Nails For Tongue-and-groove
Nails play a key role in fastening tongue-and-groove and finish work. Choosing the right nail type helps keep wood panels secure and neat. Different nails serve different purposes in these projects. Understanding the types helps ensure a strong, clean finish.
Common Nails
Common nails are thick and strong. They hold heavy boards firmly in place. Ideal for structural parts of tongue-and-groove projects. Their large heads provide good grip but can leave visible marks. Best used where strength is more important than appearance.
Finish Nails
Finish nails are thinner with smaller heads. They leave less visible marks on wood surfaces. Perfect for tongue-and-groove trim and decorative work. These nails hold well without splitting the wood. They are easy to hide with wood filler or paint.
Brad Nails
Brad nails are very thin and short. They suit delicate trim and fine finish work. Brad nails reduce wood splitting and damage. They are best for small or thin tongue-and-groove pieces. These nails are almost invisible once installed.
Casing Nails
Casing nails have medium-sized heads and strong shafts. They work well on thicker wood trim and molding. These nails offer a balance of strength and neatness. Casing nails hold tongue-and-groove boards firmly. Their heads can be countersunk and filled for a smooth look.
Choosing The Right Nail Size
Choosing the right nail size is key for fastening tongue-and-groove and finish work. The correct nail holds the wood firmly without splitting it. The right size also keeps the surface smooth and neat. Understanding nail length, gauge, and material helps pick the best option.
Length Considerations
Nail length must match the thickness of the wood pieces. Nails too short won’t hold well and can come loose. Nails too long may poke through the other side. For most tongue-and-groove boards, use nails 1 to 1.5 inches long. This length provides strong hold without damaging the wood.
Gauge Importance
Nail gauge means thickness. Thicker nails are stronger but can split thin wood. Thin nails are gentler but may bend easily. For finish work, a 15 or 16 gauge nail is best. It balances strength and prevents wood damage. Choose thinner nails for delicate trim or softwood.
Material And Coating
Nails come in various materials like steel, stainless steel, and brass. Steel nails are strong and common for most jobs. Stainless steel nails resist rust and suit outdoor projects. Coated nails have a finish to grip wood better. Choose coated nails for extra hold in tongue-and-groove work.
Nail Features For Finish Work
Nails used for finish work must have special features. They need to hold materials tightly without damaging the surface. These nails are perfect for tongue-and-groove projects and detailed trim work. Choosing the right nail helps the job look clean and last longer.
Head Design
Finish nails have small heads that are easy to hide. The heads are usually flat or slightly rounded. This shape allows nails to sit flush with the wood. Small heads reduce the chance of splitting the wood. They also make it easier to cover nail holes with putty.
Holding Power
Finish nails offer strong holding power without being bulky. Their slender shank holds wood pieces firmly together. The nails grip well but do not cause splitting. This balance is important for delicate finish work. Good holding power keeps the wood tight and stable.
Visibility And Aesthetics
These nails are designed to be nearly invisible after installation. Their small heads and thin bodies leave minimal marks. This keeps the wood surface smooth and attractive. Nail holes can be filled and painted over easily. This helps create a polished, professional look.

Credit: www.woodcraft.com
Tools For Installing Nails
Choosing the right tools for installing nails is key to good finish work and tongue-and-groove fastening. The tools affect the speed and neatness of your job. You can use different tools based on the project size and your skill level. Each tool has its own strengths and suits specific tasks.
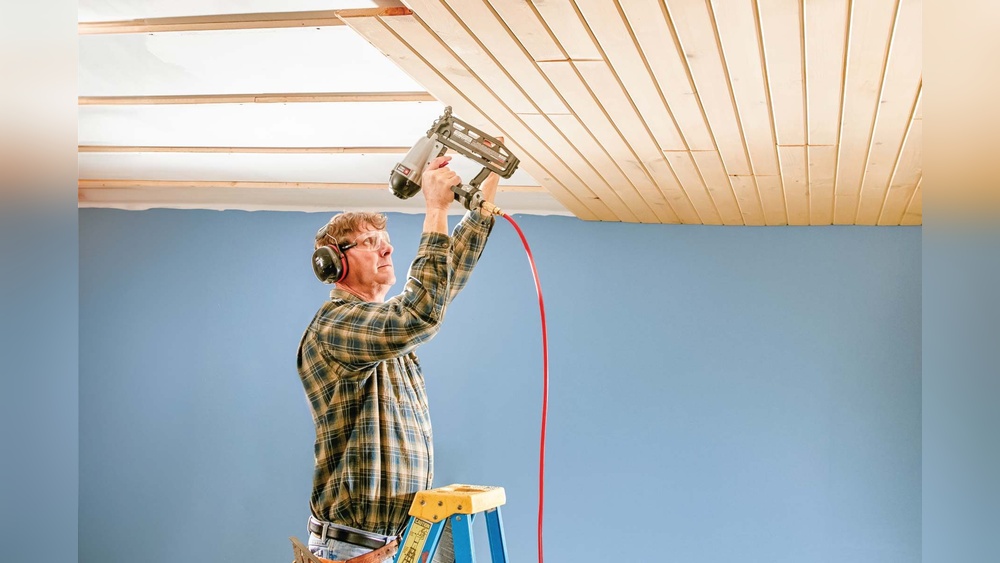
Nail Guns
Nail guns make nailing fast and easy. They use air pressure or electricity to shoot nails quickly. This tool saves time on large projects. It also reduces hand fatigue. Nail guns help keep nails straight and flush with the wood surface. They work well for both tongue-and-groove and finish nails.
Hammer And Nail Sets
A hammer and nail sets are simple, classic tools. The hammer drives nails into wood by hand. Nail sets help push the nail head below the surface. This creates a clean, smooth finish. Using these tools needs more skill and care. They are best for small jobs and precise work.
Pneumatic Tools
Pneumatic tools run on compressed air. They offer power like nail guns but with better control. These tools fire nails with less noise and recoil. Pneumatic nailers are common in professional finish work. They provide consistent nail depth for a neat look. Pneumatic tools are good for tight spaces and fine details.
Techniques For Fastening Tongue-and-groove
Fastening tongue-and-groove boards requires careful technique. Proper nailing ensures a strong hold and smooth finish. Using the right methods prevents damage and keeps the wood secure. Follow these tips to nail tongue-and-groove boards effectively.
Nailing Angles
Drive nails at a slight angle into the tongue. This angle helps hide the nail head. It also keeps the boards tightly joined. Use a nail set to sink nails below the wood surface. Avoid nailing straight down to prevent splitting.
Spacing And Placement
Space nails about 12 to 16 inches apart. Place nails near the groove but not too close. This prevents the wood from cracking. Start nailing from one end and work to the other. Keep nails evenly spaced for a neat look and strong hold.
Avoiding Wood Splitting
Pre-drill small pilot holes for hard or thin boards. This reduces the risk of splitting the wood. Use finishing nails that are thin and sharp. Hammer gently to avoid bending nails. Always check the wood grain direction before nailing.
Common Mistakes And Solutions
Fastening tongue-and-groove and finish work needs care. Using the right nails helps the job last longer. Some common mistakes can cause problems. Fixing these issues keeps your work neat and strong.
Overdriving Nails
Overdriving nails means pushing them too deep. This can damage the wood surface. It leaves holes that are hard to hide. To avoid this, use a nail set. Tap the nail just below the surface. Stop before the wood gets damaged.
Nail Pops
Nail pops happen when nails push out over time. This makes the wood look uneven. It can cause splinters or cracks. Use the right nail length and type. Make sure nails go into the framing solidly. Check nails after a few months and reset if needed.
Using Incorrect Nails
Choosing the wrong nails weakens the project. Thin nails bend easily. Thick nails may split the wood. Use finish nails or brads for tongue-and-groove. Select nails with proper length for the material. Correct nails hold wood tight and look clean.

Credit: www.mataverdedecking.com
Frequently Asked Questions
What Type Of Nail Is Best For Tongue-and-groove?
Finish nails are ideal for fastening tongue-and-groove boards. They have small heads that remain hidden for a clean look. Their length and thin shanks prevent splitting the wood during installation.
Can You Use Finish Nails For Trim Work?
Yes, finish nails are perfect for trim work. They provide strong holding power and leave minimal visible marks. Their small heads can be easily concealed with wood filler or paint.
Why Choose Finish Nails Over Common Nails?
Finish nails have thinner shanks and smaller heads than common nails. This reduces wood splitting and makes them less visible. They are designed specifically for delicate woodwork like trim and tongue-and-groove installation.
What Nail Size Is Best For Finish Work?
Nail sizes between 1 to 2 inches are commonly used for finish work. The size depends on the thickness of the material being fastened. Using the right size ensures secure attachment without damaging the wood.
Conclusion
Choosing the right nail helps secure tongue-and-groove and finish work well. Finish nails work best because they hold tightly without splitting wood. Their small heads make them easy to hide with putty or paint. Using the correct nail type saves time and improves project quality.
Always pick nails designed for fine woodworking tasks. This simple step ensures a strong, neat finish every time.

