Are you tired of struggling with tricky buttons or bulky snaps on your clothes? The Dritz Snap Fastener Tool can make your life so much easier.
With just a few simple steps, you’ll be able to add strong, durable snaps to your garments, bags, or crafts—no sewing required. Imagine how satisfying it will feel to fix or customize your items quickly and neatly. In this guide, you’ll learn exactly how to use the Dritz Snap Fastener Tool like a pro, so you can take control of your projects and enjoy flawless results every time.
Keep reading and discover the simple secrets to snapping success!
Choosing The Right Snap Fasteners
Choosing the right snap fasteners is key for a smooth sewing project. The right snaps hold fabric securely and last long. Picking snaps that match your fabric and project needs saves time and effort.
Types Of Snap Fasteners
Snap fasteners come in different styles. Some snaps are metal, others plastic. Metal snaps are strong and good for heavy fabrics. Plastic snaps are lighter and fit well on thin fabrics. Some snaps have a decorative look. Others are plain and simple. Choose the style that fits your project’s look and use.
Materials And Sizes
Snap fasteners are made from various materials. Metal snaps include brass, nickel, and stainless steel. Plastic snaps come in many colors. Size matters too. Small snaps fit thin fabric like cotton or silk. Bigger snaps work better for denim or canvas. Match the snap size to your fabric thickness. This helps the snaps hold well and last longer.
Preparing Your Workspace
Preparing your workspace is the first step to use a Dritz Snap Fastener Tool successfully. A clean and organized area helps you work faster and avoid mistakes. It also keeps your materials safe and easy to find. Taking time to prepare makes the whole process smoother and more enjoyable.
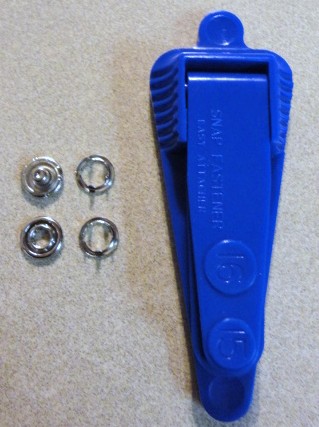
Gathering Tools And Materials
Start by collecting all the tools and materials needed for your project. You will need the Dritz Snap Fastener Tool, snap fasteners, fabric, and a small hammer or mallet. Keep a pair of scissors and a measuring tape nearby. Having everything ready saves time and prevents interruptions.
Setting Up A Stable Surface
Find a flat and sturdy surface to work on. A wooden table or desk works best. Avoid soft or uneven surfaces like beds or sofas. Place a thick cloth or cutting mat on the table to protect it and the fabric. Stability helps you press the snaps firmly and accurately.
Step-by-step Snap Fastener Installation
Installing snap fasteners with the Dritz Snap Fastener Tool is simple. This guide breaks down the process into clear steps. Follow these steps to add snaps to your fabric easily and correctly.
Marking Placement On Fabric
Start by deciding where the snap will go. Use a fabric pencil or chalk to mark the spot. Make sure the marks on both sides of the fabric match. This ensures the snap will close properly.
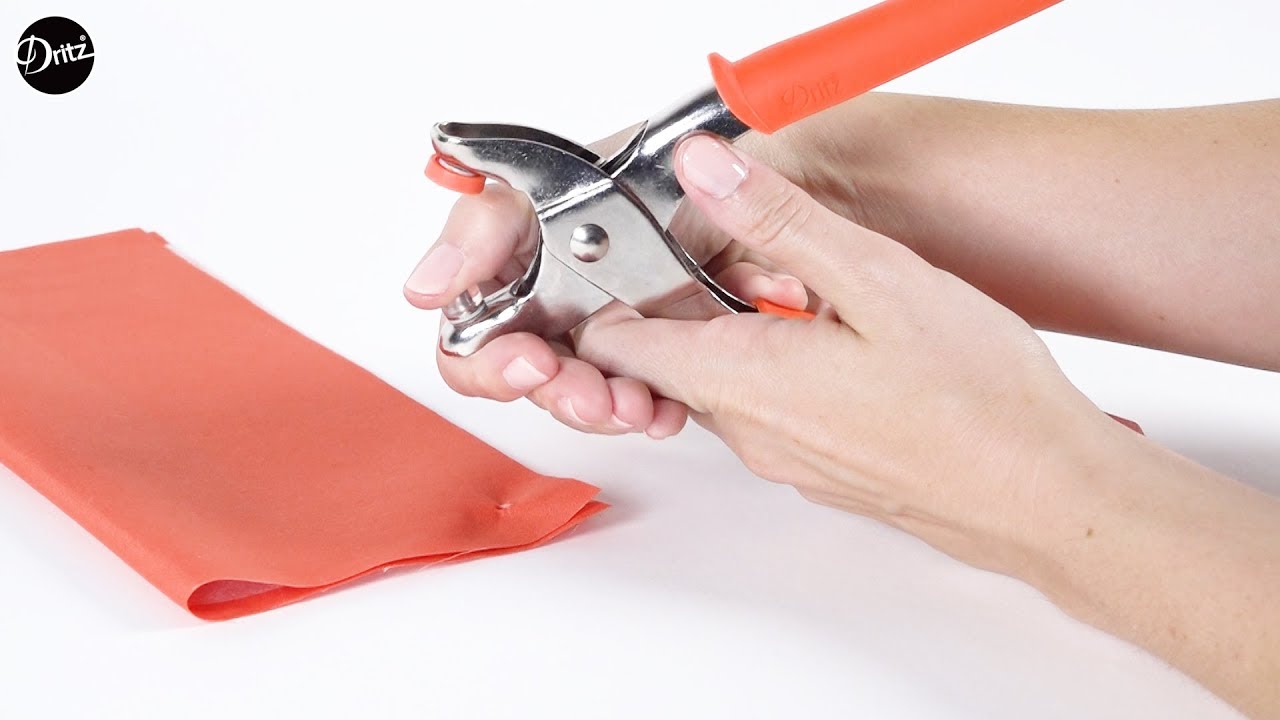
Using The Dritz Snap Fastener Tool
Place the tool on a flat surface. Insert the snap parts into the tool’s slots. Check the tool’s instructions for exact placement. Hold the tool steady and press down firmly to set the snap.
Securing The Snap Parts
After pressing, check the snap parts. They should be tightly fixed to the fabric. Test the snap by closing and opening it. If loose, repeat the pressing step carefully.

Credit: www.handicraft.com
Tips For A Professional Finish
Achieving a professional finish with the Dritz snap fastener tool takes care and attention. Small steps make a big difference in the final look. Follow these tips to ensure your snaps look neat and last long.
Avoiding Fabric Damage
Choose the right fabric type before starting. Thin or delicate fabrics need extra care. Use a small piece of scrap fabric to test the tool first. Place a thin piece of cardboard or scrap fabric behind the snap area. This protects the fabric from being crushed or torn. Press the tool gently and steadily. Avoid forcing the tool too hard, which can leave holes or marks.
Ensuring Snap Alignment
Mark snap positions clearly with a fabric pencil or chalk. Double-check the marks on both sides of the fabric. Align the snap parts carefully before pressing. Hold the fabric flat and steady to avoid shifting. Use the tool’s guide to keep snaps straight. Correct alignment makes snaps easy to open and close. Misaligned snaps look uneven and may not work well.
Troubleshooting Common Issues
Troubleshooting common problems with the Dritz snap fastener tool helps ensure your project looks great. Small mistakes can cause loose or misaligned snaps. Fixing these issues is easy with the right steps. Keep your snaps secure and neat by following these tips.
Loose Snaps
Loose snaps do not hold fabric tightly. This happens if you do not press the tool firmly. Make sure you place the snap parts correctly. Use steady, strong pressure when setting the snap. Check your fabric thickness; very thick or thin fabric may cause loose snaps.
Try using a small piece of interfacing under the fabric. It gives extra support for the snap. Also, confirm you use the right size snaps for your fabric. Replace snaps that look bent or damaged.
Misaligned Fasteners
Misaligned fasteners make snaps hard to close. This happens when the top and bottom parts do not line up. Mark the fabric with a pencil or fabric chalk before placing snaps. Use a ruler or measuring tape for accuracy.
Place each snap part carefully on the marked spots. Press the tool straight down to avoid shifting. If snaps still misalign, try loosening your grip and pressing slower. Practice on scrap fabric to improve your alignment skill.
Credit: www.youtube.com
Maintaining Your Snap Fastener Tool
Maintaining your Dritz snap fastener tool helps it last longer and work better. Regular care keeps the tool in good shape. It prevents damage and ensures smooth operation every time you use it.
Cleaning And Storage
Clean the tool after each use. Remove any fabric bits or dust. Use a soft cloth to wipe it down. Avoid using water or harsh chemicals. Store the tool in a dry place. Keep it away from moisture to stop rust. A small box or pouch works well for storage.
Replacing Worn Parts
Check the tool often for worn parts. Look at the snap dies and the anvil. Replace any parts that look damaged or bent. Use only parts made for your Dritz tool. This keeps the tool working correctly and safely. Changing parts on time saves you from bigger problems later.
Credit: www.indianainker.com
Frequently Asked Questions
What Is A Dritz Snap Fastener Tool Used For?
A Dritz Snap Fastener Tool attaches snap fasteners to fabric. It helps create secure and durable closures for clothing, accessories, and crafts. This tool ensures snaps are aligned and pressed firmly without damage.
How Do You Install Snaps With A Dritz Tool?
Place the snap parts on the tool’s posts. Align fabric between the snap pieces. Squeeze the handles firmly to press snaps together. Check for secure attachment before use.
Can The Dritz Tool Work On Thick Fabrics?
Yes, the Dritz Snap Fastener Tool works well on medium to thick fabrics. It can handle denim, canvas, and upholstery materials. For very thick fabrics, ensure proper snap size for best results.
How To Maintain A Dritz Snap Fastener Tool?
Clean the tool regularly to remove fabric lint. Store it in a dry place to prevent rust. Lubricate moving parts occasionally for smooth operation and longer lifespan.
Conclusion
Using a Dritz snap fastener tool makes sewing easier and faster. The tool helps you attach snaps firmly and neatly. Practice a few times to get comfortable with the steps. Keep your fabric flat and steady during the process. This simple tool saves time and gives your projects a clean finish.
With patience, anyone can use it well. Try it on different fabrics to see how it works best. Snap fasteners add a professional touch to clothes and crafts. Give it a go and enjoy your sewing projects more.