Are you struggling with a stubborn drive fastener that just won’t come off? You’re not alone.
Removing drive fasteners can be tricky, especially if you don’t have the right tools or know the proper technique. But don’t worry—you’re about to discover simple, effective steps that will make the job easier and faster. By the end of this guide, you’ll have the confidence to remove any drive fastener without damaging your vehicle or tools.
Keep reading, and let’s get started!

Credit: www.reddit.com
Types Of Drive Fasteners
Drive fasteners come in many types. Each type has a unique design and purpose. Knowing these types helps in removing them safely and correctly. Fasteners hold parts together, so choosing the right tool matters.
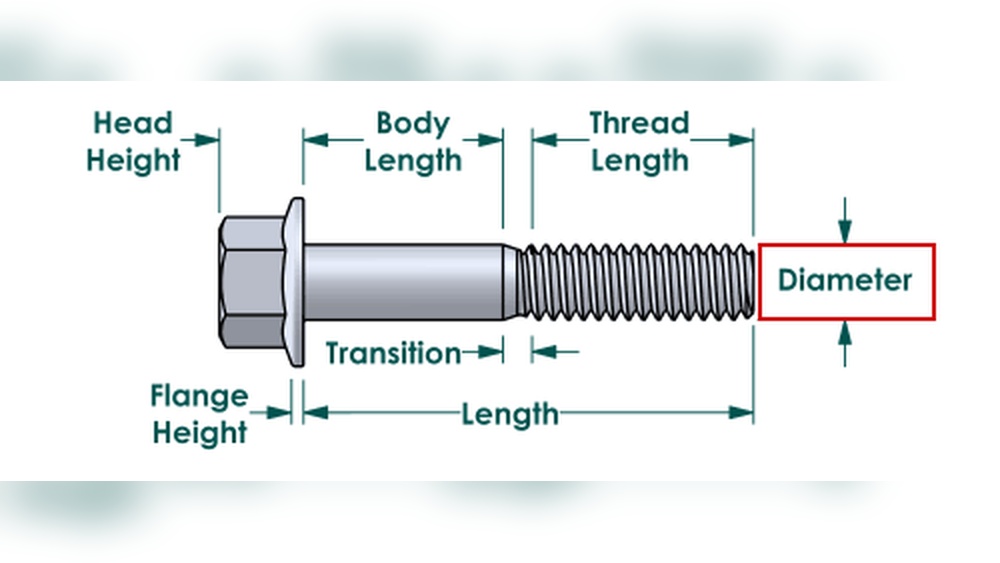
Common Fastener Designs
Drive fasteners have different head shapes. The most common are slotted, Phillips, and Torx. Slotted heads have a single straight groove. Phillips heads show a cross shape. Torx heads look like a star with six points. Each design needs a matching screwdriver or bit. Using the wrong tool can damage the fastener.
Materials And Uses
Fasteners are made from various materials. Steel is strong and common for heavy-duty use. Stainless steel resists rust and suits outdoor projects. Brass offers good corrosion resistance and a nice look. Plastic fasteners appear in electronics and light applications. Knowing the material helps choose the right removal method.
Tools Needed For Removal
Removing a drive fastener needs the right tools. Using proper tools makes the job easier and safer. This section covers basic and specialized tools. Learn what each tool does and why it helps.
Basic Hand Tools
Basic hand tools are simple and found in most toolboxes. A flathead screwdriver helps pry up fasteners carefully. A Phillips screwdriver is needed for screws with a cross shape. Needle-nose pliers grip small or tight fasteners. A small hammer can tap loose stuck fasteners gently. These tools handle most common fasteners with ease.
Specialized Removal Tools
Specialized tools target tricky or unique fasteners. A trim removal tool prevents damage to plastic parts. It slides under fasteners and pops them out safely. A fastener extractor grips broken or stripped fasteners firmly. A socket set fits bolts that need more force. These tools save time and protect parts during removal.
Preparing For Removal
Preparing to remove a drive fastener is important for a smooth and safe process. Proper preparation helps avoid damage to parts and keeps you safe. This step sets the foundation for the entire removal job.
Safety Precautions
Wear safety glasses to protect your eyes from debris. Gloves help protect your hands from sharp edges. Make sure your clothes fit well to avoid getting caught in tools. Check that all power tools are unplugged before starting. Keep a first aid kit nearby for emergencies. Stay focused and avoid distractions during the removal process.
Workspace Setup
Choose a clean and well-lit workspace. Clear the area of unnecessary items to avoid clutter. Use a sturdy workbench or table to hold parts. Arrange tools close to you for easy access. Place a container nearby to hold screws and small parts. Ensure good ventilation if you work indoors. Keep a trash bin handy for waste materials.

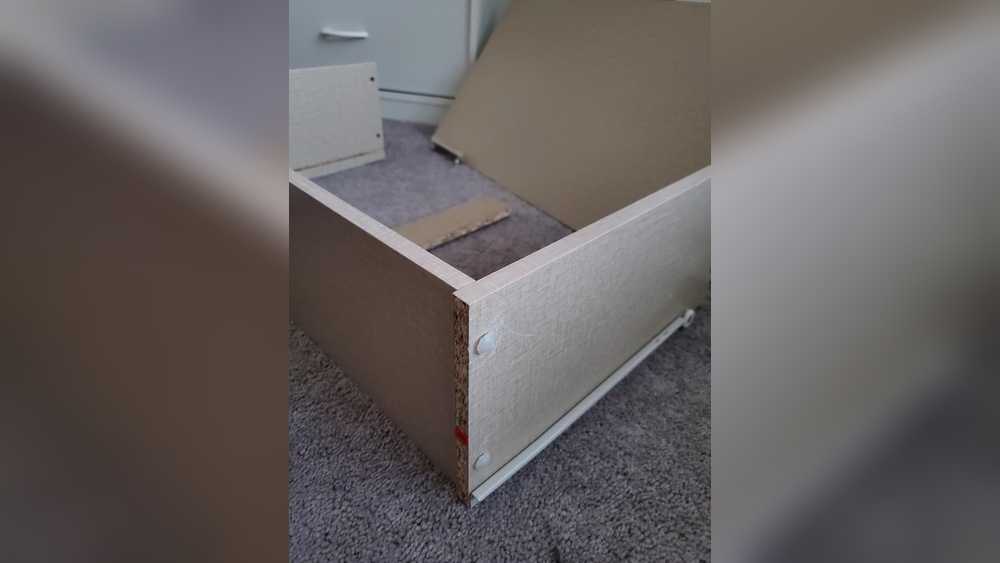
Credit: helpcenter.ameriwoodhome.com
Step-by-step Removal Process
Removing a drive fastener is easier with a clear process. Follow these simple steps carefully. This helps avoid damage to your tools or parts. Each step guides you through the removal smoothly.
Loosening The Fastener
Start by selecting the right tool for your fastener. Use a screwdriver or wrench that fits perfectly. Turn the fastener slowly to the left. Apply steady pressure without forcing it. This prevents stripping or breaking the fastener head.
If the fastener feels stuck, try a little oil. Let it sit for a few minutes. This helps loosen rust or dirt that holds the fastener tight.
Extracting The Fastener
Once loose, grip the fastener firmly. Pull it straight out carefully to avoid damage. Keep the tool steady and aligned with the fastener. Avoid twisting or bending it during removal.
If the fastener slides out easily, keep it safe for reuse. Clean the hole and fastener if needed before reinstallation.
Handling Stubborn Fasteners
Some fasteners resist removal despite loosening. Use a rubber mallet to tap the tool gently. This vibration can free the fastener without damage.
For very tight fasteners, use penetrating oil again. Let it soak longer, then try loosening once more. If still stuck, use pliers for extra grip. Work slowly to avoid breaking the fastener.
Troubleshooting Common Issues
Removing drive fasteners can sometimes be tricky. Problems often arise that slow down the process or damage parts. Understanding common issues helps you fix them quickly. This section covers the main problems you might face.
Stripped Fasteners
Stripped fasteners have damaged heads that tools cannot grip. Use a rubber band between the tool and fastener for extra grip. Try a screwdriver with a wider tip. Impact drivers can also help loosen stuck fasteners. Avoid using too much force, which can cause more damage.
Rust And Corrosion
Rust makes fasteners hard to remove. Spray a rust remover or penetrating oil on the fastener. Let it sit for several minutes to break down the rust. Use a wire brush to clean the surface before trying again. Heat can expand the metal, making removal easier.
Damaged Surrounding Material
Sometimes, the area around the fastener breaks or cracks. Protect the surface by placing a thin piece of wood or metal around the fastener. Work slowly to avoid more damage. If the material is fragile, consider using special fastener removal tools. Repair the area after removal to keep it strong.
Post-removal Tips
After removing a drive fastener, some steps help keep your work clean and safe. These tips ensure the area stays in good shape and ready for new parts. Proper care avoids damage and saves time later.
Cleaning And Inspecting
Clean the area where the fastener was. Dirt and debris can cause problems with new parts. Use a soft brush or cloth for cleaning. Check the surface for cracks or damage. Small issues can grow if ignored. Make sure everything looks smooth and intact before moving on.
Replacing Fasteners
Choose the right type and size of fastener for your project. Old fasteners can weaken and should not be reused. Use new fasteners to ensure a strong hold. Tighten them carefully to avoid stripping or breaking. Follow the manufacturer’s torque guidelines for the best results.

Credit: www.reddit.com
Frequently Asked Questions
What Tools Do I Need To Remove A Drive Fastener?
You need a flathead screwdriver, pliers, or a trim removal tool. These tools help safely pry and pull the fastener without damage.
How Do I Prevent Damage When Removing Drive Fasteners?
Apply gentle pressure and avoid forcing the fastener. Use the right tool and work slowly to prevent scratches or breaks.
Can Drive Fasteners Be Reused After Removal?
Yes, if the fasteners are undamaged and clean, they can be reused. Inspect them carefully before reinstalling to ensure proper fit.
What Is The Best Technique To Remove Stubborn Drive Fasteners?
Use a lubricant spray to loosen the fastener. Then, gently pry it with a trim tool or screwdriver for easier removal.
Conclusion
Removing drive fasteners can be simple with the right steps. Use proper tools to avoid damage. Take your time and work carefully. Clean the area before putting new fasteners. This keeps parts secure and safe. Practice makes the process easier over time.
Follow these tips to save effort and stress. You will feel confident handling fasteners yourself. Small repairs can save money and time. Keep tools ready for quick fixes.