Are your cabinet handles looking dull or outdated? You don’t have to replace them to give your kitchen or bathroom a fresh, new look.
Painting your cabinet hardware is an easy and affordable way to transform your space without a full renovation. But you might be wondering, “How do I paint cabinet hardware the right way? ” In this guide, you’ll discover simple steps to make your hardware look brand new, how to avoid common mistakes, and tips to ensure your paint lasts.
Ready to upgrade your cabinets and add a personal touch? Let’s dive in and make your hardware shine!
Gathering Materials
Gathering the right materials is the first step in painting cabinet hardware. It sets the foundation for a smooth and lasting finish. Having everything ready saves time and avoids frustration. Each item plays an important role in the painting process.
Choosing The Right Paint
Pick paint made for metal surfaces. Spray paint works well for small hardware. It covers evenly and dries fast. For brush painting, use enamel or acrylic paint. These types stick well and resist chipping. Select a color that matches your cabinets or design plan.
Selecting Brushes And Tools
Choose small brushes with fine bristles for detail work. Foam brushes also offer smooth coverage. Have a few different sizes ready for edges and flat areas. Use a small container or tray for paint. Consider using painter’s tape to protect areas you don’t want painted.
Preparing Cleaning Supplies
Clean hardware before painting for better paint adhesion. Use warm water and mild soap to remove dirt and oils. A soft cloth or sponge works well. For tough grime, use rubbing alcohol or vinegar. Make sure hardware is dry before starting to paint.

Credit: www.youtube.com
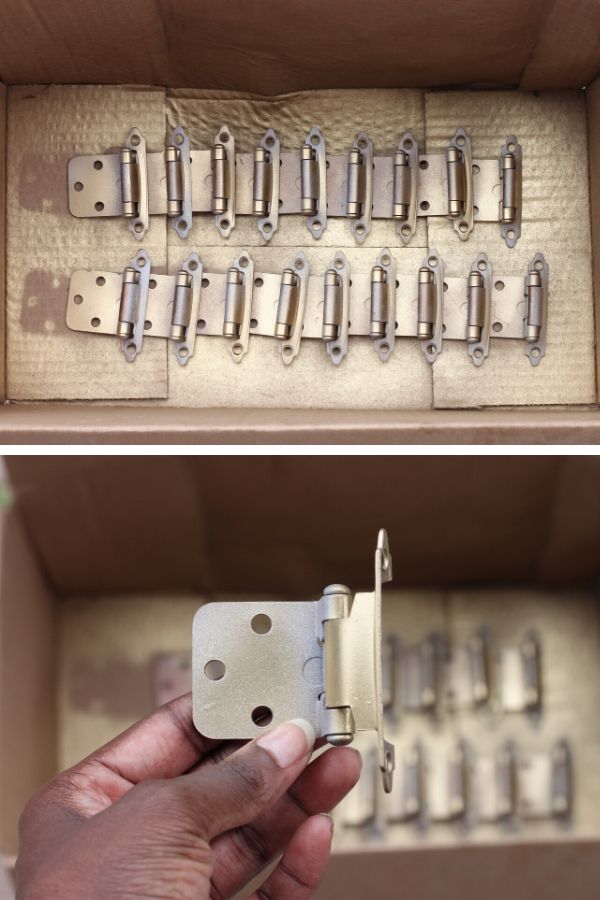
Removing Hardware
Removing cabinet hardware is the first step in painting it. Take your time to avoid damage. Use a screwdriver that fits the screws well. Keep the cabinet doors steady while you work. Loose screws or hardware can make the job harder later.
After removing the hardware, you prepare for painting. Cleaning and sanding come next. But first, organize the parts carefully. This helps you avoid losing pieces or mixing them up.
Organizing Screws And Pieces
Place screws and hardware in small containers or trays. Group parts from the same cabinet together. This keeps everything neat and easy to find. Avoid mixing screws from different pieces. Label containers if you have many parts. This simple step saves time later.
Labeling For Easy Reinstallation
Use masking tape or small sticky notes for labels. Write the cabinet name or location on each label. Attach the label to the hardware or container. This helps you know where each piece belongs. Clear labels prevent confusion during reinstallation. It makes putting everything back quick and easy.
Cleaning And Sanding
Cleaning and sanding are important first steps before painting cabinet hardware. They prepare the surface for paint. This helps the paint stick better and last longer. Without proper cleaning and sanding, the paint may peel or chip quickly.
Removing Dirt And Grease
Start by removing all dirt and grease from the hardware. Use warm water mixed with mild dish soap. Soak a cloth or sponge in the solution and wipe the hardware well. For tough grease, use a degreaser or rubbing alcohol. Make sure to clean every corner and crevice.
Rinse the hardware with clean water to remove soap residue. Dry it completely with a soft towel. This step prevents moisture from affecting the paint later.
Sanding For Better Adhesion
Sanding creates a rough surface that helps paint stick better. Use fine-grit sandpaper, about 220 grit, for best results. Gently sand all surfaces of the hardware. Focus on any shiny or smooth areas.
After sanding, wipe off the dust with a damp cloth. Let the hardware dry before painting. Proper sanding improves paint adhesion and gives a smooth finish.
Credit: www.lifesahmazing.com
Priming The Hardware
Priming cabinet hardware is a crucial step before painting. It helps paint stick better and last longer. Without primer, paint may peel or chip quickly.
Priming also prevents rust and corrosion on metal pieces. It creates a smooth surface for even paint coverage. Take time to prime carefully for the best results.
Choosing A Suitable Primer
Select a primer made for metal or plastic hardware. Some primers work best on specific materials. Check the label to ensure compatibility.
Oil-based primers provide strong adhesion and rust protection. Water-based primers dry faster and have less odor. Choose one based on your needs and workspace.
Applying Primer Evenly
Clean hardware thoroughly before applying primer. Use a soft cloth and mild cleaner to remove dirt and grease. Let the pieces dry completely.
Spray or brush primer in thin, even coats. Avoid thick layers that can drip or form lumps. Allow each coat to dry fully before adding another.
Turn hardware to cover all sides evenly. Good coverage ensures a smooth finish and better paint hold.
Painting Techniques
Painting cabinet hardware requires careful technique to get a smooth and lasting finish. Choosing the right method helps protect the metal and improve its look. Proper preparation and application matter most. Small details can make a big difference in the final result.
Each painting method has its own steps and tips. Understanding these will help you paint with confidence and avoid common mistakes. Whether using spray paint or a brush, patience and precision lead to great results.
Using Spray Paint
Spray paint offers an even and fast way to cover hardware. Choose a spray designed for metal surfaces. Work outside or in a well-ventilated area. Shake the can well before use. Hold it about 6 to 8 inches from the hardware. Move the spray in smooth, sweeping motions. Avoid spraying too close to prevent drips. Apply light coats rather than one heavy coat. Let each layer dry before adding the next.
Brushing Tips For Smooth Finish
Use a small, soft brush for brushing paint onto hardware. Select a brush with fine bristles to avoid streaks. Dip the brush lightly into the paint. Remove extra paint by tapping it on the side. Apply paint in thin, even strokes. Brush in one direction for a uniform look. Avoid over-brushing, which can cause marks. Clean the brush after each coat to keep it smooth.
Multiple Coats And Drying Time
Apply several thin coats for durability and full coverage. Let each coat dry completely before the next. Drying time varies by paint type and weather conditions. Usually, wait 20 to 30 minutes between coats. Too thick layers cause bubbling and peeling. Multiple thin coats create a strong, smooth surface. Patience during drying ensures better adhesion and finish.
Sealing And Protecting
Sealing and protecting painted cabinet hardware is important. It helps keep the paint looking fresh and stops it from peeling or scratching. This step makes your hard work last longer and keeps your cabinets looking neat.
Selecting A Clear Coat
Choose a clear coat that matches your paint type. Water-based clear coats work well with acrylic paint. Oil-based clear coats suit enamel paints better. Look for a clear coat that offers good protection and dries fast. Satin or matte finishes hide fingerprints well. Glossy finishes give a shiny look but may show marks easier.
Applying Sealer For Durability
Apply the clear coat in thin, even layers. Use a soft brush or spray for best results. Let each layer dry completely before adding the next. Two to three coats usually provide enough protection. Avoid heavy coats to prevent drips and uneven surfaces. Allow the hardware to cure for a full day before use.
Reinstalling Hardware
Reinstalling cabinet hardware is the final step after painting. This step brings your cabinets back to life. Proper reinstallation ensures your hardware looks great and works well. Take your time to avoid mistakes that can damage your cabinets or hardware.
Ensuring Secure Attachment
Start by checking the screws and holes. Make sure screws are the right size for your hardware. Use a screwdriver to fasten screws gently. Do not overtighten; this can strip the wood or crack the hardware. If holes are too big, use wood filler and let it dry before reinstalling. Check that each piece fits snugly against the cabinet surface. Loose hardware can fall off or cause damage over time.
Final Touches And Adjustments
After securing the hardware, open and close the doors. Check for smooth movement and proper alignment. Adjust screws slightly if the hardware feels loose or uneven. Clean any fingerprints or smudges on the hardware or cabinet. Use a soft cloth for a polished look. Your hardware now looks fresh and works perfectly with your painted cabinets.

Credit: porchdaydreamer.com
Troubleshooting Common Issues
Painting cabinet hardware can be tricky. Small mistakes may cause problems like drips or chips. Knowing how to fix these issues helps keep your hardware looking great. This section covers common problems and simple solutions. You will get tips to make your painted hardware smooth and durable.
Avoiding Paint Drips
Drips happen when paint is too thick or applied unevenly. Use thin coats instead of one heavy layer. Let each coat dry before adding the next. Hold the brush or spray tool steady and move slowly. Avoid overloading the brush with paint. Light, even strokes reduce drips and create a smooth finish.
Fixing Chips And Scratches
Chips and scratches can show up after painting or use. Sand the damaged area gently with fine sandpaper. Clean off dust before repainting. Use a small brush to touch up the spot carefully. Apply thin paint layers and let dry fully. Repeat if needed for full coverage. This keeps your hardware looking new longer.
Frequently Asked Questions
How Do I Prepare Cabinet Hardware For Painting?
Clean the hardware thoroughly to remove dirt and grease. Sand lightly to help paint adhere. Remove any old paint or finish. Use a primer suitable for metal before applying paint.
What Type Of Paint Is Best For Cabinet Hardware?
Use spray paint designed for metal surfaces. Look for enamel or oil-based spray paint. These provide a durable, smooth finish that resists chipping. Avoid water-based paints as they may peel over time.
Should I Remove Cabinet Hardware Before Painting?
Yes, removing hardware ensures even coverage and prevents paint on cabinets. It also allows better access to all surfaces. Label pieces to easily reinstall them later.
How Many Coats Of Paint Are Needed On Hardware?
Apply 2 to 3 thin coats for an even finish. Allow each coat to dry completely before applying the next. Thin coats prevent drips and uneven texture.
Conclusion
Painting cabinet hardware can refresh your space quickly and affordably. Choose the right paint and prepare surfaces well for best results. Take your time to apply thin, even coats and let them dry fully. Small details make a big difference in your kitchen or bathroom look.
Enjoy the new style and feel of your updated cabinets. Simple steps, great impact. Try it yourself and see how easy it can be.