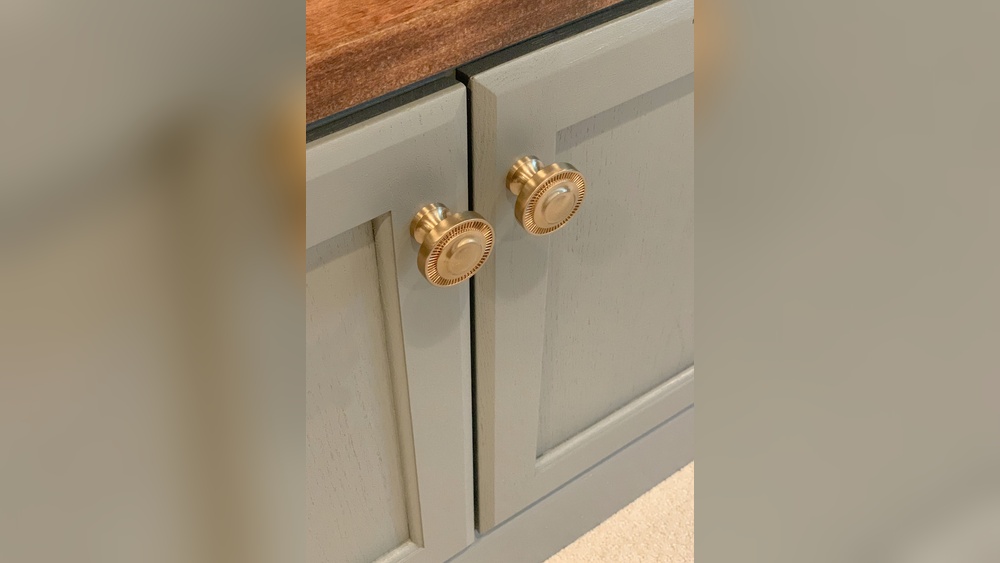
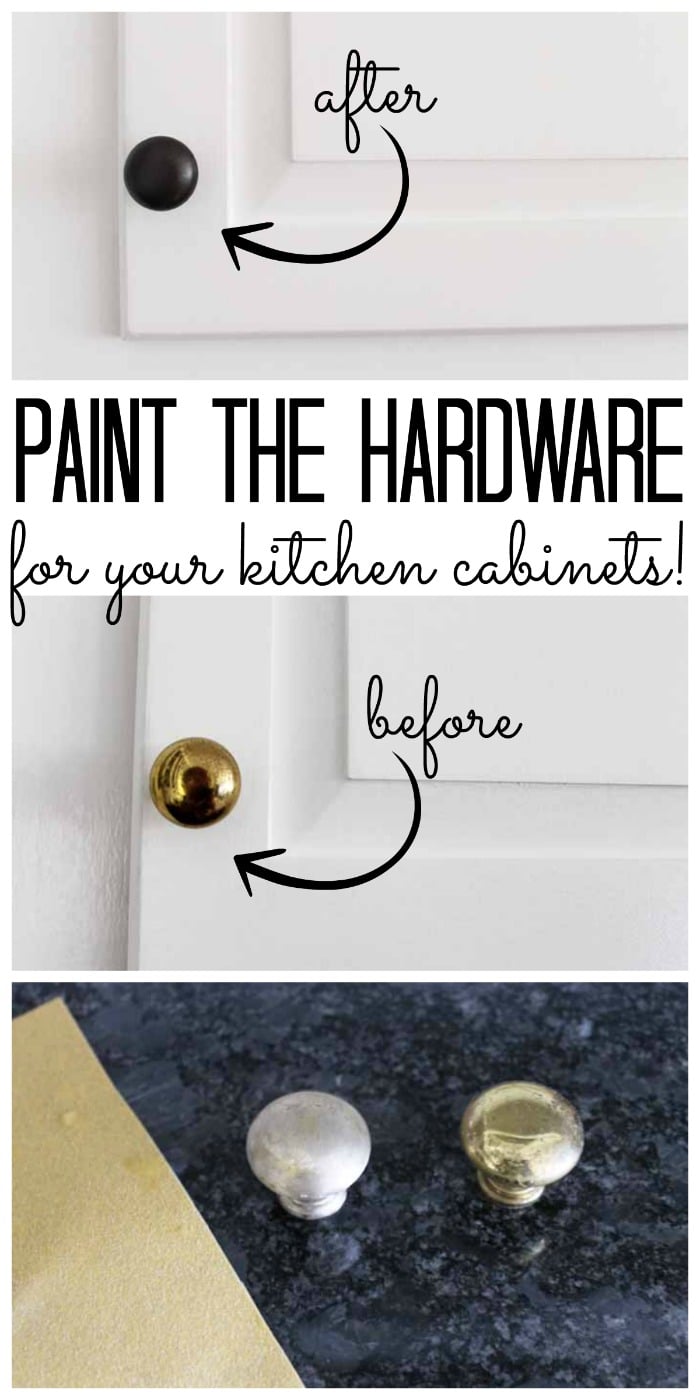
Are your cabinet knobs and handles looking dull or outdated? You don’t need to replace them to give your kitchen or bathroom a fresh new look.
Painting your cabinet hardware is a simple, affordable way to transform your space instantly. In this guide, you’ll discover easy steps to paint your hardware like a pro—even if you’ve never done it before. Ready to learn how to make your cabinets stand out with just a few brush strokes?
Keep reading, and let’s get started!
Choosing The Right Paint
Choosing the right paint for cabinet hardware is key to a smooth, lasting finish. The paint must stick well and resist wear. Different paints work better on metal or plastic hardware. Picking the right color and finish also changes the look and feel of your cabinets. This guide explains types of paint, color choices, and finishes to help your hardware stand out.
Types Of Paint Suitable For Hardware
Spray paint is popular for cabinet hardware. It covers metal evenly and dries fast. Look for spray paints made for metal or plastic. Acrylic paint also works well. It is easy to use with a small brush. Oil-based paint lasts longer but takes more time to dry. Choose paint labeled for durability and rust resistance to keep hardware looking good.
Selecting Colors That Pop
Bold colors make hardware a focal point. Bright reds, blues, or yellows bring energy to the kitchen. Neutral tones like black, white, or gray fit many styles. Consider the cabinet color and room style. Contrast helps hardware stand out. Match colors to your style for a fresh, updated look.
Paint Finishes Explained
Glossy finishes shine and reflect light. They look clean but show fingerprints. Matte finishes hide smudges and have a soft look. Satin finish strikes a balance with slight shine. Choose finish based on how much wear hardware will get. Gloss works well for easy cleaning. Matte suits a rustic or modern style.
Gathering Supplies
Gathering the right supplies is the first step to painting cabinet hardware. It sets the stage for a smooth, neat project. Having everything ready saves time and avoids frustration. This part covers the tools and workspace setup needed.
Essential Tools Needed
Start with basic tools to make painting easy and clean. You need screwdrivers to remove hardware from cabinets. Sandpaper helps roughen surfaces for better paint grip. Use painter’s tape to cover areas you don’t want painted. A small paintbrush or spray paint works for applying color. Finally, have a container for paint and gloves to protect your hands.
Preparing Your Workspace
Choose a well-ventilated area to paint your hardware. Lay down newspaper or a drop cloth to catch drips. Organize your tools within reach. Arrange hardware on a flat surface for easy access. Keep parts separate to avoid mixing or losing them. Good lighting helps you see details clearly. A clean, tidy space improves focus and results.
Removing Cabinet Hardware
Removing cabinet hardware is the first step to a fresh new look. It helps you paint the hardware evenly and avoid mess on cabinets. Taking off handles and knobs carefully keeps them safe for reuse or repainting.
Follow easy steps to remove hardware without damage. Organize parts well to save time during reassembly. This process makes painting smooth and effective.
Tips For Safe Removal
Use the right screwdriver to avoid stripping screws. Turn screws slowly to keep them intact. Hold the hardware firmly to prevent dropping it. Apply gentle force to avoid scratching the cabinet surface. Keep a soft cloth nearby to protect the cabinet edges.
Organizing Screws And Pieces
Sort screws and hardware by cabinet or drawer. Use small containers or labeled bags for parts. Keep screws with their matching hardware pieces. This prevents confusion during reinstallation. Take photos before removal to guide reassembly later.
Cleaning And Prepping Hardware
Cleaning and prepping cabinet hardware is a key step before painting. Proper preparation helps paint stick better. It also prevents paint from peeling later. Taking time to clean and sand hardware improves the final look. Follow these simple steps for best results.
Removing Dirt And Grease
Start by removing dirt and grease from hardware. Use warm water with mild soap. Soak the hardware for a few minutes. Then scrub gently with a soft brush or cloth. Avoid harsh chemicals that can damage the finish. Rinse well and dry completely before moving on.
Sanding For Better Adhesion
Next, lightly sand the hardware surface. Use fine-grit sandpaper, around 220 grit. Sanding creates small scratches for paint to grip. Focus on all areas, especially smooth or glossy spots. Wipe off dust with a clean cloth after sanding. Now the hardware is ready for priming and painting.
Priming The Hardware
Priming cabinet hardware is a vital step before painting. It helps the paint stick better and last longer. Without primer, paint may peel or chip easily. Take time to prepare the hardware well. This will give a smooth and even finish.
Choosing The Right Primer
Select a primer made for metal surfaces. It prevents rust and improves paint adhesion. Some primers dry fast, which saves time. Look for a spray primer for small hardware pieces. It covers all the nooks and crannies evenly. Avoid primers that are too thick or sticky.
Application Techniques
Start with clean and dry hardware. Shake the primer can well before use. Hold the spray can about 6 to 8 inches away. Use short, light bursts to avoid drips. Spray in a well-ventilated area or outside. Allow the primer to dry fully before painting. A second coat may be needed for full coverage. Patience here leads to a smooth paint job.
Painting Techniques
Painting cabinet hardware can change the whole look of your kitchen or bathroom. Using the right painting techniques helps the paint stick well and last long. Simple steps can make a big difference in the final result.
Focus on choosing the right method, applying paint evenly, and giving enough time to dry. These details improve the finish and keep your hardware looking fresh.
Brush Vs Spray Painting
Brush painting is easy and needs little equipment. It works well for small projects or touch-ups. Use a small brush for tight spaces and details. Brush strokes can show, so use light, smooth strokes.
Spray painting covers surfaces quickly and evenly. It is best for many pieces or complex shapes. Spray paint gives a smooth, clean finish without brush marks. Use spray paint in a well-ventilated area and protect nearby surfaces.
Applying Even Coats
Apply thin, even coats for the best finish. Thick coats can drip or peel later. Start with a light layer and let it dry before adding more. Multiple thin coats build a strong, smooth surface.
Keep your hand steady and move in one direction. Avoid overloading the brush or spray can. Check your work under good light to spot any missed areas or drips.
Drying Time Tips
Allow enough drying time between coats. Rushing can cause smudges or uneven paint. Follow the paint maker’s instructions for drying times. Keep painted pieces in a dust-free, dry place while drying.
Wait at least 24 hours before handling hardware. Full curing may take several days for the paint to harden. Patience helps the paint last longer and look better.
Sealing And Protecting
Sealing and protecting painted cabinet hardware is a crucial step. It ensures the paint lasts longer and stays vibrant. Without a proper seal, paint can chip or peel easily. The right sealant protects against moisture, dirt, and daily wear. This step adds durability and keeps your hardware looking new.
Types Of Sealants
Choose a sealant based on your hardware material and paint type. Clear acrylic sealants work well for most painted surfaces. They dry fast and resist yellowing. Polyurethane sealants offer strong protection but can be glossy. Water-based sealants are easy to clean and less smelly. Avoid oil-based sealants if you want a quick dry time. Always check if the sealant is compatible with your paint.
Applying A Durable Finish
Start with clean, dry hardware before sealing. Use a small brush or spray to apply the sealant evenly. Apply thin coats to avoid drips and bubbles. Let each coat dry completely before adding another. Usually, two to three coats provide good protection. After sealing, let the hardware cure for at least 24 hours. Handle with care during this time to avoid marks. Proper sealing keeps your hardware looking fresh and strong for years.

Credit: porchdaydreamer.com
Reinstalling The Hardware
Reinstalling cabinet hardware is a key step after painting. It helps your cabinets look fresh and complete. Taking time to do it right saves future hassle. Follow simple steps to get the best results.
Ensuring Proper Fit
Check each piece of hardware before putting it back. Make sure screws match the holes perfectly. Tighten screws gently to avoid stripping the wood. Hardware should sit flush, not loose or wobbly. Test each handle or knob by pulling lightly.
Final Touches
Wipe away fingerprints or smudges from painting. Use a soft cloth to clean hardware gently. Look for any paint that might block screw holes. Touch up small paint spots if needed. Enjoy your refreshed cabinets with new, clean hardware.
Common Mistakes To Avoid
Painting cabinet hardware can refresh your kitchen or bathroom look. Avoid common mistakes to get smooth, lasting results. These errors can cause paint to peel or chip quickly. Knowing what to skip helps you save time and effort.
Painting Without Cleaning
Dirty hardware blocks paint from sticking well. Oils and dust create a barrier on the surface. Always clean pieces thoroughly before painting. Use soap and water or rubbing alcohol. Let hardware dry completely before you start painting.
Rushing The Drying Process
Wet paint needs time to harden fully. Touching hardware too soon causes smudges and uneven spots. Follow the paint’s recommended drying time. Avoid handling parts until paint feels dry to touch. Patience here leads to better, longer-lasting finishes.

Credit: www.youtube.com
Creative Ideas For Customization
Customizing cabinet hardware adds personality to your kitchen or bathroom. Simple paint can transform plain knobs into unique decor pieces. Use creative ideas to match your style and space. Small changes bring a fresh, updated look without much cost. Explore fun ways to mix styles and add details for a new feel.
Mixing And Matching Styles
Combine different hardware styles for an eclectic look. Pair modern knobs with vintage handles on the same cabinets. Use color to unify diverse shapes and designs. Contrasting finishes like matte black and shiny gold create interest. This mix adds depth and character to your room.
Adding Decorative Details
Enhance hardware by adding small decorations after painting. Use stencils to create patterns on the knobs or pulls. Attach tiny gems or beads for a subtle sparkle. Try painting stripes, dots, or floral designs for a personal touch. These small details make your hardware truly one of a kind.
Credit: www.thecountrychiccottage.net
Frequently Asked Questions
How Do I Prepare Cabinet Hardware For Painting?
Clean hardware thoroughly to remove dirt and grease. Sand lightly to create a rough surface. Use a primer before painting for better adhesion and durability.
What Type Of Paint Works Best On Cabinet Hardware?
Use spray paint designed for metal or plastic, depending on your hardware. Choose durable, chip-resistant paint for long-lasting results. Avoid regular wall paint.
Can I Paint Cabinet Hardware Without Removing It?
It’s best to remove hardware before painting. This ensures even coverage and prevents paint on cabinets. Removing hardware also allows safer, cleaner work.
How Long Should Painted Cabinet Hardware Dry?
Allow hardware to dry for at least 24 hours. Full curing can take up to 72 hours. Avoid handling to prevent smudges or damage.
Conclusion
Painting cabinet hardware can refresh your space without much cost. Clean the pieces well before painting. Choose paint made for metal for best results. Let each coat dry fully to avoid smudges. Use light, even strokes to get a smooth finish.
Small steps lead to a big change. Your cabinets will look new and stylish. Try this simple project to brighten your home. Enjoy the satisfaction of DIY improvements today.