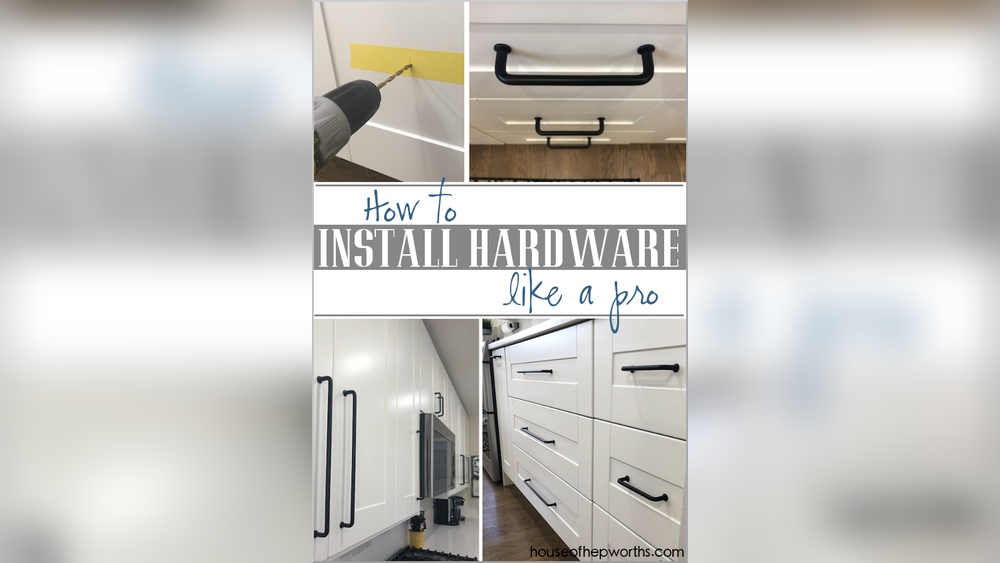
Are you ready to give your Ikea cabinets a fresh, stylish look without spending a fortune? Installing new cabinet hardware can completely transform your space, making it look polished and modern.
But if you’re unsure where to start or worried about making mistakes, don’t worry—you’re in the right place. This step-by-step guide will show you exactly how to install Ikea cabinet hardware quickly and easily. By the end, you’ll have the confidence to upgrade your cabinets like a pro and enjoy the satisfying feeling of doing it yourself.
Keep reading to unlock the simple secrets to a beautiful kitchen or bathroom makeover!
Credit: www.houseofhepworths.com
Tools And Materials Needed
Installing Ikea cabinet hardware is easier with the right tools and materials. Preparing everything before starting saves time and avoids frustration. It also ensures a smooth and accurate installation process.
This section lists all necessary tools and helps pick the right hardware for your cabinets. Follow these tips to get ready for your project.
Essential Tools
Gather these tools to install your cabinet hardware properly:
- Power drill with drill bits
- Screwdriver (Phillips or flathead, depending on screws)
- Measuring tape for precise placement
- Level to keep hardware straight
- Pencil for marking drill points
- Masking tape to avoid wood damage
- Safety glasses to protect your eyes
Having these tools ready helps the work go smoothly. Each tool plays a key role in making the installation neat and secure.
Choosing The Right Hardware
Select hardware that fits your Ikea cabinets and style. Consider these points:
- Match hardware size with cabinet door thickness
- Pick finishes that complement your room decor
- Check if the screws fit Ikea pre-drilled holes
- Choose handles or knobs based on ease of use
Correct hardware ensures your cabinets look good and work well. Spend time selecting pieces that suit both function and design.
Preparing Your Cabinets
Preparing your cabinets is the first step to install Ikea cabinet hardware. This stage ensures the hardware fits correctly and works well. Proper preparation saves time and avoids mistakes during installation.
Cleaning And Clearing
Start by cleaning the cabinet surfaces. Use a soft cloth and mild cleaner. Remove dust, grease, and dirt. This helps the hardware stick better and look nice.
Clear out items inside the cabinets. Empty shelves and drawers for easy access. It also keeps your belongings safe from damage.
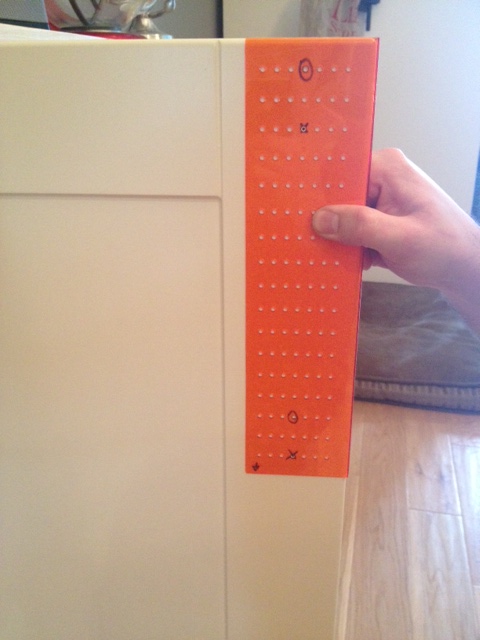
Measuring And Marking
Measure where you want to place the hardware. Use a tape measure for accuracy. Check the height and spacing carefully.
Mark the spots with a pencil lightly. These marks guide you during drilling or screwing. Double-check measurements before making any holes.
Installing Cabinet Handles
Installing cabinet handles is a key step in upgrading your Ikea cabinets. It changes the look and makes opening easier. The process is simple with the right tools and steps. Follow clear instructions for a neat finish.
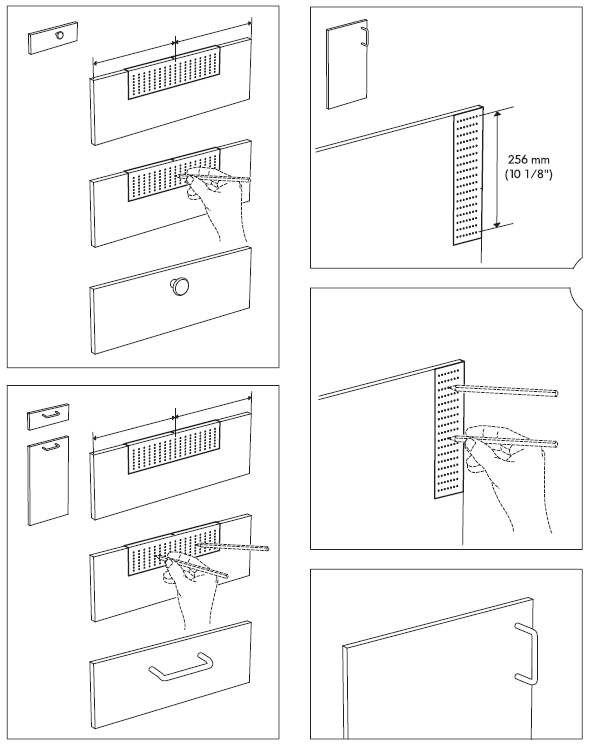
Positioning The Handles
First, decide where to place the handles on the cabinet doors. Usually, handles go near the edge of the door. Measure the same distance from the top or bottom for each handle. Use a pencil to mark the spots for holes. Keep marks even for a balanced look.
Drilling Holes
Choose a drill bit that matches the screw size. Drill carefully through the marks on the cabinet. Hold the drill steady to avoid splintering the wood. Drill straight, not at an angle, for a perfect fit. Clean any dust before moving to the next step.
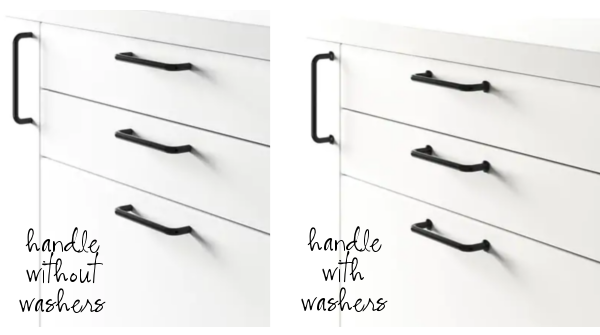
Securing The Handles
Line up the handle with the drilled holes. Insert screws from inside the cabinet door. Tighten screws with a screwdriver until the handle is firm. Avoid over-tightening to protect the cabinet material. Check each handle to ensure it is secure and straight.
Credit: www.storefrontlife.com
Installing Cabinet Knobs
Installing cabinet knobs is a simple way to refresh your kitchen or bathroom cabinets. It changes the look and makes opening doors easier. This section guides you through choosing the right spot for your knobs and how to attach them securely.
Choosing Knob Placement
Decide where the knob will be most comfortable to use. Usually, knobs go on the upper corner of cabinet doors. For drawers, place the knob in the center or slightly off-center. Measure carefully to keep all knobs aligned. Mark the spot with a pencil for accurate drilling. Consistency in placement improves the cabinet’s look and feel.
Drilling And Attaching
Use a drill with a bit matching the screw size. Drill a hole at the marked spot, going straight through the door or drawer. Insert the screw from inside the cabinet. Align the knob on the outside and twist it onto the screw. Tighten the knob by hand or with a screwdriver. Avoid over-tightening to prevent damage.
Troubleshooting Common Issues
Installing Ikea cabinet hardware is simple, but small problems can occur. These issues can slow down your project. Knowing how to fix common problems saves time and frustration. Below are tips to solve frequent hardware troubles.
Aligning Hardware Correctly
Proper alignment makes your cabinets look neat. Use a ruler or measuring tape to mark holes. Check marks twice before drilling. Use a level to keep handles straight. If a hole is off, fill it with wood filler. Drill a new hole in the right spot. Take your time to avoid mistakes.
Fixing Loose Handles Or Knobs
Loose handles cause discomfort and damage over time. Tighten screws with a screwdriver to fix this. If screws spin without tightening, add a small piece of paper inside. This adds grip for the screw. Replace stripped screws with new ones if needed. Regular checks keep hardware secure and safe.
Credit: inspiredkitchendesign.com
Tips For Maintaining Your Cabinet Hardware
Keeping your Ikea cabinet hardware in good shape helps your kitchen or room look neat. Proper care makes handles and knobs last longer. You save money by avoiding early replacements. Follow simple steps to keep hardware clean and damage-free.
Cleaning Techniques
Use a soft cloth to wipe your hardware often. Avoid rough materials that can scratch the surface. Warm soapy water works well for most knobs and handles. Dry the hardware after cleaning to stop water spots. For metal pieces, a small amount of vinegar can help remove stains. Never use harsh chemicals or abrasive cleaners.
Preventing Damage
Do not use too much force when opening or closing cabinets. Tighten loose screws regularly to keep hardware stable. Avoid hanging heavy items on knobs or handles. Protect hardware from moisture by fixing leaks fast. Use felt pads on doors if hardware hits walls. These steps keep your hardware strong and working well.
Frequently Asked Questions
What Tools Do I Need To Install Ikea Cabinet Hardware?
You need a drill, screwdriver, measuring tape, pencil, and level. These tools help align and secure the hardware properly. Having the right tools ensures a smooth installation and a professional finish on your Ikea cabinets.
How Do I Measure For Ikea Cabinet Hardware Placement?
Measure the distance from cabinet edges to the desired hardware position. Use a pencil to mark drill points accurately. Consistent measurements ensure that handles and knobs are aligned evenly on all cabinet doors and drawers.
Can I Install Ikea Hardware On Non-ikea Cabinets?
Yes, Ikea hardware can fit most standard cabinets. Ensure the screw size and hole spacing match your cabinet doors. Adapting Ikea hardware is a budget-friendly way to upgrade any cabinet style.
How Do I Avoid Damaging Cabinets During Hardware Installation?
Use a low-speed drill setting and pilot holes to prevent wood splitting. Handle screws gently and avoid overtightening. Proper technique preserves your cabinet’s finish and structure during installation.
Conclusion
Installing Ikea cabinet hardware is simple with clear steps. Measure and mark carefully for best results. Use the right tools to avoid mistakes. Take your time to align handles or knobs perfectly. This small update can improve your kitchen’s look.
Enjoy your new cabinets and the fresh feel they bring. Keep instructions handy for future hardware changes. Your effort makes a big difference in home style.


