Are you struggling with stubborn stayput fasteners that just won’t budge? Removing these tiny but tough clips can be frustrating, especially if you don’t have the right technique.
But don’t worry—you’re about to learn simple, effective steps to get them out quickly and safely. Keep reading, and you’ll discover easy tricks that save you time and prevent damage to your materials. Ready to make those stayput fasteners disappear fast?
Let’s dive in!
What Are Stayput Fasteners
Stayput fasteners hold materials tightly in place without screws or nails. Removing them requires careful prying or cutting to avoid damage. Using the right tools makes the process easier and safer.
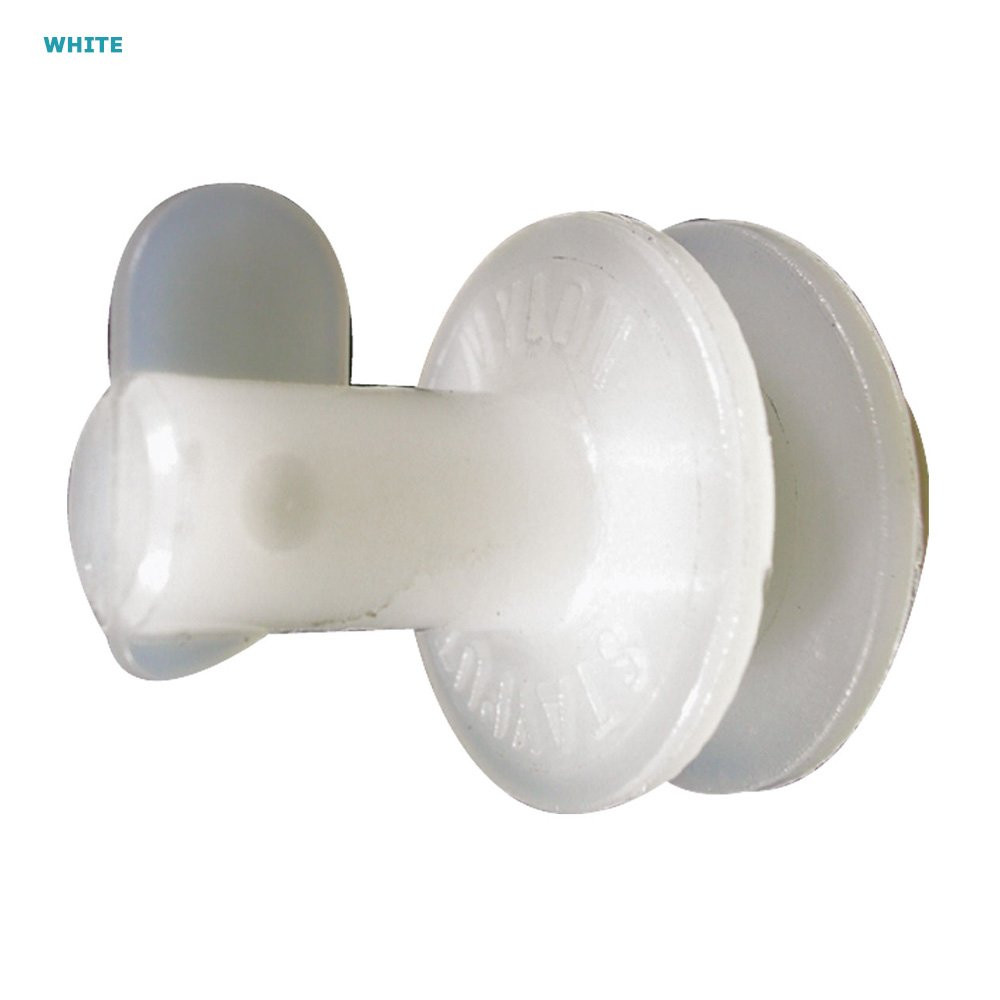
Stayput fasteners are special small pins used in upholstery. They hold fabric tightly to furniture frames. Their main job is to keep materials in place without slipping.
These fasteners are common in chairs, sofas, and car seats. They create a neat, smooth surface by securing fabric firmly. Unlike regular nails or staples, stayput fasteners resist pulling out.
Design And Materials
Stayput fasteners usually have a U-shape or a flat head. They are made from metal or plastic. The metal types resist rust and last longer. Plastic ones are lighter and easier to use in some fabrics.
The design helps the fastener grip the fabric and frame tightly. This prevents wrinkles and sagging. The shape also makes removal easier without damaging the material.
Common Uses Of Stayput Fasteners
Furniture makers use stayput fasteners to attach fabric to wood frames. Car manufacturers use them in seat covers. These fasteners work well on curved or flat surfaces.
They are popular in repairs too. Stayput fasteners help replace old fabric without big damage. They keep the upholstery looking fresh and tidy.
Credit: www.nhakhoaviethung.com.vn
Tools Needed For Removal
Removing Stayput fasteners requires the right tools for a smooth job. Using proper tools saves time and prevents damage to surfaces. Gather these items before starting.
Flathead Screwdriver
A flathead screwdriver helps pry the fastener gently. Choose one with a comfortable handle and a blade that fits well. It provides leverage to loosen the fastener without scratching the surface.
Pliers
Pliers grip the fastener tightly for easy removal. Needle-nose pliers work best for small or hard-to-reach fasteners. They help twist or pull out the fastener carefully.
Utility Knife
A utility knife cuts through any seal or paint around the fastener. Use it to free edges that stick firmly. Handle the knife carefully to avoid injury or damage.
Hammer
A hammer helps tap tools under the fastener. Light taps ease the fastener loose without breaking it. Use a small hammer for better control and precision.
Protective Gloves
Wear gloves to protect your hands from sharp edges. They also improve grip on tools and fasteners. Gloves reduce the risk of cuts or scrapes during removal.
Preparing The Work Area
Preparing the work area is a key step before removing stayput fasteners. A clean and organized space helps you work safely and efficiently. It also reduces the risk of damage to surrounding materials.
Clear the area around the fasteners. Remove any furniture or objects that might get in the way. This gives you enough room to move and use tools freely.
Gather all necessary tools before starting. Having everything ready saves time and avoids interruptions. Make sure your tools are in good condition.
Clear The Work Surface
Remove dust, dirt, and debris from the work surface. A clean surface makes it easier to spot fasteners. It also prevents tools from slipping during use.
Ensure Proper Lighting
Use bright lighting to see the fasteners clearly. Natural light or a strong lamp works well. Good lighting helps avoid mistakes and speeds up the process.
Wear Protective Gear
Put on safety glasses and gloves. These protect your eyes and hands from sharp edges. Safety gear keeps you safe while working with fasteners.
Organize Tools And Materials
Arrange your tools within easy reach. Keep fasteners and removed parts in a container. This keeps the work area tidy and prevents loss.
Step 1: Inspect The Fastener
Step 1 is to inspect the stayput fastener carefully. This step helps you understand the fastener’s type and condition. It guides the removal process and keeps you safe.
Start by cleaning the area around the fastener. Dirt or debris can hide important details. Use a brush or cloth to clear the surface gently.
Look closely at the fastener’s shape and size. Notice if it is a nail, screw, or clip. Each type needs a different removal tool.
Check if the fastener is damaged or rusted. Damaged fasteners require extra care to avoid breaking. Rusty fasteners might need lubrication before removal.
Identify the material of the fastener. Metal fasteners behave differently from plastic ones. This affects how you remove them.
Examine The Fastener’s Head
Focus on the fastener head shape. It can be flat, round, or have a slot. The head type shows which tool fits best. Use the right tool to avoid damage.
Assess The Fastener’s Position
Look at how the fastener sits in the material. Is it flush, recessed, or sticking out? Position changes how you approach removal. Recessed fasteners might need special tools.
Note Any Rust Or Corrosion
Rust can make removal harder. Check for rust spots or corrosion signs. Applying a rust remover can ease the process. Let it sit for a few minutes before trying again.
Identify The Fastener Material
Fasteners come in steel, aluminum, or plastic. Knowing the material helps prevent damage during removal. Use gentle force on soft materials like plastic.
Step 2: Select The Right Tool
Step 2 in removing Stayput fasteners is to select the right tool. Using the correct tool makes the job easier. It helps to avoid damage to the fastener or surface.
Tools come in many shapes and sizes. Choosing one depends on the type of fastener and its condition. Picking the wrong tool can cause frustration and slow the process.
Identify The Fastener Type
First, check what type of Stayput fastener you have. Different fasteners need different tools. Some fasteners have a flat head. Others have a Phillips or a special design.
Knowing the type helps you pick the best tool. It also helps prevent damage to the fastener or the surface.
Use A Flathead Screwdriver
A flathead screwdriver works well for simple flat slots. Make sure the blade fits the slot tightly. This gives better grip and control. Avoid forcing the screwdriver, which can slip and scratch surfaces.
Choose A Phillips Screwdriver
Use a Phillips screwdriver for fasteners with cross-shaped slots. Pick one that matches the slot size exactly. This reduces the risk of stripping the fastener head. A good fit allows smooth turning and easier removal.
Try A Pry Bar Or Pliers
For stubborn or damaged fasteners, use a pry bar or pliers. These tools can grip and pull the fastener out. Use them carefully to avoid bending or breaking the fastener. Apply steady pressure and work slowly.
Consider Specialty Tools
Some Stayput fasteners need specialty tools. These tools are made for unique fastener heads. Check hardware stores or online for these tools. Using the right specialty tool saves time and effort.
Step 3: Loosen The Fastener
Step 3: Loosen the Fastener is a key part of removing stayput fasteners. This step requires care to avoid damage to the material around the fastener. Taking time here makes the whole process smoother.
Start by choosing the right tool for the fastener type. Use a screwdriver or wrench that fits well. A loose fit can strip the fastener head and make removal harder.
Prepare The Work Area
Clear the area around the fastener. Remove dirt and debris that might block your tool. Clean surfaces help tools grip better.
Apply Gentle Pressure
Place the tool on the fastener firmly. Turn slowly to loosen it. Avoid sudden force to prevent slipping or damage.
Use Lubricant If Needed
If the fastener is stuck, apply a small amount of lubricant. Let it sit for a few minutes. Lubricant helps free rusted or tight fasteners.
Check Progress Regularly
Stop and check the fastener often. Make sure it loosens evenly. Reposition the tool if slipping occurs.
Step 4: Remove The Fastener
Step 4 focuses on the actual removal of the stayput fastener. This step requires care and the right tools to avoid damage. Patience helps prevent breaking the fastener or the surface around it.
Removing the fastener carefully ensures a clean finish. It also saves time for any repairs or replacements needed later.
Prepare Your Tools
Gather tools like pliers, a flathead screwdriver, or a pry bar. Choose the tool that fits best with the fastener type. Using the correct tool reduces effort and risk of damage.
Grip The Fastener Firmly
Hold the fastener tightly with pliers or your chosen tool. A firm grip stops slipping and makes pulling easier. Avoid squeezing too hard to prevent crushing the fastener.
Pull The Fastener Out Slowly
Apply steady pressure to pull the fastener straight out. Move slowly to loosen it without breaking. Wiggle gently if the fastener feels stuck but keep control.
Check For Remaining Parts
Look closely for any pieces left inside the hole. Remove small bits with tweezers or a magnet. Clean the area to prepare for the next step or new fastener.
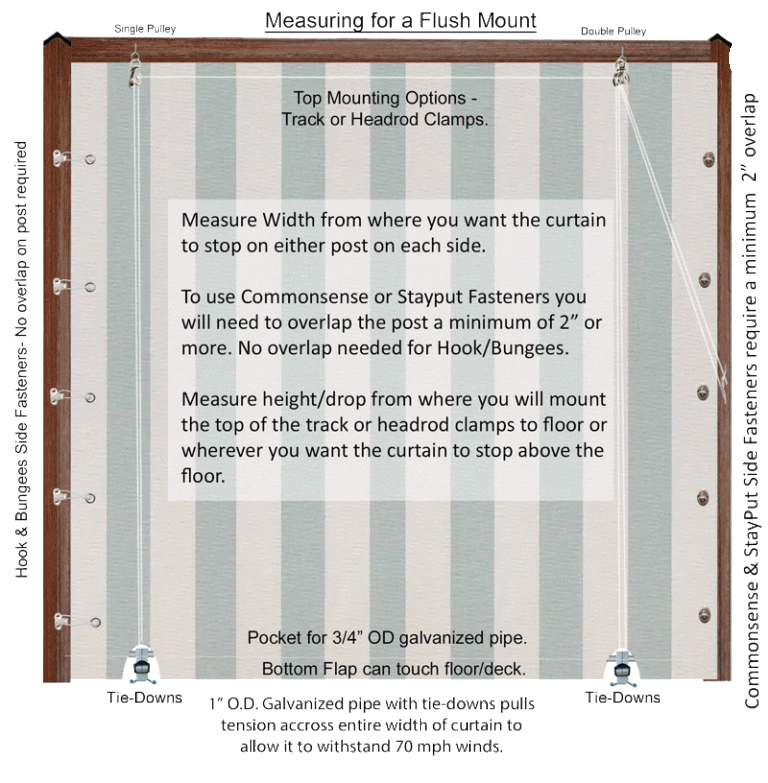
Credit: www.pycawnings.com
Step 5: Clean The Area
Step 5 focuses on cleaning the area after removing Stayput fasteners. This step is important for safety and for preparing the surface for the next task. A clean workspace helps avoid accidents and ensures better results.
Cleaning also removes any sharp edges, dust, or debris left behind. It makes the surface ready for painting, sealing, or other finishing work.
Remove Loose Debris
Start by picking up large pieces of metal or plastic left from the fastener. Use gloves to protect your hands. Sweep or vacuum the area to clear smaller bits and dust.
Use A Wire Brush
Scrub the surface gently with a wire brush. This removes rust, dirt, and leftover adhesive. Brush in one direction to avoid scratching the material too much.
Wipe With A Damp Cloth
After brushing, wipe the area with a damp cloth. This clears away fine dust and particles. Let the surface dry completely before moving on.
Check For Damage
Look carefully for any damage or holes from the fastener. Fill small holes with putty or filler if needed. This keeps the surface smooth and ready for finishing.
Tips For Easy Removal
Removing Stayput fasteners can feel tricky without the right approach. The key lies in using simple tricks to ease the process. These tips help avoid damage and save time.
Stayput fasteners hold materials firmly. Pulling them out carelessly can cause tearing or breakage. Follow these easy steps to get them out smoothly.
Use The Right Tools
Choose tools made for fasteners, like pliers or a flat-head screwdriver. These give better grip and control. Avoid using your hands alone to prevent injury.
Apply Gentle Heat
Warm the fastener slightly with a hairdryer. Heat softens the plastic or adhesive, making removal easier. Do not use too much heat to avoid damage.
Work Slowly And Carefully
Pull the fastener out slowly. Wiggle it gently to loosen its hold. Rushing can break the fastener or damage the material.
Use Lubricant For Stubborn Fasteners
Apply a small amount of lubricant like WD-40. It helps reduce friction and eases removal. Wipe off excess lubricant after the fastener is removed.
Protect Surrounding Areas
Place a thin cloth or tape around the fastener. This protects nearby surfaces from scratches. It also helps catch any small parts that fall.
Common Mistakes To Avoid
Removing Stayput fasteners can seem simple, but many people make avoidable mistakes. These errors can cause damage to the material or make removal harder. Knowing what to avoid helps you finish the job fast and clean.
Using Too Much Force
Pulling or twisting Stayput fasteners too hard can break them. Broken fasteners are tough to remove and may damage the surface. Use steady, gentle pressure instead of strong force.
Not Using The Right Tool
Stayput fasteners need specific tools for removal. Using the wrong tool can slip and scratch the material. Always pick a tool designed for Stayput fasteners to avoid damage.
Ignoring Safety Precautions
Fastener removal can cause small parts to fly off. Not wearing safety glasses or gloves risks injury. Protect your eyes and hands during the process.
Skipping Surface Preparation
Dirt or paint around the fastener can make removal difficult. Clean the area before starting to get a clear view. This step helps prevent accidental damage.
Removing Fasteners In The Wrong Order
Removing fasteners randomly can stress the material unevenly. Follow a logical order to keep the surface stable. This practice reduces the chance of cracks or breaks.

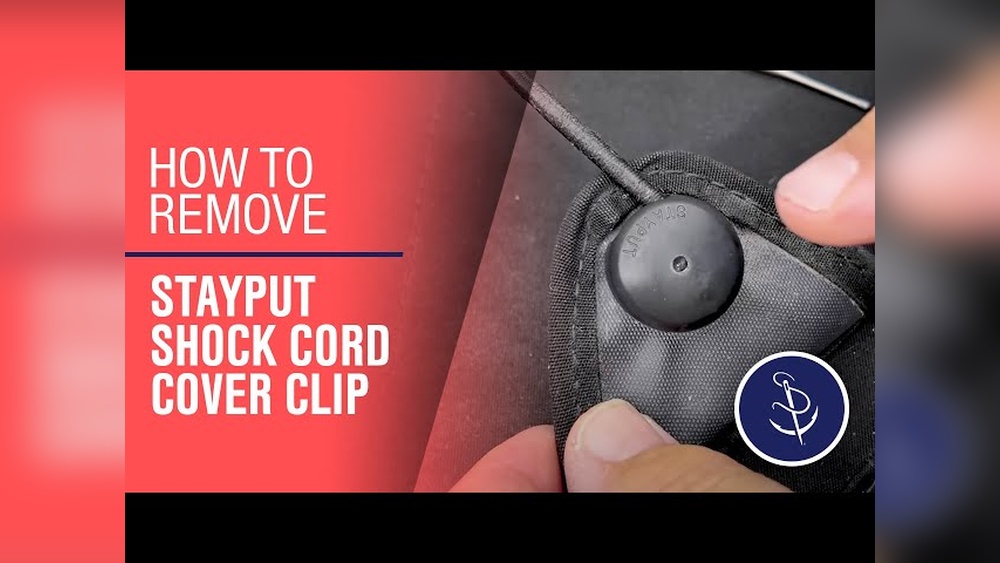
Credit: www.youtube.com
Frequently Asked Questions
What Tools Are Needed To Remove Stayput Fasteners?
You need a flathead screwdriver, pliers, and a pry bar. These tools help you loosen and carefully pull out the fasteners without damage.
How Do You Safely Remove Stayput Fasteners?
Gently pry under the fastener head using a flathead screwdriver. Apply steady pressure and avoid forcing it to prevent damage.
Can Stayput Fasteners Be Reused After Removal?
Generally, stayput fasteners are designed for one-time use. Removing them often damages the fastener, so replacing with new ones is recommended.
How Long Does It Take To Remove Stayput Fasteners?
Removing stayput fasteners usually takes 5-10 minutes each, depending on the tool and fastener condition. Patience ensures safe removal.
Conclusion
Removing stayput fasteners is easier with the right tools and steps. Always work slowly to avoid damage. Use pliers or a flat tool to lift the fastener carefully. Clean the area after removal for better results. Practice patience for the best outcome.
Following these tips helps keep your project safe and tidy. Now, you can handle stayput fasteners with confidence and ease.

